General Panda 45 in Antigua

Currently reading:
General Panda 45 in Antigua

Neal376

New member
Joined
Jul 6, 2008
Messages
14
Points
2
Hello,

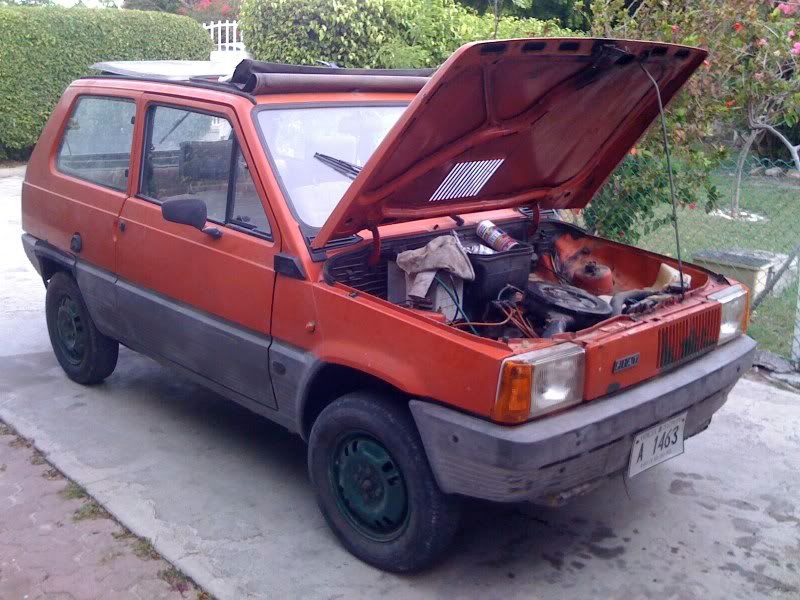
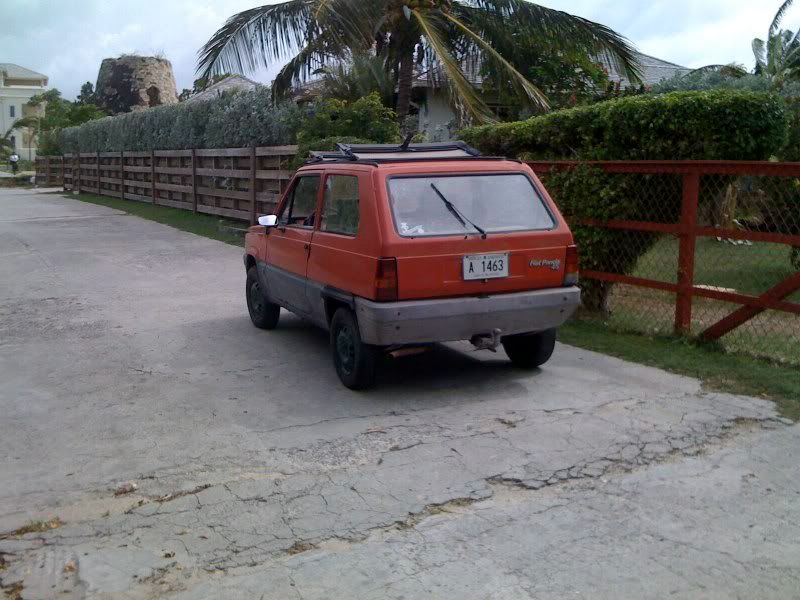
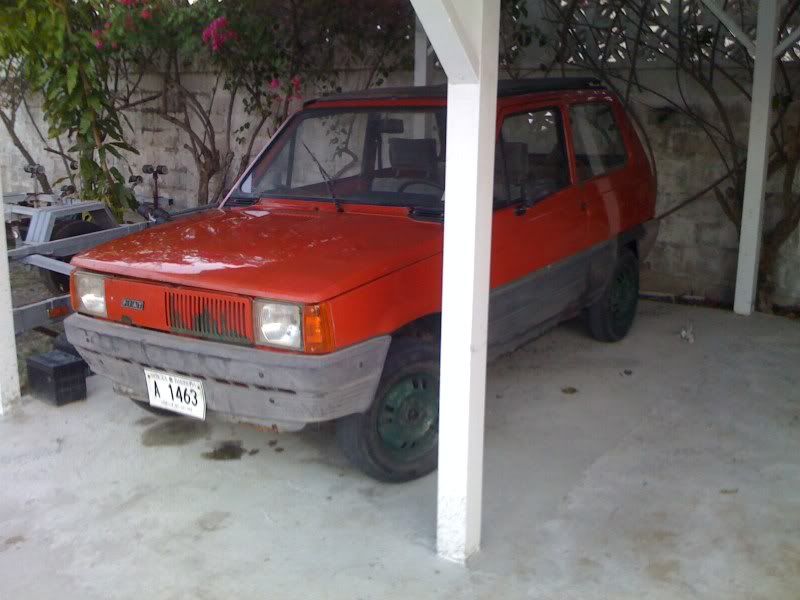
Iam a medical student in Antigua originally from the states. My landlord is a very proud italian who had imported a fiat panda from italy 30 years ago. However, It has been sitting around the side of his house for the past 4 or 5 years. I had a crack at it one morning and got it started by lunch time.

battery was dead
tires were deflated
windshield was opaque
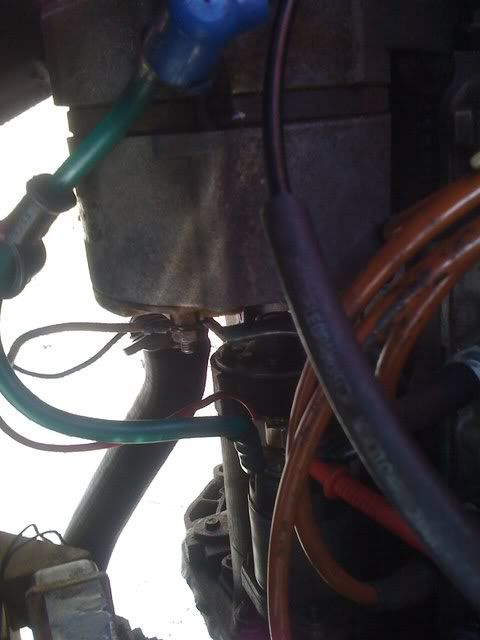
ignition coil had a rusty ground
starter had a rusty ground
ground from battery was rusty
hand brake was seized
IMG_0206.jpg

IMG_0205.jpg

IMG_0203.jpg

IMG_0207.jpg

----
things i have done to it since then

--abrasive polish just to bring back a little gloss
--drained coolant and replaced with 100 percent distilled water
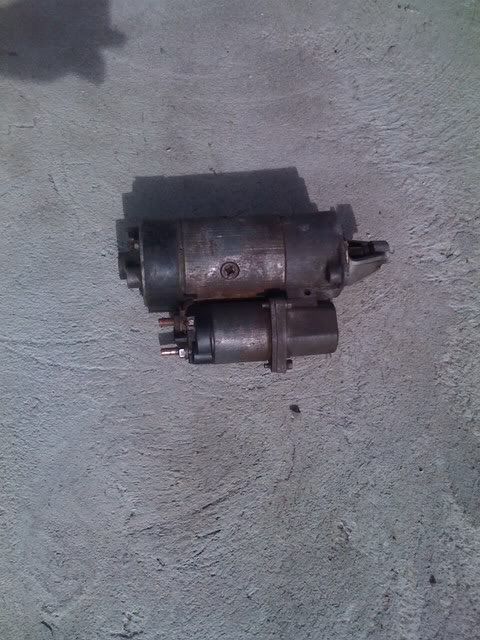
--accidently stripped the stud on the starter...whoops--fixed with washers
--tread on one tire just...came off
--tested various components...re-wired the horn and alternator...everything works

IMG_0214.jpg


on my days off i will roll the car into my garage and try to bring it back to a more reliable condition. i might have to rent a orbital polisher in order to bring some depth back to the paint...i also would like to remove the interior and clean! I might just paint the side sills, bumpers, and wheel wells with black paint as well.

few questions...
um...i dont know too much about carbueration...but i do know that its running pretty rich! are there any tutorials online about carb tunning for this fiat panda?

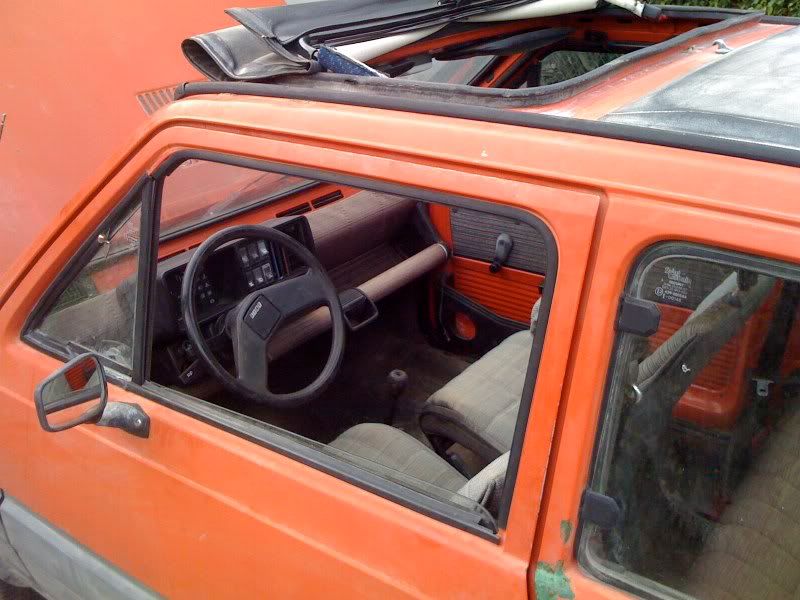
- i read a wikipedia article that said the seat covers are removable and washable...i could really find any way to remove those seats...was that article true?

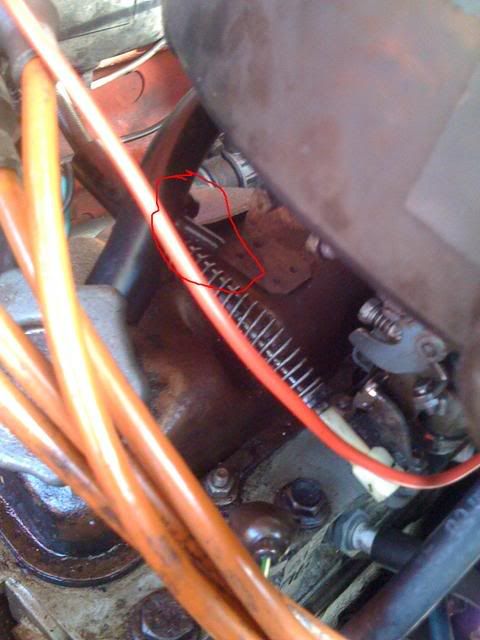
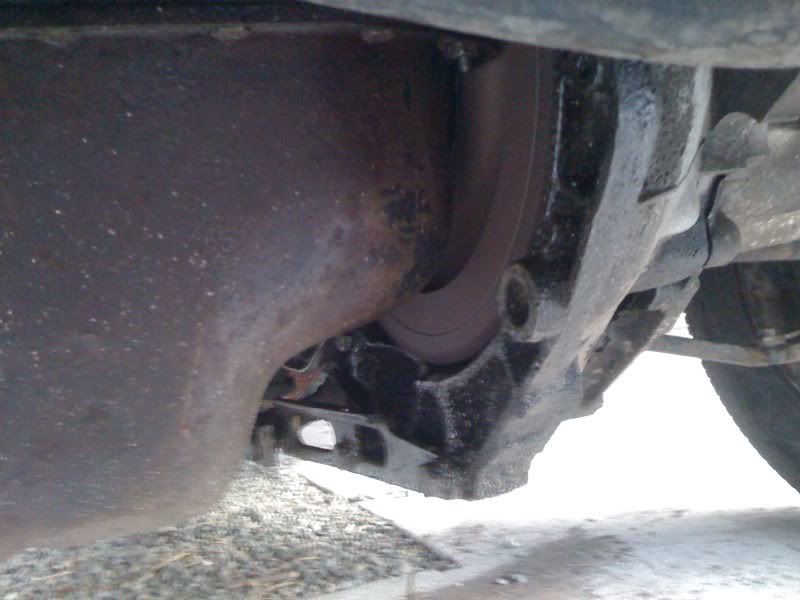
and finally ---am i supposed to see the flywheel like this lol -- owner said he replaced the engine at one point (didnt do a really good job...everything is kind of messy---missmatched bolts---messy wiring etc.
IMG_0213.jpg


alignment is off on this vehicle as well - anyone know how to adjust the toe on the front wheels?

this darn thing leaks half a ton of oil as well! what grade motor oil and gear box oil do you use in your pandas?
thanks guys! any crucial welds/areas on the panda prone to rust?


ohhhh oh oh oh one last question! the throttle is semi sticky/delayed. i stalled quite a bit when i would tap the gas and forget to wait for the revs to build before i released the clutch---is there a way to fix it or is this natural for carb vehicles?
 
Last edited:
Hello and welcome to the forum.

That appears to be a 903 Mk1 Panda, so less than 30 years rather than more but interesting none the less. Do you have a manual of any kind? If not look on Ebay.

Several Mk1 owners on the forum who should be along shortly. Please keep us advised of progress.
Regards, Petel
 
Hello Neal and welcome!

We love to hear from Panda owners all over the world, we've never had one from Antigua before (y)

That's a very rare Mark 1 Panda you've found there. Nice to hear you are taking care of it.

There are lots of Panda experts on Fiat Forum.. I'm not one of them but I'm sure you can find an answer to all your questions here.

Good luck with your Panda, and thank you for the photos! Please post some more as you work on it :)

Cheers,

Plug
 
Hello and welcome!

Great to hear from another mk1 owner!

Regarding your questions:

The flywheel is meant to have a guard. Its a thin sheet of metal that fits between the gearbox and engine and so, I assume, when the guy removed the engine it wasnt put back! that cant be good, especially if a bit of gravel or a stone went in there. Could cause some serious damage!

The carburettor is best left to an expert tbh. Sorry i cant help out too much there. They're a little fiddly and tempermetal although when the work, they work well! Apart from the idling adjustment and a mixture screw that makes little difference, there's not much more I can say. You need a manual ideally. (haynes maybe). This being badly set up may be causing the delayed responce to the throttle too. I know mine has been like that in the past when it needed a good overhall!

I have never removed the seat covers, but I have heard they are removable. Maybe not as easy as they claim, but obviously if it sounds like its breaking then just leave it. You can clean seats up suprisingly well with carpet cleaner and a soft brush. Which means you can leave it all in. (bet it dries quite fast over there in the sun too! :D).

The toe is adjusted by losening off the nut next to the tie rod end on the steering rack (easier said than done with the rust welding them tight!) and when you have it in the right position just tighten it up!

They leak oil quite badly these cars because of a terrible design of the inner CV joint boots (seals) They need replacing quite regularly I find as they wear out and oil leaks out where the shaft spins if you know what i mean. Gear oil is sufficient (80W) and for the engine i think i use 15/40W correct me if I am wrong here guys. I hope your not buring/losing engine oil though. That would not be the best!!

Rust wise, there are alot of places to check. behind the rear bumper around the suspension (leaf spring) mounts. and all around the front suspension mounts (inner wing). Check underneath the plastic guards in the fron arched and rear arches too.
Also, although yours seems ok from the photos, around the windscreen (particularly around the black vents at the bottom corners) is very prone to rust particularly on the mk1's.

Anyway, time to get some grub! I hope that answers your questions!

Si
 
thanks guys!

hopefully i can get around to the vehicle as soon as i get a break from class. there are spots of rust and bubbly paint around the windshield and roof but nothing nowhere structurally significant. no rust found on the body behind the seats...no rust found within the engine compartment as well (at least none found yet!)

i think the next task will be to clean up that messy engine bay...rewire those flimsy wire looms--and then eventually get to that interior...and get that allignment done...ohh boy lol :rolleyes:
 
I see you put in distilled water which is good but without coolant it will still rust the innards so would put in a 50/50 mix of water and coolant.

The gearbox will take engine oil, the thicker the better 20/50 will do fine, the proper oil is zc90 but hard to find.

The video is very poor so difficult to say, I can hear a slight rattle which may be the tappets needing adjusting (need a manual as it's not the normal rule of 9 in the OHV's) or it's possibly pinking re fuel mixture.

There are three methods required to tune the engine First the timing (you will need a strobe light) you can adjust the distributor by loostening the nut on the U bracket holding it tight once loose you can turn the distributor left or right to get the right setting (from the small gap at the top of the gearbox)

Next set the mixture screw on the carb (you will need to have a Co meter up the exhaust to set it correctly)

Finally set the idle the screw at the side of the throttle cable on/next to the carb.

A very warm welcome to the site (y) I need to get to bed or I would have added more but there is plenty of time and we will try to help as much as you need it. Bye for now.

I applaud your efforts so far for bringing such a rare car back into life WELL DONE.
 
Last edited:
video.google.com/googleplayer.swf?docid=4048356518012615694&hl=en&fs=true

- another crappy video..


thanks for the comments alan! looks like i need a lot more equiptment to tune the motor than i thought (darn...why couldnt it just be FI!). maybe i could rent such tools from the local store - i will see.

yes - 50/50 mixture should be on its way. it looked really really messy in the radiator when i first saw it --- i just had to get rid of it asap!

im pretty sure it isnt pinging...well i hope so. its difficult to diagnose when i dont have another model to compare with.
 
Tools you need are a strobe timing light and a Co meter to measure the carbon dioxide/monoxide (having a bad morning and cant remember which) comming out of the exhaust if there is too much it is too rich if not enough its running lean. If it is running rich the spark plugs will get sooty and eventually are not as effective it will also hamper starting.

One way of checking richness is to remove a spark plug if it's all black it's running rich if white ish in appearance it's running lean. The spark plug should be a light brown colour if running OK.

Re the timing you can set by feel but unless you have lots of experience you may make things worse instead of better.

One warning becarefull of tampering too much with the mixture screw, if you tighten it into the carb you can flatten the needle point and then the carb will never be effective unless the needle is replaced.

I'll try to find some pics for you later but I'm currently waiting for the Dr cause I'm in agony with back pain.......I hope what i'm typing makes sense cause i think i'm maybe a bit delerious :(:eek:
 
Feeling better :)

OK have a look at the auto data in the link below there will be figures for the 903cc engine from 86 on but I would imagine that it will be the same info as the Mk1 903....

https://www.fiatforum.com/panda-classic/71697-haynes-autodata-info.html

For you it will be the first file and at the bottom will show you the position of the idle & mixture screws on the carb, also shows the timing as 5 deg BTDC with no vacum so you have to remove and block the vacum pipe before changing any settings.
 
Last edited:
Feeling better

OK have a look at the auto data in the link below there will be figures for the 903cc engine from 86 on but I would imagine that it will be the same info as the Mk1 903....


For you it will be the first file and at the bottom will show you the position of the idle & mixture screws on the carb, also shows the timing as 5 deg BTDC with no vacum so you have to remove and block the vacum pipe before changing any settings.
thank you so much alan1111:) im gonna get to it
 
hello

- another question -

there seems to be an open ventalation system coming out of the oil filler neck on the cam cover. the fumes are fed into the intake assemble as expected - however, there seems to be an opening in the hose right before the intake that dumps fumes to the atmosphere (and a lot of fumes!) is it supposed to dump fumes to the atmosphere like this? (i guess it does this at idle when the air box is saturated). i am assuming that this is a more traditional pcv system
 
Last edited:
hello

- another question -

there seems to be an open ventalation system coming out of the oil filler neck on the cam cover. the fumes are fed into the intake assemble as expected - however, there seems to be an opening in the hose right before the intake that dumps fumes to the atmosphere (and a lot of fumes!) is it supposed to dump fumes to the atmosphere like this? (i guess it does this at idle when the air box is saturated). i am assuming that this is a more traditional pcv system

Hi again,

Not sure why there is an opening in the pipe. It should be a solid pipe going into the airbox. As for the fumes, mine is also really messy and kicks out lots of oily smoke. I have changed the set-up on mine so that the breather off the rocker cover goes into an oil catch tank and then exits to atmosphere. The catch tank collects a hell of a lot of water/oil mix but I cant see anything wrong with the car. I expect it is just worn valve stem seals, so should be nothing to worry about. Are there any mayonaise like substances on the oil filler cap? Mine has a lot of white residue on the filler cap but no apparant signs of a blown head gasket. Just a dirty little engine :p

Si
 
havent checked the oil cap - but the good ole catch can mod is def an option...just need to find a can on this island


thats good to know - lol this is the first open dump i have seen - i think i will route an extension to the pavement so that i dont smell that smoke when i drive.
 
... i think i will route an extension to the pavement so that i dont smell that smoke when i drive.

Haha, I know exactly what you mean. Really bad smell isnt it :eek: and unfortunately it seems to spray the oily water all over the alternator which causes charging problems. Thats my bad, a better position of the breather outlet would solve that problem :eek:

Si

PS I used a robertsons orange squash bottle till I got my catch tank :slayer: Bodging panda style...on a budget.
 
What's wrong with just replacing the pipe and attach back into the Airbox?

The breather system is always smokey even on relatively new engines that's why it shouldn't be to atmosphere, It's not a problem...unless as said the head gasket is gone and you'll fill the carb with crap. Just make sure there is a gause of sorts to break the smoke down before going to carb....Or make an oil catch system but with the extension pipe going into the airbox rather than the atmosphere.
 
IMG_0253.jpg


-- thats the guy in red that vents it out --- should i send it to the pavement[question mark] normaly the fumes travel down that pipe into the airbox, but i guess when the box gets saturated excess pressure builds up and backs up into that vent


here is the dam starter that has been giving me waaaay too many problems

the terminal is stripped and i cant get the fastener on tight[explanation point]
IMG_0251.jpg

IMG_0255.jpg


when i connect it - nothing...sometimes a click --- when i short it with jumper cables - nothing - even tho every wire reads 12.3 - 12.4 volts. - the ignition wire reads 12 volts as well [the lights do dim when i turn the key]

once dissattached the alternator from the terminal and attached a jumper cable from the positive terminal directly to the starter...it worked but i havent been able to replicate it

when i short the two terminals with a screwdrive the starter spins - when i short the stripped terminal with the ignition switch solenoid thingy---nuthing--just sparks

[sorry my shift key is gone]
 
Last edited:
Back
Top