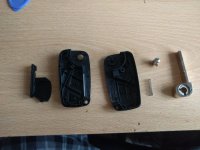
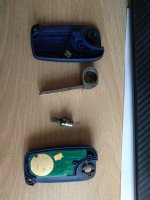
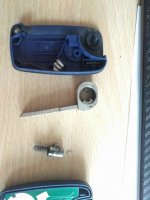
Switching the insides
Now the real transplant begins.
You'll see on the non-button side there is a silver contact strip. Lift this out and replace. It'll lift up with a light pry from screwdriver or tweezers. Be careful not to distort it as it's fairly delicate. You need to make sure the contact strip sticks out fair enough from the rim of the key to touch the battery when inserted. You can test fit to make sure. Give it a tweek if necessary.
Next swap the little grain of rice immobiliser chip out. It sits in it's own little clip in the top corner as pictured. It should knock out into your palm. Replace in new key but be careful as it'll potentially be loose and you dont want to drop it.
Put the circuit board in place. It just sits in place, it's not clipped or screwed in, so it sits loose.
Now the fiddly bit - key blade.
Sit the spring in place, so that the spring's little leg sits in about the six oclock position - as you're going to tighten it anti-clockwise to give the key it's flip. There is a cut out slot in the key for this leg to sit in.
Now put the button on top of the spring. Note that the button is keyed with 2 little legs off it.
Put the old key blade over the button so that the key is in the open pointing outwards position. Make sure the key locates onto the legs of the button. Return the blade to the open position.
Apply some downward pressure on the blade (to stop it pinging away) and rotate anti-clock to load up the spring. The standard key spring needs 1 turn, the new key spring needed 2 turns, to give it the tension required.
Once it's got those two full turns it should still be in the open position. Push the blade right down onto the housing so that it's clicked into open position. Keep it held down.
Now with the other hand take the second half of the key and mate it to the first. It's a bit fiddly, making sure nothing moves and the blade doesn't ping off, so prepare to be patient but it's not too hard.
Keep the unit pinched shut between your fingers whilst you re-insert the small screw that sits behind the key badge.


