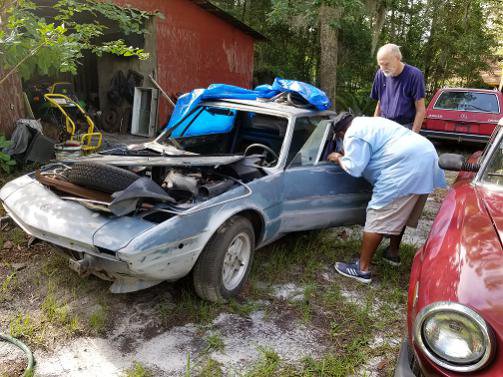
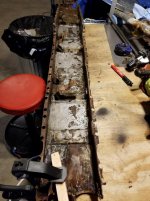
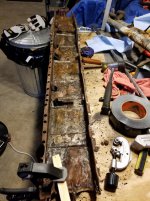
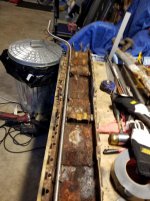
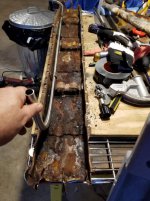
Basket Case 1.jpg

X1/9 Restoring an 82 X1/9

Introduction

My Fiat X1/9 project

MANY years ago, I used to own Fiats. My first NEW car was a Fiat 128 sedan. I drove it mercilessly, autocrossed it frequently, and it never had a failure or let me down (including towing a single snowmobile trailer in Alaskan winters!).

I moved to X1/9s, and have had several. A street car, that was yellow, which I ended up running in the Fur Rendezvous Gran Prix, a sanctioned road race run on downtown streets around a carnival in Anchorage Alaska in February. Then a pure race car that was red with various white parts on it, Carrera coil overs, PBS engineering head, exhaust, etc., which was an autocross maniac. After that was a stock metallic green X in Seattle. Perfect car for Seattle traffic.

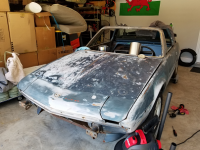
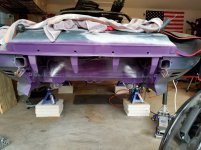
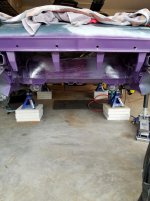
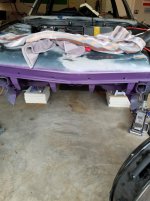
Now, some 35 years later, I found the desire to bring one back from the grave. I found an 82 (first time I am dealing with fuel injection) that has sat in a pole barn for several years. Maybe 5 years. Parts of it sat in the woods (hence the hail damage and really terrible primer on the hood hiding surface rust bubbles). Someone started to prep it for paint, and did some disassembly, but it was literally a basket case. When I went to pick it up, I ended up with 4 crates of parts and components, as well as a pickup-truck bed of other parts, hoods, engine covers, etc. It was Mediterranean blue, and various shades of primer and rust and etc. There was some surface rust, but no rust-through areas. It had over 100K miles, a clean title, and a key, no battery, and it looks like most of the parts are there.

The car suffers from being exceptionally dirty (a couple wasp nests, LOTS of leaves), and there was some water intrusion in the various cavities. Those issues have been handled.

The goals are as follows:

Clean it up visually: Remove bumpers, mounts, side marker lights, pop up headlights, and weld everything over and smooth.

Get it ‘pretty’: New wheels. New paint, deep purple metallic. Interior changed from blue to black. No rust, all visible surfaces painted and clean to the touch. Interior cleaned up and any missing parts replaced. Projector beam H1 headlights, and LED turn signals up front.

Get it comfortable: New carpet, new seats, 4 point harnesses, etc.

Make sure it functions, even if different than designed: For instance, get rid of all three rusty hood latches and cables, and replace with flush mount pushbutton hood pins, some of which would be lockable.

THEN get the wiring straightened out, and get the 85hp injected motor running, and have a fun weekend driver.

Long term goal, maybe a year out: Switch it over to a Honda K20A2 motor with a Honda 6 speed limited slip transmission (and over 200HP). Midwest-Bayless has a rather expensive kit that makes this possible, with a limited amount of cutting and welding. :slayer:

The car has so far had the following done in the last 4 weeks, working 2 hours on Saturday morning, and 2 hours on Sunday morning before the heat and humidity make my garage uninhabitable, and whenever the heat and humidity allow me to work in the evening after my regular job:

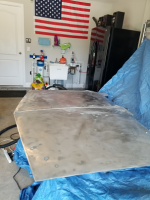
Took the hood down to bare metal, treated for hail damage and one ding, painted with rust restorer primer, and then with a regular primer. Treated the underside of the hood to a nice satin-black paint job.

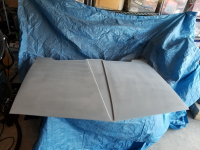
Sanded the rear decklid, treated with rust restorer primer and then with regular primer. Treated the underside of the lid to a nice satin-black paint job.

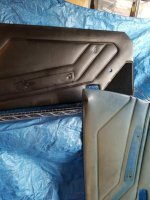
Door cards have been removed, cleaned and treated, and painted satin black.

Seats have been removed

Interior old blue carpet has been removed

Interior blue vinyl trim has been removed (blue? Really? Yuck!)

Cromodora Iron Cross wheels and old Kumho tires have been removed. Tires are actually in decent shape, wheels are in decent shape, and I have a spare wheel with road rash.

New tires (Toyo Proxes 195/45-15) have arrived, and new ‘Competizione’ 4x98 15x6.5 wheels should be here next week.

Targa top has been stripped. Latches have been treated for rust and painted to prevent further rusting. The trim and the 35 year old vinyl, foam, and gritty tar-like adhesive have been removed. The top has been painted with Bumper and Trim black paint.

Doors have been removed, and the door latch areas sanded and primed
Headlight buckets and motors have been removed

Radiator has been removed

Gas tank has been removed. Will be removing old gasoline that smells like turpentine, and then refreshing, cleaning the inside, and painting the outside.

Bumpers have been removed

Bumper Shocks have been removed

Whats Next:

Now there will be a couple months of perfecting the body, surface rust removal and treatment, in the front, interior, and rear compartments, as well as treating the rust on the outside of the body, and repairing any dings or small dents that I find.

I will be creating plates to replace the headlight buckets, cleaning up the wiring, and making the front end smoother.

Will cut out the bumper mount square tubing (and tow hooks) that extend out of the body in front and rear. Then I will make some threaded inserts to be able to put in racing tow straps or thread in tow hooks when needed. This will be followed by cover plates welded in and smoothed.

Will create cover plates for the four side marker lights, and weld them in. Will also be weld-filling in the various holes in the body for things that no longer require a mount.

Will be fabricating the mounts for the projector beam H1 headlights, which are just 2.5 inches in diameter, as well as the front marker/turn signal LED lights.

Once all the body work is done, I will turn the car over to a professional for the final coat of deep metallic purple.

Then it will be another couple months of sorting wiring, rebuilding an interior, and getting the engine singing happily.

Barring any major difficulties, should have it back on the road by 1st qtr of 2018.

And, during this process, I will be putting the following up on Ebay:
Front Bumper
Rear Bumper
Bumper Shocks
Seats
Headlight Buckets
Headlight Motors
Cromodora Wheels

I'll be posting some pictures, as soon as I figure out how.
  • Like
Reactions: varesecrazy
Project Mutant: Oh, the horrors, the ravages of time.

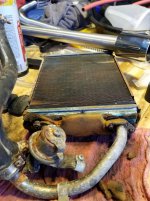
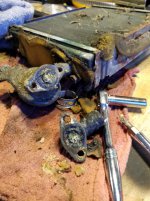
Unable to do much more, I decided to remove the heater core, since I was going to replace a non-functioning heater control valve.

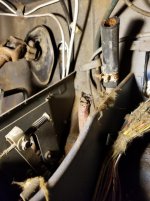
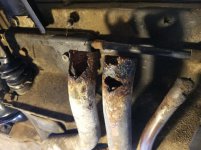
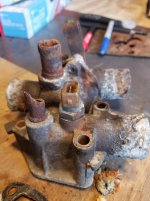
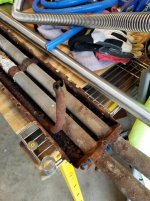
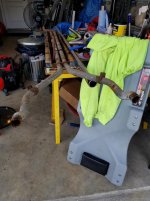
Wow. To say it was disgusting is an understatement. The valve is clogged with some sort of hard waxy stuff. The valve was corroded to the heater core. I had to cut off the aluminum 'ears' to get it removed. And the pipe that gets coolant to the heater is corroded beyond repair. It looks like the scrunge in the heater valve didn't make it to the inside of the heater core.
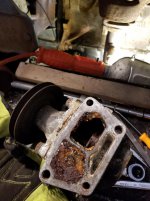
I will be cutting out 150 spot welds to remove the channel from the bottom of the car where the radiator coolant tubes and one of the heater supply tubes runs. Looks like the heater tubes are now on the list for replacement as well, since they also run through that same channel.

And in Jacksonville, FL, there is only 1 place that rebuilds heater and radiator cores. I'll be dropping off the heater core next week.
 

Attachments

  • 20180329_192955.jpg
    20180329_192955.jpg
    91.3 KB · Views: 85
  • 20180329_193810.jpg
    20180329_193810.jpg
    93.6 KB · Views: 88
  • 20180330_061623.jpg
    20180330_061623.jpg
    66 KB · Views: 85
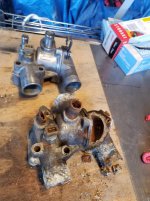
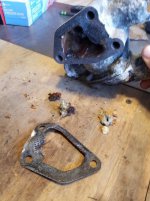
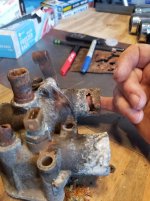
Project Mutant: Started the work to remove the coolant passage box under the car. Step one is to remove the hoses and while I am at it, replace the thermostat housing and associated components.

You can see from the pictures that there truly was some horrors lurking inside. Thank goodness for Bertie and the replacement housing he sold me, and for Midwest Bayless for some of the other components.

Getting the heater core rebuilt as we speak. Removed the hoses that will be replaced. Started cleaning, finding spot welds, and have already cut about 30 of them. So, about 1/3 done with the removal process. Some of the time was prep work and removing hoses and etc, and some of the time is sanding away the coating so I can find the spot welds.

Did figure out that when cutting spot welds on thin sheet steel, it is hard to judge the depth. I will have a few holes that will need to be fill-welded when I am done.

My back still hinders me getting around and crawling under the car. What I wouldn't give to have a nice two post lift. So I am done for tonight, and will probably be able to pick up the drill again on Saturday morning. Tomorrow is date night. ?

I think I can have the box removed by Saturday afternoon, then give my back another rest, and so on.
 

Attachments

  • 20180405_185644.jpg
    20180405_185644.jpg
    67 KB · Views: 98
  • 20180405_182010.jpg
    20180405_182010.jpg
    84.1 KB · Views: 92
  • 20180405_181513.jpg
    20180405_181513.jpg
    70.1 KB · Views: 87
  • 20180405_181455.jpg
    20180405_181455.jpg
    71.8 KB · Views: 86
  • 20180405_181445.jpg
    20180405_181445.jpg
    65.6 KB · Views: 87
Project Mutant: Finally, a project that went faster than expected! I spent a couple hours on Thursday night, and a couple hours this morning.

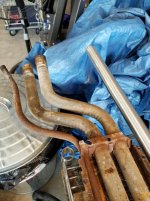
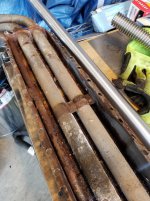
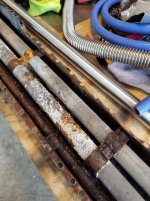
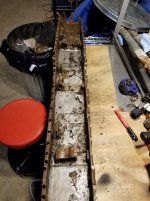
I was able to get the coolant tube box off of the bottom of the car in just under 2 hours. It was as ugly inside as predicted.

There was some really nasty fluid left in the tubes. the heater tube was pretty much blocked. All in all, this is definitely a task that needed to be done!

I ordered the gaskets for the water pump, and will be cleaning and servicing that as well, before I finally put it back together. Stainless tube and corrugated stainless radiator hoses. I also ordered 4 45 degree stainless elbows, and will weld up the back part myself. From there out, it is just ad-libbing my way through.

So I will take the rest of the day off, and congratulate myself on a task well done.
 

Attachments

  • 20180407_092548.jpg
    20180407_092548.jpg
    91 KB · Views: 113
  • 20180407_092538.jpg
    20180407_092538.jpg
    93.2 KB · Views: 98
  • 20180407_092532.jpg
    20180407_092532.jpg
    101.1 KB · Views: 102
  • 20180407_092527.jpg
    20180407_092527.jpg
    94.3 KB · Views: 105
  • 20180407_092521.jpg
    20180407_092521.jpg
    68.2 KB · Views: 99
  • 20180407_093258.jpg
    20180407_093258.jpg
    97.2 KB · Views: 104
Last edited:
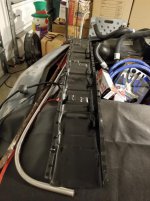
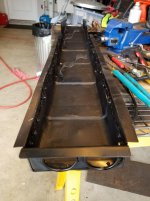
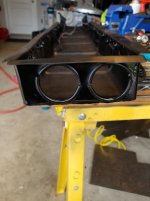
Project Mutant: The coolant box is on the bench, and the coolant tubes and heater tube have been removed.

I've bent a new heater tube that looks pretty good. Should fit and end up where the old tube ended up.

I started cleaning the inside of the box, and after some 45 minutes of scraping, it looks like I should be able to get out the wire brush and start removing the rest of the scrunge real soon now. Then, some rust restorer primer, and some satin black paint, and then sand off and repaint the outside, and it will be awaiting the installation of the new stainless coolant tubes.
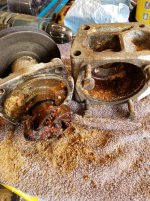
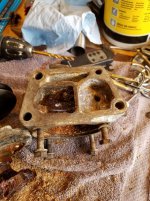
I will start fabricating the new tubes this week, and will get to see how much my welding skills have deteriorated with 15 years of not being used. :D
 

Attachments

  • 20180409_193536.jpg
    20180409_193536.jpg
    81.4 KB · Views: 97
  • 20180409_193531.jpg
    20180409_193531.jpg
    78.5 KB · Views: 96
  • 20180409_192941.jpg
    20180409_192941.jpg
    95.9 KB · Views: 100
  • 20180409_190928.jpg
    20180409_190928.jpg
    75.5 KB · Views: 103
  • 20180409_190923.jpg
    20180409_190923.jpg
    84.4 KB · Views: 95
Would it not be easier to fabricate a new coolant pipe box? Possibly even from stainless steel and rivet it to the bodyshell?

AL.
 
I had thought about that. Unfortunately, I do not have the skill nor tools to work with a large piece of sheet metal. No bending brakes or other forming tools.

The box actually has a couple different levels. If you look about halfway down, you can see where it 'steps' down lower. I am OK mechanically, but when it comes to sheet steel manipulation, I know where my limitation is.

So for now, I will just straighten, clean, de-rust, paint, and reinstall, and re-weld it back to the car.
 
As an alternative, could you omit the coolant pipe box, tidy up and repaint the car floor and leave your nice shiny new stainless coolant pipes on show (just fit appropriate pipe clips/clamps.

Stainless steel sheet is notoriously hard to manipulate/form in a home 'shop.
Mild steel on the other hand is relatively easy. Given that you can weld and the box has a step in it, it could be formed in sections at home, especially if you have access to a small box folder or bend the sections between lengths of angle iron clamped in a bench vice and then weld together. Just a thought.

On the other hand, you may be aiming for originality plus I don't know if omission of this box section would compromise safety in a collision. ( not a good way to find out!).

Re:- cleaning radiators incl. heater rads. - I just block the openings, fill with a caustic soda (drain cleaner) solution, leave a day or two, then flush with a hosepipe until water runs clear. Works fine for me, just don't let the caustic soda solution come into contact with alloy components e.g. heater valve.

AL.
 
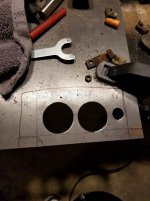
Project Mutant: Done cleaning and repainting the coolant tube enclosure from the bottom of the car. Removed the end plates, removed all the old sealer and rust, and primed with rust restorer primer, and painted satin black.

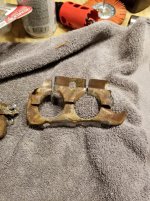
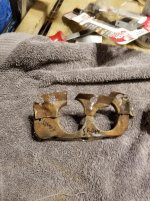
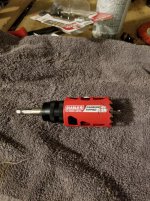
I am now working on recreating the end plates where the pipes pass through. A carbide-tipped hole saw is Da Bomb for making the proper holes. Amazing bit of kit.

I am also planning on running BOTH of the heater lines in the enclosure. One of them currently runs inside the car (instead of underneath) in the same box where the shift mechanism lives. So I'll be ordering another piece of 5/8" stainless and bending THAT to match the new one I bent. Makes more sense.

I will be rounding off the edges of the holes by welding in some tubing (like brake line) over the sharp end of the cut metal, so that it doesn't damage the stainless coolant tubes over time.

Deconstruction takes a LONG time and can be very frustrating, especially when you keep finding other related issues. Construction and rebuilding brings a smile to my face, and building something physical with my hands makes me feel good. This car will likely be willed to my grandkids when I pass, whenever that happens, since I seriously doubt that I could ever bring myself to sell it.
 

Attachments

  • 20180414_065812.jpg
    20180414_065812.jpg
    120.2 KB · Views: 79
  • 20180414_065808.jpg
    20180414_065808.jpg
    112.8 KB · Views: 83
  • 20180414_064308.jpg
    20180414_064308.jpg
    117.2 KB · Views: 82
  • 20180414_064247.jpg
    20180414_064247.jpg
    67.5 KB · Views: 83
  • 20180414_064230.jpg
    20180414_064230.jpg
    67.4 KB · Views: 97
  • 20180414_065827.jpg
    20180414_065827.jpg
    66 KB · Views: 80
Project Mutant: Some things are just too good (bad) not to share.

It seems that everywhere I turn, I find holes in things that shouldn't have holes, and blockages in things that should have holes. I will be SO glad when I am done with the cooling system revival!

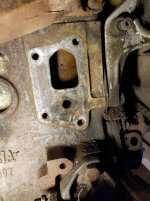
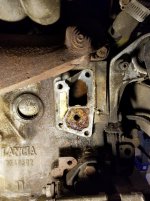
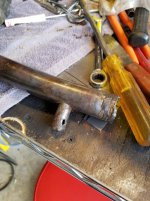
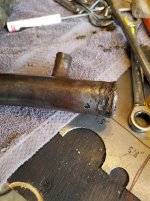
I removed the tube that takes coolant from the engine back to the water pump. It wasn't blocked, but the inside looks terrible. In cleaning it up, I found a hole in the large pipe, AND a hole in the small pipe. DANG!

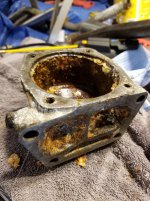
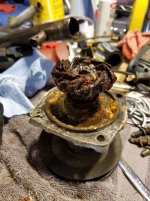
Then, I took the water pump off. There are two holes in the engine block, one large and one small. So far, so good. The water pump housing itself is a different story. The large hole was disgusting, but the small hole was CAKED, BLOCKED, and that stuff was what I have been finding all over the cooling system.

I think in the past, someone used some stop-leak, or maybe a LARGE case of stop-leak, and where it didn't circulate, it decided to settle in and make itself into some form of crystalline cement.

I had ordered a replacement water pump, BUT the illustration doesn't show the full housing. So, I ordered a Beck-Arnley water pump also, where the illustration DOES show a full housing. The winner will be the first one to arrive with the full housing. The loser gets returned for refund.

I ordered an in-line filter for the cooling system (wire mesh in a clear housing) so I can place it where it will catch larger flakes and etc. It also will make it so I can view the state of the coolant.

Once I get everything here, I will remove the thermostat, hook the out and in-flow parts of the thermostat housing together with the filter, and do a full cooling system flush. Or two. Or three.

Nothing gets hooked up to my new cooling lines and radiator until I can get the engine completely flushed, and running clear. Until then, it will be flushing with a closed loop system.

For my Fiat X1/9 community friends... If you decide to remove the heater tube that runs inside the car, in the console, you will want to know that there are THREE 'clamps' that are spot-welded to the console. They do NOT want to be removed. Took some large pry bars. chisels, spot weld cutters, and a right angle cut off tool to get it loose. Then, I decided to cut the tube into three sections to remove it, since it was easier than taking it out the back.
 

Attachments

  • 20180415_161809.jpg
    20180415_161809.jpg
    99.2 KB · Views: 69
  • 20180415_161805.jpg
    20180415_161805.jpg
    83 KB · Views: 76
  • 20180415_161610.jpg
    20180415_161610.jpg
    100.5 KB · Views: 69
  • 20180415_160749.jpg
    20180415_160749.jpg
    89.4 KB · Views: 75
  • 20180415_160740.jpg
    20180415_160740.jpg
    70.8 KB · Views: 81
  • 20180415_163316.jpg
    20180415_163316.jpg
    129.1 KB · Views: 77
  • 20180415_163320.jpg
    20180415_163320.jpg
    110 KB · Views: 79
  • 20180415_163404.jpg
    20180415_163404.jpg
    80.8 KB · Views: 69
  • 20180415_163418.jpg
    20180415_163418.jpg
    90 KB · Views: 69
I've often been astonished at how badly Fiat water pipes can corrode. Probably wouldn't happen with regular anti-freeze/coolant changes (iirc, the corrosion inhibitors get used up first).

As well as the coolant pipes rusting, the engine block core (frost) plugs also rust badly...... Idk if there are any core plugs in the cyl. head or inlet manifold?

I was surprised that you hadn't removed the engine and trans. as a unit. This would have allowed you to work in comfort around the engine and then refit the combined unit from underneath the car, lifting it into position with your engine crane.

AL.
 
It is often said that hindsight is 20/20. In this case, I would agree with you. However, since I am disinclined to go back and remove it all again, I will treat the problems I find with the engine/tran in place.

From what I can see using a flashlight and cheap borescope, the inside of the cylinder head and block look reasonable. Not nearly as bad as the rest of the pipes in the system.

And, you are correct that changing coolant at proper intervals usually leaves the pipes and mechanicals in good condition. However, since I can't go back in time and grab whoever owned it by the lapels and shake some sense into them, I am left to deal with the aftermath and bad decisions. Again: I believe someone used radiator stop-leak, and attempted to keep it as a permanent solution, instead of correcting the problem.

The further I get in this project, the more I hear the phrase in the back of my head: "Rode hard, and put away wet".
 
Project Mutant: Completed creation of a closed-loop cooling system without radiator, and without thermostat. The idea is to get clean water running through the system BEFORE I hook it up to the new radiator, refurb heater core, and new coolant tubes. Ran some fresh water into the system. It works. No runs, No Drips, No Errors. Flows water. Put fresh water in, get rusty gnarly water out. Water from the system is REALLY ugly, as I expected.

Done for the day. Will be doing several cooling system flushes tomorrow until the water flows clean, THEN I'll add some cooling system cleaner chemicals, and run THAT until things are clean.

Hooked up the instrument panel I received with the car. I don't think it is the correct one for the car. The tachometer seems like it is reading 500 or more revs to high, the charging meter and temperature meter don't seem to work, and I get no reading for the fuel level. 36 year old problems. :)
 
Project Mutant: After 3 fresh water flushes, and 2 chemical flushes, the coolant system in and around the engine is running CLEAR!

Removed the thermostat housing, and all of the temporary cooling hoses and heater hoses I installed to do the flushes.

Now, back to working on the underbody coolant pipes and heater pipes. Getting closer to completing the cooling system revival, and upgrades. We'll see what the next week brings.

I did find another area of rust through in the drivers footwell. I'll get that done after I get the underbody work done. Then brakes and clutch assembly attachment and bleeding, and it will be ready to sit on its own four wheels again.
 
Oh yeah. I also rebuilt the dogbone upper motor mount. The rubber at both ends had perished, the hole in one end had elongated until the engine would wag back and forth at will.

Using the Chevy transmission mounts (#2122). It took quite a bit of sweat and muscle to get the new bushings in, but TOTALLY worth it.

$8 worth of mounts and a little time (less than an hour), and the dogbone is as good or better than new. Especially since the new dogbones I saw (which were all out of stock anyway) were from $40 to $60.
 
Project Mutant: Time for an update...

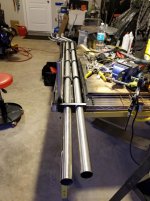
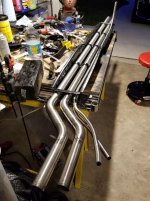
I got an excellent start on getting the box under the car where the coolant lines run nearly complete. Because I am running coolant lines that are slightly larger than stock (and STAINLESS STEEL), I decided to make the box slightly taller.

The larger tubes required more height. So, I extended the box sides 3/8" taller. I then fabbed up a new front end and just need to fab up the rear end, and then I am ready for the new tubes.

I am also running BOTH of the new stainless steel heater lines in the box, rather than running one in the center console.

I replaced all of the coolant hoses in the engine compartment. Thanks to Bertie from Canada, I also have an excellent condition coolant tube from the brand new water pump, replacing the one that had holes in the big tube, and the small tube.

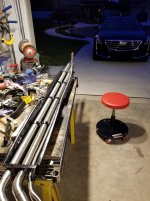
By the end of next week I will either have new stainless coolant tubes welded (all materials are on-hand, the appropriate skill set is not!), or have a new set bent. I decided to NOT bend the front of the tubes. Makes them easier to work with and I can fabricate something for the front end of the car to the radiator.
 

Attachments

  • 20180506_174052.jpg
    20180506_174052.jpg
    89.5 KB · Views: 117
  • 20180506_174031.jpg
    20180506_174031.jpg
    76.2 KB · Views: 121
  • 20180506_173202.jpg
    20180506_173202.jpg
    64 KB · Views: 120
  • 20180506_173158.jpg
    20180506_173158.jpg
    46.1 KB · Views: 124
Last edited:
Project Mutant: The coolant tubes and heater tubes are in the box, and after some more 'massaging', the box is ready to go back under the car.

Need to get some body panel adhesive to make sure the box is structurally sound when I mount it to the bottom of the car, and some sealant for the ends of the box to keep the nasty stuff out Then need to get the front tubes cut off where I want them to be. Then, ready to mount everything back up and start finishing the cooling system and heater.

As far as the overall job quality? It is not my best work. But in the words of a wise old woman, spoken with a deep-south drawl, for some reason in Brainerd Minnesota "It ain't gourmet, but it's food."

Also determined today that I have the incorrect speedometer cable. The one that came with the car is for a mid-seventies X1/9, and won't connect to the speedometer. One more thing... :-( Oh well, I wasn't planning on doing any measurable speed any time soon.
 

Attachments

  • 20180513_201502.jpg
    20180513_201502.jpg
    75.5 KB · Views: 95
  • 20180513_203136.jpg
    20180513_203136.jpg
    82.9 KB · Views: 100
  • 20180513_203140.jpg
    20180513_203140.jpg
    76.1 KB · Views: 125
Project Mutant: Progress is being made. Holes in under-car tray have been filled. Seams for end caps and around pipes have been sealed with automotive seam-sealer. Radiator box has been de-rustified, and primed, and painted a temporary color.

"This isn't even my final form!"

New (correct) speedometer cable arrived.

Tomorrow, have some mikey-do items to attend to, then grind the mounting area for the under-car tray smooth (spot-weld cutter leaves behind flotsam and jetsam), and drill five new holes in the side of the tray for the new speedometer cable mounts.

Then, we clean the mounting surfaces, pre-drill a few dozen holes in the tray flange for pop-rivets to hold everything in place, and lay on the two-part epoxy auto body part adhesive. Then I have 90 minutes to get the tray up where it belongs, and pop-rivet it in place to allow the body adhesive to cure for a day. After that, it is a one-piece with the rest of the car, forever. A day later, and I can hook up the hoses and maybe even get the radiator in place.
 

Attachments

  • 20180518_192843.jpg
    20180518_192843.jpg
    75.2 KB · Views: 121
  • 20180518_192837.jpg
    20180518_192837.jpg
    66 KB · Views: 84
  • 20180518_192829.jpg
    20180518_192829.jpg
    71.3 KB · Views: 105
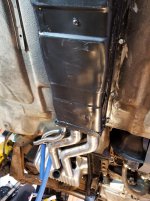
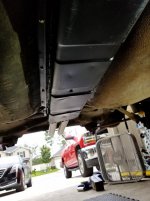
Project Mutant: Minor milestone. The under-car tray with the new stainless steel coolant and heater lines is completed, and is mounted, with the aid of body panel epoxy and a couple dozen self-tapping screws.

4 hours set time, then I can seam-seal all of the little gaps at the corners, attach all four of the hoses in the back, run the new speedometer cable that mounts on the side of the tray, and start reinstalling the heater core in the dash.

Tomorrow evening, I can put the front radiator hoses in place, and start figuring out how to mount the radiator lines and keep them neat and tidy in the front.

BTW - if you are in Jacksonville area, and need some thin stainless tubing TIG welded, I know a guy.
 

Attachments

  • 20180520_101432.jpg
    20180520_101432.jpg
    84.3 KB · Views: 93
  • 20180520_101440.jpg
    20180520_101440.jpg
    65.8 KB · Views: 133
Last edited:
Back
Top