Introduction
My Fiat X1/9 project
MANY years ago, I used to own Fiats. My first NEW car was a Fiat 128 sedan. I drove it mercilessly, autocrossed it frequently, and it never had a failure or let me down (including towing a single snowmobile trailer in Alaskan winters!).
I moved to X1/9s, and have had several. A street car, that was yellow, which I ended up running in the Fur Rendezvous Gran Prix, a sanctioned road race run on downtown streets around a carnival in Anchorage Alaska in February. Then a pure race car that was red with various white parts on it, Carrera coil overs, PBS engineering head, exhaust, etc., which was an autocross maniac. After that was a stock metallic green X in Seattle. Perfect car for Seattle traffic.
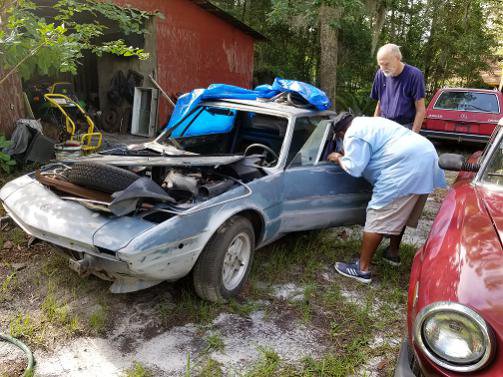
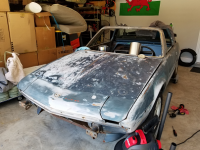
Now, some 35 years later, I found the desire to bring one back from the grave. I found an 82 (first time I am dealing with fuel injection) that has sat in a pole barn for several years. Maybe 5 years. Parts of it sat in the woods (hence the hail damage and really terrible primer on the hood hiding surface rust bubbles). Someone started to prep it for paint, and did some disassembly, but it was literally a basket case. When I went to pick it up, I ended up with 4 crates of parts and components, as well as a pickup-truck bed of other parts, hoods, engine covers, etc. It was Mediterranean blue, and various shades of primer and rust and etc. There was some surface rust, but no rust-through areas. It had over 100K miles, a clean title, and a key, no battery, and it looks like most of the parts are there.
The car suffers from being exceptionally dirty (a couple wasp nests, LOTS of leaves), and there was some water intrusion in the various cavities. Those issues have been handled.
The goals are as follows:
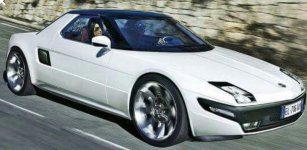
Clean it up visually: Remove bumpers, mounts, side marker lights, pop up headlights, and weld everything over and smooth.
Get it ‘pretty’: New wheels. New paint, deep purple metallic. Interior changed from blue to black. No rust, all visible surfaces painted and clean to the touch. Interior cleaned up and any missing parts replaced. Projector beam H1 headlights, and LED turn signals up front.
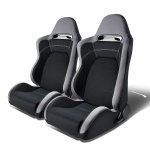
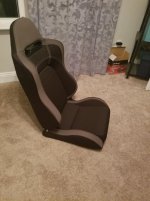
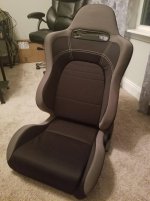
Get it comfortable: New carpet, new seats, 4 point harnesses, etc.
Make sure it functions, even if different than designed: For instance, get rid of all three rusty hood latches and cables, and replace with flush mount pushbutton hood pins, some of which would be lockable.
THEN get the wiring straightened out, and get the 85hp injected motor running, and have a fun weekend driver.
Long term goal, maybe a year out: Switch it over to a Honda K20A2 motor with a Honda 6 speed limited slip transmission (and over 200HP). Midwest-Bayless has a rather expensive kit that makes this possible, with a limited amount of cutting and welding. :slayer:
The car has so far had the following done in the last 4 weeks, working 2 hours on Saturday morning, and 2 hours on Sunday morning before the heat and humidity make my garage uninhabitable, and whenever the heat and humidity allow me to work in the evening after my regular job:
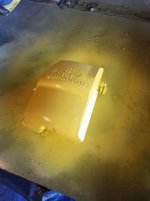
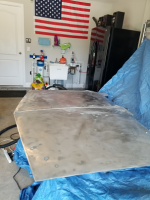
Took the hood down to bare metal, treated for hail damage and one ding, painted with rust restorer primer, and then with a regular primer. Treated the underside of the hood to a nice satin-black paint job.
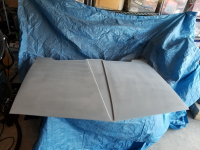
Sanded the rear decklid, treated with rust restorer primer and then with regular primer. Treated the underside of the lid to a nice satin-black paint job.
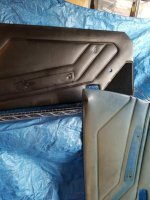
Door cards have been removed, cleaned and treated, and painted satin black.
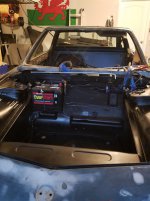
Seats have been removed
Interior old blue carpet has been removed
Interior blue vinyl trim has been removed (blue? Really? Yuck!)
Cromodora Iron Cross wheels and old Kumho tires have been removed. Tires are actually in decent shape, wheels are in decent shape, and I have a spare wheel with road rash.
New tires (Toyo Proxes 195/45-15) have arrived, and new ‘Competizione’ 4x98 15x6.5 wheels should be here next week.
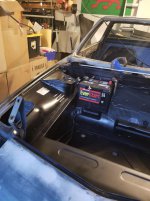
Targa top has been stripped. Latches have been treated for rust and painted to prevent further rusting. The trim and the 35 year old vinyl, foam, and gritty tar-like adhesive have been removed. The top has been painted with Bumper and Trim black paint.
Doors have been removed, and the door latch areas sanded and primed
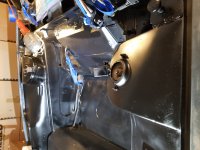
Headlight buckets and motors have been removed
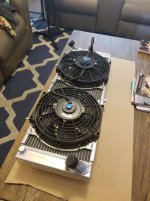
Radiator has been removed
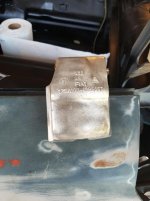
Gas tank has been removed. Will be removing old gasoline that smells like turpentine, and then refreshing, cleaning the inside, and painting the outside.
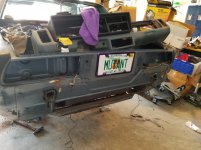
Bumpers have been removed
Bumper Shocks have been removed
Whats Next:
Now there will be a couple months of perfecting the body, surface rust removal and treatment, in the front, interior, and rear compartments, as well as treating the rust on the outside of the body, and repairing any dings or small dents that I find.
I will be creating plates to replace the headlight buckets, cleaning up the wiring, and making the front end smoother.
Will cut out the bumper mount square tubing (and tow hooks) that extend out of the body in front and rear. Then I will make some threaded inserts to be able to put in racing tow straps or thread in tow hooks when needed. This will be followed by cover plates welded in and smoothed.
Will create cover plates for the four side marker lights, and weld them in. Will also be weld-filling in the various holes in the body for things that no longer require a mount.
Will be fabricating the mounts for the projector beam H1 headlights, which are just 2.5 inches in diameter, as well as the front marker/turn signal LED lights.
Once all the body work is done, I will turn the car over to a professional for the final coat of deep metallic purple.
Then it will be another couple months of sorting wiring, rebuilding an interior, and getting the engine singing happily.
Barring any major difficulties, should have it back on the road by 1st qtr of 2018.
And, during this process, I will be putting the following up on Ebay:
Front Bumper
Rear Bumper
Bumper Shocks
Seats
Headlight Buckets
Headlight Motors
Cromodora Wheels
I'll be posting some pictures, as soon as I figure out how.
MANY years ago, I used to own Fiats. My first NEW car was a Fiat 128 sedan. I drove it mercilessly, autocrossed it frequently, and it never had a failure or let me down (including towing a single snowmobile trailer in Alaskan winters!).
I moved to X1/9s, and have had several. A street car, that was yellow, which I ended up running in the Fur Rendezvous Gran Prix, a sanctioned road race run on downtown streets around a carnival in Anchorage Alaska in February. Then a pure race car that was red with various white parts on it, Carrera coil overs, PBS engineering head, exhaust, etc., which was an autocross maniac. After that was a stock metallic green X in Seattle. Perfect car for Seattle traffic.
Now, some 35 years later, I found the desire to bring one back from the grave. I found an 82 (first time I am dealing with fuel injection) that has sat in a pole barn for several years. Maybe 5 years. Parts of it sat in the woods (hence the hail damage and really terrible primer on the hood hiding surface rust bubbles). Someone started to prep it for paint, and did some disassembly, but it was literally a basket case. When I went to pick it up, I ended up with 4 crates of parts and components, as well as a pickup-truck bed of other parts, hoods, engine covers, etc. It was Mediterranean blue, and various shades of primer and rust and etc. There was some surface rust, but no rust-through areas. It had over 100K miles, a clean title, and a key, no battery, and it looks like most of the parts are there.
The car suffers from being exceptionally dirty (a couple wasp nests, LOTS of leaves), and there was some water intrusion in the various cavities. Those issues have been handled.
The goals are as follows:
Clean it up visually: Remove bumpers, mounts, side marker lights, pop up headlights, and weld everything over and smooth.
Get it ‘pretty’: New wheels. New paint, deep purple metallic. Interior changed from blue to black. No rust, all visible surfaces painted and clean to the touch. Interior cleaned up and any missing parts replaced. Projector beam H1 headlights, and LED turn signals up front.
Get it comfortable: New carpet, new seats, 4 point harnesses, etc.
Make sure it functions, even if different than designed: For instance, get rid of all three rusty hood latches and cables, and replace with flush mount pushbutton hood pins, some of which would be lockable.
THEN get the wiring straightened out, and get the 85hp injected motor running, and have a fun weekend driver.
Long term goal, maybe a year out: Switch it over to a Honda K20A2 motor with a Honda 6 speed limited slip transmission (and over 200HP). Midwest-Bayless has a rather expensive kit that makes this possible, with a limited amount of cutting and welding. :slayer:
The car has so far had the following done in the last 4 weeks, working 2 hours on Saturday morning, and 2 hours on Sunday morning before the heat and humidity make my garage uninhabitable, and whenever the heat and humidity allow me to work in the evening after my regular job:
Took the hood down to bare metal, treated for hail damage and one ding, painted with rust restorer primer, and then with a regular primer. Treated the underside of the hood to a nice satin-black paint job.
Sanded the rear decklid, treated with rust restorer primer and then with regular primer. Treated the underside of the lid to a nice satin-black paint job.
Door cards have been removed, cleaned and treated, and painted satin black.
Seats have been removed
Interior old blue carpet has been removed
Interior blue vinyl trim has been removed (blue? Really? Yuck!)
Cromodora Iron Cross wheels and old Kumho tires have been removed. Tires are actually in decent shape, wheels are in decent shape, and I have a spare wheel with road rash.
New tires (Toyo Proxes 195/45-15) have arrived, and new ‘Competizione’ 4x98 15x6.5 wheels should be here next week.
Targa top has been stripped. Latches have been treated for rust and painted to prevent further rusting. The trim and the 35 year old vinyl, foam, and gritty tar-like adhesive have been removed. The top has been painted with Bumper and Trim black paint.
Doors have been removed, and the door latch areas sanded and primed
Headlight buckets and motors have been removed
Radiator has been removed
Gas tank has been removed. Will be removing old gasoline that smells like turpentine, and then refreshing, cleaning the inside, and painting the outside.
Bumpers have been removed
Bumper Shocks have been removed
Whats Next:
Now there will be a couple months of perfecting the body, surface rust removal and treatment, in the front, interior, and rear compartments, as well as treating the rust on the outside of the body, and repairing any dings or small dents that I find.
I will be creating plates to replace the headlight buckets, cleaning up the wiring, and making the front end smoother.
Will cut out the bumper mount square tubing (and tow hooks) that extend out of the body in front and rear. Then I will make some threaded inserts to be able to put in racing tow straps or thread in tow hooks when needed. This will be followed by cover plates welded in and smoothed.
Will create cover plates for the four side marker lights, and weld them in. Will also be weld-filling in the various holes in the body for things that no longer require a mount.
Will be fabricating the mounts for the projector beam H1 headlights, which are just 2.5 inches in diameter, as well as the front marker/turn signal LED lights.
Once all the body work is done, I will turn the car over to a professional for the final coat of deep metallic purple.
Then it will be another couple months of sorting wiring, rebuilding an interior, and getting the engine singing happily.
Barring any major difficulties, should have it back on the road by 1st qtr of 2018.
And, during this process, I will be putting the following up on Ebay:
Front Bumper
Rear Bumper
Bumper Shocks
Seats
Headlight Buckets
Headlight Motors
Cromodora Wheels
I'll be posting some pictures, as soon as I figure out how.