General Uno 1.0ie alternator replacement

Currently reading:
General Uno 1.0ie alternator replacement

trublue

New member
Joined
Jun 17, 2004
Messages
26
Points
6
Location
United Kingdom.
Can anyone tell me the where the alternator is located on this model and does it involve jacking up and removing one of the wheels? Manual mentions doing this for all other models except for the 999cc. It also doesn't say (as far as I can tell) anything about its location.

TIA
 
On the 999 FIRE (1.0IE) engine it is located (looking from of car) on Left hand side, further back than the oil filler cap to the left of dip stick. It has the drive belt attached (to drive it). But it looks the same. What are the symptoms? Why do you want it off, have the brushes gone?

If you are replacing unit, be sure you can lift the new one to the back of engine (I can’t remember how heavy they are but I did it myself (on old 903) before battery ran out again) before tiring to remove it. Also note where the wires go.

Remove wires {Later ones may also have an air cooling hose at the back that also needs removing according to Porter manual). I can’t see one on my 1993 1.0 IE}.

Remove its 2 fixing bolts and slide it off the nuts to the left. I think you can lift it upwards and out (manual don’t specify). Refit is reverse, but you need to re tension the belt (as for all other UNOs). It is easy to tighten belt as you push it downwards to increase tension before tightening off, unlike pulling upwards on 903.

No mention of wheels or jacking. – unlike Like Haynes’s “vague” manual (for 1992 onwards).

Louie Bee.
 
Well what happened was the radio suddenly went off followed by the engine dying - it wouldn't restart. Tried jump leads which started it but putting the lights on killed it again. Tried jumping it again - no joy.

Called the AA out and he immediately said it was the alternator as the battery light wasn't on with keys in ignition. Tried re-crimping one of the wires to see if it was a bad connection, this didn't seem to work but then the battery light suddenly came back on and the alternator seemed to be charging again.

Got it home (about 3 miles). As soon as I parked up the engine cut out again and wouldn't re-start, same symptoms as before.

So it seems the alternator itself is faulty. Not 100% sure it isn't a wiring fault or even the battery but it seems unlikely from the symptoms and what the AA guy said.

So from what you're saying you don't need to remove a wheel to get to it?
 
Sounds like an alternator problem.

If the car would not start, then suddenly drove 3 miles and died again, I wonder where the charge came from. Did you see what else the AA guy did, perhaps attach a charger pack?

The drive belt is on, and the wire do connections make good contact? What is the battery’s earth strap like? You may as well check them before buying and fitting alternator. If your battery has been flat, it should be carefully charged fully (with a charger). I read somewhere that you shouldn’t use a fast charger on UNOs as the battery can explode, also be careful with the acid, and hydrogen gas that bubbles off while charging it!

Remember: NEVER bump start the car (1.0 IE has a CAT converter) as you will probably be buying a new exhaust to pass the MOT on emissions as the unburned petrol kills it. Keep it firing well by keeping it in good tune ALL THE TIME, with regular oil changes (no LRP) and it will last much longer.

a few years ago I bought a new battery for the 903 (
icon10.gif
mug) which lasted about a day and the car died again, but the other would hold charge (meaning bad alternator), so then I could rotate them to get around by daylight (with no music firing through amps). I had accidentally spilled oil into my alternator and it did not like it. The car would not bump with no alternator anyway.


The “battery charging warning light” seems to do 3 things off the norm – I may have the belt and dead alternator explanations the wrong way round, but see posts on https://www.fiatforum.com/showthread.php?t=18879


The AA are not always spot on as I remember calling them out when way from home once (so I didn’t get my hands dirty setting the points etc), and to see how good they are while playing dumb). I asked how much It would be to upgrade my cover over the phone and if your already in trouble, they charge (or used to charge) a lot more. I think they didn’t do their best to gain business.

The guy pulled up on his M. Bike, and decided to force the fixed part of my points with a big screwdriver to set the gap (without undoing the points screw like he should have) and file them down inside the distributor – I knew I should have told him to get back on his bike. The car got me home just, but then the points would no longer tighten (drifting points gap). My cousin tapped a new screw in for me but its only thin aluminium and did not hold. I replaced the whole distributor, then that base plate went too, so the scrap yard welded a bolt on underneath for me and new screws would fit. The AA only wrote to apologise after I complained, but would not fund a new distributor. Keep an eye on them if you can. They may have the right tools, but they don’t all use them properly. The 1.0 IE doesn’t have points to worry about though.

icon2.gif
Louie Bee.
 
Yeah, he did attach a charger pack...

Thanks for the tips Louie. Have been poking around under the bonnet tonight to figure out how to get it off which for me is a job in itself!

Think I've sussed how to take it off. I will need to get the wheel off and remove the wheel arch shield but I can't see how you are supposed to do this. I think there is a nut which attaches it to the wing but I can't even see it (only feel it), never mind get a spanner/socket in there!

If I can get this off it should be pretty straightforward I think.
 
Last edited:
OK, if you have right-hand-drive (well duh, I see now you're in the UK :)) then yes, wheel must come off because brake servo-master cylinder is in the way above the alternator.

The wheel arch shield has a couple of small 7mm-head bolts into the wheelarch, behind the wheel. Then it's a matter of flexing it around slightly so that you can unclip it from the lip of the wing. I find if you pull the inside, upper edge down from around the suspension tower (sort of 'untuck' it) then you can get enough slackness to unclip from the lip of the wing.

Now you will probably want to remove the engine 'side' shield as well. This is held on by four or five press-fasteners installed vertically from below. The centre of the press fastener has a 'core' which you must push out before you can remove the fastener. Use a jeweller's screwdriver or similar to push out the core - do not simply tug and hope for the best! ;-)

The alternator nuts are 17mm and the bolt head are held captive - so it's just a matter of taking the nuts off. DON'T forget to disconnect the battery before you touch the 13mm nut on the main cable! :)

Alternator itself will then squeeze out downwards, though it can be tough with the driveshaft in the way.

My suggestion would be to have it tested by an auto electrician, unless you find that the brushes are obviously worn.

In theory, the small wire supplies enough current (via. the warning light) for the alternator windings to build up a magnetic field and thus for the alternator to start charging.

In my experience, if the no-charge warning light is not coming on it is usually the small wire connection, but even in this scenario (small wire disconnected) the alternator will in fact self-excite and charge the battery once the engine reaches a reasonable speed.

Another piece of perhaps useless info: also in my experience, it is possible for the brushes to be worn-out and thus for the alternator not to recharge the battery, even if the alternator light does not stay on with engine running. In other words, the 'no charge' warning light may not come on, even when the charge is insufficient.

But anyway. While you have the alternator out, change the bearings - saves aggro in the future. Just my advice...

Thanks,
-Alex
 
Cheers Alex,

Am still feeling my way around with this - I know very little about these things so it's very useful to have these kind of tips. The manual doesn't always make things that clear(well not to me anyway!). Want to make sure I know what I'm doing before I start.

The small wire you mentioned - is this the one with the spade crimp on the end that plugs into a socket next to the main connector? From the wiring diagram in Haynes this is the one that connects directly to the warning light so a bad connection at either end would obviously mean the bulb never lights. Can this affect the charging? I heard somebody on other thread say that the bulb was part of the charging circuit, dunno if this is right or not.

I'm hoping to get it done at the weekend when I've got more time and the light is better! These cold winter nights when the rain is hammering down (haven't got a garage) are not ideal conditions for doing car repairs. Plus I will have some assistance. Hopefully it won't be too traumatic..........:)
 
trublu,
Re: the small wire, yes, what the 'somebody' said was correct, as I alluded to in my post. When you first turn on the key, that small wire is 'grounded' (0V) because the alternator outside windings are not generating any voltage. That wire goes to the warning light (as you said) and the other side of the warning light has 12V from the ignition switch. Therefore, the light comes on.

What is actually happening, though, is that the small current flow through the light is also going through the alternator outside windings, creating a (weak) magnetic field. The rotating part of the alternator also has windings (the armature) and these have battery current fed into them by two brushes. So, the rotating part has a strong magnetic field.

Now as the engine starts and runs, the interaction of the magnetic fields creates a strong current in the outside (stationary) windings, which is rectified by the diodes and voltage regulator (built-in to the alternator). Now that small wire has at least 12V on it (actually about 14.2V), as a result of the 'strong current'. The warning light therefore has voltage on both sides of it - so it goes out.

Sorry for all the theory but it's necessary to explain the following. If the small wire is missing, there is no initial weak magnetic field in the outside (stationary) windings. So as the rotating magnetic field begins to turn, it is spinning freely without any opposing field. HOWEVER it does excite a voltage in those windings once a certain RPM is reached (I think about 2000-3000) sufficient to activate the regulator and so the alternator does actually produce an output even though it was slow to start.

I'm basing this statement on my own observations plus what I have read about getting alternators to work in different cars. Please, if anyone else has corrections or specifics, chime in now!

For example, there was a question to a magazine where the light would only go off once over a certain RPM. It turned out the warning light was originally for a dynamo and was of insufficient wattage - the bulb was not giving enough current flow to set up the magnetic field in the stationary outside windings. A light went on in my head (if you'll excuse the pun) because I have noticed that in an Uno instrument cluster, the no-charge warning light has a larger bulb than all the others!

<deep breath> sorry, this post was rather technical, and not what would be 'in the manual'... but there's the theory. Now we need to get down to the PRACTICE... namely why is your alternator not charging... I'm still a little confused by the symptoms. Here are some common causes I have experienced:

Warning light does not come on when key turned on: broken wire contact (but sounds like you have fixed this?), blown bulb

Warning light comes on, but stays on with engine running:
1. bright: Alternator regulator faulty, alternator diodes faulty, drivebelt broken
2. dim, but getting slightly brighter with headlights switched on: Worn brushes
3. dim, same brightness at all times: Instrument panel faulty, alternator diode faulty

Note that for possibility 2. it can happen that the warning light is not on, but the alternator is not actually charging the battery (as I said in my previous post). This may be the case with your alternator - brushes may be worn, business with the warning light not being on is coincidental.

If I was faced with your car, here is what I would do:
1. Remove battery from car and charge slowly (3A or so for at least 12 hours, 'low' if you have a charger with several rates).
2. Check the voltage of the battery. Should be at least 12.3V. If less, buy or borrow a good battery before continuing.
3. Refit battery to car, check all connections in place, and start engine.
4. Check that warning light came on and goes out correctly. If not: check belt tension, if that's OK, then alternator is bad.
5. Check voltage at battery with engine running. Should be about 14V - but in any case more than it was with battery out of car.
6. Switch engine off and wait a couple of minutes.
7. Check battery voltage again. Should be less than it was in step 5, probably about 12.3V.
8. If you pass all the above tests, everything seems fine.

If you find that the voltage at the battery is no greater with engine running than it is with engine not running, then clearly the alternator is not contributing anything! And I would then take it off for replacement brushes and possibly a parts swap with a known-good alternator, depending on how bad the brushes were. They should have at least 3mm sticking out (I think your manual will say 5mm); if they have less than this, I would reassemble with new brushes and retest, before replacing other parts.

Also about the brushes - factor-in to your consideration the number of miles the car has done. I would expect the brushes to be worn-out somewhere around 120,000 miles, so if you have only done (say) 50,000 miles, it is more likely that you have a fault with the regulator or diodes.

If you wanted to be more thorough, you could do a proper test of the alternator current output. Generally-low current might be the brushes bad, while no current or a fixed low current could be regulator/diodes. Current meters go in series with the wire that bolts to the alternator. With headlights on high beam, and all electrical accessories working, and engine revved to perhaps 2500RPM, you should see a current of 30-40 amps - but it is hard to say, it depends on the condition of the battery (worse condition would mean higher amps going into it). The alternator can produce up to a maximum of 45A on the 999cc Uno, but you are unlikely to reach this with just headlights, wiper etc. on. This is why an auto electrician has a 'load tester' that will produce a more accurate result. Also, never disconnect the battery with the engine running - that will damage the alternator's regulator and probably the engine's electronic ignition as well. So - on the whole - I don't think it's worth bothering with this test, just check the voltage and go from there.

This must set a record for 'longest post' - but let us know how it goes and it will be worth it :)

-Alex
 
Last edited:
Alex - I appreciate the time you took over your last post! Have never bothered to learn about how it works but your explanation does make some sense to me (I have an electronic engineering degree).

Problem is now sorted. Fitted a new alternator at the weekend, was quite easy once the engine shield was off - those push studs with pop-out core are weird, never come across them before...anyway, everything now seems back to normal APART FROM an irritating squeaking noise when the car is moving.

Have I got the drivebelt tension wrong? I know you are not supposed to over-tighten it, I have tried to tighten it as much as possible but engine seems to idle unevenly (sometimes stalling). Now I've loosened it a bit and the idling is OK but the noise is still there.

Could it need replacing? I've had this problem for a while but the noise has always ceased once the engine warmed up. Now it is there all the time.

Or could it be the timing belt that needs tightening?
 
trublue,
Thanks for the compliments... funnily enough I have an electronics engineering degree as well. Doesn't make much difference to my daily life though :)

The engine running unevenly should really not be caused by excessive drivebelt tension... it sounds as though the alternator pulley could be out of alignment with the engine if the uneven running really is due to the belt being tight.

If you think the timing belt may be responsible for the noises, why not try removing the alternator drivebelt and see if the noises continue...

A friend's Uno made all manner of squeaking noises from the drivebelt... in the end I doused it with engine degreaser from a spraycan (with engine running) and hosed it off... seemed to reduce the noises so my suggestion is that maybe your pulleys are not clean enough.

Anyway, good to hear that you've got the Uno running reliably again... and if you haven't already done so, perhaps try a new drivebelt to stop the squeaking: not very expensive...

-Alex
 
Changed drivebelt. There is now less noise - the loud screeching has gone but there is still a squeaking which increases on acceleration.

Will try cleaning the pulleys next although I've got a feeling the problem might be with the cam belt assembly. I've heard of worn out tensioner bearings making similar noises. Worth trying to tighten the belt before thinking about replacing the bearing do you think? Trouble is it's hard to tell exactly where the noise is coming from as it can only be heard while the car is moving.

It's very irritating. Thought I'd got this sorted.
 
Cam or Drive

Hi there.
I’ve had LAN problems and that, so been offline for a bit. When back up and running (and after bleeding rear brakes) I find an in-depth explanation of my alternator – thanks Alex!!!. Glad you’re nearly there trublue.
My tensioner went after cam belt replaced (my first post). When I got car I did not know history, so I had it done. When I went back to collect it the guy in the garage told me I was the luckiest man alive, it had done about 70K in 10 years on original belt (a bit overdue). He then snapped it with minimal force.
[Alex glad to see your mate did not have to replace their cam belt + tensioner. Mine was relay bad after being disturbed, but I can’t say I saw the unit “collapsed” or checked it for dirt. That would have kind of invalidated garages guarantee, and the car was new to me.]
It’s hard to explain the sound difference as their both belt squeals that track engine pitch/speed. In my experience, the cam squeal only started at higher revs, the drive squeal at lower revs but stopped at higher revs.
According to the garage that did mine, if cam belt snaps on 999 not much damage is done (to engine), but you could get stranded / need recovery.
The garage’s first method of testing if cam or drive belt was revving the balls of it and listening. They barely believed me when I insisted it was not the drive belt, and it wouldn’t do it for them for a while. When it did it got much worse. When they realised my cam belt was playing up they let me drive home.
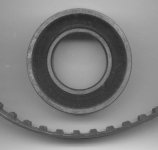
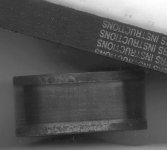
Next day I took it back, they investigated, and had to order a new tensioner. Till the new part was fitted they were not so keen on (refused) me driving with a naf tensioner, but they sorted it and I got the old parts (attached).
If either belt is really loose or dirty I guess they could squeal till they fall/snap off, are tightened, replaced or cleaned. Drive belt is worth replacing regardless. Get a new one before investigating the cam belt. I guess the car will be at least 10 years old. Has its cam belt ever been done? If not be thinking about it, as you can’t see belt’s internal condition.
Alex’s cam or drive test is much better “…try removing the alternator drive belt and see if the noises continue”. Just remove it from equation, then if its not cam belt you will most probably sort it with new drive belt, worse case is its both. If you’re not sure of cam belt history, even if its not noisy, its also worth doing coz they can just snap.
If you do remove the cam belt’s plastic cover, be careful of rusty bolts. Use new ones if you can, as I sheared one completely when refitting. Luckily that was least important one.

Louie Bee.
 

Attachments

  • Tensioner.JPG
    Tensioner.JPG
    25.1 KB · Views: 43
  • Tensioner2.JPG
    Tensioner2.JPG
    20 KB · Views: 31
You’d of thought I’d know better by now, but I think I spilt a bit brake fluid in alternator (rushing to top up when bleeder screw half cracked off), or got a piece of paper stuck in it (forgot to remove drip catching newspaper before starting engine). Now I have a faint electrical noise (like buck Rodger’s ship) while engine running.

Just after bleeding the (back) brakes, removing paper etc, I put some Injector cleaner in with a full tank of fuel (first time ever). Now I don’t know if the electrical noise is because of alternator contamination or the anti fuel evaporation unit operating at higher fuel level than I am used to, and/or a clean injector + fuel pump (normal sound). Perhaps a relay is faulty.

I think ill replace my drive belt, see if its alternator noise, if not see how it is with normal petrol later.

Ever since I replaced my first alternator (through spillage), the 3 since have all been noisy (on 3 cars) not belt noisy, but kind of like a timing chain rattle even with clutch in (excluding gear box), and no timing chain (on FIRE engine). The first one had don extremely low mileage, the others much higher. Alex, you couldn’t perhaps let give a few pointers on changing the alternator bearings?

Looks like get new bearing, remove alternator as above, remove its drive end bracket, shaft nut, spring washer, thrust ring and bearing, reassemble reverse order with new parts.

I can’t find any info on torque settings. Don’t know if I can get parts. The guys at FIAT (UK) sometimes pull funny faces when you try ordering UNO parts they don’t stock individually (Like distributor base plates). I would replace the parts and fix it then buy a second hand unknown, or a new one. The manuals advise to get a factory reconditioned one, but can I do a recon?

Its funny how this alternator has never quite been the same since I had the cam belt done.

Louie Bee.
 
Hi Louie,

Tried Alex's drivebelt/cam belt test. Alternator pulley squeaks very slightly when turned manually but I am 90% sure this is not the prob as when I removed the drivebelt the "small" squeaking noise was still there (with car moving).

So it has to be cam belt/bearing that is causing the "lesser" noise I think. Apart from the irritation factor, as you said, it's an idea to get it done anyway in case it snaps. Only had the car 6 months, it's a 93 L-plate and I've no idea when (if at all) it was last changed. May as well get a new tensioner as well while I'm at it. I notice you took yours to a garage, is it hard to do yourself?

Have to keep costs down bearing in mind the value of the car otherwise it just isn't worth keeping it. Seems pointless chucking money at it if it's going to end up in the scrapyard in 6 months time.

Not that you ever want to throw money away but you know what I mean ;)
 
Re: Cambelt squeaks

Well trublue,

I have a solution for that slight irritation (though it's probably going to throw some people up in arms!) - I had a squeaky cambelt on the Uno FIRE that I'm driving around - yes it really was the belt making a squeaky noise as it went around the pulleys.

I sprayed the cambelt vigorously with 'dashboard cleaner' (any Armorall-type product will do!) in an effort to make the surface of the 'rubber' a bit less dry. It worked perfectly, no more squeaking.

Now in theory you risk weakening the belt, etc. etc. but in practice I don't think you do. You're just replacing some of the lost oils that result from operating in a hot environment on slightly-rusted pulleys. And no, the belt does not really become softer because it's reinforced with cords.

The car I'm talking about is worth very little money (easy for me to say, it belongs to a friend ;) ) and anyway I have heard that if the belt snaps, it doesn't damage the engine. So... your call, but I've been driving around for a month now with a silent engine (apart from the tick-tocking noise quite common to the FIRE and caused by conrod little-end wear...)

By the way, if you feel like replacing the belt, GO FOR IT! It's an easy job (very, very easy I'd say compared with certain other cars, e.g. my Alfa took me a week) - the cover comes off with two obvious bolts plus one just above the pulley. There is excellent access and visibility and you don't need to take the crankshaft pulley off. Use the timing mark on the flywheel (through gearbox window) - set to left-most mark as you look across the top of the gearbox. The cam pulley needs to be set so that the fine notch in pulley lines up with wide notch in engine block just below cylinder head join (i.e. at 20 minutes to the hour, if you can visualise that). And that's it. How much money - surely only a tenner? ;)

Change the tensioner if you like, but otherwise just give it a spin and judge whether the bearing feels 'dry' - or smooth and 'greasy' in its rotation.

Cambelt tension set so that you can twist the longest run of the belt through 90 degrees fairly easily. I have found that, if uncertain, don't over-tighten. Again this will have people up in arms but I will point out that the engine 'grows' slightly as it expands. My Alfa's tensioner is set correctly and with cold engine, belt has almost 2cm up-and-down slack! That is an extreme case: most FIAT engines seem happy with belt able to be twisted easily through 90 degrees and maybe a little more. When set to tighter, there seem to be odd noises and it must shorten the life of the (small) tensioner.

I reckon one of the main reasons to own these cars is so that you can do jobs like this yourself. Apart from the money saving, there is the satisfaction of knowing what is done (or not done ;)) to your car.

-Alex
 
Last edited:
Oh dear

Disaster strikes! Trying to adjust the cam belt tension and while re-tightening the nut on the tensioner, the bolt it attaches to snapped in half! Don't know whether I was too heavy-handed or what

I think this is going to be the end of the line as it seems a new oil pump is going to be required to re-mount the tensioner. On balance, bearing in mind the age and value of the car I just don't think it's worth it.

Thanks for your help though guys!
 
Re: Oh dear

Arrgh!
That sounds ridiculous, there must be an engineering shop that can drill out and replace the bolt. Are you sure it goes into the oil pump?

Granted, it can be tricky trying to extract (with screw extractors) or drill out the bolt yourself.

But really, are you going to give up the battle for want of a horseshoe nail? Someone will get a bargain if you do...

Maybe just put it aside for a while. Someone will turn up who will be able to help.

-Alex
 
Back
Top