nice wellies")


That's James - wearing gumboots. I suppose you call those 'wellies'!
Typical - over two hours for me posting all those updates and the only thing that gets noticed is someone else's gumboots
-Alex
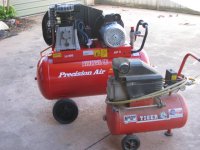
Keep it up!!! F R O $ T YThis monster compressor gets delivered tomorrow - they wouldn't let me put it in my car, on account of it being in pieces that weigh 76kg in total.
There's a Devilbiss GTI gravity-fed gun. That was $500 (£200) but just look at it. Candy-apple red, and incredibly smooth controls!
I'm sure you'll wish me luck with my new Devilbiss...
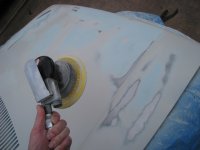
It's in a park near Johannesburg. I was a bit upset at the thought of taking it back to the shop - such an inconvenience - however this is New Zealand and at the National Agricultural Fieldays, I bumped into the guy that sold it to me! I asked him what to do (warranty etc.) He said take the regulator off, clean it out, and if there's still a problem, bring back just the regulator for a replacement Turned out that the top housing (under the red knob) had a burr on the plastic that wasn't sealing against a seal. I sanded it off, put it back together, and it's perfect Lots of filling and sanding of the bonnet - the air-powered D/A sander is MAGIC - just so much faster and seems to give a good even finish, like using a block. The filler I use is a special smooth type ("glazing putty", with blue hardener) and I think I've been using it too thinly, as I'm onto about the fourth application now for some of the dents! I've got some painting to do, bought some cheap synthetic filler primer and paint, beats the current metallic grey and black rattle can finish.
I'll be interested!You should start a new thread and show us your project
When you say 'synthetic', do you mean 'enamel' or 'acrylic lacquer'?
-Alex
 May normal Uno service resume
 Alex, I've also thanked each of your main posts in this thread as the amount of time and effort you've taken to write them deserves a thanks at the very least. I take my hat off to you :worship:
So these pictures are like the unveiling of a tomb!Cheers Chas! But I've always wondered about that 'Thanks' system - though I've seen 'Thanks' given for less, I don't think this thread has been helpful to anyone
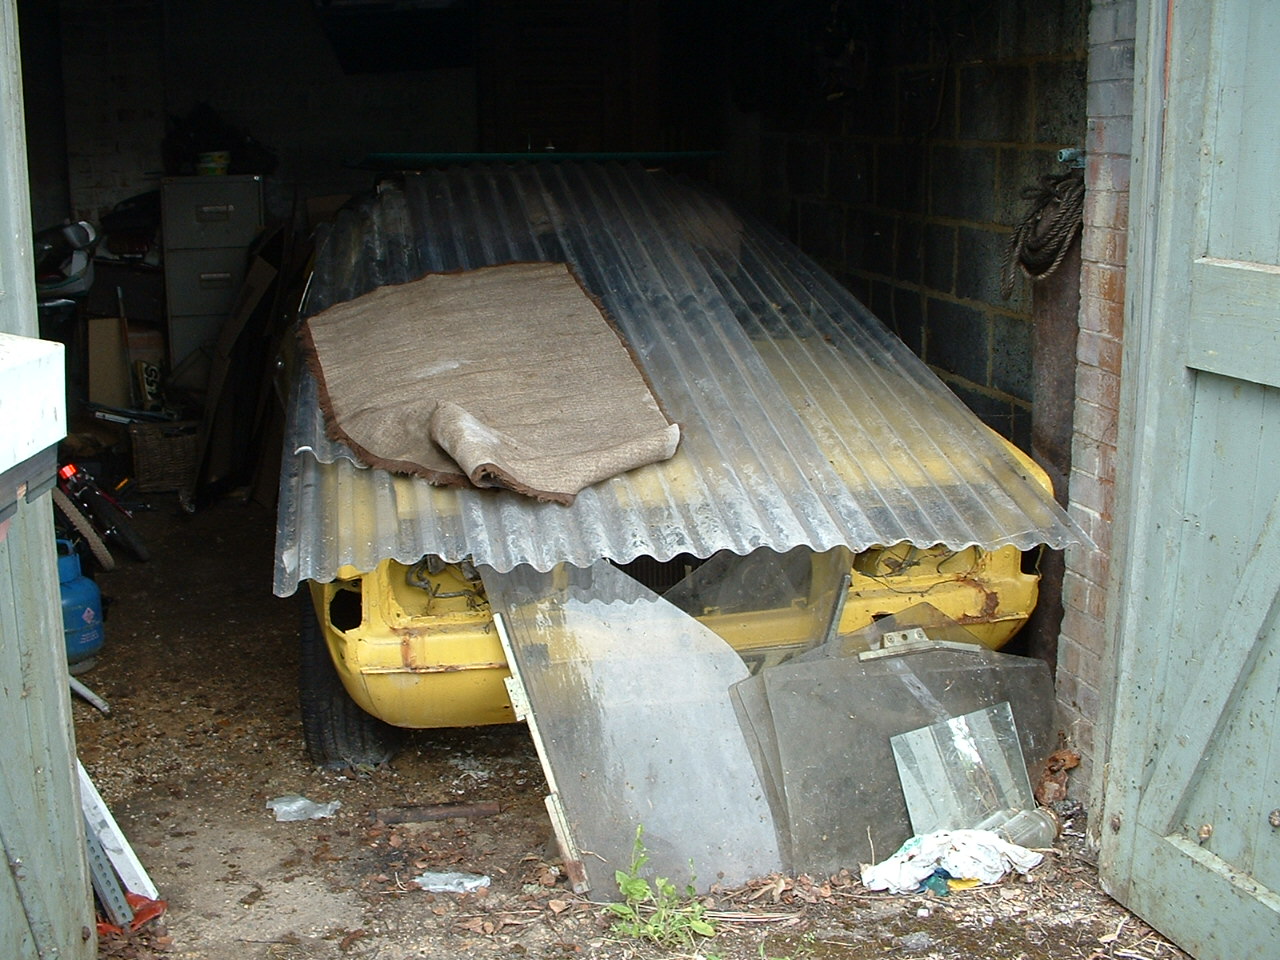
You have a MkII Cortina (or something)?!
The one with four headlights and a Coke-bottle shape down the sides.
Has that been in that shed out the back all this time while your driveway was crammed with FIATs? Unbelievable! I visited twice and you never showed me inside that shed
Nope, the car is stored in a council lock-up about 4 miles away. Bit of a pain as I have to drive to get to it and there's no power. But we have to make do and mend.I'm sure it won't take you long to rebuild the brakes,
but the prospect of body repairs - that is a bit more daunting, though what's on top looks good enough to cruise the streets already. But I spot a power-steering reservior there, and you mentioned it's an auto - start saving for the petrol to fill the tank
It deserves its own thread (as you said) and I can't wait to see what you do with it, you ageing rocker, you...!
-Alex
Anyway, enough about my car - what's the latest on the Uno? Got to get this thread back on track!
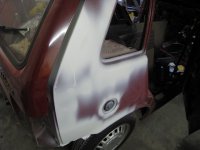
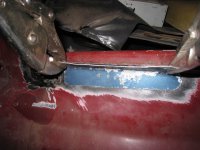
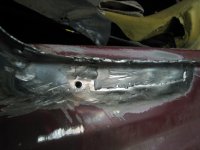
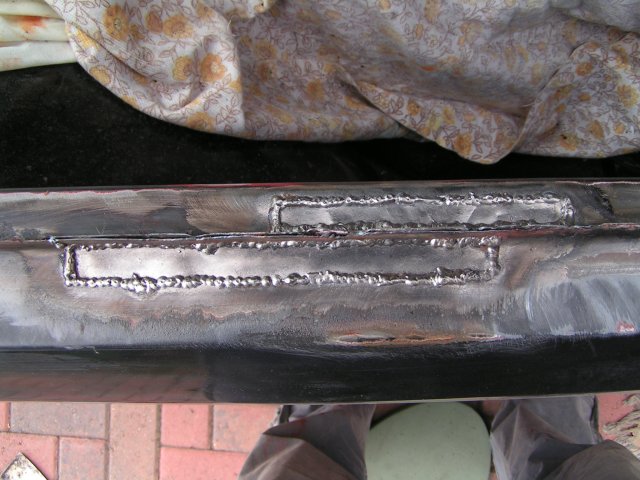 That piece in my picture is butt welded, just a thin skim of filler to try and hide. I always primer before applying filler like you. Not very good with filler, tend to loose patience trying to get it perfect.
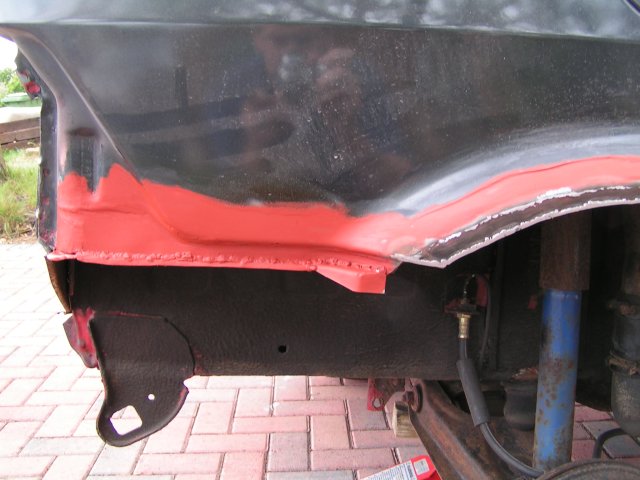 I find the moment I have to weld upwards (the top edge), that's when it goes wrong.
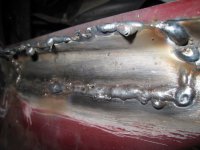
Hi thepottleflump,
That's very nice welding - and you're right, much neater than mine - however I think you have welded from above, under a side window, which is possibly easier than the rear tailgate lip
The gas mix I have is CO2/Argon/Oxygen, it seems odd to have oxygen in there! But it definitely works better than when there was no gas at all.
I shall try adjusting the wire feed more precisely next time - good idea.
-Alex