Lego 007.JPG

Tipo (Classic) New Tipo (old model!)

Introduction

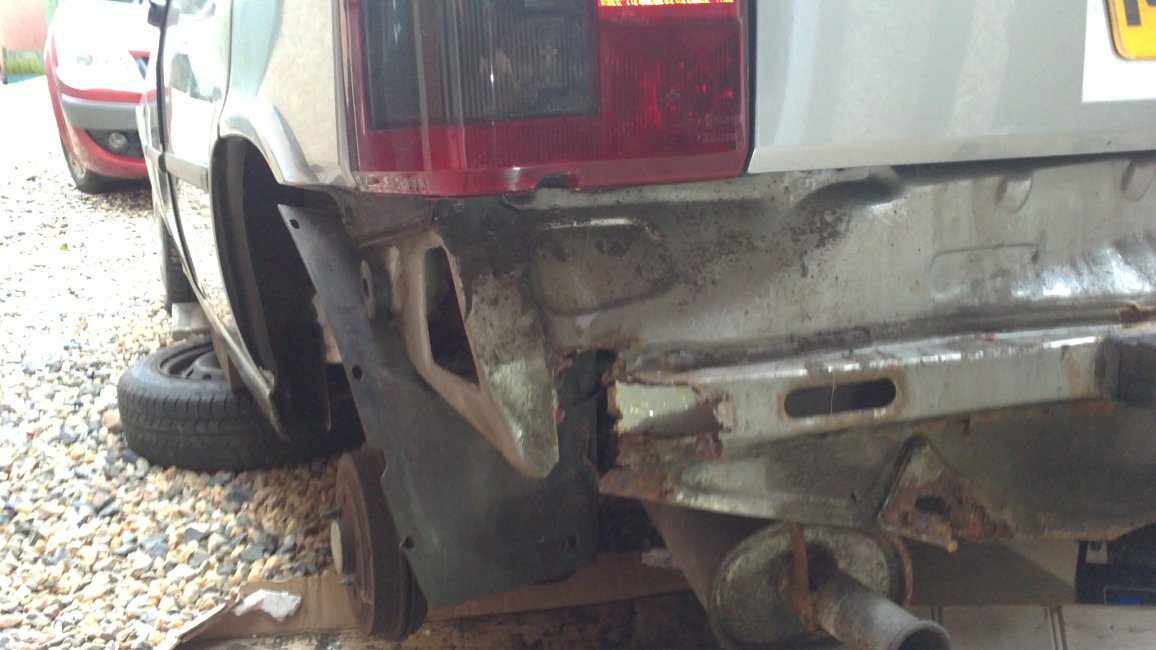
Following the demise of the red Tipo (see previous rust thread) I obtained a new one and this is work to date. This one had a fairly long MOT failure list including excessive corrosion on both front suspension mounts, 1 rear seat belt mounting point and an advisory on the other. However the 'Liberty' special edition with air-con in SX trim was tempting and the previous owner had fitted new springs and had some tidy welding done previously. So what needs doing...
Lego 007.JPG

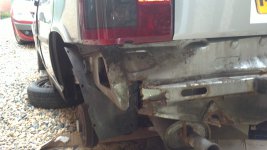
The rear valance is heading the same way as the red Tipo and cutting off and using the remade valance from the red one may be the way forward later on.
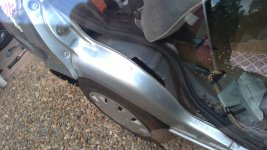
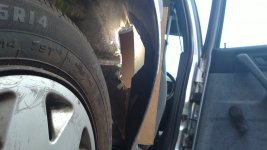
Lego 002.JPG

Lego 003.JPG

The inner arches are not too far gone but there was more rust at the top and the back to tackle later.
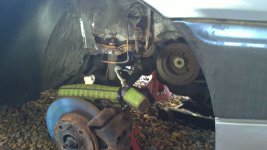
Lego 027.JPG

The holes behind the front struts will be the worst to fix, just above the sub-frame mounting bolts. Both my Mk11s suffer this.
Well done Jonti. You really triumphed over adversity with this. I'm jealous that you now have a fine Tipo back on the road. You deserve it. Where on earth did you come across a new cylinder head? I thought they would be rarer than hens teeth.
 
Well done Jonti. You really triumphed over adversity with this..

Cheers Stephen. It was bit of a hole tbh, but I thought best keep digging :(


I'm jealous that you now have a fine Tipo back on the road.

Unfortunately, the days of wind in our hair and cloudless skies (sunroof) didn't last long. I went down the garage to get a proper clip round the inner cv boot. Picking it up after hours, the clutch was almost on the floor. Unrelated, but why do such things happen... :rolleyes:
 
Last edited:
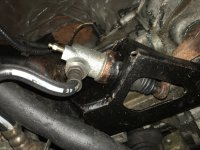
I'd been surprised the original slave cylinder was working and glad, because it looked jolly awkward compared to the TD (just 2 bolts). However, on getting back from the garage it had clearly sprung a leak.

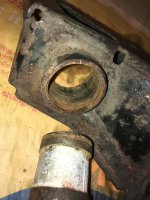
On this car the slave sits in a steel bracket sleeve. I assume the gearbox was designed for a cable and this was the easiest way to accommodate hydraulic.

So both were predictably rusted together SOLID. Smashing the slave with a hammer then cutting it down with a grinder didn't help. I came up with the idea of frying them for a while on the hob and this enabled the slave body to start to release, after further clouts with hammer and chisel.

CL1.jpg

Oh, and not to mention the most awkward and brutish circlip.

CL2.jpg

So here is the new one Dynaxed and copper-eased to excess. The little plastic protection was missing from this side when I got the car, they reduce wheel spray, garages tended to 'lose' them, and it contributes to problems like this.
 
Last edited:
I was still losing fluid and traced this back to the rear o/s bleed screw leaking under system pressure :eek: Thinking back this seemed a loose fit during the brake pipe replace. Replaced and re-bled all round and hopefully now, a leak free, air free system. :)
 
Last edited:
I'd been surprised the original slave cylinder was working and glad, because it looked jolly awkward compared to the TD (just 2 bolts). However, on getting back from the garage it had clearly sprung a leak.

On this car the slave sits in a steel bracket sleeve. I assume the gearbox was designed for a cable and this was the easiest way to accommodate hydraulic.

So both were predictably rusted together SOLID. Smashing the slave with a hammer then cutting it down with a grinder didn't help. I came up with the idea of frying them for a while on the hob and this enabled the slave body to start to release, after further clouts with hammer and chisel.

View attachment 215520

Oh, and not to mention the most awkward and brutish circlip.

View attachment 215521

So here is the new one Dynaxed and copper-eased to excess. The little plastic protection was missing from this side when I got the car, they reduce wheel spray, garages tended to 'lose' them, and it contributes to problems like this.

Any hints for getting that retaining circlip back on? I decided to change my cylinder as I had one in stock plus the old one looked like it was weeping fluid out under the boot. Unfortunately i need to change the hose as well but don't have one of those at the minute. You need about 3 hands to try and get the circlip back on!
 
Any hints for getting that retaining circlip back on? You need about 3 hands to try and get the circlip back on!

Yes. It's a problem. I had a cheap circlip tool (too small for this brute, but can fit in one hole in the circlip) then a screwdriver type thingy with a point (can't think what it's called :bang:) in the other hole and maybe pliers too to drag the other end round. I think I got enough circlip on the body to tap it on further with a hammer.

A needlessly difficult task. Pleased you are still making progress, post any updates when you get chance (y)
 
Last edited:
Any hints for getting that retaining circlip back on? You need about 3 hands to try and get the circlip back on!

Yes. It's a problem. I had a cheap circlip tool (too small for this brute, but can fit in the hole in the circlip, then a screwdriver type thingy with a point (can't think what it's called :bang:) edit: a braddle, in the other hole and maybe pliers too to drag the other end round. I think I got enough circlip on the body to tap it on further with a hammer.

A needlessly difficult task. Pleased you are still making progress (y)
 
I just realised you must have removed the bracket in its entirety with the cylinder still attached. I tried changing mine in situ (the old one came out easily in contrast to yours).
I will probably just take out the bracket, clean it up and fit the cylinder on the bench.
 
Only a few minor things holding me up with welding of the rear valance being the chief one. Unfortunately despite attempts I can't make a decent job of it so whenever covid restrictions are lifted i am hoping someone else can do this for me. Just needs a back box and some tyres after that. Sorry for the thread hijack!
 
Following the clutch hiccup the Tipo has put in strong performances on trips to the local shops AND back :) To add to the tedium of a Friday evening in lockdown I've listed the components fitted to the car since purchase to deliver almost full functionality:
New parts necessary:
Heater matrix
Coolant thermostat
Electric door mirrors
Front bumper
Registration plates
Gear linkage pivot
Clutch slave cylinder
Brake load valve
Brake pipes
Strut tops
Front suspension arms
Drop links
Engine mount & bolt o/s
Shims
Cylinder head
Pistons x 2
Piston rings
Crank bearings
Sparkplugs
Crankcase recirculation hose
Thermostatic air intake control hose
OEM gaskets
Battery
Lower protection front o/s
Front bumper support o/s
Inner timing belt cover (broke it)
Sheet steel

Used parts necessary:
Rear wing o/s
Sunroof motor - off TD
Heater control cables - TD
Heater resistor - TD
Heater fan - TD
Crankshaft

Other replacement parts fitted as a precaution etc:
Gearbox
Oil pump
Water pump
Coolant metal pipe
Tensioners
Timing belt
Wheel rims - Brava
Wheel trims - off TD
Pollen filter & casing
Rear arch liners

Without Ebay and European sellers it would have been tricky to obtain several necessary items.
 
Last edited:
I just pop back into the Forum once in a while as we now live overseas and the Doblo (around 12 years in our pocession) just keeps going.

Anyway, I've just read through your thread and am amazed at what you've achieved. I had a Tipo 23 years ago until my brother decided to take it from Leics to Plymouth with a blown head gasket and always felt they were a very underrated car. I also worked for a while in a Fiat dealer and the amount of people who bought the 6 month old ex rentals and then said they wouldn't go back to a Ford after was really surprising.

It's a good thing I'm not in the UK because I would probably make you an offer for it.
 
It's a good thing I'm not in the UK because I would probably make you an offer for it.

Great stories. It sounds like it could have been the end of that particular car? Maybe it was this car :)

It's going to need to work hard to repay the significant investment. :) Certainly independent rear suspension with no boot intrusion is a great combo I hadn't appreciated before.

Compared to the Fords it was something, before the Focus came along but that was later.
 
Someone attempted to clean the front seats and ruined the faux leather, I am wondering whether some light work with a razor will restore the sought after tortoiseshell look?

DSC_1004[1].JPG

DSC_1003[1].JPG

DSC_0996[1].JPG

I've got some Punto wheel trims I feel will work with the Tipo aesthetic whilst a little more contemporary and I need to work up the energy to fit them.
 
Adding to the list:

Forgot 3 tyres, replacing the piebald collection
Boot struts (just fitted, returned the 1st pair, only magneti ones have clips strong enough to stay in place under the giant weight :eek:

The air con system was next to do and deemed leak free. After a cacophony from the rusted compressor clutch, all seemed well and cold air filtered through the grills. Maybe it was the last century when this last worked. :eek:

DSC_1041[1].JPG

The gent said the kit had robust characteristics from the R12 aircon generation, phased out shortly before. He thought R134A kit later got lighter and possibly less robust.

I found a major leak to the back offside sill though;). I'd avoided putting cavity wax here before as I suspected this old repair. As thought the rust had been plated over making the situation worse, also the area is partly hidden by the plastic aero shroud.

DSC_1044[1].JPG

DSC_1045[1].JPG

I'll further prep and butt weld, although it will be difficult as the outer sills are pressed wafer thin, then wax to billio.
 
Last edited:
a great Fiat car !

It's running well but the fault light has returned (not visible on the dash until it lights up, an injector symbol). If you switch the engine off and on, it goes off. The idle wanders slightly, you mentioned cleaning a valve behind the throttle body, but on mine I can only see electrical connectors and a stepper motor? Is yours still active with the rare safety-pack?
 
Hopefully the last of the plated-over repairs dealt with. It was already rusting out in post 23 ! I have 0.8 wire in the MIG now not 0.6 and it's a revelation, much easier to work with, wish I'd used it from the start. Glad I didn't cavity-wax this end of the sill as it always looked doubtful. I worked rust convertor into the new inner weld and sprayed the lot with cold galvanising spray. Epoxy mastic for the outside and finally I will spray noxudol inside the sill.

DSC_1055[1].JPG

DSC_1059[1].JPG

Took the aftermarket rear liner off and it seems to be doing a good job keeping the inner arch clean. The epoxy seems to slow any returning rust.

DSC_1061[1].JPG

DSC_1037[1].JPG

DSC_1036[1].JPG
 
Last edited:
Glad you’re happy with the last (?) of your rust repairs, I had to have a lot of holes fixed in mine to get another year’s MOT. She might just get one more but that’s probably too much to reasonably expect.

I tried to refresh her with all my stored spare interior bits but only got halfway, still using and abusing her. We went to Bristol and back from Chester last month to pick up my motorbike with a trailer. Unfortunately the incorrect cam cover gasket I fitted the day before leaked a lot of my oil away by the time I got to Strensham services on the M5, I had to bodge a seal and spend £50 on 4l of overpriced incorrect Castrol Magnates 5W/40 fully synthetic from the BP garage, but she seems to have survived.
 
I had to bodge a seal and spend £50 on 4l of overpriced incorrect Castrol Magnates 5W/40 fully synthetic from the BP garage, but she seems to have survived.

I thought you figured out the necessary gasket / modification due to the late-model housing change? It's a good thing you became aware of the situation when you did, did the oil light show? And that sounds like the most annoying distress purchase :(

I guess you pass Chester services on the M50, not far from here, that's two Tipos past there in a month, tell me next time and I'll get there for the flypast :p
 
Back
Top