

Introduction
Where do I start...
I've always thought there little things were cute, until I drove gadge 's 126 at Mitcar 2014 and LOVED IT! From that moment I knew it wouldn't be long until I had one myself!

^^ Me in Gadge's 126.
So after scouring eBay for one to call my own, I found one, only thing was, I had to fetch it from Essex!!
So, Tuesday morning saw me up bright and early, borrowing mum's car, and a friend's trailer (huge thanks to Barbara!!!!), to make the mammoth 360 mile round trip:

Few Pics loaded up and ready to set off home:


Pic at South Mimms services, after realising the tail light fuse had blew on the car, and the trailer! we turned on the 126 lights and prayed the battery would light our rear as we took the 3 hour journey home! (It did. )
)

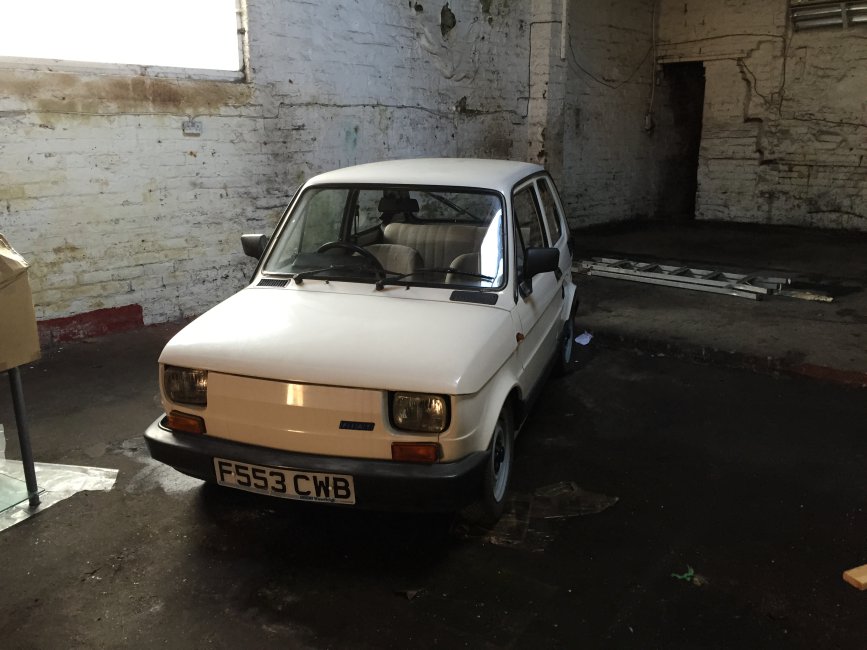
Few pics as it sits in the garage waiting for me to check it over to drive soon (fingers crossed!)


The Car's History
WOW! In a word.
The car was registered in 1988 at Woodleigh dealers in Chesterfield (Thankyou to the random 126 lover I met at South Mimms services for pointing that out!) and sold to a lady who kept the car until 2007, and wrote every penny she spent on the car in the service book, right down to "tail light bulb £0.45".
2007 her neighbor bought the car knowing how much the lady had cherished and cared for it, didn't use it much until:
July 2014 the car was bought by the person I bought the car from yesterday, who hadn't passed his test yet.
18/11/14 - I bought it.
Dom
I've always thought there little things were cute, until I drove gadge 's 126 at Mitcar 2014 and LOVED IT! From that moment I knew it wouldn't be long until I had one myself!
^^ Me in Gadge's 126.
So after scouring eBay for one to call my own, I found one, only thing was, I had to fetch it from Essex!!
So, Tuesday morning saw me up bright and early, borrowing mum's car, and a friend's trailer (huge thanks to Barbara!!!!), to make the mammoth 360 mile round trip:
Few Pics loaded up and ready to set off home:
Pic at South Mimms services, after realising the tail light fuse had blew on the car, and the trailer! we turned on the 126 lights and prayed the battery would light our rear as we took the 3 hour journey home! (It did.
)Few pics as it sits in the garage waiting for me to check it over to drive soon (fingers crossed!)
The Car's History
WOW! In a word.
The car was registered in 1988 at Woodleigh dealers in Chesterfield (Thankyou to the random 126 lover I met at South Mimms services for pointing that out!) and sold to a lady who kept the car until 2007, and wrote every penny she spent on the car in the service book, right down to "tail light bulb £0.45".
2007 her neighbor bought the car knowing how much the lady had cherished and cared for it, didn't use it much until:
July 2014 the car was bought by the person I bought the car from yesterday, who hadn't passed his test yet.
18/11/14 - I bought it.
Dom


