General Planning a rebuilt 650 engine and gearbox swap

Currently reading:
General Planning a rebuilt 650 engine and gearbox swap

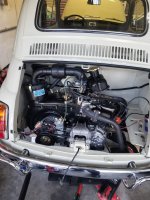
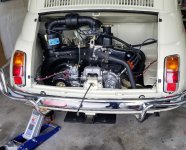
I realise that New York is not a 'hot' state (except occasionally), but I would still recommend the fitment of the 3.5 litre sump---they definately help keep the engine stay cooler.
When you change the rear suspension arm bushes, make a careful note as too where the washers go either side of the bushes--THIS IS IMPORTANT. The washer/shims adjust and control the rear suspension angles. It can be a real pain-in-the-bum trying to set it up if you get the shimming wrong, (0.5 deg of TOE-IN total), and it must be the same (i.e. identical) each side.

Got it. I figured I’d reuse whatever shims or washers are already there. And replace exactly as I found them. Do you know if the bushes need to be tightened under load (or load simulated by jacking up the wheel hubs)? I’ll look into the sump.
 
Xmas arrived early ?. Decided to strip the bay and repaint, so will be a while before I get to installation (I’m a weekend warrior). Also will upgrade to the 3.5 liter sump.
 

Attachments

  • E5F26775-AF32-4219-A244-DFE6C067B014.jpeg
    E5F26775-AF32-4219-A244-DFE6C067B014.jpeg
    2.8 MB · Views: 31
Some progress. Stripped the engine bay partially. Removing all the original undercoating proved too difficult. Also was starting to get into some original seam sealer that I didn’t want to disturb, overall happy with the results.
 

Attachments

  • 06A779CA-A908-492F-8B2C-1CAFF0455BF9.jpeg
    06A779CA-A908-492F-8B2C-1CAFF0455BF9.jpeg
    5 MB · Views: 26
  • 2D6751C2-C240-4A1B-A1FC-1493DA644779.jpeg
    2D6751C2-C240-4A1B-A1FC-1493DA644779.jpeg
    3.6 MB · Views: 20
  • 4D52615E-1234-44ED-A94D-F39A326F8C31.jpeg
    4D52615E-1234-44ED-A94D-F39A326F8C31.jpeg
    3.5 MB · Views: 20
  • 3F093E4C-4DD5-4AB0-8090-F88177A1EDE7.jpeg
    3F093E4C-4DD5-4AB0-8090-F88177A1EDE7.jpeg
    2.7 MB · Views: 27
Quick question on wiring the new coil. I lost track of my wires. Green wire from ignition goes to the “15” or positive side of the coil. The other side “1” is negative I think, and that goes to the new distributor with its own short lead. But see the black wire in the photo below with the round terminal? Where does that go? I think it’s a ground (earth) I disconnected but can’t recall where. There is one ground that I know goes to the rear bumper panel bolt. Does anyone know where this second thin black wire goes?
 

Attachments

  • 8AC63FFD-30CA-47EB-84BA-7921FE1B6DD3.jpeg
    8AC63FFD-30CA-47EB-84BA-7921FE1B6DD3.jpeg
    2.4 MB · Views: 24
Pretty sure that black wire is an earth (ground) to the car body. All the black wires on this car seem to be earths. I connected it to the negative side of the coil, and there will be a second wire coming off the negative side of the coil that should ground the 123 Electronic Ignition.
 

Attachments

  • 23DD2332-E31A-4DB1-8575-49BBB37E764A.jpeg
    23DD2332-E31A-4DB1-8575-49BBB37E764A.jpeg
    1.9 MB · Views: 17
Don’t ground the coil. I learned that the old coil ground becomes redundant so I just grounded it to the body.
 
Status
 

Attachments

  • AA684C79-D65F-4E9A-A3A4-F8DC991D76E7.jpeg
    AA684C79-D65F-4E9A-A3A4-F8DC991D76E7.jpeg
    2.9 MB · Views: 29
  • 97B65980-BFBF-4A6B-B854-0F3CFE4387E4.jpeg
    97B65980-BFBF-4A6B-B854-0F3CFE4387E4.jpeg
    236.9 KB · Views: 25
  • 3D7ABA9F-C04C-41EE-843B-6D2C8877FEF2.jpeg
    3D7ABA9F-C04C-41EE-843B-6D2C8877FEF2.jpeg
    949.3 KB · Views: 26
Got it in but not starting. Puttering and sputtering thru the carb. I think it’s a weak battery and 123 Ignition timing is off. Will try more tomorrow.
 
Also have to get bolts for new oil pan, so have the 2.5 liter steel pan in for now. Existing bolts are too short for the new aluminum 3.5 liter pan. And one was retapped and is larger than all the others. (Ah the benefits of a rebuilt engine)
 
I have used 25mm (1 inch) x 6mm stainless-steel cap-head (allen-key) bolts for holding my 3.5 litre sump in place. With the engine in-situ, it is much easier to use the cap-head bolts, especially for the bolts behind the flywheel, where you are a bit short of space. If you decide to fit a sump gasket, use the ruberoid gasket---definately NOT the cork variety.
 
I have used 25mm (1 inch) x 6mm stainless-steel cap-head (allen-key) bolts for holding my 3.5 litre sump in place. With the engine in-situ, it is much easier to use the cap-head bolts, especially for the bolts behind the flywheel, where you are a bit short of space. If you decide to fit a sump gasket, use the ruberoid gasket---definately NOT the cork variety.

Thanks! Gonna use Permatex ultra grey RTV gasket maker.

Also, new engine purring like a kitten ?. I was off on my initial (static) timing. Also, tired battery. All up and running now. Just need to figure out how to hold the starter cable on the heater tube. The plastic cable holder broke immediately and I’m sure a replacement will too. Need to rig up a metal eyelet or something.
 
Back
Top