2023-10-29 01 Classic car meeting, Blackbushe Airport (Large).JPG

500 (Classic) Noah's "Ark"ive

LHD 1971 Fiat 500L

Introduction

My 500 arrived with me at the end of August. Summary:

  • LHD 1971 500L in blu scuro with bordeaux upholstery
  • Originally registered in Viterbo, then from 1975 in Rome.
  • Imported to the UK in June 2021
  • Registered by DVLA in the UK as a 1975 on a P plate
The Italian reg document had a date in 1975 based on the Rome reg. Date. VIN, features (e.g. type of badging, instrument cluster) point to a 1971 car. I also have a copy of an ACI inspection giving 01.01.1971 as date of "immatricolazione" and 20.10.1971 as date of first registration.

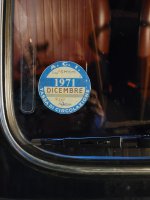
Based on this info and a letter from the Fiat 500 Enthusiasts Club and details of a list of VIN ranges and manufacture dates, DVLA updated the V5C and issued a 1971 reg :)

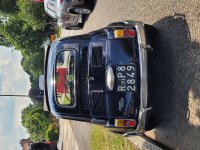
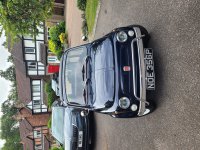
Here's how it looked with the Rome plates, and then with the first UK ones.

Named Noah since Noè is Italian for Noah (original UK reg was NOE)

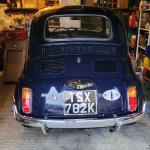
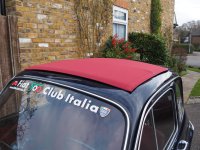
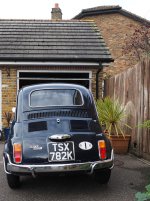
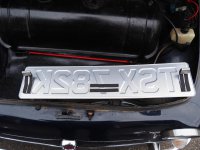
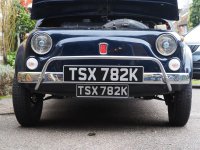
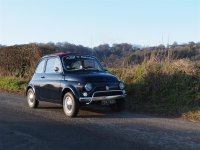
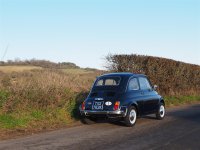
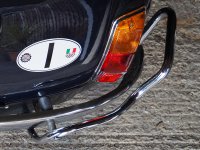
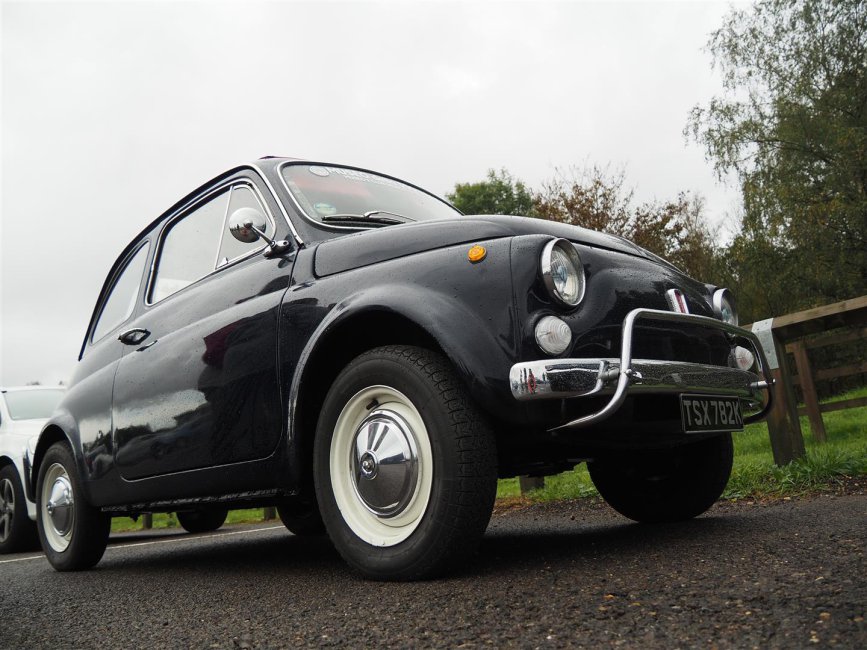
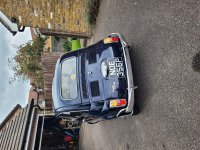
And with current (1971) plates ;)
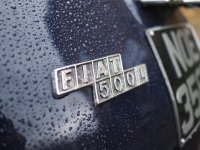
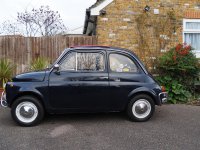
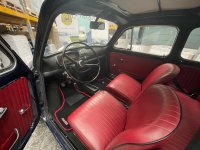
  • Like
Reactions: porta and ben
The other day I fitted new front indicator lamp holders (actually for dual filament bulbs) because the old ones were perished and the lens screws didn't stay put properly. While I was at it I decided to go back to the original Italian-spec clear lenses (2x lens+holder units for £16 from fiat500spareparts on ebay) and managed to track down amber dual filament lenses for a reasonable price from Holden Vintage & Classic here. P&P is a bit steep if you just buy 2 but not too bad if you get a few spares.

I went to the classic car meeting at the Black Swan, Ockham this morning. Loads of interesting vehicles... see here if you like.

The car was out this afternoon in the rain for a while so I took some raindrop shots :)
 

Attachments

  • 2021-11-14 02 Black Swan, Ockham (Large).JPG
    2021-11-14 02 Black Swan, Ockham (Large).JPG
    278.2 KB · Views: 58
  • 2021-11-14 42 Fiat 500L (Large).JPG
    2021-11-14 42 Fiat 500L (Large).JPG
    209.6 KB · Views: 54
  • 2021-11-14 43 Fiat 500L (Large).JPG
    2021-11-14 43 Fiat 500L (Large).JPG
    177 KB · Views: 53
  • 2021-11-14 44 Fiat 500L (Large).JPG
    2021-11-14 44 Fiat 500L (Large).JPG
    188.7 KB · Views: 46
  • 2021-11-14 45 Fiat 500L (Large).JPG
    2021-11-14 45 Fiat 500L (Large).JPG
    188.7 KB · Views: 51
I decided that a fire extinguisher might be a good insurance policy. After reviewing various threads on the forum, I ended up with an 800g powder extinguisher. To avoid having to drill holes for the bracket I stuck a strip of velcro onto the extinguisher, covered the edge of the crossbar thingy under the passenger seat with a piece of spare U trim, velcro'd the extinguisher onto the carpet and held it in place with a plastic/webbing strap with a fairly quick release
 

Attachments

  • 20211121_125723.jpg
    20211121_125723.jpg
    4.6 MB · Views: 53
  • 20211121_125859.jpg
    20211121_125859.jpg
    4.5 MB · Views: 50
Oh bum! My door mirrors (probably aftermarket, screwed onto the door skins) look nice but are extremely annoying in that the slightest touch knocks them out of alignment. This happens particularly in the garage but they also seem to adjust themselves a bit after a run out, maybe due to vibration. I took one off, which exposes the first part that can be tightened up, i.e. the arm. No problem. However, the head also swivels and to expose the adjustment screw means removing the glass. On the first mirror it worked fine - just eased the glass up in its silicone seal using a small screwdriver and it popped out. Screw tightened, glass and seal eased back in and Bob's your uncle. On the second mirror, the glass seemed a bit tighter and, sure enough, when I was trying to get it out it cracked :(

Anyway I found a supplier of mirror glass on ebay so I've order a replacement to go on passenger side - actually a convex one to give a better view when driving my LHD car on the left hand side of the road.
 

Attachments

  • 2021-11-27 01 Fiat 500 mirror.jpg
    2021-11-27 01 Fiat 500 mirror.jpg
    1.4 MB · Views: 46
Just added a bit of Italian retro to my windscreen. I found examples of original Italian tax discs here so I downloaded one for the year of my car, printed it off, put the Italian reg no. on and stuck it to the inside of the screen. I'll see how it looks in daylight but for now it seems OK.
 

Attachments

  • 20211205_142842.jpg
    20211205_142842.jpg
    1.2 MB · Views: 48
I've just taken Noah in for a brake transplant based on the front disc brake kit from fiat500spareparts (Ricambi Fiat 500 Spare Parts) on ebay. It looks good quality, with minimal spacing out of the road wheel (because of the need for an adapter from 500 PCD to 126 PCD). Clearances between the edge of the caliper and the wheel rim, and from the back of the disc to the caliper, are tight but should be OK. Once he's back I'll report back and post up some pictures
 
My 500 arrived with me at the end of August. Summary:

  • LHD 1971 500L in blu scuro with burgundy upholstery
  • Originally registered in Rome, allegedly owned by one man until bought by the UK importer's business partner
  • Imported to the UK in June 2021
  • Registered by DVLA in the UK as a 1975 on a P plate
The Italian reg document had a date in 1975 but, according to the importer it had been re-registered in 1975 "because the owner had lost the original documentation"... Whatever the case, the VIN, features (e.g. type of badging, instrument cluster) point to a 1971 car. I also have a copy of an ACI inspection giving 01.01.1971 as date of "immatricolazione" and 20.10.1971 as date of first registration. I've sent those off, together with a letter from the Fiat 500 Enthusiasts Club and details of a list of VIN ranges and manufacture dates to DVLA to request that they fix the date and issue a 1971 reg... we'll see what happens, though I'm not holding my breath.

Here's how it looked with the Rome plates, and then with the UK ones.
Named Noah since Noè is Italian for Noah ;)
Hey, I got a result from DVLA! After sending off my letter and docs (see above), 8 weeks later I got a new V5C registration document... still with Date of First Registration in 1975 (per the Italian docs) but with an official Special Note that it was declared manufactured in 1971 and a replacement registration number appropriate for the real first Italian registration date in October 1971 :D

Just ordered some plates...
 
Last edited:
Just before Christmas I had my front brake disc kit installed. It was £420 from fiat500spares on eBay (since gone up to £440). Described as 'Classic Fiat 500 126 Front Disc Brake Conversion Top Abarth Kit', it includes uprights, kingpins installed and greased, calliper mounts and callipers, discs, adapters from 126 to 500 PCD and new flexi hoses. Quality looks good though clearance is very tight - test fitting to my spare wheel, I had to file off some weld blobs from the wheel to clear the callipers. Also had to cut down the wheel bolts so for extra insurance I renewed the split washers and added a dab of medium strength thread lock when they were put back. I got my local mechanic to fit them... after about a week there is quite a bit of brake fluid on the garage floor so I need to get the pipework tightened up. Since I’ve only driven it back c. ¼ mile I can’t comment on effectiveness yet, though he also replaced the outer track rod ends and adjusted the handbrake so it doesn’t need to be pulled up to the last click, so fingers crossed ;)
 

Attachments

  • 2021-12-27 02 Fiat 500 (Large).jpg
    2021-12-27 02 Fiat 500 (Large).jpg
    281.8 KB · Views: 52
  • 2021-12-27 01 Fiat 500 (Large).jpg
    2021-12-27 01 Fiat 500 (Large).jpg
    267.7 KB · Views: 53
  • 2021-12-08 03 Disc brake kit (Large).JPG
    2021-12-08 03 Disc brake kit (Large).JPG
    285.4 KB · Views: 60
  • 2021-12-08 02 Disc brake kit (Large).JPG
    2021-12-08 02 Disc brake kit (Large).JPG
    160 KB · Views: 51
  • 2021-12-08 01 Disc brake kit (Large).JPG
    2021-12-08 01 Disc brake kit (Large).JPG
    242.4 KB · Views: 47
  • 2021-12-08 05 Disc brake kit (Large).JPG
    2021-12-08 05 Disc brake kit (Large).JPG
    237.5 KB · Views: 49
  • 2021-12-08 04 Disc brake kit (Large).JPG
    2021-12-08 04 Disc brake kit (Large).JPG
    206.6 KB · Views: 53
New year, new clothes.

OK, the roof was actually fitted just before New Year. The roof itself was from fiat500spares on eBay for £35 and is described as 'CLASSIC FIAT 500 F L R BORDEAUX SOFT TOP SUN ROOF CANVAS BRAND NEW'. I got just the cloth part as the metal fixings on the existing roof were fine. As a reminder, I changed the roof because the old black one, although watertight, had what looked like white paint overspray on it. I got new rivets for the centre bar from Ricambio.

Removal of the old roof was straightforward and fitting the new one reasonably OK - I watched the Axel Gerstl video for inspiration. To fit the rivets on the centre bar put some insulating tape on the outside half of the rivet, placed that end down on the top of a vice and banged the other end on with a hammer. Then I had a hell of a job stretching the hood enough so the hole lined up with the other end, but got there eventually. Probably good that it had to stretch so it is nice and tight. The roof fits as tight as a drum, to the extent that I had to hang a bucket containing 4 2litre bottles of lemonade, a club hammer, a claw hammer, a cold chisel and a brick bolster on the bow, then left it without the catch done up to ease it down. Now, 4 days later, it closes reasonably easily, though if you move the inside centre catch just a little it pops the roof open, which could be a bit of an issue if it happens spontaneously when driving... To try to get round that issue I've progressively cut off about 5mm of the rubber bumpstop where the sunroof catch goes, so now it closes even more over-centre. Hopefully that will do the trick.
 

Attachments

  • 2021-12-28 01 Fiat 500 (Large).jpg
    2021-12-28 01 Fiat 500 (Large).jpg
    121.5 KB · Views: 45
  • 2022-01-01 03 Fiat 500 (Large).JPG
    2022-01-01 03 Fiat 500 (Large).JPG
    260.4 KB · Views: 48
  • 2022-01-01 04 Fiat 500 (Large).JPG
    2022-01-01 04 Fiat 500 (Large).JPG
    244.9 KB · Views: 48
  • 2022-01-01 01 Fiat 500 (Large).JPG
    2022-01-01 01 Fiat 500 (Large).JPG
    383.1 KB · Views: 53
I also got some pressed aluminium black/silver number plates (UK historic style) with the new registration number. Since Tippers were closed for Christmas/New Year I looked elsewhere and found Chase Lane Plates (chaselaneplates) on eBay. I got a 11”/8” rear plate (Italian size) plus a full-size legal UK oblong front plate in case of need. They had an offer on at £19.99 the pair, which was very reasonable and the quality looks good. The rear plate is fitted with the original Italian chrome number plate surround which is in keeping.

For the front I ideally wanted an Italian tiny size (“11”x3”) plate so I could use the Italian chrome plate surround which came with my car but I couldn’t find any available/at a reasonable price so what I ended up with was a ‘1x Small Black and Silver 340x90mm Novelty Metal Pressed Plate Any Name Number’ which is effectively a small pressed aluminium number plate which does the trick. It is c. 13”x3.5” and has a pressed-in silver border which gives the impression of the Italian surround. Even though it is a bit bigger than the original, I actually think it looks slightly better as it is not ridiculously small…

On the back of the legal UK size front plate I fitted some clips made from 2mm aluminium strip, fixed with double side foam tape to the plate and with foam tape on the parts that touch the bumper. If I ever need to show it, it can be hung onto the front bumper fairy securely for a short time at least.
 

Attachments

  • 2022-01-01 02 Fiat 500 (Large).JPG
    2022-01-01 02 Fiat 500 (Large).JPG
    206.4 KB · Views: 58
  • 2022-01-01 06 Fiat 500 (Large).JPG
    2022-01-01 06 Fiat 500 (Large).JPG
    363.3 KB · Views: 51
  • 2022-01-01 07 Fiat 500 (Large).JPG
    2022-01-01 07 Fiat 500 (Large).JPG
    171.1 KB · Views: 50
  • 2022-01-01 08 Fiat 500 (Large).JPG
    2022-01-01 08 Fiat 500 (Large).JPG
    288.6 KB · Views: 68
Update on the brake fluid leak - my mechanic kindly came round to check it out. The disc installation seems to be OK, but the leak is at the back of the master cylinder where the rod from the pedal goes in. His theory is an old/perished/damaged seal, maybe exacerbated by bleeding the system. Anyway, the unit itself looks all rusty so may even be the original; new one on order!
 
Last edited:
Split door pocket replaced with new one ('textured' style from Ricambio). btw, not sure if other people have had the same problem but, having read other guides on removing the window handle, it was not simply a matter of 'push in the bezel and remove the spring clip'. For me, I had to force in a large screwdriver between the handle and the bezel then get a pair of fine-nose pliers in the tiny gap to grab one leg of the spring, all the while trying to keep the gap open with the screwdriver. I eventually managed but it took 15-20 minutes and even then the bezel ended up quite scratched :(. I decided to take the handle off the other door as well so I could align them, and that one was as per the guides i.e. a fairly easy push to make the gap between the bezel and the handle.

Anyway, door pocket is all renewed now, and the window handles point +/- towards the corners of the door cards when the windows are up, rather than drooping back towards the lower seatbelt mounts :)
 
Just before Christmas I had my front brake disc kit installed. It was £420 from fiat500spares on eBay (since gone up to £440). Described as 'Classic Fiat 500 126 Front Disc Brake Conversion Top Abarth Kit', it includes uprights, kingpins installed and greased, calliper mounts and callipers, discs, adapters from 126 to 500 PCD and new flexi hoses. Quality looks good though clearance is very tight - test fitting to my spare wheel, I had to file off some weld blobs from the wheel to clear the callipers. Also had to cut down the wheel bolts so for extra insurance I renewed the split washers and added a dab of medium strength thread lock when they were put back. I got my local mechanic to fit them... after about a week there is quite a bit of brake fluid on the garage floor so I need to get the pipework tightened up. Since I’ve only driven it back c. ¼ mile I can’t comment on effectiveness yet, though he also replaced the outer track rod ends and adjusted the handbrake so it doesn’t need to be pulled up to the last click, so fingers crossed ;)

Update on the brake fluid leak - my mechanic kindly came round to check it out. The disc installation seems to be OK, but the leak is at the back of the master cylinder where the rod from the pedal goes in. His theory is an old/perished/damaged seal, maybe exacerbated by bleeding the system. Anyway, the unit itself looks all rusty so may even be the original; new one on order!

New standard-style master cylinder now fitted, new fluid and system re-bled. I went for about a 5km diver and I can confirm that the pedal is now much firmer than before and braking effectiveness is much improved with the front disc setup. Not that I'm planning any emergency stops but I'll feel a lot more confident about stopping in a reasonable distance now :)
 
Nice run out this afternoon in the winter sunshine (25km or so). Good to confirm that

a) the disc brakes make a lot of difference (in a good way!)

and b) that the new hood, taut though it is, stayed put. I think trimming some height off the rubber hood catch bump stop helped a lot here.
 

Attachments

  • 2022-01-16 02 Fiat 500, Kent (Large).JPG
    2022-01-16 02 Fiat 500, Kent (Large).JPG
    294.1 KB · Views: 48
  • 2022-01-16 01 Fiat 500, Kent (Large).JPG
    2022-01-16 01 Fiat 500, Kent (Large).JPG
    286.4 KB · Views: 52
  • 2022-01-16 04 Fiat 500, Kent (Large).JPG
    2022-01-16 04 Fiat 500, Kent (Large).JPG
    353.2 KB · Views: 34
  • 2022-01-16 06 Fiat 500, Kent (Large).JPG
    2022-01-16 06 Fiat 500, Kent (Large).JPG
    466.1 KB · Views: 45
Looks like a beautiful day for a drive there! Winter sun like that can be so pleasing to the eye.

Glad to hear the hard work is paying off and that the car is starting to work how you’d like it to!

The pressed metal plates look good, my car came with a new set of black and silver plates but in modern printed plastic style, and it’s just all wrong!
 
A little addition to my dash today. I found it a bit annoying that the toggle switches have no labels or symbols on. I found these switch tags from a company called Emberton Imperial. They are intended for things like old Land Rovers or Minis but they fit a treat on the Fiat 500 dash switches and are suitably retro, I think (though not in Italian!). Reasonable value and good quality (made of brass). I gave the tabs with the text on a very slight bend to fit better on the curved dash but I'm pleased with the result.

btw the link above is for label starting I-R - there are separate pages for labels starting A-E, F-H and S-W
 

Attachments

  • 2022-01-21 12 Fiat 500 (Large).JPG
    2022-01-21 12 Fiat 500 (Large).JPG
    317.9 KB · Views: 62
  • 2022-01-21 13 Fiat 500 (Large).JPG
    2022-01-21 13 Fiat 500 (Large).JPG
    203.9 KB · Views: 64
Last edited:
A top-up with petrol and then a little outing to see a local namesake...
 

Attachments

  • 2022-01-29 01 Fiat 500 (Large).jpg
    2022-01-29 01 Fiat 500 (Large).jpg
    282.5 KB · Views: 48
  • 2022-01-29 02 Noah's Ark, Kemsing (Large).JPG
    2022-01-29 02 Noah's Ark, Kemsing (Large).JPG
    409.4 KB · Views: 50
  • 2022-01-29 05 Noah's Ark, Kemsing (Large).JPG
    2022-01-29 05 Noah's Ark, Kemsing (Large).JPG
    254.5 KB · Views: 48
Per my question in this thread it turns out that my car is missing the thermostat and associated flap linkage inside the thermostat housing (though the flap was still there, so a previous owner probably removed a non-functioning thermostat and didn't replace it...). I've now got a thermostat (fiat500spares on ebay) and a flap repair kit (Auto-Bella, also on ebay), which includes a new flap, spindle rod and all the connections needed to link up to the thermostat. Annoyingly, though, neither of them includes the top nut to fix the thermostat onto the housing. The Auto-Bella description says it does include one, so now I'm just waiting for them to send one on to me.

This morning I managed to remove the thermostat housing, once I had got the heater hose off and found where all the bolts are. Most are obvious i.e. on the left (rear of the car,) top middle and top right, but there are 2 that cannot be seen on the right hand side facing the front of the car deep in the engine bay: one at the bottom was missing, though I have found a replacement that I may be able to put in place; the other is under the RH exhaust elbow - a bit of a fiddle but OK once you locate it.

I was just going to replace the linkage mechanisms but I found that the flap was missing one of the bushes that allows it to turn in the housing, so I decided to replace the lot. Not too much of a hassle, as it turned out.

While I had the housing out I also decided to add a bit of extra heat shielding for the distributor, as recommended by @the hobbler and a few others. My version is a small piece of ali plate that effectively extends the distributor indentation on the housing down to the the hinge point of the flap (poor description but the pictures should make it clearer) so should at least reduce the amount of hot air blasting directly onto the distributor. I riveted the ali on and gave the outside a quick spray of satin black paint to make it blend in somewhat. Hopefully this will give a bit of extra heat protection to the distributor and condenser... soon to be replaced by a Powerspark hall effect electronic ignition unit (points and condenser replacement) once I get the thermostat in and the housing back on.

I bought the Powerspark unit this week, together with some shiny new red HT leads which I've already fitted.
 

Attachments

  • 2022-01-31 01 Fiat 500 thermostat housing (Large).jpg
    2022-01-31 01 Fiat 500 thermostat housing (Large).jpg
    336.8 KB · Views: 67
  • 2022-01-31 07 Fiat 500 thermostat housing (Large).JPG
    2022-01-31 07 Fiat 500 thermostat housing (Large).JPG
    201.1 KB · Views: 69
  • 2022-01-31 08 Fiat 500 thermostat housing (Large).JPG
    2022-01-31 08 Fiat 500 thermostat housing (Large).JPG
    211.3 KB · Views: 73
Last edited:
I've done a bit of tidying up at the rear... the nudge bars were looking a bit close the the bumper at the corners, presumably down to previous 'nudges' (supposedly the previous owner from new to June 2021 lived in Rome, so I guess that's probably not unexpected ;) ).

I attempted to bend them back into shape, including taking them off to get more leverage but a) I managed to snap both of them at the hole where bolt that goes through the bumper fixes (because they were both somewhat rusty there, making a weak point even weaker) and b) they both had a few dings and one had a considerable patch corroded right through underneath.

I decided to bite the bullet and fork out for new ones from Auto-Bella, so now Noah has a bright and shiny rear end, and the nudge bars are nicely spaced out from the bumper.
 

Attachments

  • 2022-02-05 05 Fiat 500 rear (Large).JPG
    2022-02-05 05 Fiat 500 rear (Large).JPG
    301.6 KB · Views: 43
  • 2022-02-05 04 Fiat 500 rear (Large).JPG
    2022-02-05 04 Fiat 500 rear (Large).JPG
    249 KB · Views: 33
Back
Top