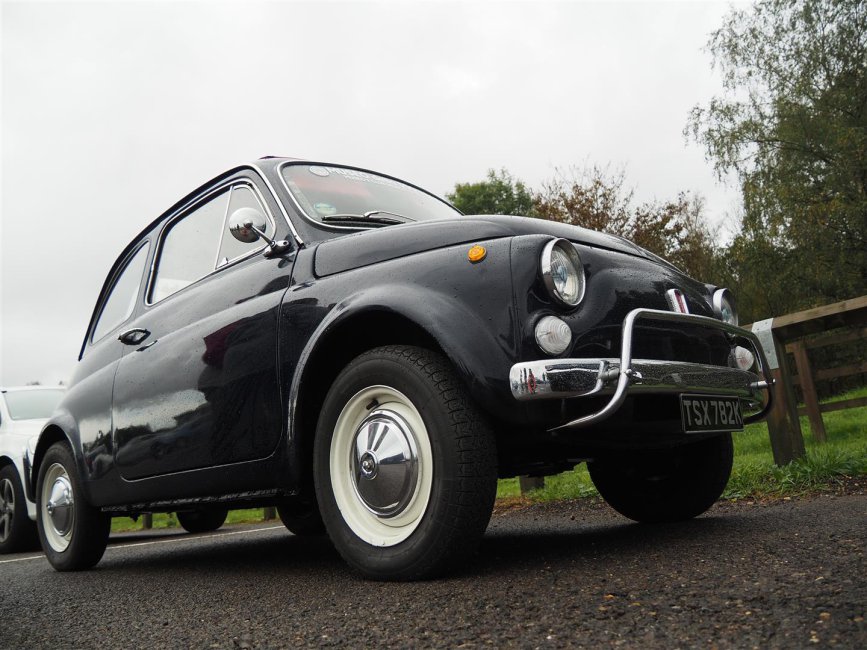
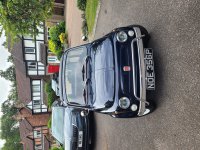
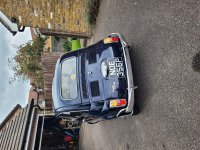
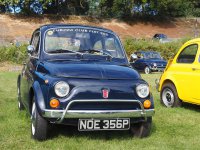
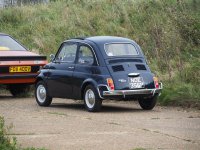
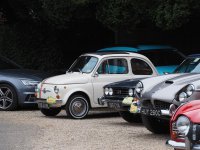
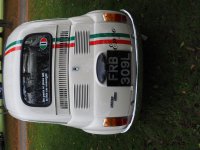
2023-10-29 01 Classic car meeting, Blackbushe Airport (Large).JPG

500 (Classic) Noah's "Ark"ive

LHD 1971 Fiat 500L

Introduction

My 500 arrived with me at the end of August. Summary:

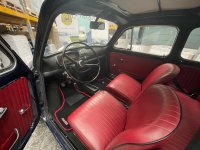
  • LHD 1971 500L in blu scuro with bordeaux upholstery
  • Originally registered in Viterbo, then from 1975 in Rome.
  • Imported to the UK in June 2021
  • Registered by DVLA in the UK as a 1975 on a P plate
The Italian reg document had a date in 1975 based on the Rome reg. Date. VIN, features (e.g. type of badging, instrument cluster) point to a 1971 car. I also have a copy of an ACI inspection giving 01.01.1971 as date of "immatricolazione" and 20.10.1971 as date of first registration.

Based on this info and a letter from the Fiat 500 Enthusiasts Club and details of a list of VIN ranges and manufacture dates, DVLA updated the V5C and issued a 1971 reg :)

Here's how it looked with the Rome plates, and then with the first UK ones.

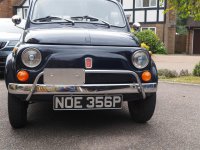
Named Noah since Noè is Italian for Noah (original UK reg was NOE)

And with current (1971) plates ;)
  • Like
Reactions: porta and ben
[Catching up a bit here so I haven't done all these things on the same day!]
A few little changes/upgrades including:

  • UK headlights with sidelamps, and orange indicator lenses
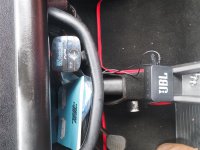
  • Small DAB radio and JBL bluetooth speaker (powered by USB cable to double USB lead wired with inline fuse to the fuse box)
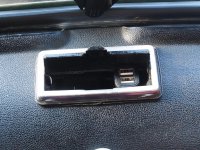
  • 12V socket fitted into the ashtray plus USB charger (wired directly to the battery with inline fuse). Means I can charge my phone without having to unplug the audio)
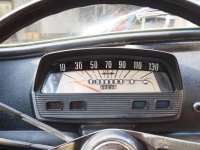
  • Original Km/h speedo removed and cleaned, and fitted with mph markings. These are stickers on a sheet of acetate, with marker lines put on with Sharpie pen. The acetate is fitted to the inside of the glass with double-sided adhesive tape so I can remove it at a later date if necessary. I may at some point get mph glass and backing plate but this will do for now. As an aside, the markings seem to be pretty accurate compared with phone satnav speedo
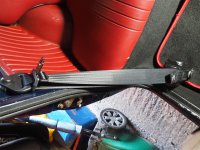
  • Inertia reel seat belts to replace the worn static belts which also had various cracked plastic parts. Sabelt 500/30 (as recommended by others on here). I got them from Paddock Spares - they are intended for Series Land Rovers and include various brackets etc. which enable them to be fitted satisfactorily for a 500, though I did have to reverse the orientation of the tongue by folding over the belt and feeding it through (does that make sense?)
 

Attachments

  • 2021-09-26 01 Fiat 500 (Large).JPG
    2021-09-26 01 Fiat 500 (Large).JPG
    281.9 KB · Views: 106
  • 2021-09-26 03 Fiat 500 (Large).JPG
    2021-09-26 03 Fiat 500 (Large).JPG
    254.9 KB · Views: 104
  • 2021-09-26 07 Fiat 500 (Large).JPG
    2021-09-26 07 Fiat 500 (Large).JPG
    363.6 KB · Views: 122
  • 2021-09-26 05 Fiat 500 (Large).JPG
    2021-09-26 05 Fiat 500 (Large).JPG
    280.7 KB · Views: 119
  • 2021-09-26 08 Fiat 500 (Large).JPG
    2021-09-26 08 Fiat 500 (Large).JPG
    298.2 KB · Views: 103
A few odds and ends done over the past couple of weeks - new wiper blades; slightly frayed battery earth cable replaced; front and rear number plate bolts (zinc-plated hex head bolts) replaced with stainless button head allen bolts.

Also, some smartening up in the form of new chromed plastic front badge and number plate light cover; new (i.e. not split or stretched!) jack strap; new rear light lenses to replace the faded items.

I also fixed the light in the mirror - 2 issues: the switch on the mirror itself did not move so I took it apart and reseated the ball in the switch part; and the spring in the door plunger had broken, so it was replaced with one from a ballpoint pen, suitable cut and slightly opened out
 
A couple of weeks ago I went to the Italian Car Day at Brooklands, sponsored by Auto Italia. I met up with several other 500 owners on the Fiat 500 Enthusiasts Club stand (great bunch!) and Noah met his twin Joey ;). Some other great cars to see as well, in addition to the motoring and aviation exhibits at Brooklands.

See here for more photos
 

Attachments

  • 2021-10-10 089 Auto Italia Italian Car Day, Brooklands (Large).JPG
    2021-10-10 089 Auto Italia Italian Car Day, Brooklands (Large).JPG
    464.1 KB · Views: 94
  • 2021-10-10 087 Auto Italia Italian Car Day, Brooklands (Large).JPG
    2021-10-10 087 Auto Italia Italian Car Day, Brooklands (Large).JPG
    371.8 KB · Views: 96
Last edited:
Yesterday Noah had his longest outing to day - nearly 300km/185 miles to/from and on the Blackpalfrey Motor Club's Tour of Kent. Tulip roadbook route round some lovely countryside and villages in the company of 50+ other classic cars and their owners, including the winner of the day's concours prize, the other Fiat 500 - Congratulations well deserved!:worship:

See here for more photos.
 

Attachments

  • 2021-10-17 13 Blackpalfrey Motor Club Tour of Kent - Battle of Britain Memorial (Large) (Large).JPG
    2021-10-17 13 Blackpalfrey Motor Club Tour of Kent - Battle of Britain Memorial (Large) (Large).JPG
    365.4 KB · Views: 73
  • 2021-10-17 41 Blackpalfrey Motor Club Tour of Kent - Broome Park (Large).JPG
    2021-10-17 41 Blackpalfrey Motor Club Tour of Kent - Broome Park (Large).JPG
    342.9 KB · Views: 80
  • 2021-10-17 38 Blackpalfrey Motor Club Tour of Kent - Broome Park (Large).JPG
    2021-10-17 38 Blackpalfrey Motor Club Tour of Kent - Broome Park (Large).JPG
    255 KB · Views: 78
  • 2021-10-17 32 Blackpalfrey Motor Club Tour of Kent - Broome Park (Large).JPG
    2021-10-17 32 Blackpalfrey Motor Club Tour of Kent - Broome Park (Large).JPG
    250.4 KB · Views: 86
  • 2021-10-17 07 Blackpalfrey Motor Club Tour of Kent (Large).JPG
    2021-10-17 07 Blackpalfrey Motor Club Tour of Kent (Large).JPG
    190.6 KB · Views: 76
On the way back from the Tour of Kent Noah "may" have breached 70mph according to the Google Maps app on my phone on a long motorway downhill stretch:D. Interestingly, given the 60mph-ish theoretical top speed, he seemed OK cruising at about 63-64 GPS mph on the flat.

The long day's driving which included 2x 40 miles or so on the motorway may have had something to do with the fact that, when I went out this morning to fill up with petrol, there was a loud rattling from the rear end. Further examination revealed that all 4 exhaust manifold bolts were loose (though still on). Even further examination showed half an exhaust gasket on one pipe and none on the other - order put in to Motobambino forthwith. I decided to take the whole exhaust off in preparation and additionally found that one of the pipes had cracked it's weld at the silencer end, though still attached. My local spannerman is going to reweld it for me and I'll see how it goes. Worst case, a whole new exhaust isn't outrageously priced.
 

Attachments

  • 2021-10-17 47 Fiat 500 71 MPH.jpg
    2021-10-17 47 Fiat 500 71 MPH.jpg
    432.6 KB · Views: 71
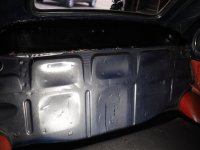
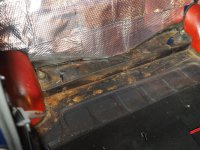
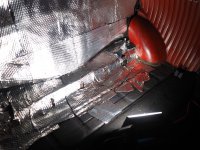
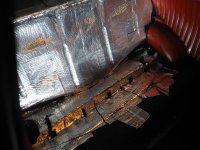
I forgot to say that, after going to Brooklands on the motorway and finding the engine noise a bit loud, I fitted some noise insulation to the rear bulkhead - and a bit of the floor under the rear seat with the leftover bits. I used Noico 80 which is 2mm thick self-adhesive butyl faced with aluminium foil. c. £18 for 9 rectangular sheets from Amazon and fairly easy to fit: just offer up, trim to size, peel off the backing sheet and stick in place. Once it is all on, you need to roll it to stick better - I used a wallpaper join roller and the ball end of a hammer for the recessed pressings. I put back the standard felt insulation over the top.

I would say it made a slight improvement, at least £18-worth anyway.

Another benefit of the exercise was to see that the rear bulkhead and floor look in pretty good condition. btw the brown bits on the floor section are bits of the felt padding, not rust.
 

Attachments

  • 2021-10-15 01 Fiat 500 rear bulkhead soundproofing (Large).JPG
    2021-10-15 01 Fiat 500 rear bulkhead soundproofing (Large).JPG
    180.3 KB · Views: 84
  • 2021-10-15 02 Fiat 500 rear bulkhead soundproofing (Large).JPG
    2021-10-15 02 Fiat 500 rear bulkhead soundproofing (Large).JPG
    291.6 KB · Views: 82
  • 2021-10-15 03 Fiat 500 rear bulkhead soundproofing (Large).JPG
    2021-10-15 03 Fiat 500 rear bulkhead soundproofing (Large).JPG
    262 KB · Views: 86
  • 2021-10-15 04 Fiat 500 rear bulkhead soundproofing (Large).JPG
    2021-10-15 04 Fiat 500 rear bulkhead soundproofing (Large).JPG
    257.1 KB · Views: 89
Last edited:
Nice looking 500!
Sounds like you’re well on with many of the little jobs we’ve all found ourselves doing, isn’t that interior light just a fantastic thing!
Well done on the long distance travels, we’ve not been that brave as yet!
Keep up the good work!

Ian
 
Oh, I forgot... when I got the car it came with:

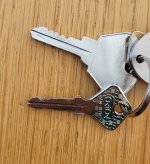
  • what looks like the original steering lock key with a nice crack halfway through, plus an aftermarket spare
  • original-looking door key and aftermarket spare
  • original-looking engine bay key (different from the doors)
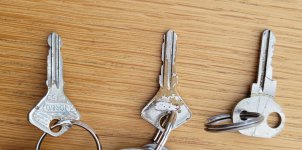
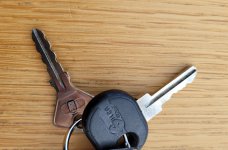
I didn't fancy the steering lock key snapping off in the lock and leaving me with only 1, and it's always good to have spares of all of them so I went to my local Timpson's at the beginning of September and they said "no problem, we can do one of each for £30 (!) but we'll have to order in the blanks.". After several weeks of checking with them in person and by phone, still nothing so I found a supplier of blanks on ebay. 5 days later, they arrived. I cut the plastic off the original steering lock key so I could clamp it up next to the new blank in a bench vice and used a small square-edged file to cut the shapes out... same for the engine key and hey presto, new spares for the sum of £11 delivered! I didn't pay Timpson's in advance, so it's their loss...

("D" on one of the keys means "Door" to avoid confusion ;))

Photos of the originals, the supplied spares and my new DIY-cut spares
 

Attachments

  • 2021-10-20 01 Fiat 500 keys - original.jpg
    2021-10-20 01 Fiat 500 keys - original.jpg
    1.6 MB · Views: 63
  • 2021-10-20 02 Fiat 500 keys- spares.jpg
    2021-10-20 02 Fiat 500 keys- spares.jpg
    2.2 MB · Views: 61
  • 2021-10-20 03 Fiat 500 keys - new.jpg
    2021-10-20 03 Fiat 500 keys - new.jpg
    1.5 MB · Views: 66
Very neat, and well done. Just for interest, who was your eventual supplier---I could do with a spare of each of the ignition and door keys. I have 1 of each from Timsons (very close, but not QUITE right) and could do with a couple of more accurate spares.
 
Very neat, and well done. Just for interest, who was your eventual supplier---I could do with a spare of each of the ignition and door keys. I have 1 of each from Timsons (very close, but not QUITE right) and could do with a couple of more accurate spares.

The supplier on eBay was swampys-old-skool-lock-shop https://www.ebay.co.uk/usr/swampys-old-skool-lock-shop?_trksid=p2047675.l2559

These are the blanks that worked for me, but he sells quite a few so you need to make sure that your keys are of the right size/shape including length of the blank blade, where the grooves are, the stop "arms", etc.


https://www.ebay.co.uk/itm/324471697830
https://www.ebay.co.uk/itm/323949405394

Good luck!
 
This post contains affiliate links which may earn a commission at no additional cost to you.
Here's another great key supplier; the keys for my car were supplied by simply giving the number inscribed inside the door locks. They were of great quality and sent very promptly. I think the phone number on my old image might be out of date.

https://www.keysinthepost.com/contact/

I wish I had known that before... the address on the website is only up the road a few miles!
 
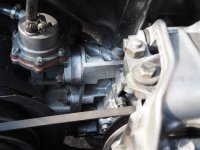
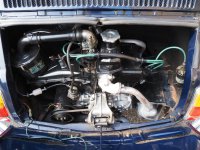
Looks great, certainly like the sound proofing in rear bulkhead. I know I will not be the only person to say this PLEASE REMOVE THE IN LINE FUEL FILTER IN THE ENGINE COMPARTMENT, when they go it sprays petrol over the dynamo & then BANG! there is a filter in the petrol tank that works well & safe.
Best of luck & love the car.

Thanks for the comments. I didn't know about the risk of the filter in the engine bay - it's all as I bought it at the end of August... the pipe on the left (with the filter in it) looks pretty new. Presumably if I remove the filter I need to replace the whole pipe, otherwise there will still be 2 joints?

...or a shorter piece of pipe from the pump to the other side of where the filter currently is, joined with a brass connector and then there's only 1 join.
 
Last edited:
Thanks for the comments. I didn't know about the risk of the filter in the engine bay - it's all as I bought it at the end of August... the pipe on the left (with the filter in it) looks pretty new. Presumably if I remove the filter I need to replace the whole pipe, otherwise there will still be 2 joints?

...or a shorter piece of pipe from the pump to the other side of where the filter currently is, joined with a brass connector and then there's only 1 join.

OK: fuel pump removed along with the 2 pieces of hose (one end of which was partially cracked, the other end of which was pushed onto the metal pipe with no clip at all) and the jubilee clips which were not fully tightened. Replaced with a single piece of modern fuel hose and proper fuel hose clamps. I cut off the top of the filter to have a look inside and it looked pretty clean, so hopefully missing out the filter will not be a problem :)
 
Back
Top