Necessary tools you will need :
Optional tools you might need :
-------------------------
Prepare The Car
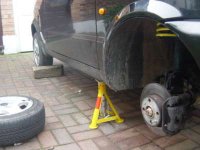
You need to park your Cento on a flat even surface. Failing that, any driveway will do as long as it isn't really steep (use your own judgment). You then need to get the car up on axel stands with the handbrake on and with something blocking the back wheels (as pictured, a rock will do). Remove the front wheels and place them nearby (they are quite handy to sit on whilst working later).
Prepare yourself
The job your about to attempt isn't a quick one and neither is it very exciting. a wandering mind isn't something you need when it could mean forgetting to tighten that bolt that holds the strut to the wheels...
Wind down the windows and turn the radio up. Go and get a cup of tea as well!:yum:
---------------------------
1.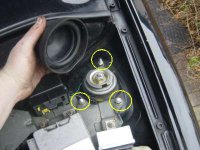
Pop the bonnet and take off the black rubber housing to the strut tops. This comes off with a little pull and is basically just stretched over the top of the strut.. Underneath you will find 3 little bolts and a big bolt which is the top of the strut (notice the circles I have cleverly drawn onto the photos).
2.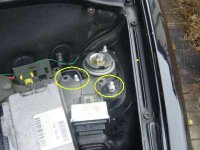
You will notice that the ECU (silver thing pictured above) is also attached to the car using the same bolts as the strut. (on the passenger side, the coolant expansion tank is held on using the same bolts, not pictured).
On further inspection you will see that there are 2 layers of screws. Remove the first layer now which will unbolt the ECU. Push it to the side to reveal the second layer of bolts.
3.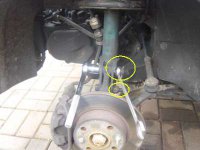
You now need to get down onto the floor (sit on one of the wheels!) and unscrew the 2 large bolts that hold the strut to the lower suspension arm and wheel hub. To do this you will need a socket wrench and a spanner. If these bolts have seized (likely), use some WD40 and let it soak for a few minutes and try again.
Completely unscrew and remove these bolts. The strut should not be hanging free from the top mount.
4.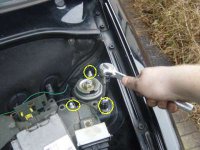
Return to the engine bay and unscrew the 3 little bolts at the top of the strut.
When removing the last one, reach down and hold the strut with your free hand otherwise it will fall onto the floor.
5.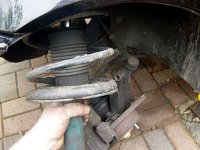
The strut will no longer be attached to the car but before you can remove it you will need to detach the brake hose which is just clipped to the side of the strut. This simply pulls off.
You will now be able to remove the strut Completely from the wheel arch.
6.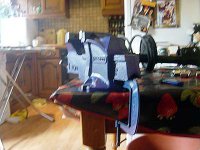
Go inside to your workshop/kitchen and get the vice setup.
if you have a purpose built work bench with a built in vice then great! but if you don't, you will probably have to recreate a similar contraption to what I have (pictured above). Its simply a Vice with a G-clamp holding it to the table. Make sure its nice and secure.
7.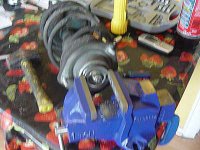
Clamp the top plate of the strut into the vice. There are 2 notches on each side of the top plate. This is where you need to clamp it as it provides a firm hold on the strut. Clamp it tight but try not to dent/damage the plate.
8.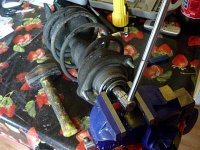
Using your trusty socket wrench, loosen the large nut at the top of the strut. This is likely to be very very tight! An extension bar might help if you have girly arms.
DO NOT Completely unscrew the nut yet, just loosen it! You wouldn't want to go and loose an eye now would you?
9.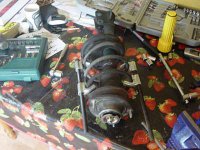
You now need to compress the springs.
For this you will need Spring Compressors. There are a few different types of compressors but they all do the same job. The type pictured above come in a pack of 2 (use a minimum of 2, 1 wont do the job) and they simply clamp onto the side of the springs. You then tighten the nut at either end to compress or decompress.
Place the first compressor onto the spring and tighten it to make it stay on. Then place the second compressor onto the the spring directly opposite the other. If you don't place the opposite, the spring will compress and bent to the side, possibly taking off your arm in the process...
10.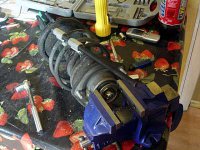
With the spring compressed, place the top plate of the strut back into the vice. and tighten it.
You can now Completely unscrew and remove the large bolt on the top of the strut.
11.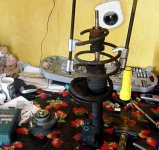
Remove all of the bits and bobs from the top of the strut. Make sure to make a mental note of the order in which they went on. Or you could just pile them up in the right order just incase you forget.
12.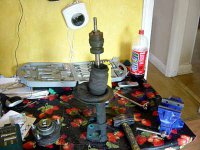
Remove the compressed spring.
If you have bought a full suspension kit which includes new struts, throw this old one in the bin (or sell it on Ebay) and do the rest of this guide using the new strut!
13.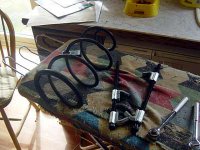
Decompress the spring and remove the compressors.
This is a simple task of undoing the bolts again. Do a few turns on each compressor one at a time until they are loose enough to remove.
14.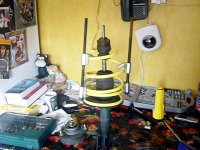
Using the springs compressors you just removed, compress your lowered aftermarket spring and place it onto the strut (or onto your new strut if you have a full suspension kit).
15.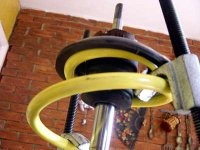
Begin to reassemble the bits and bobs you took off the strut. First on is the rubber mount. make sure the spring fits back into the grooves properly.
16.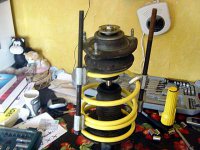
Reassemble the rest of the bits and bobs and tighten the bolt at the top as much as u can with your hand. Keep the spring compressed whilst reassembling.
17.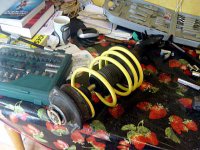
With the top bits and bobs fully reassembled and the top nut on you can now remove the springs compressors.
Check that the spring sits into the top and bottom notches on the strut before removing the compressors as it will be alot easier to adjust the spring whilst they are on.
18.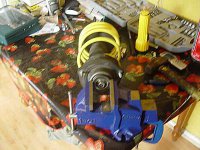
Tighten the top plate of the strut back into the vice just as we did earlier.
19.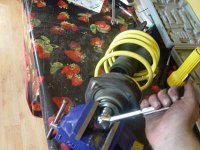
Using your socket wrench again, tighten the top nut as tight as you can! (not stupidly tight though, you don't want to ruin the thread! Use your own judgment eg. do not jump up and down on the wrench).
20.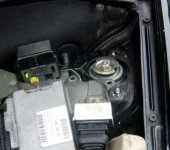
Return back to the car and put the strut with the new spring up into the arch.
Line up the 3 small holes with the studs and push them through. This can be a little tricky sometimes but you'll get it eventually.
21.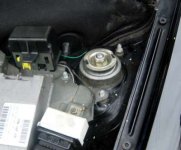
Put back on and tighten the 3 small bolts that hold the strut in place.
Depending what side of the Cento you are working on, you will need to put the ECU or the expansion tank back into place.
22.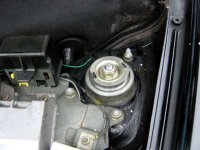
Put the ECU/expansion tanks screws on and tighten them. (these screws seem to thread quite easily so down tighten them too tight. Just tight enough)
23.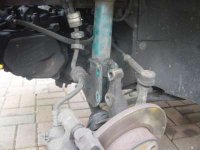
With the strut mounted at the top, the bottom should look something like this. (hopefully not as rusty and dirty)
24.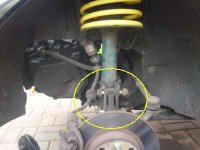
Align the screw holes and push the 2 bolts through to secure the bottom of the strut to the lower suspension arm and wheel hub.
25.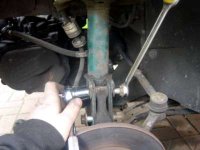
Tighten the bolts using a suitable socket wrench and spanner. Tighten these nice and tight! You don't want these coming off when your driving!
26.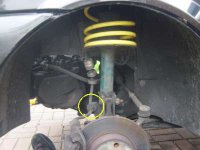
Once the bolts are tightened you will need to reattach the brake hose into its holder. this is done simply but pushing it in.
Don't forget this as you don't want the hose getting caught and split. Non working brakes aren't very useful...
27.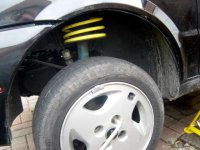
Now you just need to put the wheels back on, lower the car off of the axel stands and de chock (de rock in some cases) the back wheels! In that order, lowering the car without the wheels on isn't a good idea.
----------------------------
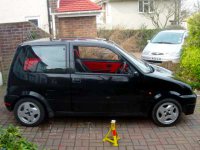
Dum de de dum dum dummm! (fanfare)
You have just saved yourself £150+ by not getting a garage to do this for you! Well done! You will need to leave the car to settle on its new springs for a while. it wont drop to its proper height for a while. Give the car a bounce in each corner to help it along.
Take it for a quick test run, if anything sounds dodgy, come back home and check over everything.
Depending on how low the new aftermarket springs lower the car, you may have to cut down the bump stops. this can easily be done with a pair of sharp scissors
- Socket wrench with various socket sizes (a good toolkit should have all the sizes needed)
- Spanners of various sizes (the sockets probably wont fit on some of the bolts, see step.3)
- Car jack (the Fiat one in the boot will do perfect)
- Axel stands (any motor factors or car shop sell these, even some petrol stations)
- Small/Medium sized Vice (preferably blue in colour, any good hardware shop sell these)
- Medium sized G-clamp (only needed if you don't have a suitable workbench for the vice)
- WD40 lubricant spray (I guarantee there will be at least one seized bolt)
- Spring compressors (at least two! Use with extreme care! Any good motor factors will sell these)
Optional tools you might need :
- A working radio (the one in the car will do)
- Your Mums kitchen table (as good as any workbench)
- An old ironing board (makes a perfect place to put your tools)
-------------------------
Prepare The Car

You need to park your Cento on a flat even surface. Failing that, any driveway will do as long as it isn't really steep (use your own judgment). You then need to get the car up on axel stands with the handbrake on and with something blocking the back wheels (as pictured, a rock will do). Remove the front wheels and place them nearby (they are quite handy to sit on whilst working later).
Prepare yourself

The job your about to attempt isn't a quick one and neither is it very exciting. a wandering mind isn't something you need when it could mean forgetting to tighten that bolt that holds the strut to the wheels...
Wind down the windows and turn the radio up. Go and get a cup of tea as well!:yum:
---------------------------
1.

Pop the bonnet and take off the black rubber housing to the strut tops. This comes off with a little pull and is basically just stretched over the top of the strut.. Underneath you will find 3 little bolts and a big bolt which is the top of the strut (notice the circles I have cleverly drawn onto the photos).
2.

You will notice that the ECU (silver thing pictured above) is also attached to the car using the same bolts as the strut. (on the passenger side, the coolant expansion tank is held on using the same bolts, not pictured).
On further inspection you will see that there are 2 layers of screws. Remove the first layer now which will unbolt the ECU. Push it to the side to reveal the second layer of bolts.
3.

You now need to get down onto the floor (sit on one of the wheels!) and unscrew the 2 large bolts that hold the strut to the lower suspension arm and wheel hub. To do this you will need a socket wrench and a spanner. If these bolts have seized (likely), use some WD40 and let it soak for a few minutes and try again.
Completely unscrew and remove these bolts. The strut should not be hanging free from the top mount.
4.

Return to the engine bay and unscrew the 3 little bolts at the top of the strut.
When removing the last one, reach down and hold the strut with your free hand otherwise it will fall onto the floor.
5.

The strut will no longer be attached to the car but before you can remove it you will need to detach the brake hose which is just clipped to the side of the strut. This simply pulls off.
You will now be able to remove the strut Completely from the wheel arch.
6.

Go inside to your workshop/kitchen and get the vice setup.
if you have a purpose built work bench with a built in vice then great! but if you don't, you will probably have to recreate a similar contraption to what I have (pictured above). Its simply a Vice with a G-clamp holding it to the table. Make sure its nice and secure.
7.

Clamp the top plate of the strut into the vice. There are 2 notches on each side of the top plate. This is where you need to clamp it as it provides a firm hold on the strut. Clamp it tight but try not to dent/damage the plate.
8.

Using your trusty socket wrench, loosen the large nut at the top of the strut. This is likely to be very very tight! An extension bar might help if you have girly arms.
DO NOT Completely unscrew the nut yet, just loosen it! You wouldn't want to go and loose an eye now would you?
9.

You now need to compress the springs.
For this you will need Spring Compressors. There are a few different types of compressors but they all do the same job. The type pictured above come in a pack of 2 (use a minimum of 2, 1 wont do the job) and they simply clamp onto the side of the springs. You then tighten the nut at either end to compress or decompress.
Place the first compressor onto the spring and tighten it to make it stay on. Then place the second compressor onto the the spring directly opposite the other. If you don't place the opposite, the spring will compress and bent to the side, possibly taking off your arm in the process...
10.

With the spring compressed, place the top plate of the strut back into the vice. and tighten it.
You can now Completely unscrew and remove the large bolt on the top of the strut.
11.

Remove all of the bits and bobs from the top of the strut. Make sure to make a mental note of the order in which they went on. Or you could just pile them up in the right order just incase you forget.
12.

Remove the compressed spring.
If you have bought a full suspension kit which includes new struts, throw this old one in the bin (or sell it on Ebay) and do the rest of this guide using the new strut!
13.

Decompress the spring and remove the compressors.
This is a simple task of undoing the bolts again. Do a few turns on each compressor one at a time until they are loose enough to remove.
14.

Using the springs compressors you just removed, compress your lowered aftermarket spring and place it onto the strut (or onto your new strut if you have a full suspension kit).
15.

Begin to reassemble the bits and bobs you took off the strut. First on is the rubber mount. make sure the spring fits back into the grooves properly.
16.

Reassemble the rest of the bits and bobs and tighten the bolt at the top as much as u can with your hand. Keep the spring compressed whilst reassembling.
17.

With the top bits and bobs fully reassembled and the top nut on you can now remove the springs compressors.
Check that the spring sits into the top and bottom notches on the strut before removing the compressors as it will be alot easier to adjust the spring whilst they are on.
18.

Tighten the top plate of the strut back into the vice just as we did earlier.
19.

Using your socket wrench again, tighten the top nut as tight as you can! (not stupidly tight though, you don't want to ruin the thread! Use your own judgment eg. do not jump up and down on the wrench).
20.

Return back to the car and put the strut with the new spring up into the arch.
Line up the 3 small holes with the studs and push them through. This can be a little tricky sometimes but you'll get it eventually.
21.

Put back on and tighten the 3 small bolts that hold the strut in place.
Depending what side of the Cento you are working on, you will need to put the ECU or the expansion tank back into place.
22.

Put the ECU/expansion tanks screws on and tighten them. (these screws seem to thread quite easily so down tighten them too tight. Just tight enough)
23.

With the strut mounted at the top, the bottom should look something like this. (hopefully not as rusty and dirty)
24.

Align the screw holes and push the 2 bolts through to secure the bottom of the strut to the lower suspension arm and wheel hub.
25.

Tighten the bolts using a suitable socket wrench and spanner. Tighten these nice and tight! You don't want these coming off when your driving!
26.

Once the bolts are tightened you will need to reattach the brake hose into its holder. this is done simply but pushing it in.
Don't forget this as you don't want the hose getting caught and split. Non working brakes aren't very useful...
27.

Now you just need to put the wheels back on, lower the car off of the axel stands and de chock (de rock in some cases) the back wheels! In that order, lowering the car without the wheels on isn't a good idea.
----------------------------

Dum de de dum dum dummm! (fanfare)
You have just saved yourself £150+ by not getting a garage to do this for you! Well done! You will need to leave the car to settle on its new springs for a while. it wont drop to its proper height for a while. Give the car a bounce in each corner to help it along.
Take it for a quick test run, if anything sounds dodgy, come back home and check over everything.
Depending on how low the new aftermarket springs lower the car, you may have to cut down the bump stops. this can easily be done with a pair of sharp scissors

