My sisters 500 was becoming a real swine to start so i went on a diagnostic fault finding hunting session..
Having done a load test of the battery to chassis then battery to engine block there was a high resistance problem between the battery / Chassis and the engine / gear box... ( a normal multi meter wouldn't show the fault but it jumped out when a 100a load was applied)
So first the earth strap in question there are 2 on the 500 the one i worked on is a 1.2 with start stop....
the upper cable which includes the quick release for the Battery sensor post is part number #00518676930
And the lower chassis to gear box link which i found at fault is Part number # 00517440280
But its not easy to get at so here we go......
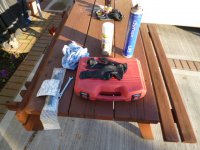
tools needed
Safety glasses
rubber gloves (both for handling battery)
insulation tape
Socket set with 13 mm socket and extension bar
Long nose pliers
small wire brush
10 mm combination spanner
battery terminal grease
Release oil if needed
Battery terminal grease (HIGHLY RECOMMENDED)
underseal or cavity wax ((optional))
And new earth strap
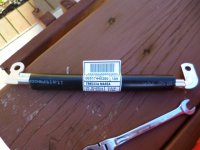
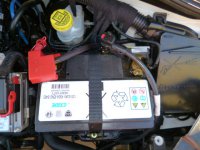
Open bonnet and remove the quick release negative post by pressing the red button and pulling it upwards
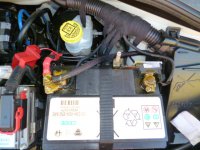
Next remove the NEGATIVE battery sensor with a 10 mm spanner (( ITS always good practice to remove the negative post first on a negative earth vehicle))
DO NOT LEAVE THE SENSOR DANGLING PLACE IT ON THE SCUTTLE TO AVOID DAMAGING THE WIRING
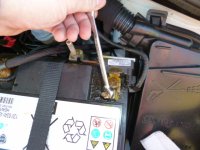
remove the live cable in the same way and tuck out the way

Ideally now use a bit of tape to insulate the battery terminals whilst its off the car....
Using a 13mm socket undo the battery retaining clamp and strap
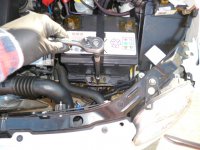
Then take care and lift the battery out of the car (its heavy)
then use the needle nose pliers to release the cable clips at the back of the battery tray
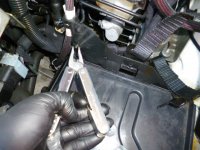
Next remove the plastic liner and drain tube ((TAKE CARE THIS MIGHT HAVE ACID ON IT IF THE BATTERY HAS LEAKED IN THE PAST))
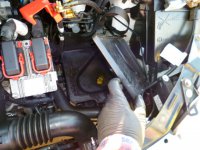
Now remove the 2 bolts and 1 nut holding the metal battery tray in place using a 13mm socket
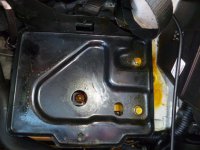
now we are slowly getting somewhere
Now remove the clutch slave using a 13 mm socket and ease it out of the way
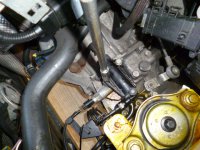
Now you can get to the gear box end of the cable and undo the 13 mm nut
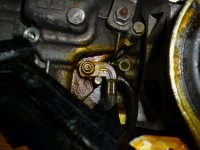
next undo the 13mm bolt on the chassis leg which also holds the upper earth cable
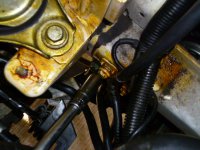
You can see the level of oxidisation which has been causing the problems....

So now its off
clean all the contact areas with a wire brush
i packed the new cable with Battery grease to protect it from moisture in the future
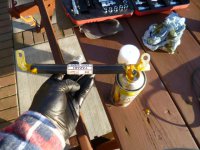
i sprayed plenty in till it came out the other end then wiggled the plastic sleeve about to spread it about inside and repeated a couple of times
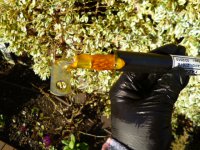
once refitted cover all terminals and crimp lugs when tight as well
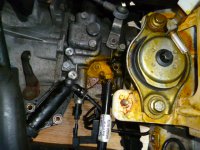
and put back together..
REMEMBER DO NOT
over tighten clutch slave its only plastic... and ensure the ball joint on the piston sits into the clutch actuator arm...
also live terminal on first then negative
then blather the battery terminals with grease
Hopefully thats the problem cured :slayer:
Big thanks to Neil at Sturgess Motor Group for getting me the part delivered for a great price....
This guide will also be useful for the Panda and the new Ford KA as its the same set up but stoneacre wanted the best part of £30 for the cable from the ford part system
Having done a load test of the battery to chassis then battery to engine block there was a high resistance problem between the battery / Chassis and the engine / gear box... ( a normal multi meter wouldn't show the fault but it jumped out when a 100a load was applied)
So first the earth strap in question there are 2 on the 500 the one i worked on is a 1.2 with start stop....
the upper cable which includes the quick release for the Battery sensor post is part number #00518676930
And the lower chassis to gear box link which i found at fault is Part number # 00517440280
But its not easy to get at so here we go......

tools needed
Safety glasses
rubber gloves (both for handling battery)
insulation tape
Socket set with 13 mm socket and extension bar
Long nose pliers
small wire brush
10 mm combination spanner
battery terminal grease
Release oil if needed
Battery terminal grease (HIGHLY RECOMMENDED)
underseal or cavity wax ((optional))
And new earth strap


Open bonnet and remove the quick release negative post by pressing the red button and pulling it upwards

Next remove the NEGATIVE battery sensor with a 10 mm spanner (( ITS always good practice to remove the negative post first on a negative earth vehicle))
DO NOT LEAVE THE SENSOR DANGLING PLACE IT ON THE SCUTTLE TO AVOID DAMAGING THE WIRING

remove the live cable in the same way and tuck out the way

Ideally now use a bit of tape to insulate the battery terminals whilst its off the car....
Using a 13mm socket undo the battery retaining clamp and strap

Then take care and lift the battery out of the car (its heavy)
then use the needle nose pliers to release the cable clips at the back of the battery tray

Next remove the plastic liner and drain tube ((TAKE CARE THIS MIGHT HAVE ACID ON IT IF THE BATTERY HAS LEAKED IN THE PAST))

Now remove the 2 bolts and 1 nut holding the metal battery tray in place using a 13mm socket

now we are slowly getting somewhere
Now remove the clutch slave using a 13 mm socket and ease it out of the way

Now you can get to the gear box end of the cable and undo the 13 mm nut

next undo the 13mm bolt on the chassis leg which also holds the upper earth cable

You can see the level of oxidisation which has been causing the problems....

So now its off
clean all the contact areas with a wire brush
i packed the new cable with Battery grease to protect it from moisture in the future

i sprayed plenty in till it came out the other end then wiggled the plastic sleeve about to spread it about inside and repeated a couple of times

once refitted cover all terminals and crimp lugs when tight as well

and put back together..
REMEMBER DO NOT
over tighten clutch slave its only plastic... and ensure the ball joint on the piston sits into the clutch actuator arm...
also live terminal on first then negative
then blather the battery terminals with grease
Hopefully thats the problem cured :slayer:
Big thanks to Neil at Sturgess Motor Group for getting me the part delivered for a great price....
This guide will also be useful for the Panda and the new Ford KA as its the same set up but stoneacre wanted the best part of £30 for the cable from the ford part system

