right, i'll try my best. if you still have any questions. ask away and i'll answer best i can.
what you need;
car jack
wheel brace
normal claw hammer and a nice big lump hammer.
hand grinder
philips screw driver
hand drill with a 3.2 drill bit or likewise size.
rivet gun and a couple of rivets same size as the drill bit with a 5mm shank.
80 grit paper, 240 grit paper, 1200 grit paper (wet and dry stuff)
about a litre of body filler
and a can or 2 of high build primer
1;
really think about what your about to commit yourself too. once you start, there isn't much chance of going back. not without it looking dodgy anyway.
2;
firstly, jack your car up and remove the wheels.
3;
if you have a cinq, using your screwdriver, remove the plastic arch trims. and any inner arch linings.
4;
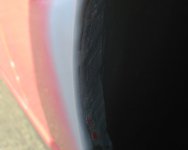
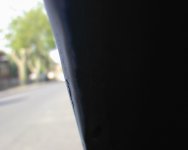
now the fun starts, using the normal hammer, hit back the inner lip of the arch, see pics..
5;
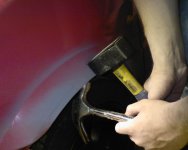
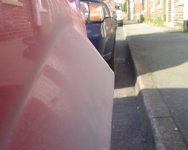
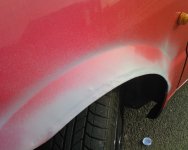
once you have the inner lip smashed up against the inside of the arch, you then need to hit the inner and the outter part of your arch outward together. this is where you use the lump hammer.
holding the lump hammer on the out side. best using the top part which is the flatest and has the biggest surface. hold that to the outside of the arch and using the normal hammer in your other hand, hit the inner arch, against the lump hamper, effectively knocking the arch outwards.
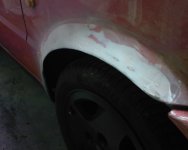
to give this kind of result
6;
once you have your arches to this stage, its time for the grinder to come out.
grind back all the paint on your nicely bashed arch to remove any lose paint and get it back to bare metal, for a better bond with the bodyfiller.
7;
time to start layering on the filler, keeping the layers as smooth and as level as possible for an easier and better finish. using the 80grit paper in between layers.
8;
once you achive the required skin of filler. use the 240grit paper to get it nice and smooth, getting it ready for primer.
9;
once the primer is dry, use the 1200grit paper to flat it back, layering the primer, like you did with filler till you get it as perfect as you can. then your ready for painting.
10;
now to deal with the underside of the arches. becuase of what you've done so far. you will not be able to reuse the front inner arch liners. as originally, these use the inner lip to fasten too.
where the inner lip has been beaten against the rest of the inner arch, its best to use some kind of silicone to seal it all up, to prevent water and other crap getting between and running the risk of getting rust. once the silicone is applied and dried, use some under body sealent paint, to finish it off.
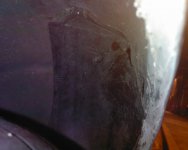
for the rear arches again do the same as the front. however, when it come to the rear offside (drivers side) the fuel tank filler pipe is exsposed, and this will need covering back up for safety reasons. so reattach that arch lining. but you'll see that because the arches have changed, it wont fit back together properly, so you'll need to trim it back so it dosent stick out. at the top across from the top fixing screw, you'll need to push it back as far as you can, then using the drill, drill through the liner and the inner skin of the arch and put a rivet in there, or a self tapper, for future removal.
in the pic, you can see where i've trimmed it back, but as yet, i've not had the chance to secure it with either the rivet or self tapper. luckily, i've got some excess filler holding it in place.
11;
once all this is done, replace your wheels and give yourself a pat on the back!!
well done!
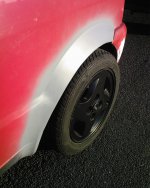
hope this help you all. i'll get some more pics on friday when i continue my car, explaining the hammer and hammer part. so i'll edit this thread accordingly!
what you need;
car jack
wheel brace
normal claw hammer and a nice big lump hammer.
hand grinder
philips screw driver
hand drill with a 3.2 drill bit or likewise size.
rivet gun and a couple of rivets same size as the drill bit with a 5mm shank.
80 grit paper, 240 grit paper, 1200 grit paper (wet and dry stuff)
about a litre of body filler
and a can or 2 of high build primer
1;
really think about what your about to commit yourself too. once you start, there isn't much chance of going back. not without it looking dodgy anyway.
2;
firstly, jack your car up and remove the wheels.
3;
if you have a cinq, using your screwdriver, remove the plastic arch trims. and any inner arch linings.
4;
now the fun starts, using the normal hammer, hit back the inner lip of the arch, see pics..


5;
once you have the inner lip smashed up against the inside of the arch, you then need to hit the inner and the outter part of your arch outward together. this is where you use the lump hammer.
holding the lump hammer on the out side. best using the top part which is the flatest and has the biggest surface. hold that to the outside of the arch and using the normal hammer in your other hand, hit the inner arch, against the lump hamper, effectively knocking the arch outwards.
to give this kind of result


6;
once you have your arches to this stage, its time for the grinder to come out.
grind back all the paint on your nicely bashed arch to remove any lose paint and get it back to bare metal, for a better bond with the bodyfiller.
7;
time to start layering on the filler, keeping the layers as smooth and as level as possible for an easier and better finish. using the 80grit paper in between layers.
8;
once you achive the required skin of filler. use the 240grit paper to get it nice and smooth, getting it ready for primer.
9;
once the primer is dry, use the 1200grit paper to flat it back, layering the primer, like you did with filler till you get it as perfect as you can. then your ready for painting.
10;
now to deal with the underside of the arches. becuase of what you've done so far. you will not be able to reuse the front inner arch liners. as originally, these use the inner lip to fasten too.
where the inner lip has been beaten against the rest of the inner arch, its best to use some kind of silicone to seal it all up, to prevent water and other crap getting between and running the risk of getting rust. once the silicone is applied and dried, use some under body sealent paint, to finish it off.
for the rear arches again do the same as the front. however, when it come to the rear offside (drivers side) the fuel tank filler pipe is exsposed, and this will need covering back up for safety reasons. so reattach that arch lining. but you'll see that because the arches have changed, it wont fit back together properly, so you'll need to trim it back so it dosent stick out. at the top across from the top fixing screw, you'll need to push it back as far as you can, then using the drill, drill through the liner and the inner skin of the arch and put a rivet in there, or a self tapper, for future removal.
in the pic, you can see where i've trimmed it back, but as yet, i've not had the chance to secure it with either the rivet or self tapper. luckily, i've got some excess filler holding it in place.

11;
once all this is done, replace your wheels and give yourself a pat on the back!!
well done!

hope this help you all. i'll get some more pics on friday when i continue my car, explaining the hammer and hammer part. so i'll edit this thread accordingly!


