Technical EML Disabled - 2004 Ducato JTD

Currently reading:
Technical EML Disabled - 2004 Ducato JTD

Lotus26R

Member
Joined
Aug 19, 2022
Messages
35
Points
59
Location
North Yorkshire
I have discovered that the EML on my recently bought Ducato Motorhome has been disabled - it never comes on. I've begun to sort out the issues that are behind it but now need to re-enable the EML.

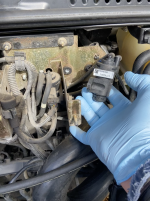
I've pulled the instrument cluster out and it doesn't (seem) to have been messed with so I'm left tracing the wiring back to the ECU to find out where the "break" is. I'm in the early days at the moment, I've not yet tracked down a wiring diagram that contains the EML connections but will keep looking.

I just wondered if there are any electricians on here that can give me some shortcuts/obvious places to look etc?

Is there any pin-out information on the ECU for example and are there any obvious connectors on the main loom that I could look at first.

Any help gratefully accepted and appreciated.
 
Hi Lotus26R,

What you need for diagrams and much other info is eLearn which may be avaiable as a CD on Ebay for under £5, search for "Fiat Ducato Workshop Manual",but due you have a computer with an optical drive. Also be warned that eLearn contains errors.

An incomplete and sometimes unreadable online version is available here.

It may not matter with your current problem, but for the correct ECU diagram you need to know if you engine has EGR or not, and if the fuel filter is a metal canister type, or a UFI model, (so called green). My green filter is all black.

I think that the following pdf attachements from my library should help, but I have assumed no EGR with UFI filter, the same as my vehicle.
 

Attachments

  • eLearn E5050-1b Engine Management UFI Filter.pdf
    152.1 KB · Views: 93
  • Fiat Wiring Colour Codes.pdf
    70.1 KB · Views: 68
In addition in my previous post, I assumed engine size to be 2.8 ltrs.

Also D001A is the "Front / Dasboard Coupling" somewhere behind the LH cab fusepanel, and D004A is the "Front/Engine Coupling" which is to be found under the Engine Bay fuse/relay panel. I am also attaching my corrected version of the eLearn ECU pin numbering.
 

Attachments

  • Ducato 2.8 JTD ECU Pinout.pdf
    116.3 KB · Views: 50
In addition in my previous post, I assumed engine size to be 2.8 ltrs.

Also D001A is the "Front / Dasboard Coupling" somewhere behind the LH cab fusepanel, and D004A is the "Front/Engine Coupling" which is to be found under the Engine Bay fuse/relay panel. I am also attaching my corrected version of the eLearn ECU pin numbering.
That is super useful Communicator (how apt!) - mine is actually the 2.0 engine - currently running NA as the turbo doesn't seem to cut in.

Your wiring diagram is brilliant thanks. It seems I need to trace a black and red wire through the system to see how far the signal gets. Sounds easy enough once I've located all the junctions. Your description will help enormously so I'll head to the drive fully optimistic. I'll let you know how I get on.

I did actually buy the eLearn dvd although the only wiring diagram I found so far is nowhere near as clear as yours.
 
Once again I will quote forum member @Ocwobio. "Using eLearn is like peeling layers off an onion."

Are you following the correct "layers"? After selecting the language, engine type, and opening the home page, follow the path, Electrical Functions - Engine - Engine Control and Management Systems. For the next selection you need to know fuel filter type/make. Next make the appropriate selection, followed by xxxxxxx Wiring Diagram. Expand the resulting image to full screen width. By scrolling down below the diagram and clicking on the various connectors, you can see the wire size, colour, and destination for each pin.

If you follow the alternative path: Descriptions - Engine - Fuel System, and scroll down there is some interesting information relating to varios sensors etc. However the circuit diagrams in this area are of poor quality. Perhaps these are what you have found?
 
I think it was the poor quality ones I found initially. Having found all of the connectors, I can't find a black wire with a red trace so I was stymied at the first fence. I have a lot to learn about vehicle electrics - maybe the first lesson should be to send it to a professional! How do I know which fuel filter I have? Mine is silver/grey and has MecaF visible - maybe more round the back.
 
I think I'm at the end of my road now on electrical expertise. I've traced the connectors from instruments through to the ECU. I don't have the knowledge or equipment to probe the sockets - I just checked that all the pins/sockets seemed to be straight and clean and that none of the wires were loose/cut/disturbed. I guess the next thing is to run continuity from one end to the other - although I can't seem to find a black with red trace wire (would you agree that's what the circuit diagram indicates?) I'm also assuming that this circuit is an earth only, the power coming from the blue/black wire fed via the ignition? Is it possible to feed the cluster directly to see if the LED is functioning? I guess that would be relatively simple for someone with the correct pin ID's and appropriate probes?
 
Hi,
I prepared this post in reply to your post #6 above, but due to a distraction forgot to send it. Still seems relevant so will add a bit more, and then send.

Sorry about the filter confusion. What you describe sounds like the metal cannister type, further I am not sure when the UFI filter was introduced, but all the mentions of a green filter have confused me in the past.

As regards wire colours, it may be worth looking for a red wire with a black trace instead. Worse some forum members have reported finding completely different colours used in other areas.

A few years ago, I fitted DRLs into the foglamp spaces on my PVC, using the existing foglamp wiring and relay. I needed to make some mods to connector D104A. There were more wires connected than expected but a sequential list of wire colours matched part of the connector and gave confidence.

While writing, if you need to go that far, the ECU is usually located inside the LH wing, near the air filter.

Addendum.

The wire in question is shown as NR i.e, black with a red trace, but see above. For testing I have recently bought some needle probes from Ebay. First set were not good, and one failed during first testing session. Second pair are better. For testing, if you are using a multimeter, I recommend using the diode test function. In answer to your later question the LEDs are illuminated when the ECU output is connected to earth., so with diode test selected connect the red lead to a suitable positive, and probe with the black lead. This is prbably safer than using an earth connection for testing.

The wire that you are trying to find will be 0.35mm csa, somtimes the trace colour is only a narrow stripe, and not easy to see. I am attaching my copy of eLearn E5050 wiring diagram appropriate to vehicles with cannister type fuel filter. While selected for a 2.8JTD, I think that it will be OK for your vehicle in the area under investigation.
 
Thanks Communicator - neighbours Mini clutch hydraulics sorted now so back to the job in hand...

Needle probes arrive tomorrow, thank you Mr Bezos. Never used the diode test function but your description is clear - I'll hit some YouTube in the meantime. I'll let you know how I get on.
 
Well - who'd have believed it?

I decided to take the brave pill and adopt a strategy of running an earth continuity check on any of the wires that had either red or black in them on the instrument cluster multi-plugs. I got tone (as Tom Cruise may once have said) for 10 seconds after ignition on the third pin I tried after which the tone stopped. Promising I thought.

I then failed the EML by disconnecting the turbo solenoid, OBD scan confirmed EML should be on so I redid the test. This time, continuous tone!

I can't say how chuffed that made me feel.

I'm pretty sure that the cluster LED has failed - the circuit board seems pretty much impenetrable without risking serious damage to the bits that still work so I'll hopefully pick up a spare on Monday. Assuming that all works, I'll pull the old one apart and see how/why the LED has conveniently failed.

Rest of the afternoon will be spent tucking all the engine wiring back where it came from.

It wouldn't have been possible without the circuit diagram and the hints you provided so sincere thanks again. I'll post a piccy when it's all fixed.

Cheers.
 
Hi,
There is a firm called Cartronics who repair faulty instrument panels. Perhaps it would be worth using there services?

You mentioned the turbo solenoid. This raises a mystery, as it obviously exists, and is mentioned in eLearn under descriptions - engine - fuel system. However it does not appear onwhat should the appropriate version of diagram E5050 of which I am attaching a copy on two files. Is eLearn linking to the wrong file?
 

Attachments

  • eLearn E5050-1 2.0JTD.pdf
    96.2 KB · Views: 50
  • eLearn E5050-2 2.0JTD.pdf
    66.9 KB · Views: 51
I think I've found a reasonably priced second hand unit that I'm hoping to collect on Monday - if that doesn't happen, I'll check out the repair option - although I'm impatient to use our new van as you might imagine and the instrument cluster is in my kitchen currently.

There are two solenoids on the bulkhead - both look very similar. The one on the right was brand new but disconnected for some reason - that's what triggered the EML. The blue (looks new?) connector wasn't plugged in. The two pin connector looks like its been unused for a long time - I'll check against the wiring diagram and see what it might be for. The two wires without a connector look to belong to the emission valve also in shot. I suspect they'll not cause me a problem but I'll fix in due course.

The vacuum pipes on the LH solenoid suggest they might be connected the wrong way round - the white banded pipe is not connected to the white marked connection - another one for another day.

I suspect this purchase will keep me out of mischief for a while to come yet!
 

Attachments

  • Screenshot 2022-08-21 at 09.43.49.png
    Screenshot 2022-08-21 at 09.43.49.png
    6.7 MB · Views: 39
  • Screenshot 2022-08-21 at 09.20.08.png
    Screenshot 2022-08-21 at 09.20.08.png
    5.6 MB · Views: 40
You may find mysterious loose connectors dangling in the engine bay, or elsewhere. These may be for optional accessories e.g. oil level, and coolant level.
 
So. Fast forward to today and a replacement instrument cluster has been sourced and fitted. The good news is that the diagnosis was spot on, the EML now performs exactly as it should do. The bad news is that the new cluster has carried with it the donor vehicle mileage of 263,000 miles! I would have thought that that data would have been held on the ECU - clearly not.

Back to the drawing board then - seems like getting the old one mended might be the best solution after all.
 
So the final chapter in this one. I took my original instrument cluster to an electronics specialist who took rather less than 5 minutes to restore the instrument to full functionality. He simply removed the ½ square piece of black insulation tape from in between the LED and the back of the panel display. I thought vendors who did that sort of thing were consigned to the history books. Not so it seems.
 
Back
Top