6109D921-FFB3-4B52-BEFF-BE5E028CA51A.jpg

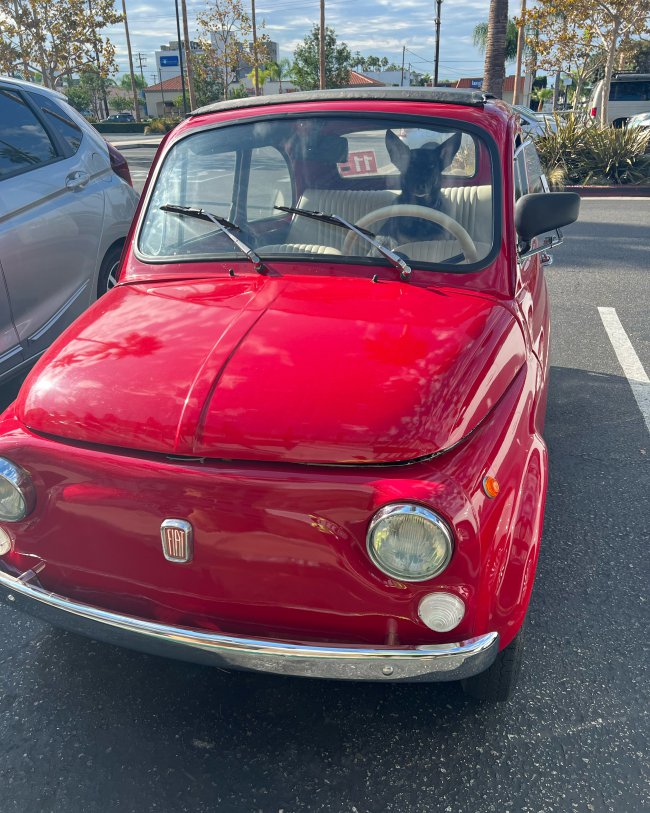
500 (Classic) Ducati powered Fiat from California

I have taken on the crazy task of trying to stuff a Ducati 1100 air cooled L-Twin engine in the back of my 1974 Fiat 500R, and solving all the challenges that will arise because of it!

Introduction

Hello everyone! As the title suggests, I have decided to build a Ducati powered Fiat 500!

I have restored a couple classic American cars, some motorcycles, and have designed and built a handful of Formula SAE cars in college, but I've always wanted to build my own motorcycle powered road car.

After a decade of working at one of the largest Spacecraft companies in California, I decided to take a break and try to make this dream a reality. The car needed to be simple, lightweight, relatively cheap, and older than 1975 (California smog requirements). I have a buddy that did this with an old Honda S600, and another with a Fiat 850 spider, but I wanted to do something a bit less roadster-y. Then, as the wife and I were honeymooning in Italy, I saw the answer: the old Cinquecento.

There seems to be lots of motorcycle powered 500s for hill climbing, and Z-Cars is one of the most popular swaps out there with their Suzuki Hayabusa swapped "Fiabusa" (they also make a Subaru swapped "Fubaru"), but I wanted to keep the motor air cooled (no big radiator up front) and Italian. After a bit of research, I decided to go with my favorite motorcycle engine, a Ducati 1100. The last of the big, air cooled, dry clutch L-Twins. How hilariously adorable would this car be with that noise coming out of it?

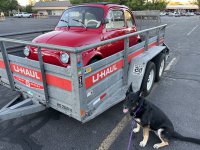
I spent a few months looking for the perfect car - something that was driveable, in decent shape, but not too nice, so I could save money up front and put it toward the swap. I ended up with a clean-ish 1974 Fiat 500 R with about 26,000 km on the clock that had been imported into the states a few years prior. The body was in pretty good shape until a strap broke towing it home resulting in a head on collision with the trailer. I minimally repaired the damaged area so I could turn the wheels full lock again, then drove it around a few months until I got the car registered.

Now that the car is legal, it's time to begin the project!

I'm looking forward to sharing the progress and hearing everyone's thoughts on the build. I have reached out to a few people individually and everyone has been extremely nice and very helpful!
  • Like
Reactions: ben
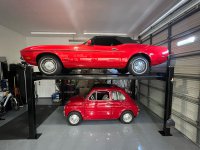
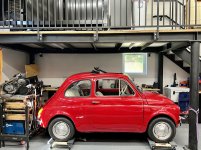
Before I started teardown, I needed to make a cart for the car. This would allow me to move the body around the garage and elevate the car enough to work under. However, I couldn't go too tall, or I wouldn't be able to get the car under the mezzanine. After a few measurements, I ordered some Amazon bits, picked up some steel, and whipped up this little guy.

IMG_2772.jpeg


I measured corner-weights with and without me so I would have a good baseline for the project and something to keep in mind as I was adding and removing components. Then it was time to lift the car onto the cart, which totally was not sketchy or scary at all.

IMG_2785.jpeg


IMG_2787.jpeg
IMG_2793.jpeg


With Francesca on her new set of legs, it was time to remove the engine and suspension

IMG_2805.jpeg
IMG_2883.jpeg


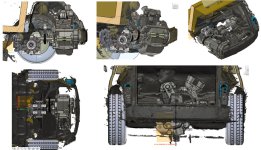
With all the major components out of the way, I had a buddy come over to 3D scan the engine compartment so I could start trying to figure out how I would package the motor.

Screen Shot 2022-11-15 at 4.27.06 PM.png
Screen Shot 2022-11-15 at 4.26.05 PM.png


Now the design work can begin!

Screen Shot 2022-11-15 at 4.31.20 PM.png

Attachments

  • IMG_9995.jpeg
    IMG_9995.jpeg
    429.2 KB · Views: 104
Ok. Right. Got you. What an insane project. Love it! Will be following with interest.

I suppose my first thought is the Duke's engine weight. Comparable to the existing engine?
The power output will mean a lot of upgrades to the suspension, chassis, brakes, wheels, tyres. What are your options and opinion on these?

My best
Rob
Thanks Rob!

It's actually going to weigh pretty close to the original weight. I put the original engine and trans on a scale (with fluids) and it came out to around 214 lbs. Very impressed with how little this package weighs!

IMG_2938.jpeg


The Ducati motor should be about 140 lbs and the diff is around 65 lbs, so pretty close to the original. I'm sure it'll be a bit heavier when I add in electronics and a sub frame. Sorry for all the American units!

Since this is more of a fun autocross and canyon carving car and less of a dedicated track car, I'm not planning to go super crazy on the chassis side. Yokohama 165s all around on some Minilites. Current plan for the front is to do the standard suite of upgrades: disc brakes, A-Arms, coil overs, and rack and pinion steering. For the rear, the suspension will be a custom a-arm design with custom uprights. I'd like to keep the same hubs and drum brakes for now, until I get it driving and see if they need upgrading. It sounds like people are able to put lots of power through these things, so long as they get rid of the rubber flex joint. I was looking to upgrade with tripod kit, but if I need to, I can use my buddy's 850 spider hub (should be similar torque output with this 1st gear and final drives). Axles will be custom to match my diff and the outboard tripods.

Very interested to hear what you guys think on all this and if there's anything I should watch out for!
 
I'm definitely going to keep an eye on this build. Looks like its gonna be an absolute little rocket of a 500.

If you need any info about the tripod joints, i have a set on my 500, not fully installed. I can take photos and measurements if needed.
Along with the front wishbone/big brake setup. There are different options (kits), but they all have about the same adjustability.
Along with the tips to make the front rack and pinion work. Tom (the hobbler), might chime in, he has some documents regarding the front rack kit. I can also email them to you if you want.

Also, do you plan to go widebody at all?


I have a Kawasaki ninja zx-9r 900 engine sitting in the corner of the shop for a rainy day, no doubt the ideal of it in the 500 crossed my mind.
 
Last edited:
I'm definitely going to keep an eye on this build. Looks like its gonna be an absolute little rocket of a 500.

If you need any info about the tripod joints, i have a set on my 500, not fully installed. I can take photos and measurements if needed.
Along with the front wishbone/big brake setup. There are different options (kits), but they all have about the same adjustability.
Along with the tips to make the front rack and pinion work. Tom (the hobbler), might chime in, he has some documents regarding the front rack kit. I can also email them to you if you want.

Also, do you plan to go widebody at all?


I have a Kawasaki ninja zx-9r 900 engine sitting in the corner of the shop for a rainy day, no doubt the ideal of it in the 500 crossed my mind.
I am in the process of writing to Bobby about the fitment of R+P steering, along with a pile of photos showing the parts required and a description of how they go together. As Jacques will confirm, the rack-mounting bracket I supplied to him is just about the simplest, and easiest, way of mounting the rack. With regard to fitting front wish-bone and 'coil-over' suspension, I have been able to purchase a VERY well UK made cross-member unit along, with a lot of help from GAZ coil-overs.
 
Happy to hear people are interested in the project! I was afraid of being shunned for this!

Thanks @Bounding Bambino. I have been closely watching the evolution of your build, so I very much appreciate the details you share! Maybe after you wrap this one up, you can also do a Ninja Bambino ;)

I have been using Mr. Fiat for parts since they're based in the States and I can get things pretty quick, but the website is not very descriptive. They offer this brake kit which I do like since it includes rebuilt spindles, but unknown if this changes the track width. The Axel Gerstl kit you reference is pretty sweet looking, especially if I want to run 10 inch wheels in the future but I'd still need to rebuild my hubs. Did you end up running their dual circuit master cylinder?

Tom has been super helpful in sending over info! It sounds like there is a good solution for the steering rack and the bracket, but now I need to piece together the column parts. I'll start digging into that over the next couple weeks after I finish tearing out the interior and pedal assembly.

Also, regarding steering, it sounds like there is some nasty bump steer that people solve with this bracket for relocating pickup points. Is that still needed with the new rack conversion?

I'm going to take some measurements before I order a coil over kit, but it would be helpful to figure out what your final A-Arms lengths ended up being. I might play around with different pickup points, but I'll likely just look for an off the shelf solution, so I can spend more time to play with the motor! When I get closer to that point of the project, I'll definitely reach out!

No current plans for a wide body, I just want to get the new engine installed and get the car driving. I do like the idea of a totally stock appearing car that emits the noise of something much wilder. After I get it running, I'm sure I'll want to change some things - so that's when I'll reevaluate what to do with the body.

Thanks again for all the interest!

-Bobby
 
This post contains affiliate links which may earn a commission at no additional cost to you.
Happy to hear people are interested in the project! I was afraid of being shunned for this!

Thanks @Bounding Bambino. I have been closely watching the evolution of your build, so I very much appreciate the details you share! Maybe after you wrap this one up, you can also do a Ninja Bambino ;)

I have been using Mr. Fiat for parts since they're based in the States and I can get things pretty quick, but the website is not very descriptive. They offer this brake kit which I do like since it includes rebuilt spindles, but unknown if this changes the track width. The Axel Gerstl kit you reference is pretty sweet looking, especially if I want to run 10 inch wheels in the future but I'd still need to rebuild my hubs. Did you end up running their dual circuit master cylinder?

Tom has been super helpful in sending over info! It sounds like there is a good solution for the steering rack and the bracket, but now I need to piece together the column parts. I'll start digging into that over the next couple weeks after I finish tearing out the interior and pedal assembly.

Also, regarding steering, it sounds like there is some nasty bump steer that people solve with this bracket for relocating pickup points. Is that still needed with the new rack conversion?

I'm going to take some measurements before I order a coil over kit, but it would be helpful to figure out what your final A-Arms lengths ended up being. I might play around with different pickup points, but I'll likely just look for an off the shelf solution, so I can spend more time to play with the motor! When I get closer to that point of the project, I'll definitely reach out!

No current plans for a wide body, I just want to get the new engine installed and get the car driving. I do like the idea of a totally stock appearing car that emits the noise of something much wilder. After I get it running, I'm sure I'll want to change some things - so that's when I'll reevaluate what to do with the body.

Thanks again for all the interest!

-Bobby
Morning Bobby----the front-hub/disc kit that "Mr Fiat" sells ties in with one of the reccomendations in my letter. Fitting a "cross-member/wishbone/coil-over" front suspension will pretty well eliminate "bump-steer" as the wishbones will ensurethat the front hube just go 'up and down'. With the transverse spring set-up (as original) as the car rises and falls at the front, the effective length of the spring changes----result, bump-steer. I have included the article that I wrote regarding the fitment of a cross-member and coil-overs in my letter to you. The pick-up points for the wish-bones need to be pretty well in line with the studs that secure the cross-member (and transvers spring) to the body
 
This post contains affiliate links which may earn a commission at no additional cost to you.
Happy to hear people are interested in the project! I was afraid of being shunned for this!

Thanks @Bounding Bambino. I have been closely watching the evolution of your build, so I very much appreciate the details you share! Maybe after you wrap this one up, you can also do a Ninja Bambino ;)

I have been using Mr. Fiat for parts since they're based in the States and I can get things pretty quick, but the website is not very descriptive. They offer this brake kit which I do like since it includes rebuilt spindles, but unknown if this changes the track width. The Axel Gerstl kit you reference is pretty sweet looking, especially if I want to run 10 inch wheels in the future but I'd still need to rebuild my hubs. Did you end up running their dual circuit master cylinder?

Tom has been super helpful in sending over info! It sounds like there is a good solution for the steering rack and the bracket, but now I need to piece together the column parts. I'll start digging into that over the next couple weeks after I finish tearing out the interior and pedal assembly.

Also, regarding steering, it sounds like there is some nasty bump steer that people solve with this bracket for relocating pickup points. Is that still needed with the new rack conversion?

I'm going to take some measurements before I order a coil over kit, but it would be helpful to figure out what your final A-Arms lengths ended up being. I might play around with different pickup points, but I'll likely just look for an off the shelf solution, so I can spend more time to play with the motor! When I get closer to that point of the project, I'll definitely reach out!

No current plans for a wide body, I just want to get the new engine installed and get the car driving. I do like the idea of a totally stock appearing car that emits the noise of something much wilder. After I get it running, I'm sure I'll want to change some things - so that's when I'll reevaluate what to do with the body.

Thanks again for all the interest!

-Bobby
That is one of the things i found with the classic 500 guys, we all support each others "visions" for our cars even if its not something that we individualy would do. Its the one car group that i found who seems to be the most accommodating to those of us who like to veer from stock, and a massive wealth of info and tips/tricks on here to help keep them going. A stock 500 is an experience none the less, but a modded one is also a whole new experience.

The ninja bambino would be a perfect fit. Trust me there will be more then one 500 in the stable as time goes on; they are so small and take up almost next to no space, so its a given to have more then one lol. Next one has to be a more "race" inspired, widebody, rollcage car. There is one locally i have kept my eye on, needs some serious work, but would be the perfect platform/blank canvas for my vision of the build, without having to go down the path of a full resto like my current one.


One thing to note about that brake kit is its expecting that your going to be running 126 bolt pattern wheels. Adapters do exists but i don't know how the stack up would be when trying to refit the larger 500 bolt pattern rims, If you are still planning to run stock rims. If not, the sky's the limit.
I will say that the offset on the axel-gerstl ones is nearly not even a question. Yes as you can see i had to modify the lower a-arms on the suspension kit i got, but it wasn't because of the brake kit at all, the offset from stock is negligible on that specific kit. Again im going for the sleeper look on that build.

Yes i am using a double brake master cyl, but not exactly that kit, i was able to massage it into the stock position. Absoulety nothing wrong with the design and engieering of the 90 degree adaptor setup, i just perfer to keep as much mechanical seperation between pedal actuation and master cyl to a minimum.

In regards to the a-arm length, if you need that i can measure. I still have to do all the suspension adjustments, so it will inevitably change once i get the geometry all setup. One thing i should of measured was the spring eye to eye dimension before removing it from the car, that would of help get a base setup done quicker.

Looking forward to your build (y)

I also checked out the 850 spider build from your friend JNH classics, interesting setup there, seems to be alot of new products out there suited to motorcycle swap builds, liking that reversing gearbox. I will definitely watch the rest of his vids.
Also, been a big fan of SuperfastMatt and his builds, been a long time subscriber of his content. Recongized his logo from the shirt in your photo. lol
 
Last edited:
This post contains affiliate links which may earn a commission at no additional cost to you.
That is one of the things i found with the classic 500 guys, we all support each others "visions" for our cars even if its not something that we individualy would do. Its the one car group that i found who seems to be the most accommodating to those of us who like to veer from stock, and a massive wealth of info and tips/tricks on here to help keep them going. A stock 500 is an experience none the less, but a modded one is also a whole new experience.

The ninja bambino would be a perfect fit. Trust me there will be more then one 500 in the stable as time goes on; they are so small and take up almost next to no space, so its a given to have more then one lol. Next one has to be a more "race" inspired, widebody, rollcage car. There is one locally i have kept my eye on, needs some serious work, but would be the perfect platform/blank canvas for my vision of the build, without having to go down the path of a full resto like my current one.


One thing to note about that brake kit is its expecting that your going to be running 126 bolt pattern wheels. Adapters do exists but i don't know how the stack up would be when trying to refit the larger 500 bolt pattern rims, If you are still planning to run stock rims. If not, the sky's the limit.
I will say that the offset on the axel-gerstl ones is nearly not even a question. Yes as you can see i had to modify the lower a-arms on the suspension kit i got, but it wasn't because of the brake kit at all, the offset from stock is negligible on that specific kit. Again im going for the sleeper look on that build.

Yes i am using a double brake master cyl, but not exactly that kit, i was able to massage it into the stock position. Absoulety nothing wrong with the design and engieering of the 90 degree adaptor setup, i just perfer to keep as much mechanical seperation between pedal actuation and master cyl to a minimum.

In regards to the a-arm length, if you need that i can measure. I still have to do all the suspension adjustments, so it will inevitably change once i get the geometry all setup. One thing i should of measured was the spring eye to eye dimension before removing it from the car, that would of help get a base setup done quicker.

Looking forward to your build (y)

I also checked out the 850 spider build from your friend JNH classics, interesting setup there, seems to be alot of new products out there suited to motorcycle swap builds, liking that reversing gearbox. I will definitely watch the rest of his vids.
Also, been a big fan of SuperfastMatt and his builds, been a long time subscriber of his content. Recongized his logo from the shirt in your photo. lol
Hi Bobby, Yes I would consider the fitting of the 'Tripod' kit a must with your build. Am Very interested regarding the Diff/Gearbox/Final drive affair you plan to use and the method of transferring drive from the engine? I also hope that you plan to fit and use some sort of sump guard if you are going off-road??
Ian.
 
I am in UK with a 500 and was thinking of doing something similar but using a water cooled motorcycle engine.
I already have fitted disc brakes at the front (fiat 124} and rack and pinion steering off the same using brackets purchased. How are you going to cool the engine? I presume you are using existing gearbox and making a sandwich plate. Anyway I will watch with interest. Bryan
 
Thanks All!

@the hobbler Good to know on Mr. Fiat’s Brake kit is reasonable and that the bump steer problem should go away with a lower control arm. I’m looking at this kit from them, though I may end up changing springs and shocks later.

Can you guys share any pics of how you’ve supported the coil overs where they mount to the wheel well?

@Bounding Bambino I do plan on running these wheels, so moving to the 4x98 pattern. Agree that less joints in braking system is always preferred. What cylinder did you go with? Mr. Fiat has this guy, but I may want to go with something much larger to reduce pedal effort. I also need to figure something out for the clutch (bike motor is hydraulic) so custom pedals may be in my future anyways.

I will do a more thorough update on the engine/gearbox plan in a few days, so hopefully that helps answer some of the questions!
The cross-member and lower wish-bone kit from"Mr Fiat" LOOKS OK---as I said, the cross-member kit that I have on my car uses olive-joints with 12mm threaded sections---most kits use much smaller olive-joints. The wheel, a common "Minilite" pattern, look fine---interesting that you are sticking to 12in wheels; i have 13 x 5in wheels on my car. As for the "Servo" master-cylinder, be VERY careful. A colleague and I ordered 4 of these (from an Italian supplier)---we had a LOT of trouble making them work properly. I was lucky in that mine has given me no trouble, BUT only after we had gently honed out the interior bore and substituted the original seals with (I seem to remember) Volvo seals. My colleague who had required the other 3 master cylinders eventually got just one working, and had to throw the other 2 away---an expensive excercise! I even found, and wrote to, the original maker of the cylinders (in Italy) but got no respones at all, not even a courtesy acknowledgement---and I had written the letter in Italian (with the help of an Italian friend). My advice would ask Jacques (aka Bounding Bambino) how he has fitted a (124?) "twin circuit" master cylinder 'in line' and do the same.
 
My advice would ask Jacques (aka Bounding Bambino) how he has fitted a (124?) "twin circuit" master cylinder 'in line' and do the same.
I had to go thru my orders to see where and what i had ordered. Heres the info.

I got it from Rockauto. Its a master cylinder for a fiat 128 1.1L. (1971)
Raybestos MC39046, which ended being a FAG brand master cylinder (a common brand i have seen frequently in the oem world). Raybestos sometimes puts rebranded product in their boxes, not a concern. This was a made in Italy part.
This specific p/n already comes with the 90 degree barbed reservoir feeds which will allow you to use a twin (126) master cyl reservoir which has dual hose feeds.

The fiat 124 of the same year, has a nearly identical design (different p/n likely a different bore diameter). which could also be a option if you are planning to tune brake feel (obviously smaller master cyl bore - more pedal travel, but more force). For now im sticking with the 128 setup

When i ordered mine, RA did not have the other cheaper compatable options shown under that vehicle category which also show the plastic feed barbs (just not installed). which is also a option. Trying to find those barbs separately wasn't easy here in NA when i was out hunting.

One thing to note. On the original car, the brake light pressure switch is attached to the end cap on the master cylinder measuring brake feed pressure on the front wheel feed pistion. You will not be able to use or fit this switch onto the master cyl (it will hit the front trunk pan/spare tire). You will need to do a mechanical on/off switch internal to the pedal. Tom had a great photo he sent me showing this. I cant seem to find it right now. I am currently about to make the bracket for this switch. nothing fancy, but its actuated near the pedal pivot.


Some other P/N's to possibly cross reference by:
MC39046
383004
13004200
35507002
0720383

MC39046.jpg
MC39046_ANG__ra_p.jpg
MC39046_SID__ra_p.jpg
IMG_8131.JPG
 
Last edited:
I had to go thru my orders to see where and what i had ordered. Heres the info.

I got it from Rockauto. Its a master cylinder for a fiat 128 1.1L. (1971)
Raybestos MC39046, which ended being a FAG brand master cylinder (a common brand i have seen frequently in the oem world). Raybestos sometimes puts rebranded product in their boxes, not a concern. This was a made in Italy part.
This specific p/n already comes with the 90 degree barbed reservoir feeds which will allow you to use a twin (126) master cyl reservoir which has dual hose feeds.

The fiat 124 of the same year, has a nearly identical design (different p/n likely a different bore diameter). which could also be a option if you are planning to tune brake feel (obviously smaller master cyl bore - more pedal travel, but more force). For now im sticking with the 128 setup

When i ordered mine, RA did not have the other cheaper compatable options shown under that vehicle category which also show the plastic feed barbs (just not installed). which is also a option. Trying to find those barbs separately wasn't easy here in NA when i was out hunting.

One thing to note. On the original car, the brake light pressure switch is attached to the end cap on the master cylinder measuring brake feed pressure on the front wheel feed pistion. You will not be able to use or fit this switch onto the master cyl (it will hit the front trunk pan/spare tire). You will need to do a mechanical on/off switch internal to the pedal. Tom had a great photo he sent me showing this. I cant seem to find it right now. I am currently about to make the bracket for this switch. nothing fancy, but its actuated near the pedal pivot.


Some other P/N's to possibly cross reference by:
MC39046
383004
13004200
35507002
0720383

View attachment 415269View attachment 415270View attachment 415271View attachment 415272

Thanks for the info, very helpful! That's a pretty tight squeeze, I may just shamelessly copy what you've done 😉. Using a cylinder from a 124 (or even 850?) is a good idea, but with those cars having different weights and brakes, it may not necessarily be better than a 128's setup.

Do you know if the bore size is the same as the old 500 master cylinder? Also, are you planning to change the rear cylinder size? With my car being an R, I believe I have a 19mm master, 24mm front, and a 16mm rear cylinder, but with front discs, I'm not sure if people have been upsizing the rear cylinders to better balance the overall system. I'll keep digging around the forums to see what people have been doing.

Good notes on the brake switch! I did notice that little guy but didn't think about a solution. We've used pressure switches like this in the past, but a bracket to relocate using the existing switch does seem better. Tom did send me some pics of that and it looks pretty straight forward!
Regarding the bore size, unfortunately no i haven't measured the differences, if there are any yet. Hypothetically speaking though in my situation. Going with the 4 piston fronts, there is a massive increase in the surface area of the front caliper pistons , compared to the much smaller pistons in the original drum shoes. Obviously drums have a different pressure/travel to brake force ratio then a disk and pads. Without calculating though, a larger master cylinder plunger diameter likely wasn't going to be noticeable much in my application.
Rear wise though, yes i kept the original drums to help somewhat keep braking balance more towards the front on a car proportioned like the 500; short wheelbase, back heavy, want to avoid locking rear wheels under panic braking.

Going by the recommendations of the front disk kit, i went with the 16mm rear drum cylinders. which is smaller then the standard 19mm from the factory on the F/L. In reality i bought a bunch of pairs of the drum cylinders in different bore diameters in case i need to swap to get a better balance. Or ill just put in a proportioning valve inline. The cylinders are like 6-7€ each so keeping a few on hand to test wasn't going to break the bank, and its not even worth rebuilding the crusty originals. I believe your R already has the 16mm rear drum cylinders. But, keeping them or changing them will depend on what the company says for your front disk choice, and obviously testing to your preferences.

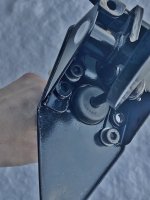
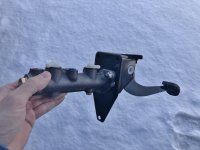
Here is some photos of the pedal assembly (clutch pedal removed as it needs to get slightly modified in my case to clear the new steering rack joint).
You can see where the original master cyl bolted (horizontal studs drilled out), and the new offset bolts. Simple mod. However the "firewall" opening had to be opened up slightly to clear the offset mounting bolts. The bolt pattern is also slightly larger then the original cyl, so even if you were ok with mounting the cyl at an angle, it still wouldn't of fit.


Also, yea its a tight squeeze between the end and the front trunk sheetmetal. If its too tight, its nothing that a large 1/2 socket extension and a slight tap from a slege wont fix to "massage" clearance into that spot. Its all behind the spare tire. lol
 

Attachments

  • brake1.jpeg
    brake1.jpeg
    880.2 KB · Views: 57
  • brake2.jpeg
    brake2.jpeg
    775.6 KB · Views: 52
Last edited:
Regarding the bore size, unfortunately no i haven't measured the differences, if there are any yet. Hypothetically speaking though in my situation. Going with the 4 piston fronts, there is a massive increase in the surface area of the front caliper pistons , compared to the much smaller pistons in the original drum shoes. Obviously drums have a different pressure/travel to brake force ratio then a disk and pads. Without calculating though, a larger master cylinder plunger diameter likely wasn't going to be noticeable much in my application.
Rear wise though, yes i kept the original drums to help somewhat keep braking balance more towards the front on a car proportioned like the 500; short wheelbase, back heavy, want to avoid locking rear wheels under panic braking.

Going by the recommendations of the front disk kit, i went with the 16mm rear drum cylinders. which is smaller then the standard 19mm from the factory on the F/L. In reality i bought a bunch of pairs of the drum cylinders in different bore diameters in case i need to swap to get a better balance. Or ill just put in a proportioning valve inline. The cylinders are like 6-7€ each so keeping a few on hand to test wasn't going to break the bank, and its not even worth rebuilding the crusty originals. I believe your R already has the 16mm rear drum cylinders. But, keeping them or changing them will depend on what the company says for your front disk choice, and obviously testing to your preferences.

Here is some photos of the pedal assembly (clutch pedal removed as it needs to get slightly modified in my case to clear the new steering rack joint).
You can see where the original master cyl bolted (horizontal studs drilled out), and the new offset bolts. Simple mod. However the "firewall" opening had to be opened up slightly to clear the offset mounting bolts. The bolt pattern is also slightly larger then the original cyl, so even if you were ok with mounting the cyl at an angle, it still wouldn't of fit.


Also, yea its a tight squeeze between the end and the front trunk sheetmetal. If its too tight, its nothing that a large 1/2 socket extension and a slight tap from a slege wont fix to "massage" clearance into that spot. Its all behind the spare tire. lol
That's true, you do have a completely different front brake setup with much more area. I had considered throwing a proportioning valve on anyways, but that's a fairly easy thing to add after I get her running.

Thanks for the pictures! My front trunk sheetmetal will not mind a little bit of love to fit a different master cylinder. I can't wait to start digging into this thing more, but I've been on donor bike duties, trying to make sure it's in top shape before the heart transplant operation!
 
Back
Top