Introduction
Good as the 500 is in many ways, it lacks a basic coating of sound insulation (that benefits the higher specification Pandas) and so is extremely noisy, particularly in diesel form. I've been steadily adding sound insulation throughout the car, the doors being my latest effort.
What Can Be Improved
There are four main areas to improve:
How Much Difference Will It Make?
The absolute sound level depends on road surface material and state of repair, speed, engine speed, tyres, tyre pressure, temperature, suspension setup, exhaust and more besides. Sound is measured in decibels (dB), and of most interest for this article is dB(A), which measures noise in general except very low frequencies, which any car will always generate a lot of due to the bodywork flexing.
Insulating the doors reduces road noise both from the 500 and other road users. Driving with the door cards removed makes clear how much noise comes in through the doors - I had a reading of 80dB(A) on one section of road at 40 mph (and quite a headache after an hour in the car).
For cars without the Interscope, the front speakers are the main source of bass. However, because the doors are not (at all) acoustically sealed, bass tones produced by the back of the speakers are reflected into the car, cancelling out the tones produced by the front of the speakers. The result is poor bass and mid-bass output. Insulating the doors helps to reduce the cancellation effect, improving the bass output.
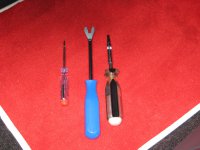
Tools Required
Materials Required
Acoustic Insulation
I tried a few combinations of felt and blocker. One thing I didn't try was the usual approach of dynamatting the entire door, although I have done this on other cars. Firstly, I didn't really want to break the door moisture seal, but secondly in my experience dynamat is not that effective at blocking noise on its own, particularly when covering open spaces like the cut-outs in doors.
Acoustic membrane is a thin (~3mm) flexible material that behaves acoustically like lead of the same weight (a barrier). When applied to a thin panel material, it is effective in reducing transmission of a broad frequency range - exactly what we're looking for.
By placing a felt (absorber) layer between the sound source and the barrier, the effectiveness of both the absorber and the barrier are greatly improved, since the felt absorbs sound hitting the barrier and then again as it is reflected back by the barrier. This is exactly how all cars combat the majority of road and engine noise (the 500 included), with a felt and barrier material applied to the firewall and front wheel arches under the carpet.
Method
Removing the Door Cards
The door cards are secured with three allen-bolts, 11 plastic push fittings, and a clip running along the top. Removal is straight forward and will only take around 20 minutes.
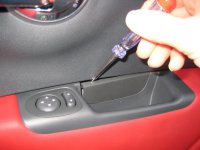
First, remove the cover in the door handle recess.
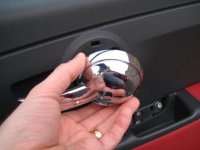
Next remove the door handle cover.
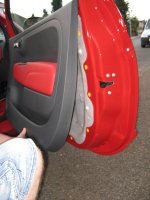
Next remove the three securing bolts. Since the door card is held all along the top (as shown below), it can now be worked from the door without fear of it dropping off altogether.
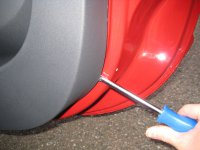
Using a panel removing tool, start from the bottom corner on the rear of the door (opposite end to the speaker).
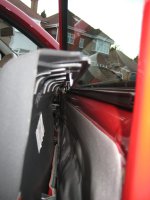
Once the card is free, it can with lifted up from the clip along the top. Winding the window down makes this easier.
Once free, the door handle cable (and on the drivers side, the mirror controls) needs to be removed.
Pop out the cable...
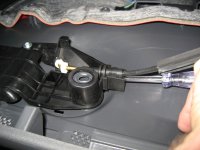
...and twist off the clip, and remove the cable:
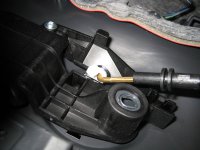
Use a screwdriver to release the clip on the mirror cable:
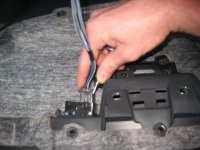
Applying the Barrier Layer
Lay the door card on a soft surface (some towels perhaps) to prevent scratching.
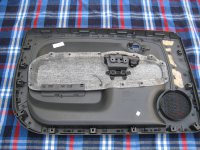
The door handle mechanism needs to be removed, which is just three screws. The panel should then be dusted off and application can commence.
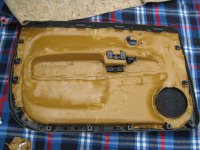
Cut the sheet a little larger than the card on account of the contours in it, about 80cm x 100cm. Next, starting from the top, start peeling back the backing and working the mebrane onto the door card. Cut the membrane around the plastic clip mounts and work into and around contours to achieve as much contact area as possible.
For the deep recesses, cuts will be required. Either work into the recesses and cut along the resulting contours, or pull over them, cut across and fill in with more membrane.
Cut around the speaker cutout closely, working up onto the guide if desired.
Cut the panel mount points and door handle as shown.
Applying the Absorber (Felt) Layer
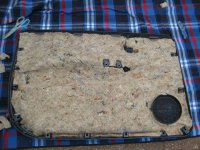
The felt layer is simply cut over the membrane and tucked in at the bottom. The membrane I used was quite tacky and so held it in place, otherwise some PVA might be used to hold it.
Cut around the panel mounts, door handle and speaker as before.
Refitting Procedure
Refitting is exactly the reverse of the removal procedure.
Having the barrier and the felt on the door card will hold the door card away from the door slighly at the bottom, but there is enough give in them, and enough strength in the plastic push clips, to hold them well back.
Be careful not to overtighten the screws, they only need to be lightly tightened. I decided to fit some larger washers as the factory washers barely covered the holes and the door was now about 4 kg heavier.
Good as the 500 is in many ways, it lacks a basic coating of sound insulation (that benefits the higher specification Pandas) and so is extremely noisy, particularly in diesel form. I've been steadily adding sound insulation throughout the car, the doors being my latest effort.
What Can Be Improved
There are four main areas to improve:
- The doors, covered here, which reduces transmission of noise from other vehicles and improves the sound systems bass output (where a sub-woofer is not fitted);
- The floor pan and fire wall, the subject of another article, which reduces road noise from the front wheels, engine noise and exhaust noise;
- The roof, which I have not considered since headlining is difficult to remove and very easily damaged, and in any case wind noise is barely audible due to the levels of other noise sources; and
- The rear section of the car, considered in another article seperately but is logical to do whilst the car is dismantled, including the rear quarters, boot, and under the rear seats.
How Much Difference Will It Make?
The absolute sound level depends on road surface material and state of repair, speed, engine speed, tyres, tyre pressure, temperature, suspension setup, exhaust and more besides. Sound is measured in decibels (dB), and of most interest for this article is dB(A), which measures noise in general except very low frequencies, which any car will always generate a lot of due to the bodywork flexing.
Insulating the doors reduces road noise both from the 500 and other road users. Driving with the door cards removed makes clear how much noise comes in through the doors - I had a reading of 80dB(A) on one section of road at 40 mph (and quite a headache after an hour in the car).
For cars without the Interscope, the front speakers are the main source of bass. However, because the doors are not (at all) acoustically sealed, bass tones produced by the back of the speakers are reflected into the car, cancelling out the tones produced by the front of the speakers. The result is poor bass and mid-bass output. Insulating the doors helps to reduce the cancellation effect, improving the bass output.
Tools Required

- Panel removing tool
- Allen key
- Sharp scissors
- Stanley knife
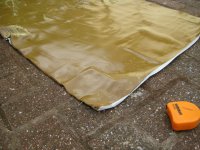
Materials Required
- 8mm felt underlay - around 0.8 sq.m per door
- 5kg per sq.m self-adhesive flexible acoustic membrane (i.e. Tecsound TS50) - around 0.8 sq.m per door

Acoustic Insulation
I tried a few combinations of felt and blocker. One thing I didn't try was the usual approach of dynamatting the entire door, although I have done this on other cars. Firstly, I didn't really want to break the door moisture seal, but secondly in my experience dynamat is not that effective at blocking noise on its own, particularly when covering open spaces like the cut-outs in doors.
Acoustic membrane is a thin (~3mm) flexible material that behaves acoustically like lead of the same weight (a barrier). When applied to a thin panel material, it is effective in reducing transmission of a broad frequency range - exactly what we're looking for.
By placing a felt (absorber) layer between the sound source and the barrier, the effectiveness of both the absorber and the barrier are greatly improved, since the felt absorbs sound hitting the barrier and then again as it is reflected back by the barrier. This is exactly how all cars combat the majority of road and engine noise (the 500 included), with a felt and barrier material applied to the firewall and front wheel arches under the carpet.
Method
Removing the Door Cards
The door cards are secured with three allen-bolts, 11 plastic push fittings, and a clip running along the top. Removal is straight forward and will only take around 20 minutes.
First, remove the cover in the door handle recess.

Next remove the door handle cover.

Next remove the three securing bolts. Since the door card is held all along the top (as shown below), it can now be worked from the door without fear of it dropping off altogether.

Using a panel removing tool, start from the bottom corner on the rear of the door (opposite end to the speaker).

Once the card is free, it can with lifted up from the clip along the top. Winding the window down makes this easier.

Once free, the door handle cable (and on the drivers side, the mirror controls) needs to be removed.
Pop out the cable...

...and twist off the clip, and remove the cable:

Use a screwdriver to release the clip on the mirror cable:

Applying the Barrier Layer
Lay the door card on a soft surface (some towels perhaps) to prevent scratching.

The door handle mechanism needs to be removed, which is just three screws. The panel should then be dusted off and application can commence.
Cut the sheet a little larger than the card on account of the contours in it, about 80cm x 100cm. Next, starting from the top, start peeling back the backing and working the mebrane onto the door card. Cut the membrane around the plastic clip mounts and work into and around contours to achieve as much contact area as possible.
For the deep recesses, cuts will be required. Either work into the recesses and cut along the resulting contours, or pull over them, cut across and fill in with more membrane.
Cut around the speaker cutout closely, working up onto the guide if desired.
Cut the panel mount points and door handle as shown.

Applying the Absorber (Felt) Layer
The felt layer is simply cut over the membrane and tucked in at the bottom. The membrane I used was quite tacky and so held it in place, otherwise some PVA might be used to hold it.
Cut around the panel mounts, door handle and speaker as before.

Refitting Procedure
Refitting is exactly the reverse of the removal procedure.
Having the barrier and the felt on the door card will hold the door card away from the door slighly at the bottom, but there is enough give in them, and enough strength in the plastic push clips, to hold them well back.
Be careful not to overtighten the screws, they only need to be lightly tightened. I decided to fit some larger washers as the factory washers barely covered the holes and the door was now about 4 kg heavier.

