- Joined
- Sep 14, 2009
- Messages
- 19,492
- Points
- 3,294
I am (Kingsteignton) but never thought to ask.


Oh! I thought you were up tut North.Paignton. PM if I have anything you need (not money)I am (Kingsteignton) but never thought to ask.
")
Here's how you strip and rebuild a Fiat common rail diesel injector. It's fussy but doable by a competent DIY. Only snag is obtaining replacement parts. I'll replace my No 4 then clean the tips on the set and job done. The top ends can stay untouched.
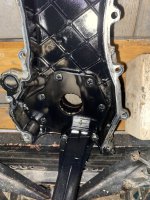
Are you still going to take the bottom end off?The head is now off. The bolts have Torx pattern heads which seemed loose for my T55 so wandered down to Halfords for a T60. That’s actually too big. So the 55 did the job and the T60 has gone back.
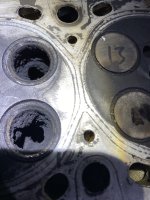
The cylinders still have honing marks on the bores so that’s excellent. #2 has fine witness marks from the valves but nothing to worry about. #3 had a puddle of cellulose thinners and black sludge in the piston bowl and the bore was dry. That’s now cleaned and oiled. I had used thinners to try and loosen the stuck injector.
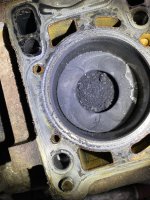
#4 piston had a pile of dry carbon chips in the piston bowl. No surprise that injector was such a struggle. Thank goodness I wasn’t intending to run the engine with that lot in place.
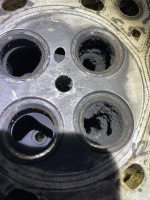
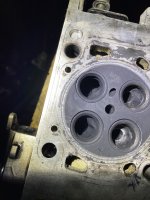
The combustion chambers and valves look clean however only #1 exhausts have that grey look of clean burning.
#4 piston below.
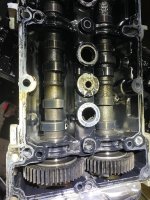
.Not sure if it really works but I always leave hydraulic cam follower/tappets in engine oil so they are ready to pump up to self adjust quicker on first start up.All knowledge is welcome so no worries about eggs.
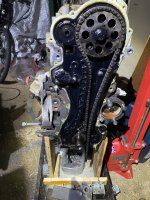
The internals are back but there is absolutely no sludge. The tiny pins I found in the sump (I thought were cam chain) are from the roller cam followers. They were all clearly visible yet there's no other gunk. It looks like three are broken. A magnifying glass examination is needed to check the rest but I'll probably change the set.
I think the bottom end should come off. You are right its daft not to. I don't have a hone but have done it with emery cloth in the past, though that was plain iron cylinders. This might be a more fancy material.
I've now got two sets of valves out. The inlets are coked in soot but it cleans off easily. Exhausts are great. Just need to do the lot and then steal some cotton buds to clean the valve guides (no point until all crud is scraped out). The lumpy port castings annoy my OCD. I want to get going with a porting grinder. It's probably pointless, because valves are small and inlets are same size as exhausts. Fiat have designed the inlets to swirl the incoming air so the air flows tangental to the bore. The exhausts share a single large port.
The valve stem seals are still soft but they come with gasket sets so assembly will wait for new valve stem seals.
The gearbox is still fitted as it made standing the engine easier. Next job will be taking that off. I was going to say the new flywheel bolts will be silly money but S4P have genuine FCA at £0.68 each.