Tuning 1.2 8v Rebuild/Tuning

Currently reading:
Tuning 1.2 8v Rebuild/Tuning

Joined
Oct 29, 2008
Messages
2,505
Points
598
Location
Nuneaton
The point in the project is to push as much out of the 1242 8v engine on a fairly decent budget of £1000(maybe a lile more).​

The Project will roughly take 3 months to do so it's complete and ready for show season this year, and hopefully a few track days.​

Anyway enough, heres the to do list:​

Engine Mod's

  • 1242 16v bottom end
  • 1.4 8v inlet manifold​
  • CB 300 degree cam​
  • Vernier adjustable pulley​
  • Port grind and polish, inc 4 branch manifold​
  • Full Engine rebuild (some gains to be had there :) )​
  • Fit Black diamond sports clutch​
  • Lighten and Balance flywheel​
  • Remap session (as reminded by rallycinq ;) )​
Chassis Mod's

  • Full polybush
  • FK highsport coilovers​
Exterior Cosmetics

Fit Seat LCR Splitter
Refurb and paint alloys
Fit new grilles
Paint Engine block​


Overall

Clean and replace where necessary
Waxoil and paint, again where necessary​

Thanks​
 
Last edited:
No budget there for wheels and brakes either!

I don't see the logic of the 1242 rebuild -- for the price of that you can buy a 1.4 16v engine and, probably, box.

Not sure why you want to use the 1242 16v bottom end unless you have one lying about doing nothing.

The standard clutch will probably be OK: if not, clutch and flywheel from a 1242 16v or 1.4 may be cheaper (buy a 1.4 16v and box and you'll get clutch and flywheel thrown in ;)).
 
I have most of the items here and waiting. Only things left to order is cam and pulley, clutch, and the little nitty gritty parts (which will kill the budget if i'm not careful)

Most of the parts i have attained so far hasn't cost me anymore than £170.

Refurb on wheels is a DIY job as all they need is a lick of paint.

I know the budget sounds unrealistic but I think it is possible, jst knowing the right people in the right places. I think at most it will cost £1250, but I will keep a list of costs and when it's all finished totalling it all up, I will let you all know (y).

Thanks

Edit, The car has already got a full brake overhaul (punto GT).
 
Last edited:
They'll be different. What you need to work out is whether they can be made to cool (and lubricate) the 8v head. Try a 16v gasket/8v gasket.

You may need to either modify the gasket (or get a custom one) or modify the block. One thing to remember is that -- classically -- engines have water passages too big at the water pump end of the block which leads to the cylinders at the other end running a bit hot.

Don't forget that most of the 8v engines use 9mm head bolts, while the 16v uses 10mm. You'll need to check the length, too.
 
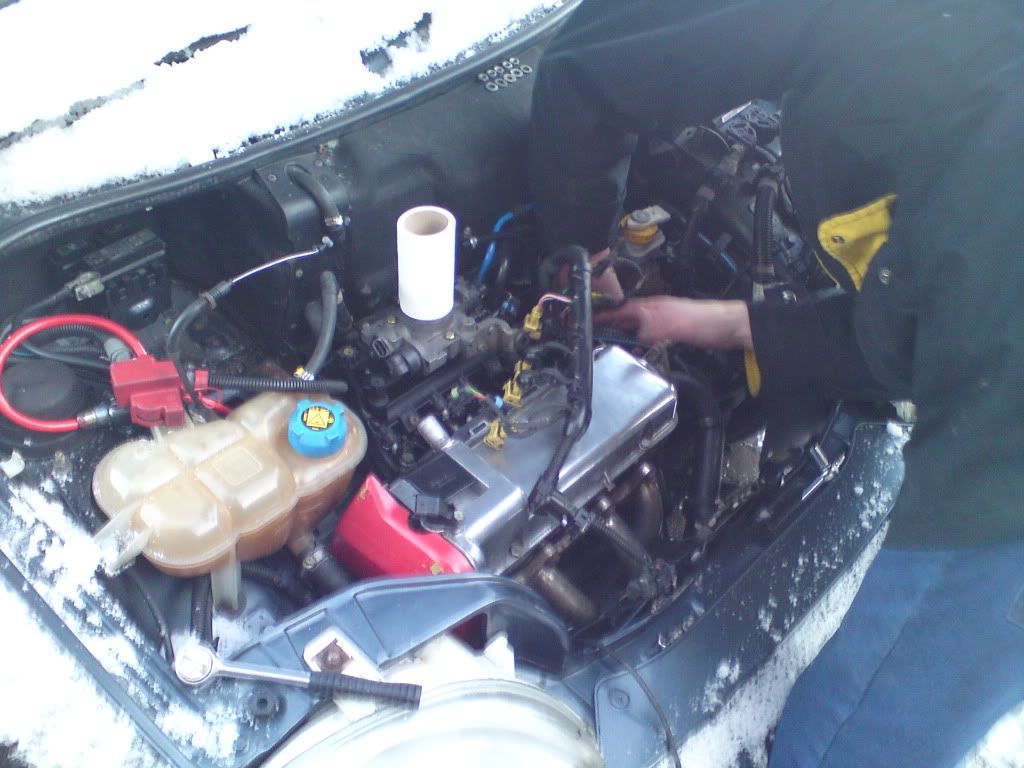
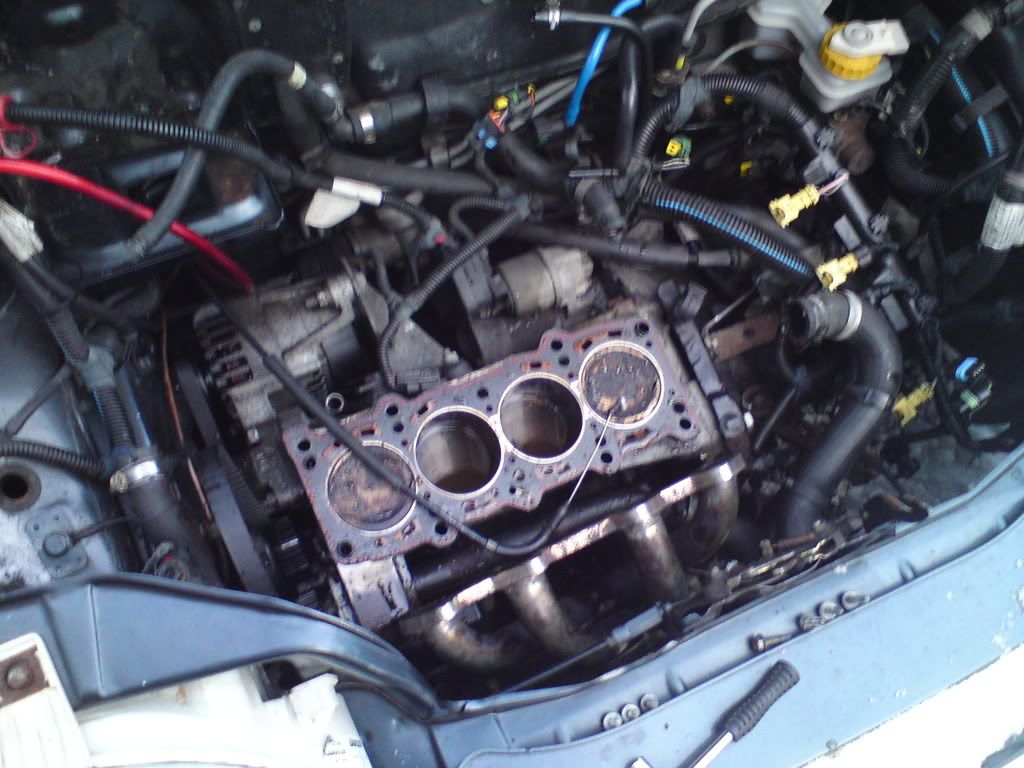
Started stripping the other day, and began with removing the inlet and outlet but cold weather came creeping so retreat to the garage to start looking at the new donor block and manifold.

DSC00076.jpg


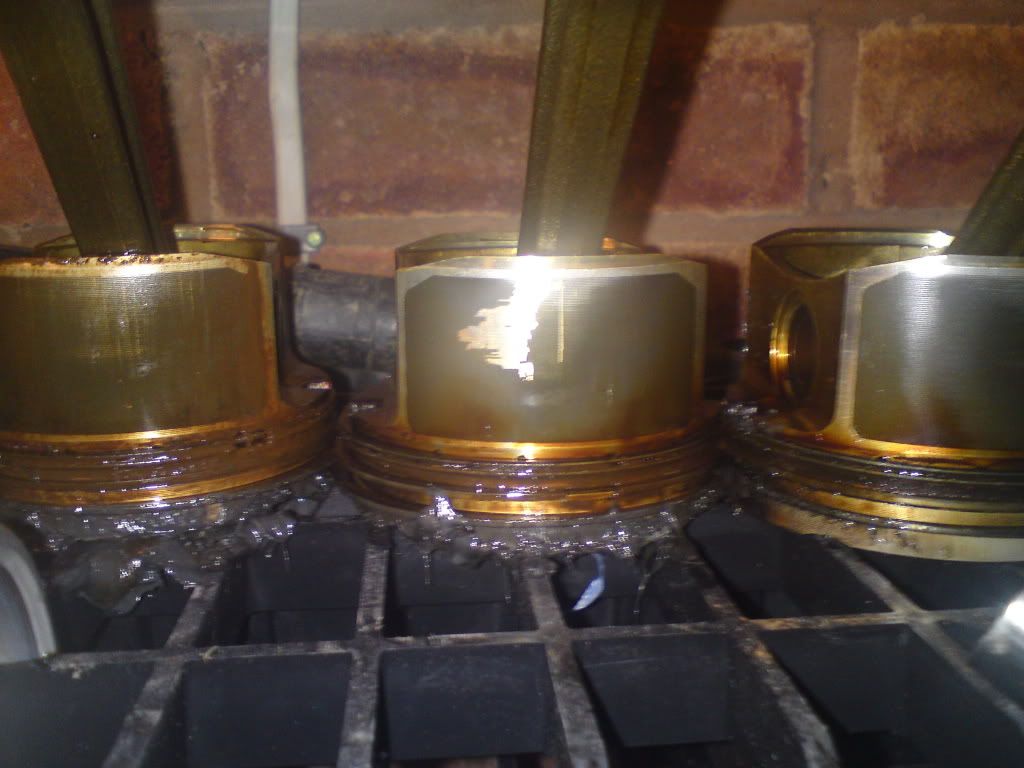
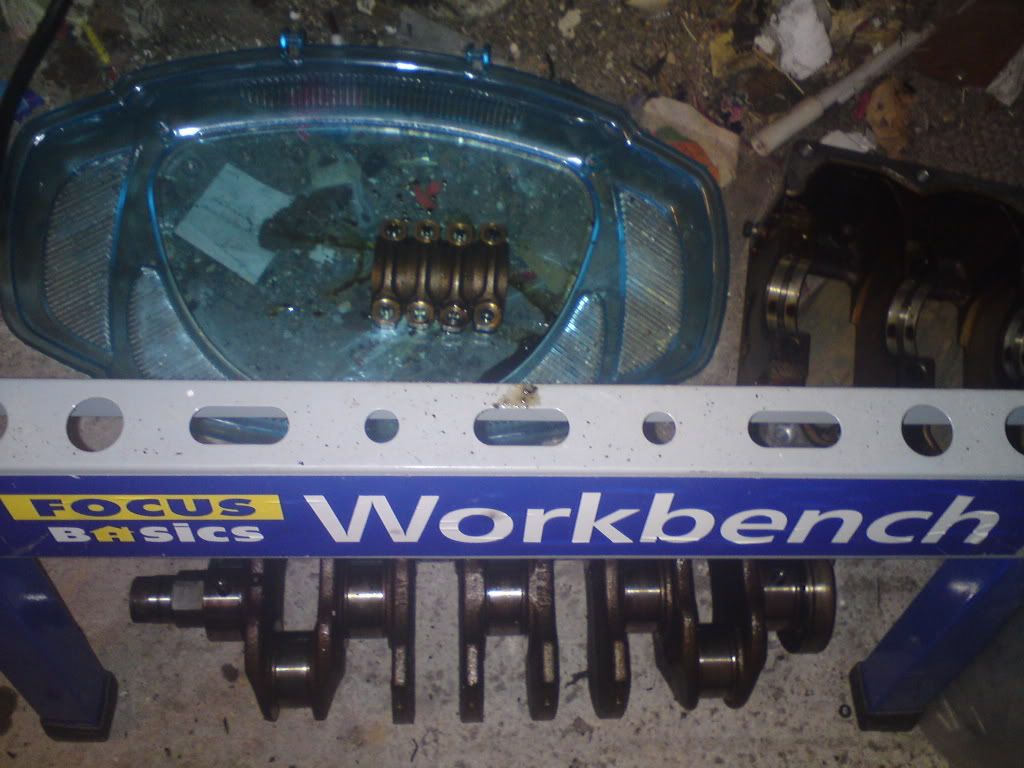
We managed to get most of the engine out but mostly stripping and investigating the 16v bottom end. We came to a decision that the 16v pstons themselves is not a good idea so instead we are going to use the 8v pistons on the 16v rods and crank, and if we can transfer the rings over as they look sparkley new (literally).

DSC00097-1.jpg


DSC00092-1.jpg


Thats grease on the bottoms by the way.

DSC00093-1.jpg


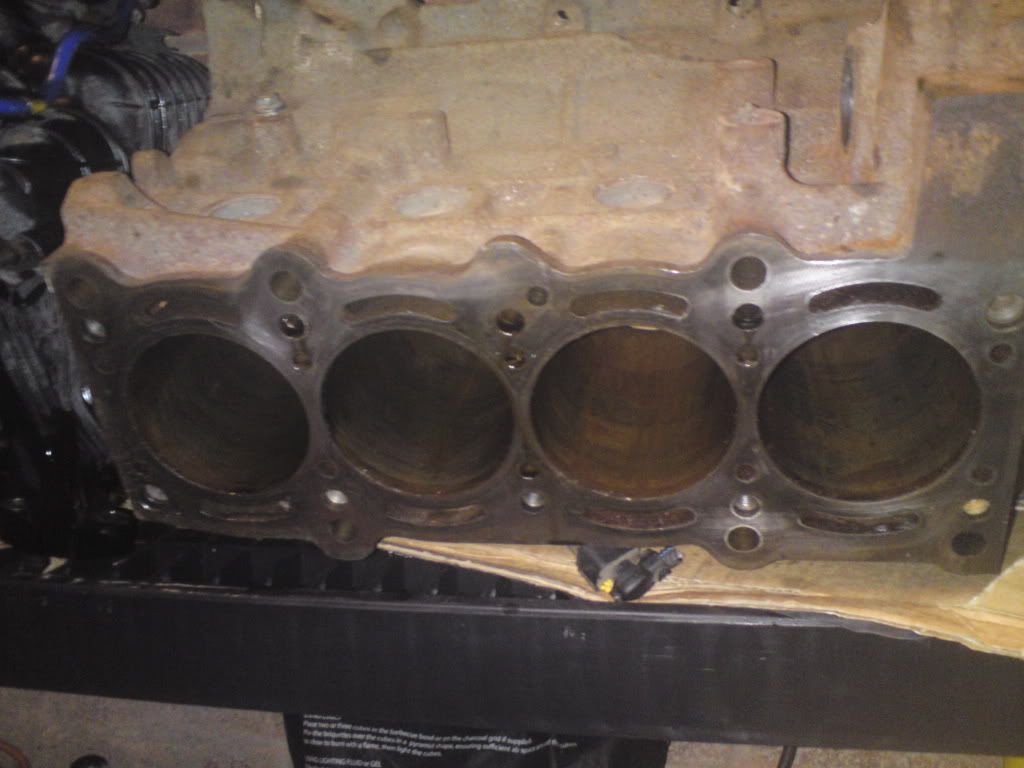
The new block is also in very good condition as you can still see the honing marks clear (not in the photo but in person (y) ). don't even think that this has been run in.

DSC00096-2.jpg


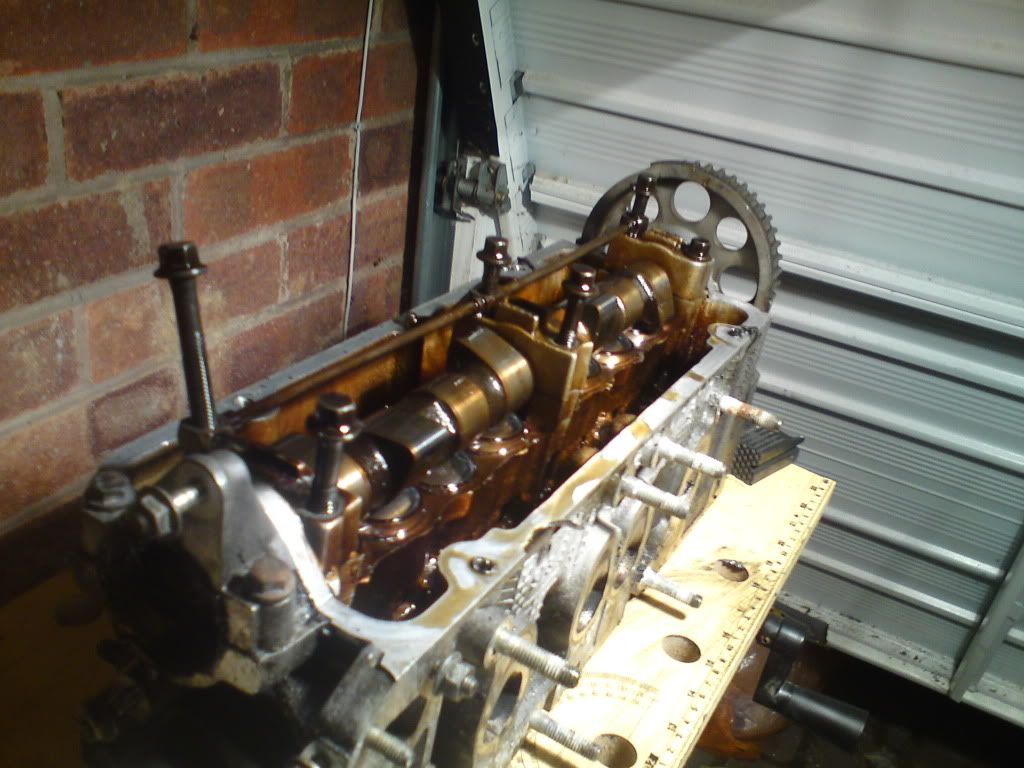
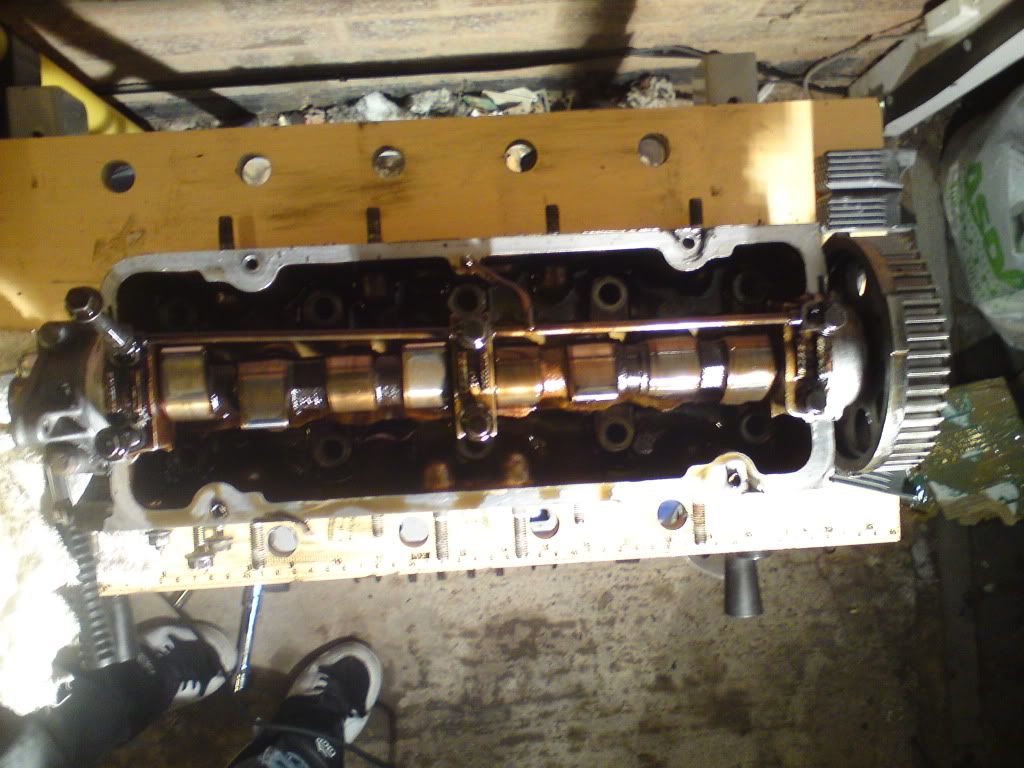
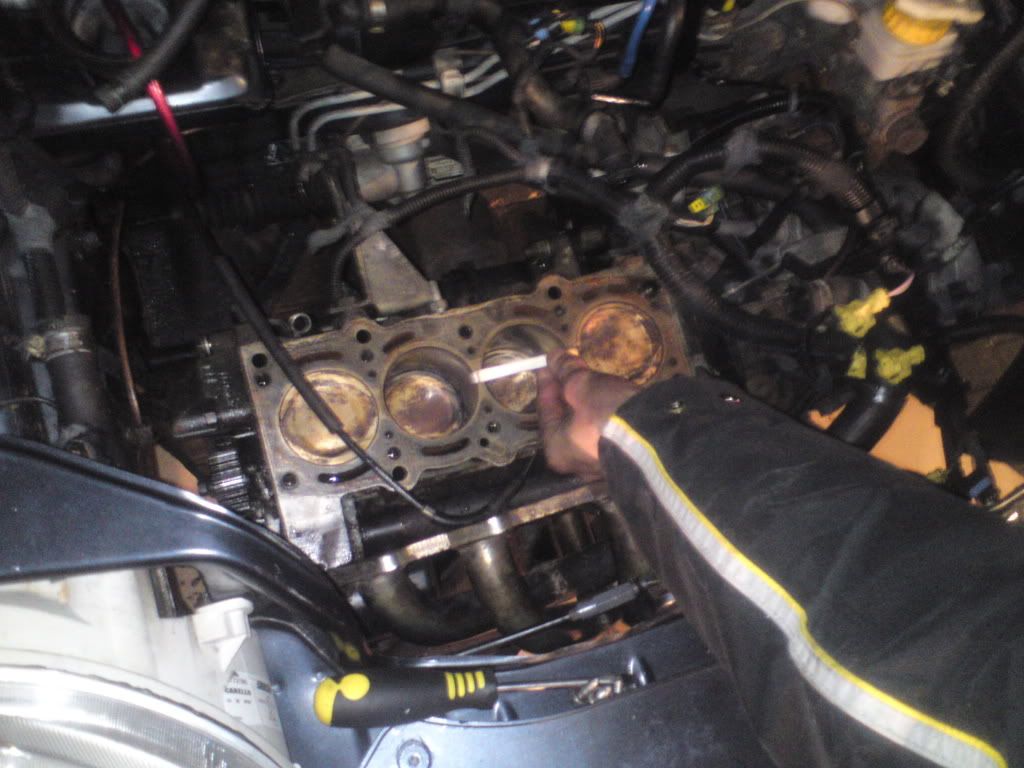
As we took the head off my block we had a close examination on it to find cylinder 3 was infact poorly.

DSC00090-1.jpg


We check the bottom end on the 8v block and it is very badly scored and I don't think honing would cure it. Would most likely need a full cylinder re-bore. Would explain the smoking, and also the very low compression. (also it looks like the head was skimmed using a power sander)

DSC00082-1.jpg


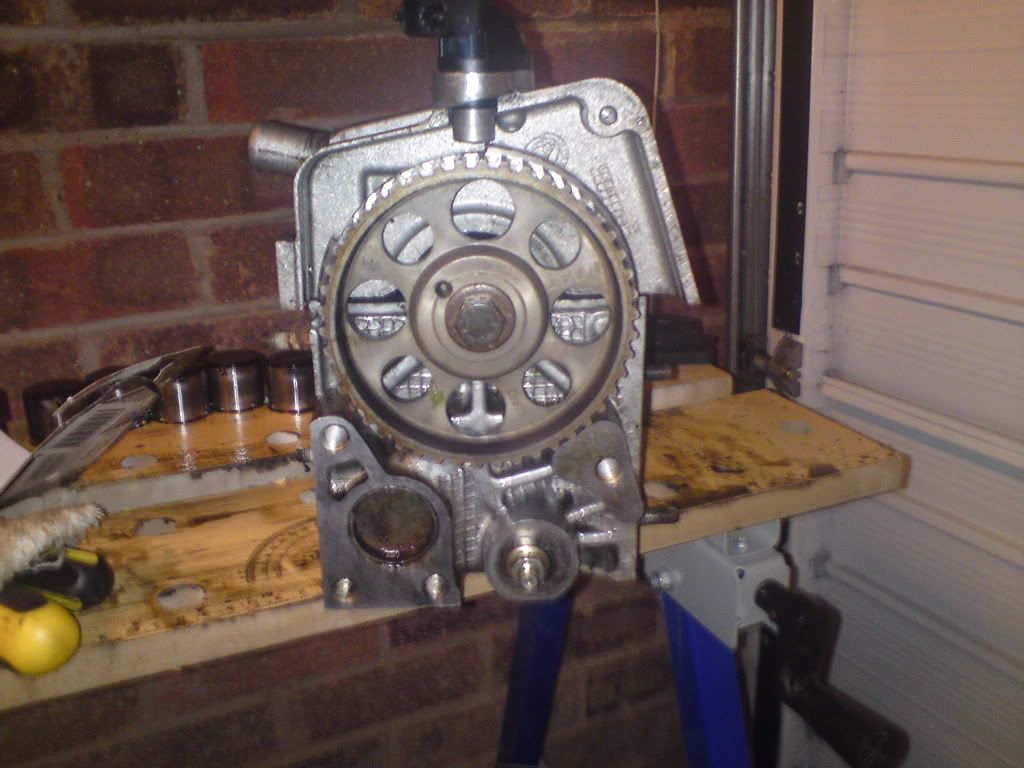
Also to our suprise it had the 866 cam already fitted (wasn't expecting there to be one fitted, but that will be going on classifieds as i'll be using a CB cam)

DSC00089-1.jpg


DSC00088-1.jpg


The cam timing is confusing us at the moment but as rally and fingers have mentioned, won't be a problem with the vernier.

DSC00098-1.jpg


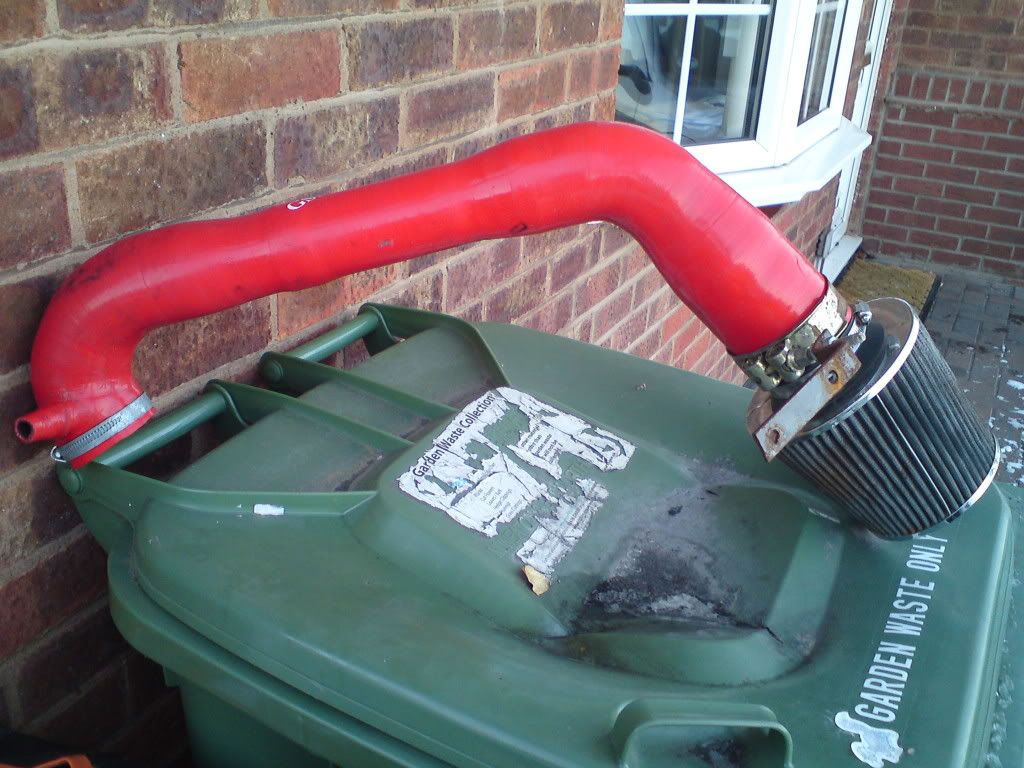
Remember my rant over the GSR kit, I thought I would get a better pic to illustrate what I meant. I'm still waiting for a replacement hose but I have a feeling i'll just fit a BMC kit

DSC00078.jpg


All I have so far, but going to try and get more done toward the end of the week (preferably whole engine out so assembly of the bottom end can begine. first I need to get hold of a 16v sump and oil pump :bang: )

Thanks

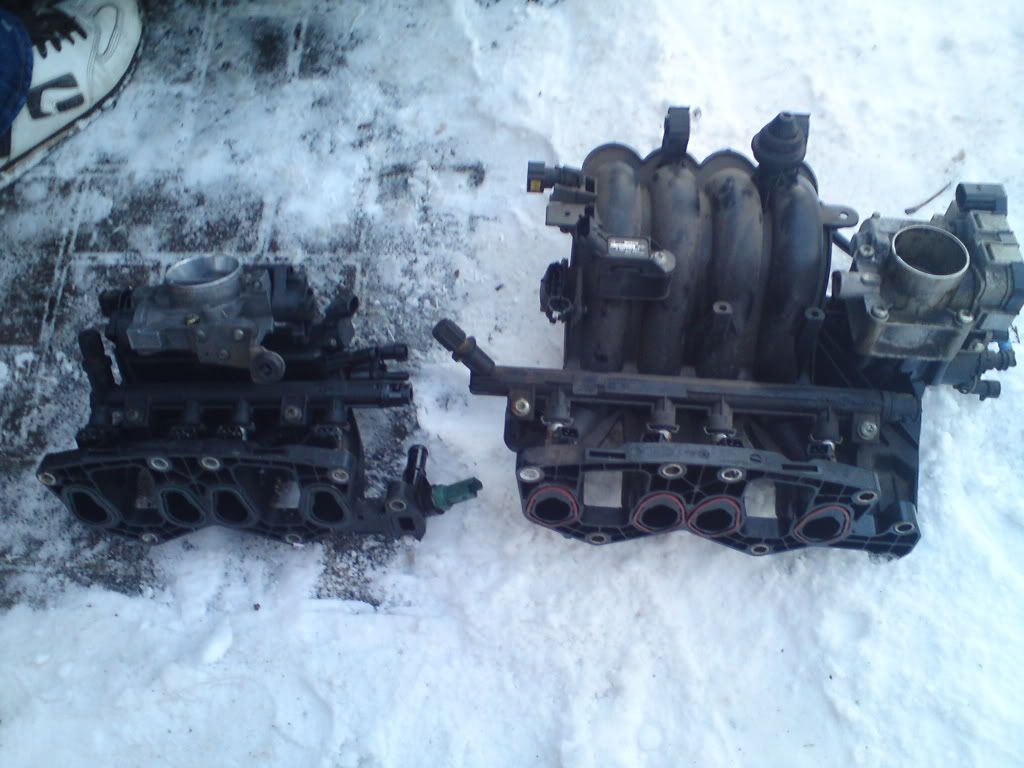
Edit, I almost forgot to show the differences between the standard inlet and the 1.4 8v inlet

DSC00081-1.jpg


The standard one isn't a ver good port match, looks very restricted whereas the 1.4 one looks like it's going to flow very nicely (of course after porting and polish will be even nicer :rolleyes: )

I do need to either modift the 1.4 inlet by cutting the end peice off for the coolant channel and bolting the standard on or drilling and threading. I think the best solution would be cutting and bolting the original.

Thanks
 
Last edited:
Great pics. Please, please hone that block. You can just see it but may not be able to feel, but there's a tiny wear ridge there. My guess is that it'll be big enough to break a ring, even if the rings on the 8v rods/pistons sit in exactly the same place as on the 16v. Talk to your machinist, tell him exactly what you're trying to do.

The honing marks on FIRE blocks seem to stay around for a long time -- I've seen them on engines with 60k miles. One day I'll talk to a real engine builder about that, see what it means.........
 
Tonight was, fairly productive.

Managed to cut the 1.4 inlet to cater for the water coolant inlet, now all fits on nicely so that part is out of the way. I'll get some pics tomorrow at some point.

Removed all the valves (what a b3tard of a job) and springs. I have a couple of questions about that and the springs.

For the new CB cam do I need to re-shim? How do you measure the distances to get the right shims?

When I got all the valves out they instantly looked very burnt and the outlet for cylinder 3 is white and crispy (I'll get a pic to show you what i mean). Tried to clean them up but I think it will be much easier to replace and polish them. Also aswell we noticed that some of the valves are different sizes, but they aren't coherent with inlet and outley, they are just random sizes.

Can anyone recomend anywhere to purchase a set from?

Took another close look at the new donor block and noticed cylinder 1 has 2 very very light verticle scores (can barely see let alone feel) so I will be getting that honed sometime at the end of the month.

The head has been receiving some porting tonight but an extension for my dremel is needed so that will have to be bought at the end of the month aswell. Never really noticed how badly these head are casted until you have a closer look and feel.

That is all really to report on.

Thanks

Edit: Before I forget, for the pistons do you just press the rod out on the conrod to release the piston? And same again to fit my 8v ones on?

Thanks
 
Last edited:
For the new CB cam do I need to re-shim? How do you measure the distances to get the right shims?

Pop any old shims in (initially!) measure the clearance with the cam at base centre (the lobe of the cam pointing away from the shim) with feeler guages. Write it down. Compare with the figures C & B give you. If the clearance is too big, fit a bigger shim (as you'll see, they're etched on the underside, if you're being super careful, measure them -- reject any shim which has an obvious depression in it), if too small, fit a smaller shim.

Fluffy sells shims (so will yout FIAT dealer).

Obviously? You do the shimming after you've recut/ground in the valves.

Your machinist or Fluffy will be able to supply valves. Check that the guides are not fubar. The guides themselves are not great quality (nor are the standard valves). If you're going to the max consider stainless one piece valves and aluminium bronze guides.

Edit: Before I forget, for the pistons do you just press the rod out on the conrod to release the piston? And same again to fit my 8v ones on?

Essentially, yes. But it is so easy to screw up that I'd not attempt it. I mean, I wouldn't attempt it. There will be someone at your local machine shop who does several every day.
 
Update:

DSC00100.jpg


DSC00104.jpg


As if this forum doesn't see enough of this :)

DSC00102.jpg


My friend taking the pee about how small my engine is :rolleyes:.

The damage to my old cylinder block, you can see it a little bit on thepic but it's alot worse in person.

DSC00103.jpg


Now something interesting came of this, the clutch fitted appears to be brand new. But whilst I was driving with it, it kept slipping and not biting on properly, could be the way I drive or something else. either way it's getting changed.

Anyway, my garage is now full of sei parts and is starting to look a bit of a mess so I think it's time to re-organise things, don't know what you think.


DSC00106-1.jpg


Thanks
 
Last edited:
I popped over last night to view this, and its going on quite well....

Personally i think with the budget of £1k, you should be getting a more 'fun' engine in there like the 1.4, or something completly different engine wise....

Would be good to see something in there with an eaton supercharger bolted on, as looking at them second hand, the whole kit seems to go for under £100...

Im tempting myself here, but 'cba' with messing about again to have a car for trax lol...
 
Would be good to see something in there with an eaton supercharger bolted on, as looking at them second hand, the whole kit seems to go for under £100...

Doubt if there's room in a Cento. Dave the Trike did it a few years ago with a Punto -- went very well, but died when pistons met valves (16v engine).

Seems that the bottom cam pulley is probably not sufficiently well engineered to take the strain of driving an old school supercharger (would possibly be up to a centrifugal one, but they're bloody expensive).
 
Yes, it's going to be my weekend car at the end of all this. When everything is all in and done it won't be very practical for everyday useage as it will just guzzle.

But i've only worked out miles to a full tank going by a buggered engine, but i'm not looking for anything above 200miles to a full tank. I might be suprised, I might not.

Hoping that when it's finished I can bed the engine in and take it for a spin at mallory park.

Thanks
 
Allready thought of that. Its just a pain in the arse to find somewhere that can do that. Friend has a welder but it will jus blow holes in my sump.

Tempted to get my friend to make me an alloy 1 with a baffle and I was thinking of a return feed for catch tank.

Also been thinking of an inline fuel regulator so I can control the feuling a little better. Dont know yet if that is just wasting money for now though as the engine will need bedding first.

Nearly pay day so engine will be 80% finished. Just have my fingers crossed that my head isn't warped. Its looking more likely that it is :(

Thanks

Be exceedingly careful with a return from the catch tank. Mine is above the level of the head and was full of vapour (water). You don't want that in the sump.

Cheers

SPD
 
Back
Top