Getting intimate with Twinkle (sorry Becky)

Currently reading:
Getting intimate with Twinkle (sorry Becky)

Joined
Oct 1, 2017
Messages
7,326
Points
2,296
Location
Edinburgh Scotland
I know this thread isn't about a Fiat but a lot of the "stuff" involved is transferable knowledge. So, Twinkle, my 2016 1.0 litre 3 cylinder turbo petrol engined Ibiza ST (Estate) is now just coming up on 4 years old so her warranty has expired and she's due a service and MOT early next month. Time to get up close and personal! (the main dealer has been attending to her needs up 'till now to maintain warranty compliance - and a good job too as she had a new turbo at 18 months, but that's another story.

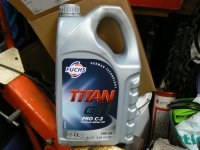
I've been collecting engine service parts for a while - oil, air and cabin (pollen) filters (all my favorite Mahle brand) and a 5 litre container of engine oil. I've been agonizing over which VW 504 compliant oil to buy and finally, for many reasons, decided on Fuchs Titan GT1 PRO C-3 5W-30. Seat advise plugs get changed at 4 years/40,000 miles. As I'm only at 18,000 miles albeit 4 years old, I'm leaving the plugs 'till next year. This engine was very new when I bought the car and one of Seat's advertising points was that the timing belt is now a lifetime fitment - REALLY? - Interestingly they still advise periodic visual inspection only with no set replacement interval. I'll be doing mine at 5 years thank you very much! The, very standard looking, canister type fuel filter - with integral pressure controlling diaphragm - is also considered "lifetime". As far as I'm concerned that'll be 5 years too then!

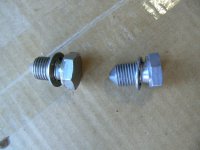
Anyway back to the engine service. I'd been stressing out about the drain plug. It's an alloy sump and I've run into problems with the thread stripping out on this type before - It then becomes a bit of a phaf to rectify - but there are some excellent repair kits now available. VAG recommend always fitting a new plug because the sealing crush washer is captive in the plug and can't be renewed separately. I bought a new genuine one from the dealer for just under £4.00 Old plug on left new on right:
P1090121.JPG

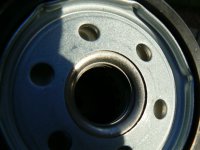
Which I notice is less than some are selling for on ebay. In fact it turned out to be the same plug as used to fit the old PD engined Fabia my boy ran years ago and I've got a new spare lying on my workbench, I'll just use that next time. The dealer also confirmed the torque for it at 30nm - exactly what the Haynes manual advises. I was pleased to find the old plug unscrewed without any sign it had been previously overtightened and the new plug snugged up perfectly - good, the dealer technician would seem to have known what he/she was doing. The oil filter canister is simple to do and very accessible on the front of the engine. I noticed the new Mahle filter did not seem to have an anti drain down diaphragm:
P1090120.JPG

so was glad to see that the genuine VAG filter it replaced didn't have one either. I was also able to prime the new filter with oil before fitting - doubt if the dealer tech would bother to do that. Interested to see the letters MHL on the old (VAG) filter. Could it be that it's manufactured by Mahle?
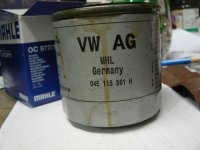
P1090144.JPG

Having filled the engine with oil - took 4 litres which I think is good because I like a nice big sump full of oil on a turbo'd engine - I had another moment of apprehension. This car, as do many these days, does not have a conventional oil warning light. The engine has a pressure sensor which is monitored by the ecu but it only lights a dashboard warning if the engine is running and no oil pressure is seen, You don't get that comforting light lit on the dash when you turn the ignition on and then extinguishes to tell you there's pressure in the galleries. So, starting the engine after the oil change was worrying me because there was going to be no light for me to watch and monitor that pressure was returning. However there is a very reassuring "clue". This engine has roller rockers with hydraulic valve clearance adjustment. When the engine first starts the rockers make a very audible clatter which disappears almost immediately as oil pressure builds up. That's exactly what happened so I knew oil pressure was good. Maybe just imagination or the fact that the oil is new but the engine sounds noticeably less rattly with the new oil? It is a "better" oil than the dealer was using. I discovered they are using a VW 502 spec castrol 5w-40.

The air filter was easily changed once the casing was removed from the engine. There is one torx screw at the front of the filter to be removed, also a small breather pipe. A couple of awkward big and very springy! hose clamps on the intake and feed pipes to the turbo and one small hard nylon vacuum pipe which just unclips. Then you pull upwards - forcefully - and it comes off the two ball headed mounts on the top of the engine.
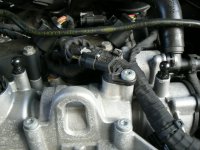
P1090150.JPG

I wonder how long it will take the rubber grommets to degrade, harden up and start rattling?
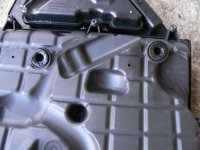
P1090149.JPG

Once off there are a host of small torx screws holding the top on with, the inevitable, sneaky one hiding down a hole so you don't know it's there! A small dab of silicon grease on the rubber grommets eases reassembly and, hopefully, will make removal easier next time. The second time it was serviced it came back with this scratch on the top of the filter.
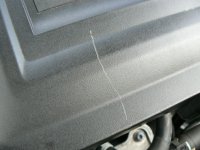
P1090160.JPG

It annoys me every time I open the bonnet but, unsurprisingly, complaining got me nowhere!

Once you've got the filter off the turbo intake is very vulnerable and needs to be shielded (with a cloth or paper towels maybe) as even quite a small bit of debris falling in here will be the kiss of death to the turbo;
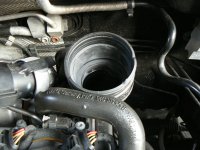
P1090151.JPG


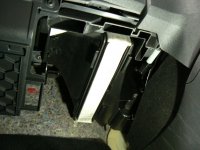
Finally the cabin filter. I really have to give Seat (VAG) full marks on this one. The filter is under the dash on the passenger side and has to be one of the easiest I've ever done. No dash/glove box parts to remove. simply look up under the dash from the passenger foot well and you'll see the cover:
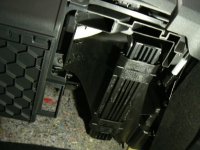
P1090115.JPG

Slide the retaining slider clips to the middle and withdraw the cover downwards (it virtually falls off)
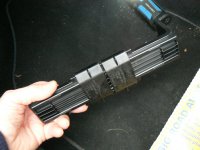
P1090118.JPG

Pull the old filter out downward and push the new one in in it's place:
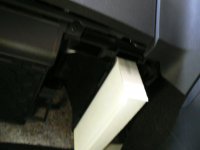
P1090148.JPG

Once it's pushed fully home place the cover back in position and slide the clips outwards to lock in place
P1090117.JPG


Took me less than 5 minutes and this was the first time. probably a 2 or 3 minute job next time.

I'll finish this one here but the brakes were a little more interesting so I'll be back to tell you all about it soon.
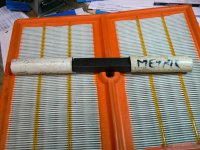
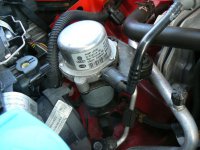
As a wee puzzler for you, guess what this is? it caused me to use the little grey cells for a few moments. Clue: the hard black nylon pipe coming out of it.
P1090153.JPG
 
Last edited:
Hi Jock,

I've had some luck with using a hot-air gun to remove scratches on plastic mouldings, just heat carefully and pat/rub with a clean cloth to blend it away.

Although some modern mouldings have a thin coloured layer e.g. silver on a different colour base material - is your filter housing the same colour throughout?

I've used coarse emery cloth to reproduce the pattern on scraped bumper corners on the older Opel/Vauxhalls having heated the area with a hot air gun.

Regards,

Al.
 
Thanks for the tip on repairing that scratch Al. I've seen videos on repairing plastic in this way but never had occasion to try it out. On reflection I think I'll just "get over it" and leave as is.

Anyone venture a guess at the Mystery Object? I'll leave it for you to think about.

So now for the brakes. With the front end up in the air to do the oil change it was logical to just carry on and attend to the front ones first. I'd had the front wheels off before so there was no problems with that - unlike the rears, more on them later. Just as good practice I like to remove the calipers and pads then clean everything up at the yearly service. I find that this ensures less in the way of problems further down the road.

I started on the O/S and easily removed the little plastic dust caps then removed the slider pins with a hex key. They unscrewed easily and I was able to now rock the caliper to force the piston back and pads slightly away from the disc. Usually it's simply a matter of then pulling the caliper away from the disc but, although it felt free, the caliper refused to be removed. It felt like when a disc has a very pronounced wear lip on it's outer edge, but not so, this disc was in good condition (18,000 miles on the clock). Pads look only about half gone too.

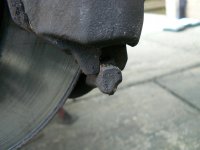
Ok Jock, don't get "brutal" lets have a closer look? Oh, that's unusual, on the bottom of the caliper casting there is a little projection which is engaging the bottom of the pad carrier:

P1090137.JPG

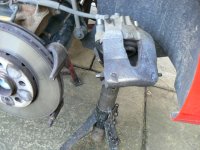
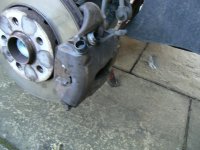
So the caliper's top edge has to be pulled forward first then it can be pulled up to allow this little "foot" to clear the carrier bar. Sneaky! So now the caliper is off and resting on a spare axle stand so that no weight/force is taken on the brake hose:

P1090123.JPG

Now there was another question that used to be raised by my trainees. "If the brake hose is strong enough to take 1,000psi or more of fluid pressure surely it can support a few pounds weight of caliper so why all the fuss about supporting calipers?" The answer is you need to consider how a flexible hose union is constructed. Anyone got a garden hose with one of those click type connectors? (hoselock is a common brand). Consider how the hose fits into the connector itself. The connector has a central spigot over which the hose is pushed. Round the outside are a ring of gripping fingers which are tightened against the outside of the hose by you tightening the locking ring. In operation if the pressure in the hose makes it swell a little it only means the fingers will grip all the tighter. However if, with no pressure in the hose, you pull hard on the hose you might be surprised to find it pulls out of the connector fairly easily. Flex hose unions are not dissimilar The metal fixing has a central spigot over which the hose is forced and the outer part is then crimped to secure the pipe in place. Same theory applies. Increased internal pressure only makes the joint grip tighter. But pull on the pipe, especially when no internal pressure is being applied, and you just might manage to pull the pipe out or worse, pull it partially out without realizing what you've done! So, ALWAYS SUPPORT THE CALIPER. Here's a rather nice armoured flex hose (see the wire protector wound like a spring round the length of the hose to protect from flying stones etc) and you can plainly see the crimping on the unions:

https://www.eurocarparts.com/search...K6WyRpaJPPErVEIl0ZOPnxgJ-_gtVx2BoCWkgQAvD_BwE

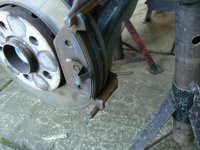
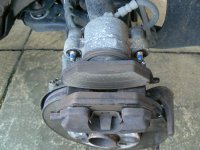
I've popped the pads back onto the discs just so you can see how the pads sit when fitted:

P1090134.JPG

The caliper in this design is there to simply force the pads against the disc when you stand on the pedal. The actual braking force, when the pads grip the disc, is taken through the carrier bars the pads are resting on - at top when reversing and and bottom when going forward.

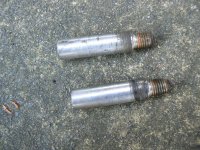
With everything cleaned up and CeraTec brake grease applied appropriately, I notice that the slider pins are showing early signs of slight corrosion:

P1090132.JPG

so cleaned up with some fine wet and dry (just 'cos it's the finest grit I've got - emery works just as well) and a thin film of silicon grease applied - the sliders run in rubber bushing in the caliper so the silicon won't degrade the rubber:

P1090133.JPG

The whole lot is now ready to be reassembled to the hub. I've put a wee dash of Thread Lock - the blue stuff - on the slider pip threads as I definitely don't want them to come undone in operation and anyway it tends to stop water being able to worm it's way down the threads and cause rusting:

P1090135.JPG

So, engaging that little "foot" at the bottom first and then pushing the top of the caliper back into line. The caliper is refitted to the hub and the slider pins tightened and torqued up:

P1090136.JPG

Don't forget to push the plastic caps back into the end of the slider pin rubbers- that's them on the top front of the caliper Lovely. job done, now for the other side.

Oh deary me, The top slider pin feels a bit "stiff" to undo. Don't like the feel of that, but it comes out and doesn't look really any the worse for wear. Bottom pin? a different kettle of fish. It breaks away and turns for almost a complete revolution quite freely, as you would expect, but then quickly, over about 3/4 of a rev goes quite tight. ooooh, don't like the feel of that at all! Slaister the now exposed bit of thread with plus gas and squirt some up the hole on the other side the best I can (disc is in the way) then, in the time honoured fashion, I start winding it in and out, in and out, in and out, coming a little further out each time and squirting lots of Plus Gas over it as I go. It doesn't really get any tighter but it fights me down to just about the last turn of thread. I'm dreading what this is going to leave me with as the slider pins on this design screw straight into the hub itself - no separate caliper carrier bracket like wee Becky.

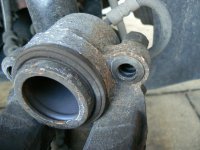
So finally the pin is out and I'm able to remove the caliper, remembering to tip it forward at the top to disengage that bottom foot. Easy when you know! At this point I was so worried about what I was going to find I forgot I'd taken the camera into the garage with me - sorry folks - Now I can get a good look at the threads in the casting where the slider pins screw into. Oh well, the top one looks really pretty good, definitely serviceable, great! The bottom one looked a bit "chewed". Wonder what the pins look like? Oh, that's interesting, both threads are copiously covered in a red thread locker. The ones on the O/S had traces but nothing like this "deluge"-?- Cleaned up with a wire brush and now I can see there's an imperfection on the start of the thread on the bottom pin! Looks like the sort of thing that might have happened when in a parts bin, dropped from a height, hit a glancing blow with a hammer or similar - you get the idea?

So this is what's been causing the problem. Ok, I'll just run a die down the thread and that should make it good as new seeing as it's only the very end of the thread that's damaged. Got out my big box of taps and dies, accumulated over my 50 something years of "doing" cars and guess what? don't have anything which fits! My flabber is gasted! I've never had this happen in years. A metric 8 is too small and a 10 too big! Must be a 9? Can't remember ever running into a 9 before - not one requiring attention like this anyway, mind you the hex key size for the slider pin is seldom used size too. Then I remembered I've got a thread file. That should do the job!

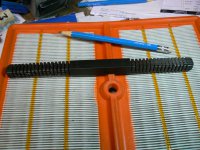
Thread file? I hear some say? Yes, a wonderful addition to any serious car menders tool box but very brittle, 'cos it's hard metal, so keep it protected when not in use or you'll find teeth get knocked off! I've got a metric and an imperial one - hardly ever use the imperial these days except on my vintage horticultural stuff. Here's the metric one with protecting bits of plastic pipe on the ends:

P1090168.JPG

And here's what it looks like ready for action:

P1090170.JPG

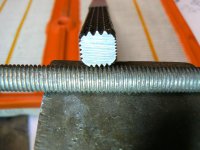
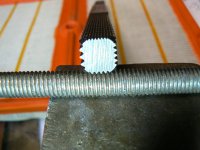
Each side - there are 8, 4 on each end - has a different thread pitch. You offer it up to the tread you are trying to repair (by the way you can't really make a thread with one of these, it's just for repairing imperfections. You need a die to actually cut a virgin thread) Keep trying the end of the file against your thread like this:

P1090167.JPG

Until you find one that's a perfect fit:

P1090166.JPG

In this case its a 1.25 pitch (each side of the tool has the relevant size marked on it) Then you just stroke it over the thread like any other file and the wee teeth will cut out the imperfection whilst engaging with the good parts of the thread to ensure a correct spacing.

Anyway, using this I was able to restore the damaged thread tooth to neigh on perfection. The problem then was what to do about the female threads in the hub? really need a tap to do this and I don't have one! The top one really needed little attention an so I just would the slider pin, with Plus Gas, in and out a few times and it cleaned up lovely. It was just Thread locker residue that needed cleaned out really. Sprayed with brake cleaner and it looked lovely! The bottom hole was not really so nice though with visible damage but plenty of thread still there. What to do then? I decided in the end to try lapping it with valve grinding paste and, if I wasn't happy then I'll have to buy a helicoil, or similar, kit.

So I cleaned out all the residue I could and, carefully centering the pin, with some course paste on the thread and in the hole, I started winding the pin in and out, in and out, in and out going a little deeper each time until it was winding in and out for the full depth of the thread. Cleaned it all up with brake cleaner and tried it in the hole. Doesn't feel too bad actually! took it out again and had a good look at it all. The pin looks perfect. The female thread has some damage especially over about the first 1/3 of it's depth but further into the hole it actually looks quite good. Ok then, am I happy with this? Hmm? Let's try torquing it up. Ok, that went fine, felt good, no sign of "give" in the thread. If it behaves like this on reassembly think I'll go with it.

I was paying a lot of attention during the reinstalling of the slider pins and I noticed that the spring retainers on the back of the pads tend to push the caliper slightly forward making it easy to cross thread the pin in the hole! It's easily overcome by pushing hard on the front of the caliper to keep it in place as you start the pins in their holes. Now I know that I'll be taking especial care each time I have them out. So now everything is assembled with thread locker applied to the pin threads and I've got the torque wrench ready to go. Will it tighten or will it strip? Yippee! tightened up a treat with a very positive and abrupt click. not a hint of stripping.

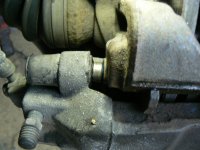
Now assembled it can be seen why that band of corrosion forms on the slider pins:

P1090142.JPG

They are exposed to the elements when installed! Put a little extra silicon grease on them just for luck.

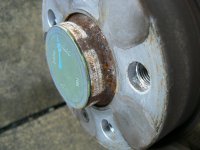
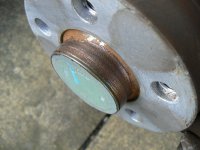
Having "done" the fronts I then moved round to the rears. Very familiar with this setup as I've run into them on many VAG vehicles. Older ones tend to suffer from "sticky" handbrakes which cause the rear brakes to not release fully. Regular maintenance is a big part of preventing that but the return is not strong on them and you can fit return springs from other models in the range on top to increase the spring force - lots on you tube if you're interested. With mine being relatively new I was not expecting any problems and things went well. The only problem I did have was that the rear wheels had obviously never been removed since she was new - what exactly do the dealers do except change oil and filters? - I ended up on my back under the back of the car, with axle stands and trolley jacks all supporting on both sides, Kicking ten shades of ***** out of the wheel rims then coming out and belting the front faces with my big rubber hammer and some padding to avoid marking the alloys, until they finally fell off. Here's what the hubs looked like:

P1090158.JPG

Doesn't look too bad does it? but boy did it take some kicking! A good wire brushing and rubbing with some emery, inside the wheel too, then a light skim of anti seize and that won't happen again.

P1090159.JPG

Mystery object will be revealed in the next post. Another clue though if you haven't got it yet? It's a turbo'd engine.
 
--------------------
-----------------------
------------------
--------------
----------

I'll finish this one here but the brakes were a little more interesting so I'll be back to tell you all about it soon.
As a wee puzzler for you, guess what this is? it caused me to use the little grey cells for a few moments. Clue: the hard black nylon pipe coming out of it.

View attachment 206335

That looks like one of those new-fangled electrically-powered vacuum pumps to support the brake booster if the engine does not supply sufficient vacuum under certain operating conditions.

Al.
 
Hi Jock,

Re:- the use of Thread Restorer Files, I'd like to suggest that the file is not used at exactly 90 degrees to the thread being cleaned up but instead is swivelled a very tiny amount so that the file teeth match the angular slope of the thread.

Iirc, there was mention of thread files a while back, possibly in the 500 (Classic) section - I posted there are also thread-files that have a cylindrical extension on each end with different thread pitches that can be used for chasing internal threads e.g inside housings, large nuts.
I still haven't found one of mine of this type to post a pic in order to better explain, nor have I found the home-made oil filter removal tool that used a section of Fiat timing belt - but I'm still searching :rolleyes:

Regards,

Al.
 
Last edited:
That looks like one of those new-fangled electrically-powered vacuum pumps to support the brake booster if the engine does not supply sufficient vacuum under certain operating conditions.

Al.
Give the man a coconut! Well done Al, Right first time. Must admit I had to think about it for a wee while. That hard nylon? hose goes to the servo but also splits off and goes to the inlet manifold so, unlike most diesel, there must be manifold vacuum available some of the time. There are non returnvalves in both branches. I haven't had the trunking from the throttle body off yet (maybe never will?) but I'd guess there's a butterfly in there somewhere.
 
Hi Jock,

Re:- the use of Thread Restorer Files, I'd like to suggest that the file is not used at exactly 90 degrees to the thread being cleaned up but instead is swivelled a very tiny amount so that the file teeth match the angular slope of the thread.

Iirc, there was mention of thread files a while back, possibly in the 500 (Classic) section - I posted there are also thread-files that have a cylindrical extension on each end with different thread pitches that can be used for chasing internal threads e.g inside housings, large nuts.
I still haven't found one of mine of this type to post a pic in order to better explain, nor have I found the home-made oil filter removal tool that used a section of Fiat timing belt - but I'm still searching :rolleyes:

Regards,

Al.
Absolutely Al, file in line with the helical slope of the thread or you'll slightly reduce the "thickness" of each individual thread - although probably not by enough to make any significant difference. Still, if you're an obsessive perfectionist like me?

That's interesting about the "internal" thread files. I've never seen, or heard, of one of those. Must look into it - although I've managed all these years without one so probably a bit late for this old dog to change his spots.

Thanks Al. regards
Jock
So there you are, Al won the coconut! The "mystery object" is indeed an electrically driven vacuum pump. Oh dear, more complication and, no doubt, expensive to replace should that become necessary. You can hear it running when the engine is first started but I'm not really aware of it subsequently. I doubt if you could hear it on the move and, although it is not noisy, I would think it would be audible sitting at traffic light stops etc and I can't say I've ever heard it, so maybe it doesn't have to run very much.

Regarding the service work? well that's all done now and, apart from that bottom slider pin on the N/S caliper and the, not altogether unexpected, seized on rear wheels, it's all gone very well. Once I have a date for the MOT from Kenny I'll give her a detailed wash and hoover out before handing her in as I think presentation tends to make a difference.

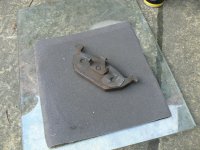
Talking about service work, who gives pads a buff up when doing a "big" service? I was taught, all those years ago, to give the friction face, of a pad which is to be reused, a "buff up" on a piece of abrasive paper. I do this with a piece of quite rough emery cloth laid on top of a piece of plate glass (plate glass is very very flat):

P1090131.JPG

Just rub the pad carefully and square on to the surface until the friction surface of the pad is cleaned up. The only time I wouldn't do this is if I encounter a disc which is quite deeply grooved. If you buff the pad flat in this case the surface area in contact with the disc will be greatly reduced so the brakes will be poor until the pad wear allows it to resume the shape of the grooves again. Maybe you should be thinking about a brake rebuild in this sort of situation though depending on how bad the grooving is? In days gone by brake design was varied and several of the designs were known for problems - remember the old "swing calipers" on earlier BL stuff and those shimmed calipers on some older Fiats anyone? - after you'd freed off all the seized up bits it was a big advantage to resurface the pads with a bit of vigorous rubbing down. Not so good for the lungs though - we didn't know about asbestos in those days and used to blow out the brake drums and disc surroundings off with air lines! Still remember that metallic tangy taste in the back of the throat and the pure matt black paint look of the snotter on your handkerchief. Probably becoming a trainer in a much more controlled environment was the best thing I did, However all my old pals don't seem to be dropping in droves from lung cancer/emphysema, just old age catching up with some of us now. We've discussed it and we recon the brake dust is probably so fine the fibres all get ground up so don't exist as fibres as they will if you saw board up or start tearing lagging down? Could be I suppose - still here and that's all that matters!

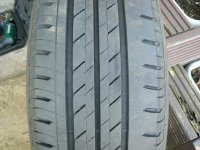
This may be a strange thing to say but I'm frustrated at how slowly those darned Bridgestone tyres are taking to wear out:

P1090156.JPG

At just over 18,000 miles the tread depths on the fronts, in millimetres, are 5,5,4 (taken in each of the grooves outside to inside) identical readings on both front tyres (ie. inside edges very slightly more worn and identical depth readings). So the inside of the tread is wearing just a little more than the outside, which doesn't particularly surprise me. Most modern suspensions run a slight negative camber on the front and the natural action of the front wheels under braking is to splay out very slightly due to give in the rubber of the bushings. If you want something interesting to do when walking around city streets take a look at any front front tyres you can see the whole width of tread on. Most will be more worn on the inside. A very good reason to keep a regular check on your own vehicles tyres. Don't just glance at the outside edge - which you will see easily with it parked at the kerb - and assume the whole tread width is going to be the same. Turn your steering onto lock each way and examine the whole tread width (you don't need to go full lock, just enough so you can easily see the whole tread width). Of course if you see uneven wear AND tread lipping then you've got a problem and need to get your geometry checked - I see no lipping on mine. The rears are, unsurprisingly, wearing even more slowly. They show 5,6,6 mm. Wear is absolutely identical on both sides but the greater wear is on the outer shoulders here (opposite of the fronts) This puzzled me for a wee while - The car drives beautifully with no tendency to pull one way or the other and, when I've followed it in Becky, it seems to drive absolutely straight (ie. no sign of crabbing). As a result of taking these readings I stood well back from the car once I'd finished and it's quite obvious that the rear wheel are carrying some degree of toe in. This would account for the wear pattern and I believe is most likely exactly as it should be, however I'll be having a chat with the lads at AVW just to set my mind at ease.

At this rate of wear I doubt if I'll wear them out before they degrade to the point where I'll be changing them anyway. Already there are surface cracks appearing at the base of the tread grooves:

P1090155.JPG

Also, if you do the "thumbnail test" in the tread rubber, it's as hard as old nails! Remember I'm an old tyre man having spent a number of years in my earlier life working, in a technical capacity, for Firestone. Once you know what you're looking for you can get quite a good idea of how "grippy" the tread compound is by pushing your thumb nail into the tread rubber and watching how deep an indentation it makes and how quickly it returns to it's original shape. I'm not impressed with these Bridgestone Ecopia tyres. I don't find they grip very well in the wet - it's easy to experience understeer on roundabouts when it's wet even at quite low speeds - and I find quite noticeably excessive road noise too. I guess maybe the trade off they thought acceptable to give a few extra MPG - and I get 60 mpg on longer journeys - but I'd be happier dropping a couple of mpg to gain in grip and probably loose some tyre life too I suppose.

Early days yet I know but so far I'm very pleased with the new oil:

P1090163.JPG

I'm pretty sure the, slight, valve gear clatter (which happens before the oil pressure picks up on a start) is disappearing more quickly which would indicate the oil is finding it's way round the engine more quickly (the dealer was filling her with a Castrol 5w-40 VW 502 compliant oil and I'm now using the Fuchs which is a 5w-30 VW 504 compliant product). The old oil - with only about, at a guess, 5,000 miles since last changed - was noticeably more viscous, even though drained warm, than the new stuff was when filling. Fuchs also make the claim that this is one of their oils which should improve fuel consumption compared to other similar products - it'll be interesting to see how that pans out on our next trip to Devon. Of incidental interest might be the fact that Fuchs do not claim, on their labeling, that their products are Synthetic (or Fully Synthetic) as is the case with pretty with every other brand. I emailed them about this, and several other things I wanted to know about, and received back a very informative, friendly and open reply. Specifically relative to the "synthetic" labeling, it's all to do with the German definition of what can be regarded to be a synthetic base oil. Our accepted legal definition is considerably more broad than that in Germany hence why they don't use it on their label but I was assured that it meets our definition of Synthetic in all respects. Fuchs have been around for a very long time and also are the supplier of Quantum branded oils to TPS (info openly available on the net if you dig for it) so I'm completely at ease with their explanation.

OOPs! just had to stop for a moment to answer the 'phone! guess who it was? a female person, with a rather strange American? accent, telling me she was from Her Majesty's Revenue and Income Tax and that it had come to their notice that my wife was due a refund on her tax paid. Oh yes, that'll be right then! Call blocked! (won't do any good though, I've blocked them before). So now I'm turning round from the phone (land line) and walking back to where I'm sitting in the living room and guess what folks? It's snowing! really heavily, not lying though 'cos every thing's so wet after the last 24 hours of almost constant rain.

Been thinking quite a lot about that bottom slider pin. I'm a natural born worrier and, especially where cars are concerned (probably having worked with competition vehicles early in my career) a bit of a perfectionist. So, although I'm absolutely confident that it's completely secure and 100% serviceable at this time, I feel it may give trouble next time it has to be dismantled so I'm going to repair that thread when some good weather comes along in the spring. If that's not until after our Devon adventure it won't worry me. I've previously used Helicoils:


But have, very occasionally found the thread coil can unwind itself from it's hole at some inconvenient later date. I really really like Wurth Time Serts:


But they are the "Rolls Royce option in terms of price and also not so easy to get hold of - our local Wurth store won't deal with non trade customers, Why? so you have to order on line and hope you get the right thing - can't take it back and swap it so easily. On reflection maybe that's why the Wurth store doesn't want to deal with "amateurs"?

Having said all that I'm intrigued by these:


never used them but I can see at least a couple of distinct advantages. Much easier to do, little in the way of aquired skills needed. If at some later date, the thread gets damaged again presumably you could just knock the insert out and install another? Probably couldn't do that ad infinitem, but I bet you could do it more than once? Oh, and I think it's relatively cheap? Yes I like that idea! think I'm going to give it a go. Anyone used them?

The last thing I can think of to mention is resetting the dashboard service warning. I have VCDS (diagnostic program) so could use that but I noticed the Haynes manual gives a procedure pressing the dashboard buttons. Trouble is my car is a later model so has a different dash to the book's example. Earlier cars have red illumination and my later car has white. Also the buttons between the speedo and rev counter, which are the ones involved, Well mine aren't "buttons" in the plural, but "button", singular:

P1090162.JPG

The book's proceedure will, I'm sure, work on the earlier vehicles but not mine. So I searched You tube and found a procedure for a dash which looks identical but from the LEON? reasoning the electronics are very likely to be "brothers" I tried it. It works just fine. The procedure is:

1) press in that 00/set button and hold it in
2) keeping the button pressed in turn the ign on - no need to start the engine.
3) keeping the button pressed in wait till your choice of reset comes up on the little central display above the button.
4) release, press and again release the button. You're done
You have the choice between the two standard warnings of an "oil service" or an "oil and inspection service". So with the button pressed in and the ign on after a wee while the oil insp will be displayed on the mini screen. If it's the oil and insp you need to reset, as was my case, you just keep the button pressed for longer until oil insp changes to oil and insp. So up till now you will have pressed the button and kept it pressed while turn on the ign and wait for the required message to appear on the miniscreen. When the service you require appears immediately release the button which will select your choice and then press and release the button again to confirm that this is the action to be completed. Nothing else to do. You're done. If you want to double check go to the info tainment screen and punch the CAR button at the bottom of the screen you'll now see a "setup" button? touch on this and from the menu that appears scroll down (it's off the page to start with) until you see "service". Touch on this and you'll see the service intervals the car thinks it knows. If you've done it right the mileages will be big figures (can't remember actual figures but relative to a year/2 years running) and the days will show 365 etc.

Well now for the MOT. Surely at 4 years old with 18,000 miles on the clock she can't have anything much wrong with her? if she passes I'm going to treat her to a new set of wiper blades as a special treat!

All the best folks - hope you've enjoyed this
Jock

PS. OH, and I've been beavering away at this for so long now that the snow has stopped and it's a lovely bright sunny but very cold day out there.
 
Last edited:
Give the man a coconut! Well done Al, Right first time. Must admit I had to think about it for a wee while. That hard nylon? hose goes to the servo but also splits off and goes to the inlet manifold so, unlike most diesel, there must be manifold vacuum available some of the time. There are non returnvalves in both branches. I haven't had the trunking from the throttle body off yet (maybe never will?) but I'd guess there's a butterfly in there somewhere.

Sorry Jock,

I'll have to forefeit the coconut..... :eek:

I cheated by doing a google search for the pump no. + Hella, as shown on the pump label ( I clicked on your pic then enlarged it so I could read the numbers). Couldn't resist, have never won anything in my life - what's that old saying?, oh yeah, 'nice guys finish last'. :D

Regards,

Coconut-less Al. :cry:
 
Last edited:
Absolutely Al, file in line with the helical slope of the thread or you'll slightly reduce the "thickness" of each individual thread - although probably not by enough to make any significant difference. Still, if you're an obsessive perfectionist like me?

______________________

That's interesting about the "internal" thread files. I've never seen, or heard, of one of those. Must look into it - although I've managed all these years without one so probably a bit late for this old dog to change his spots.

Thanks Al. regards
Jock

Obsessive perfectionist, me? - undoubtedly! Has caused me many problems working in the motor trade.

____________________

The internal thread files look like your one but, in addition, have a short cylindrical section at each end, each of which has 4? different thread pitches for internal threads. Iirc, they may have been made by that great German tool manufacturer 'Dowidat' now sadly gone afaik. I'll know when I find mine.

Just found my old Dowidat tool catalogue 1977, page 127 shows Universal thread Restorers No. 750 M (metric), 750 A (American sizes incl. UNC, UNF) and 750 W (British i.e. Whitworth). Mine came in nice covered cardboard boxes to keep them clean and away from contact with other tools (as you pointed out, same as with all files, thread taps etc.).

Now if I had a printer/scanner and knew how to scan and upload images, I could post a pic of this type of thread restorer - but I don't, so I can't. :( Maybe check out the great eBay for one of these for sale?

Regards,

Al.
 
Last edited:
Hi Jock,

I see that Car Mechanics magazine, Feb. 2020 issue has a service feature on a Seat Ibiza 3 cyl. 1.4litre, Diesel, just in case you want to compare it with your petrol version.

Al.
 
Hi Jock,

If you'd like to see a pic. of one of these external and internal thread restorer files, see:-
http://www.warrensvillefile.com and look under Speciality Files for Thread Restoring Files Internal and External

Regards,

Al.
 
Last edited:
Hi Jock,

I see that Car Mechanics magazine, Feb. 2020 issue has a service feature on a Seat Ibiza 3 cyl. 1.4litre, Diesel, just in case you want to compare it with your petrol version.

Al.
Thanks for bringing that up Al. I actually subscribe to CM and even before I did I used to buy it a lot off the shelf. In my view it's probably the best of the major mags you'll find in the shops. I like Practical classics too but there's seldom much in it I don't already know - said he humbly. Both mags are good for ideas and suppliers of tools, equipment, specialist services, etc.

The actual car featured is a 2008 so quite old now and not really equivalent to my car. much nearer to my boy's old Fabia 1.9 tdi PD.

Thanks also for directing me to the Warrensville file site - an interesting few minutes read.

regards
Jock
 
Good news. Unsurprisingly, considering she's only 4 years old, she passed! I spent Tuesday afternoon hoovering her out and giving her a wash (I think a well presented car gives a good impression to the tester.) At the same time I just popped the N/S/F wheel off and checked that slider pin. It was nice and tight still so I think repairing that damaged thread is not desperately urgent but will definitely need to be done before our next Devon adventure. I'm not dodging it, just I think I can now risk waiting for a nice day rather than grovelling around in the rain!

Suppose I'll now have to keep my promise and buy her a set of wiper blades. Anyone know what the recommended replacement interval is on the battery in the remote key fob? She's still on her original ones.

Looks like the prep work payed off as Kenny commented "very nice car you have there" when I went to pick her up. made me feel good for the rest of the day!
 
Back
Top