Technical Blow out + new wheel trashed

Currently reading:
Technical Blow out + new wheel trashed

Artermis do you remember which uni boot you used (sorry did you use one the stilo)... i may have to buy a stretchy one... but looking at how they are fitted requires lubrication and i was worried it would degrade the c.v grease over time... in videos they use thin based washing up liquid in warm water.

Try this one mate. Not used on Stilo, no. I used it on my Alfa GTA.

Look at this on eBay http://www.ebay.co.uk/itm/152300233853
 
This post contains affiliate links which may earn a commission at no additional cost to you.
Little update for today... got carried away talking about the disco an the non existent egr..

But... here goes.

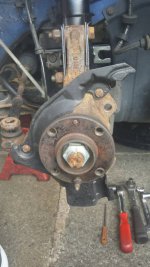
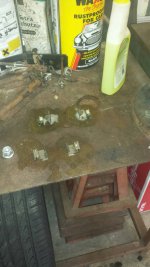
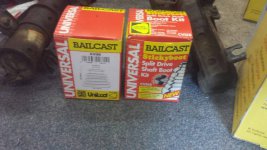
All parts obtained now... even c.v boot kits (bought both. See pics)

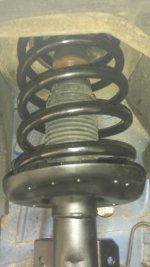
Then started to compress new springs... didnt go well first time round... took forever with a ring spanner then twang... no damage no drama... so tried plan b. Air gun and compressors on either side with 3 coils grabbed (7" of spring) no good... needed 11" compression to be safe and fit the top mount....

No where local had spring compressors that long... tried plan c... bust a few g clamps... mac compressors still fine...

Last resort... a call to westfield garage... only open to finish outstanding mots.. not usually open on a Saturday.

Charged me £10 x 2 for two springs & shocks built up... bargain, they used a cage round the spring and an air line... these stilos have big ass springs!!

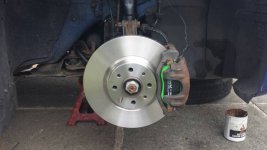
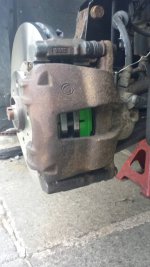
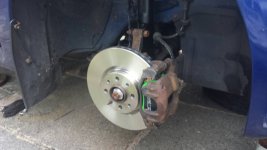
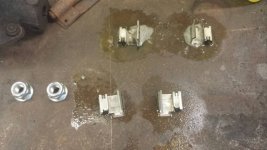
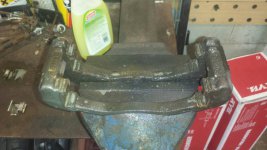
Anyhow... new shocks and springs built up. Front off side fitted... scrubbed down brake dust catcher and repainted... to keep things neat... calliper is being rebuilt on both sides... had a bottom sticky pin... wire brushed the shims and working on them still... then finally the guiding pin that the previous owner had snapped has to be removed and replaced... then onto the near side and have to do near side c.v. finally rear brakes and new wheels / tyres then boom... back on the road.

Pics attached

20170902_165407.jpeg20170902_165418.jpeg20170902_165438.jpeg20170902_165501.jpeg20170902_165448.jpeg20170902_165514.jpeg20170902_165615.jpeg
 
Last edited:
Final update of the week.

The front drivers side now has shiny new suspension, disc and pads. Fully recondition the caliper myself (lots of elbow grease, wire brushing, emery taping etc). Calliper sliding pins had previously been lubed up with copper grease!!! Ive cleaned out the pin holes (long rag and a screw driver)... gave the pins a gentle polish with some worn emery tape (didnt want to score them) lubed up with silicone grease (high temp resistant stuff, for hubs and other hot components) could have used Molly grease but was unsure of its high temp resistance. Final job was the shims...

Assembled it all on the car, used old pad to push piston back with some squeezy clamps (£15 at aldi if anyone needs any).

Copper greased edges of pads and around where the caliper grabs it and where the piston pushes the pad... not sure if i needed to do this as the greenstuff pads have black pads on the back to cut down noise and vibration... anyhow don't see how it can harm them... if anything it will help with noise.

So thats it all done on drivers side, ive put the wheel back on and taped a black bin liner over the wheel as i don't want rain to get on my new disc whilst its stood.

I am also ready to fit the passenger brakes, i have done suspension, wishbone etc on that side, refitted hub etc... oh and c.v boot had a Tiny nick in it... cleaned it up and glued it as it was on a bit that doesn't stretch and was only nicked when the metal retaining thingy hit it when the incident happened... it should hold up as its a smooth tight nick so i glued it, see how it goes, i still have two new boots if needed :).

Anyway all ready for dust plate and brakes... front should be complete tomorrow (im working 9 to 5 so only have 2 hours in the evening) then tuesday i will torquing up the rear suspension under load and fitting the new rear brakes...

I think im looking at wednesday before i will give it a ground shaking test drive... see if anything falls off LOL...

Then hopefully new tyre at the weekend and two wheels going on.

Its took much longer as I wanted to do it right... when I saw the state of the caliper, shims and pins... there was no way i was going to put my shiny new discs and green pads into them so i had to clean it all up... and boy im glad i did, its worth the piece of mind knowing its all like new snd moving really smooth...

Put it this way, my hgv mechanic said they looked awesome and that i had done a perfect job, so good that he wants me to do his on the disco when he next does them... well i aint gonna say no after all he has helped with and everything he has provided me with... what a top bloke! And very fit for 73 ;).

Anyhow, some pics attached, calling it a night (its raining)20170903_133920.jpeg20170903_133929.jpeg20170903_133959.jpeg
 
Ok then guys...

On my way to do another few hours on the car and will hopefully test drive it tonight.

It wont be my daily driver again until the weekend though, i need to get a new tyre and swap over a tyre on the rear as one rear wheel is buckled and i dont fancy my chances doing the rest of my commute with a buckled wheel... i can just imagine id knacker the hub etc on the rear if driven too much like that.

So tonight, i am cleaning off excess copper grease on my front pads lol... then doing the rears. All the front is complete now.

I also had to rebuild old calliper that snapped off... the replacement didnt fit... it was for a less powerfull jtd and they are smaller :( anyhow repaired and fitted, will replace with a new one at some point for piece of mind.

Anyway rear brakes by fiat's procedure, i need to undo the handbrake adjuster, mark it and give it 3 full turns to slacken it... then disconnect rear cables on calipers then wind them back... once pads back in and system is bled, i have to pump the pedals about 15 to 20 times with the engine running then put the handbrake adjuster back to its original position to keep the handbrake nice and tight.

If anyone else knows an easier method then please do feel free to add your ideas / experiences... i have had nothing but problems with handbrakes when i did my old stilo... i followed the procedure but it never worked, handbrake was hardley existent, brakes locked up nice under heavy foot breaking so it wasnt the pads, discs or bleeding...

Anyhow... when thats finished (hopefully tonight) i can then torque up rear shocks under load and take daniella for a test drive... then its waiting till saturday to replace wheels and tyre.
 
Last edited:
So then guys, finished the car last night at around 8:30...

Took her for a test drive, feels great... couple of niggles but the new suspension has transformed the car... she now feels taught and firm... not as soft and bouncy as before - win win, so glad i did both sides... she rides like a brand new car.

Just got tracking to do now.

Couple of niggles:

Can hear a weird clonk when i go forwards from reverse and when going into second from first and putting her under load - sounds like the driver side... could be something loose or a mount or my mechanic may have loosened the hub nut on drivers side - dont think he did but will check today... it could be me too so will keep and eye on it, its definatley not suspension... its something to do with shaft or a mount...

Next issue... brakes!
They are nice and sharp, handbrake is awesome - followed fiat's procedure from elearn... however, it didnt take much bleeding, i starter with rear driver side (furthest away from resovoir) took lots of bleeding on that rear driver side so did all other sides and then went round again twice... used about 400ml at the very most, old fluid was nasty and dirty.. all callipers had been removed completley and lines plugged up with old brake lines tapered off...

Well they work good but the peddal seens to travel away still and you have to keep a constant press to keep the same level of braking, couldnt see any leaks... will inspect again this afternoon and go round all 4 corners again and give it another bleeding session as i think there could still be some air in the system.

If not then im at a loss... doubt its the damaged calliper that i repaired, the sliding pin that bent was removed and replaced, it was the one with the rubber boot round the bottom that sits in a recess... the round brass ring that the big rubber boot goes over has a tiny crack and is a tiny bit out of shape however the bore and new pin fit perfectly and slide with nice resistance, rubber boot also fits and stays on fine... will double check this but cant see it been and issue.. if it is then a new carrier will be needed - not a big issue.

Last thing i was thinking was the brake pressure switch / pin or whatever it is... i read the end can brake and cause a soft wandering away peddal and is quite common on stilo and bravo... can anyone confirm?
 
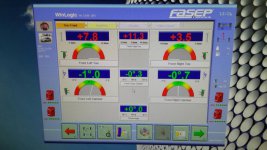
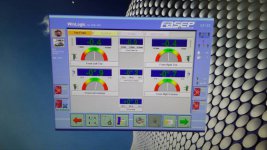
Finally had tracking done today since all the front was completed and finally feel safe to hoon the thing on the bypass again...

Drives spot on and feels like a new car... just got the offside bearing to replace and tyre place have recommended that i replace the rack ends and track rods as the threads are seizing up more and more each time i have had it aligned... so will order them bits next month...

Feeling much happier with her now and want to keep her again :)
 

With that amount of toe-in you may well find the edges of the tyres wear too much.

Better to set for zero toe which is now the recommended setting.

 
Last edited:
We struggled to get -0 toe with my current rods and rack ends... they are worn... will be replaced soon and will have -0.0 toe total.
 
We struggled to get -0 toe with my current rods and rack ends... they are worn... will be replaced soon and will have -0.0 toe total.

Just be aware that it's likely from factory that the track rods aren't keyed, so it's not like you can get them off with a good spanner. Certainly mine weren't, so I had to use one of these things:

http://www.ebay.co.uk/itm/Steering-...Garage-Tool-/140894097004?hash=item20cdf14e6c

to remove the rod. Tell you what though it make the job so simple it was unreal.

If you do it and use one of these things - just don't put the car on full lock when you do. When on full lock the head of the track rod ends up right alongside the chassis leg and the bulky head of the tool doesn't have enough room. If you wind the steering back in half a turn or so the head of the tool can fit passed the chassis leg and you've got plenty of room to work.
 
This post contains affiliate links which may earn a commission at no additional cost to you.
Just be aware that it's likely from factory that the track rods aren't keyed, so it's not like you can get them off with a good spanner. Certainly mine weren't, so I had to use one of these things:

http://www.ebay.co.uk/itm/Steering-...Garage-Tool-/140894097004?hash=item20cdf14e6c

to remove the rod. Tell you what though it make the job so simple it was unreal.

If you do it and use one of these things - just don't put the car on full lock when you do. When on full lock the head of the track rod ends up right alongside the chassis leg and the bulky head of the tool doesn't have enough room. If you wind the steering back in half a turn or so the head of the tool can fit passed the chassis leg and you've got plenty of room to work.

Thanks bud - looks like im going to be busy this time next month!
Will be sorting out both rack ends and rods along with offside hub bearing and hopefully that stubborn calliper on the nearside front.
 
This post contains affiliate links which may earn a commission at no additional cost to you.
Sorted calliper and bearing... had bearing pressed in at garage... but took took the hub and not the car... cost me £20. To be honest. I could of done it with the iron bench and press we have here but i didn't have time and funds to get another bearing if all went pairshaped... so thats done.

Calliper carrier replaced and moving freely... however, i dont recommend green stuff pads... even the non grabby side and rear wheels have built up so much dust like you would not imagine...

Anyhow, final call is tripods and cups but im struggling to find any issue with them... there solid and not dry..

Also track rods and rack end threads appear fine and i have cleaned them some more so will have to go somewhere else for 4 wheel alignment as my hgv mechanic said get me under the car in the place your getting alignment done and ill do it.... so im confident they dont need replacing... however, its not expensive...

Thank god shes coming along now and being driven more ;)
 
Last edited:
Back
Top