Styling How to paint calipers

Currently reading:
Styling How to paint calipers

Koa

Free dentistry available
Joined
Jun 5, 2004
Messages
6,685
Points
983
Location
Bournemouth
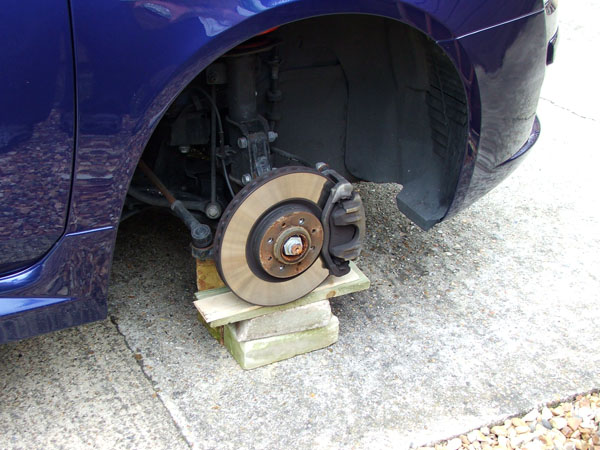
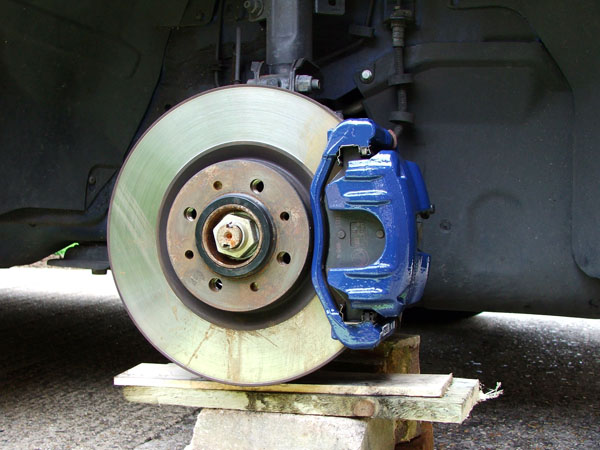
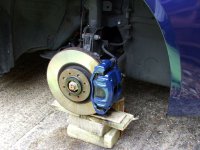
Here's a couple of pictures of my calipers I painted today as I wanted to keep myself busy because of all the crap with Fiat at the moment.

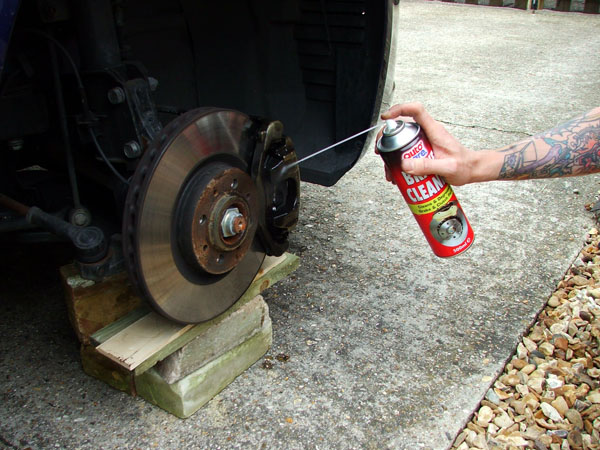
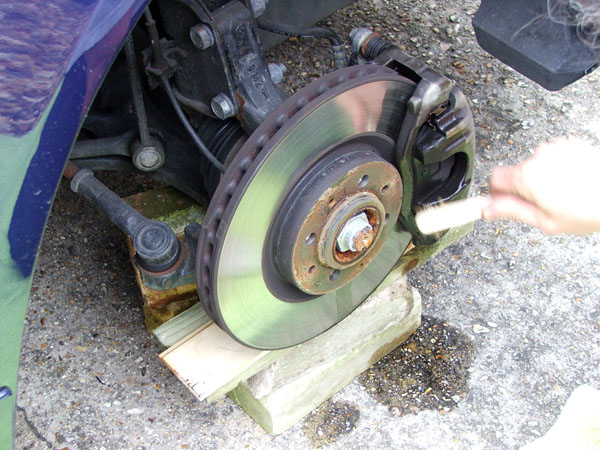
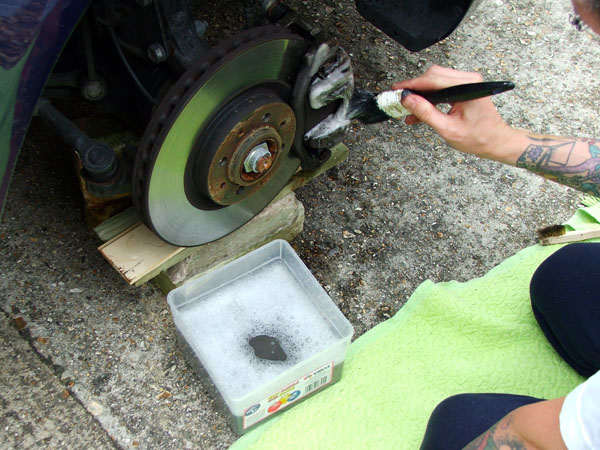
I took loads WIP of pictures and found it to be a time consuming be ultimately easy enough job as long as you take the time to do it right.

I used Hammerite Smooth which iirc was about £5 a tin and I used about a quarter of a tin in total for two coats.

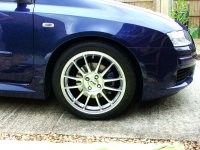
I wasn't too sure about what colour to go for at first, but in the end I mixed two different blues to get something that matched the car and I think they turned out pretty good.
 

Attachments

  • front1.jpg
    front1.jpg
    206.8 KB · Views: 510
  • front2.jpg
    front2.jpg
    232.5 KB · Views: 367
Re: A busy day painting my calipers

uno_94 said:
that looks really nice (y) does it just brush on? it looks to good to be brushed on?
Yeah mate, just brushed on. But don't follow the directions on the tin :) It says to recoat between 1-8 hours after the first. But I read somewhere on the net a while ago that when painting calipers with hammerite you should put the second coat on before the first one can harden completely and it worked fine for me :)
 
Re: A busy day painting my calipers

uno_94 said:
that looks really nice (y) does it just brush on? it looks to good to be brushed on?

The paint 'flows' out after application, so you don't have brush strokes in the finish.
 
Re: A busy day painting my calipers

activematt said:
Looking good mate, definately an improvement! Sorry to say it but from that pic your wheels look really quite small.
I have new 18" wheels coming on tuesday ;) Also the car is sitting quite high there as the suspension hasn't gone back down all the way after the jacking up.
 
Re: A busy day painting my calipers

Not telling :D

Hehe, not being funny, but i'm actually making a video and I don't wanna reveal anything about the car till i've got it all finished, bodykit included ;)
 
Re: A busy day painting my calipers

Hopefully around 4-6 weeks by the time it's done, depending on how long the kit takes to come once I order it, which i'm hoping to do within the next week.
 
Re: A busy day painting my calipers

Cheers Stu (y)

You gonna do yours sometime then mate ? In fact are you getting the new wheels you've been contemplating for a while now or are you just waiting for the Alfa ;)
 
Re: A busy day painting my calipers

Ooo, I like! (y) Might have a go at this myself this week! ;) How did you prepare your calipers? Just a wire brush and de-greasant job?
 
Re: A busy day painting my calipers

KoArAnG said:
You gonna do yours sometime then mate ? In fact are you getting the new wheels you've been contemplating for a while now or are you just waiting for the Alfa ;)
Still undecided - got work pressures on for most of this year, so currently Stilo is used as a 'fun' commute everyday - it does get hammered, though.

I will stick on 16s for now; also helped by fact I paid for 4 new Bridgestones on them. My next mods will probably just be strutbrace and engine bay coding, lol.

Yes, the Alfa is looking good - IF it is the 159, then probably the 3.2 V6 Q4 - BUT then I want to see Brera spec as well - won't happen til next summer at the earliest, and then I may keep the Stilo as a 3rd car ;)
 
Re: A busy day painting my calipers

Step By Step Guide to how Koa painted his Calipers.

Step 1: Jack car up and remove wheels. If you are using the jack included with the car, you might want to put a few bricks under the axle to be safe.
step1.jpg


Step 2: Give the calipers a good spray with some brake cleaner or something similar.
step2.jpg


Step 3: Use a wire brush to scrub off as much brake dust and muck as possible, constantly using the brake cleaner to help get rid of any stubborn muck.
step3.jpg


Step 4: Wash the calipers off with hot soapy water,(we used Fairy Liquid) use with a good stiff paint brush combined with the wire brush for any more stubborn bits.
step4.jpg


Step 5: Let calipers dry thoroughly and use a towel to assist in any hard to reach areas. when they are as clean as the image below, they are ready to paint.
step5.jpg


Step 6: Stir the Hammerite, but not too vigorously. Using a small semi flexible paint brush, apply a thin layer to the caliper working from the top of each section, making sure only to paint non moving parts of the caliper.
step6.jpg


Step 7: Apply a second coat after only 30-40 minutes regardless of what it says on the tin because if it is allowed to harden too much, the top layer will not take properly. Voila... Painted Calipers... (y)
step7.jpg


whilst all of the painting is going on,, don't forget to get your other half to thoroughly clean the wheels and tyres. :)
 
Thanks Stu,

I know it's a simple thing to paint your calipers but we all have to start somewhere and for some it can be a little daunting, I think the tutorial will encourage a few more to have a go themselves. (y)
 
Back
Top