Hi -
There's been some discussion about this 'pig of a job', eg https://www.fiatforum.com/stilo/286366-replacing-alternator-jtd.html but we haven't got a guide yet. I had to replace my alternator yesterday, and took a few photos - it's not enough for a formal guide article, but hopefully it will be helpful. There's no doubt it's a demanding job for a DIY'er, but it's not technically difficult - took me about 8 hours, working at a steady pace and stopping frequently to consult manuals etc.
Start by jacking onto axle-stands, removing driver's side road-wheel and inner wing linings. With a long spanner, turn the aux belt tensioner anti-clockwise and slip the aux belt off the pulleys :

Underneath the car, slip a piece of scrap wood as picture, this helps to absorb torque when you unbolt the front exhaust section :

With WD40 and attack weapons as preferred, unbolt the front and rear connections :


And drop the short flexi-section out :

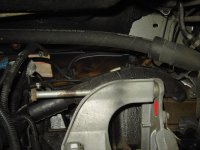
From above (standing on the removed roadwheel helps), unclip the indicated electrical connection, and unbolt the dipstick upper mounting :

Unbolt the lower dipstick fixing (where it enters the block), unclip any attached wiring, and remove the dipstick tube :

Remove the stubby rubber tube to the coolant pressure tank (warning, there will be a spurt of coolant), disconnect the ECU plugs, and stuff all the ECU cabling round the back of the engine to get access to the alternator top bolt :

After undoing the top bolt, back underneath to remove the two electrical connections on the alternator, and undo the nut on the bottom bolt. Then remove the chassis bolts from the two engine reaction struts:


There's now a neat little rectangular space between the driveshaft and the bulkhead. Apply a lever to the reaction strut mounting, and pry the engine forward just an little, and the alternator will neatly drop through there:

Reassembly is straightforward - just put everything back where you found it.
General points :
- The chassis bolts for the engine mounting are incredibly hard work to remove. A long breaker bar, and patience. Clean the bolts and coppaslip them, and they go back in a lot easier.
- The lower alternator bolt came out through the wheelarch, but fractionally fouled on the inner chassis. I was near to hacksawing it off, but then succeeded by applying a crow bar to the top of the crankshaft pulley and levering the engine block down a few mills.
There's been some discussion about this 'pig of a job', eg https://www.fiatforum.com/stilo/286366-replacing-alternator-jtd.html but we haven't got a guide yet. I had to replace my alternator yesterday, and took a few photos - it's not enough for a formal guide article, but hopefully it will be helpful. There's no doubt it's a demanding job for a DIY'er, but it's not technically difficult - took me about 8 hours, working at a steady pace and stopping frequently to consult manuals etc.
Start by jacking onto axle-stands, removing driver's side road-wheel and inner wing linings. With a long spanner, turn the aux belt tensioner anti-clockwise and slip the aux belt off the pulleys :
Underneath the car, slip a piece of scrap wood as picture, this helps to absorb torque when you unbolt the front exhaust section :
With WD40 and attack weapons as preferred, unbolt the front and rear connections :
And drop the short flexi-section out :
From above (standing on the removed roadwheel helps), unclip the indicated electrical connection, and unbolt the dipstick upper mounting :
Unbolt the lower dipstick fixing (where it enters the block), unclip any attached wiring, and remove the dipstick tube :
Remove the stubby rubber tube to the coolant pressure tank (warning, there will be a spurt of coolant), disconnect the ECU plugs, and stuff all the ECU cabling round the back of the engine to get access to the alternator top bolt :
After undoing the top bolt, back underneath to remove the two electrical connections on the alternator, and undo the nut on the bottom bolt. Then remove the chassis bolts from the two engine reaction struts:
There's now a neat little rectangular space between the driveshaft and the bulkhead. Apply a lever to the reaction strut mounting, and pry the engine forward just an little, and the alternator will neatly drop through there:
Reassembly is straightforward - just put everything back where you found it.
General points :
- The chassis bolts for the engine mounting are incredibly hard work to remove. A long breaker bar, and patience. Clean the bolts and coppaslip them, and they go back in a lot easier.
- The lower alternator bolt came out through the wheelarch, but fractionally fouled on the inner chassis. I was near to hacksawing it off, but then succeeded by applying a crow bar to the top of the crankshaft pulley and levering the engine block down a few mills.
 I tried fitting the bolt from the opposite end, but the threaded end would have fouled the auxiliary belt.