Technical Replacing the alternator (jtd)

Currently reading:
Technical Replacing the alternator (jtd)

Muppet1

Springer Mad!!
Joined
Feb 8, 2008
Messages
1,063
Points
320
Location
Somerset
Hi all,

Been a while but after sitting around for 6 months im putting the old girl back on the road, However we need a new alternator.

Has anyone done this lately as it looks a pig of a job and one im not looking forward too, Any tips and advise would be most welcome.:D


Oh ment to ask i cant turn the alternator anti clockwise from under the car but will turn the other way, Is that its way of telling its knackered.
Thanks.
 
Last edited:
Oh ment to ask i cant turn the alternator anti clockwise from under the car but will turn the other way, Is that its way of telling its knackered. Thanks.

Not sure whether that means it's faulty. I believe the JTD alternator has a clutch pulley so perhaps it's only supposed to turn one way?

Is there any other problem with it? I read somewhere that the offside driveshaft has to come out to remove the alternator and possibly the engine needs lifting slightly. :(
 
remove belt spin alt by hand if it sounds even vaguely sandy then the bearings are shot! (you may want to put a long screwdriver/metal rod, such as threaded bar, onto the alt casing and put ur ear to it to hear the sandy-ness if any...)there should be ZERO detectable play in ANY direction when acting on the spindle

final option start her up and check the charging rate at various engine speeds (after putting the belt back on obviously;))
 
Thanks for the replys so far, Well finally had to give the old girl a tug down to road to get her going come the end, And there is no power steering and the alternator isnt charging. As once i got her going i left her running but she died half an hour later.

How ever i know the belt had broken at some point so will try putting on another before i panic to much.

But thinking about it i think the alt had failed just before i parked her up as i do remember it pinging up on the dash but cant remember if i had power steering.

Well had a look at the guide and OMG.
 
the aux belt on the stilo isnt as hard as that, i had both belts changed last year (not by me) and he only undone the o/s engine mount and inner arch cowling before replacing both belts.
The doblo does seem to have the engine mounted further back than the stilo (looking at my inlaws 54 plate jtd).
Best of having a look im sure its not as hard as that.
roy
 
What a blasted job this is, How do you remove the drivers side drive shaft.

I have split it and undone the 3 bolts on the driveshaft support but i cant pull the shalf out. Got the alt undone but need to withdraw the driveshaft arggggggggggggggggggggggg.

Wish i hadnt started it now!!!!!

Please anybody??
 
Well shifted the driveshaft a bit with a block of wood and large hammer so im hoping it will pop out tomorrow.

Im guessing no body has attempted this then with a stilo, I can understand why too!!!!!!!!!!!!!!!!!!
 
Each Stilo engine is very different regarding access. Why does the driveshaft have to be removed? Not saying it doesn't have to but is it just access to get it off or access to get it out?

It's a bit of a pig on a 1.6 engine too but i managed it without removing a driveshaft
 
Last edited:
There is nowhere for the alternator to come out at all with out removing the driveshalf. I even had to drop the cambelt end of the engine so i could remove the bottom bolt to let the alternator drop.

I will take some pictures tomorrow and do a picture refit so people can have some idea of whats involved.

Its a awful job to be honest and doing it on the ground makes everything so hard. But i will win!!!!!
 
I read somewhere that the offside driveshaft has to come out to remove the alternator and possibly the engine needs lifting slightly. :(

Oh yes you are so correct with this information Davren.:mad:

Oh and yes sorry this is for a JTD.
 
Last edited:
Just looked at the eLEARN manual, it doesn't mention removing the driveshaft. For the JTD 8v engine, all it says is, remove the engine cover, undertray, right front wheel arch liner, auxiliary drive belt, front exhaust pipe section, oil dipstick tube and the center bolts of the lower engine and gearbox stabiliser mountings. Then the alternator fixing bolts and remove the alternator from below.

It's the same for the JTD 16v engine except it also says remove the crankshaft pulley.

I'm guessing that removing the exhaust pipe and stabiliser mounting bolts is to allow the engine to be moved forward a little.
 
Well i guess you could just get it through the gap where the exhaust is but thats all assuming you can get the blasted exhaust pipe off. Cant really get to the turbo end and the 3 bolts just below for the flexy bit are seized solid and i cant shift them so removing the driveshaft is the only other option.
But again in a garage on a lift it would be different but on axle stands its a complety different kettle of fish.

But of all the supid places to put the alternator though, Starter looks just as bad but at least its smaller so should fit between the engine and driveshaft!!!
 
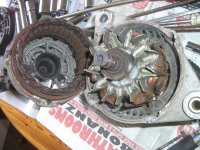
If you have the access to have the alternator disconnected off the engine and you're simply struggling to get it out the engine bay then this is what I did. It's only 3 bolts and my alternator split in two like a coconut which can make it very much easier to get the thing out. Understandably people are scared of splitting a new alternator when installing it but there's not much to go wrong and can save a lot of work removing stuff just for access to remove/install it from the engine bay

alternator split.JPG
Mark the two halves where they line up to save time
 
Last edited:
Well finally got the alternator out today and new one in,

Now The driveshaft does have to be removed unless you can deal with moving the engine forward enough for it to drop between the bulkhead and driveshaft. I didnt so a block of wood, Large hammer on the cup of the drivers side driveshaft worked in the end.

Anyway next issue once i got the alternator bolted back was putting the belt back on which was a struggle but with help from my mums neighbour who happens to be a good mechanic we got it back on.

So hopefully it will be back together tomorrow and running.

Its one of those jobs that once you have done it would be easy todo again but for the first time it has been trying to say the least.

Deckchair,

Wasnt the length of the alternator it was the width of it and i dont think splitting it would have made a difference but would try it next time though just to see.
 
Last edited:
Well got the car up and running today and its nice to say that i did it.

But a word of warning to anybody who needs to do it,

Allow at least 8-10 hours if you are doing it from the floor, I had the car on axle stands but could have done with more hight but beggars cant be choosy,

First off you need to take off drivers side wheel and engine cover.
Then disconnect the battery,
If your alternator belt is still on the car remove belt.
Oh and your plastic under tray if you have one and also the drivers side piece that the under tray bolts too, I didn't as i haven't got any.
Next thing to do is you will need to remove the drivers side drive shaft, Mine was quite easy as i had to remove the suspension strut due to having to replace the spring so i split the drive shaft where it go's into the cup, Basically just pulls out.
Next you will need to undo the rear bolt on the engine mounting bracket, This is the one that bolts around the driveshalf, Then there are 3 bolts on the C part of this bracket.
You may have too slacken the rearmost bolt where it goes in the floor of the sub frame to give you wiggle room.

Once you have removed this C section bracket you can the access the 3 allanhead bolts that hold the inner driveshalf into place. These are bloody horrid to get at and a 1/4 " little socket set is ideal though.

Once you have removed the 3 bolts from the drive shaft you can then with a lump of wood and a large hammer knock the driveshalf out of the gear box. I did resort to using a wide masonry chisel not ideal and you use on at your own risk but it soon moved the driveshalf.

Then remove the 2 wires from the alternator, 12MM and 8MM socket again this is where the 1/4 inch socket set comes in handy.

By the time you have done this, make yourself a cup of tea and a fag if you must:D.

If its a Jtd then split the exhaust pipe just after the flexi bit, U will need to trust me!!!

Then from the top remove the tiny piece of pipe between header tank and engine, Next undo the earth wire under the ecu and unplug the two plugs that go into ecu.

Basically now wrap all that behind the engine so you can now see and get to the top bolt of the alternator, You can get to the nut from above thats hidden behind so get a spanner on it and the one that pokes out just above the chassis rail i ended up using a socket and two 1/2 inch extension bars to shift it.

Once you have removed the top one remove the bottom one again from under the car get the spanner on the nut and undo the bolt from the wheel arch end.

Once you have undone the bolt you wont get the bugger out until you drop the engine. Do that by placing a jack under the sump with a piece of wood, Take the weight of the engine and undo the 3 bolts until the end of the threads.
Drop engine slowly and remove bottom alternator bolt. That should then allow you to knock the alternator from the engine, Beware it will be tight then wiggle said alternator along the back of engine and down in between engine and bulkhead and push flexi bit to one side as well.

Careful because you will trap a finger whilst doing this. i do have the cuts to prove it.

Fitting is the exact reversal of the above, But you will know that as you have just done it.

I will take some pictures of must of the above point to show where and what i mean but didn't take any of the job in progress I'm afraid.
 
Last edited:
Back
Top