JohnsonChris
New member
Re: Where's the CDChanger Port on ConnectNav+?
ok here goes ... I apologise for any fuzzy images, and if you want the hi-res versions then please PM me. I don't know how to embed images into the post so please just look to the attached images and I'll reference this in the walkthrough below.
First Step, "What do you get?"
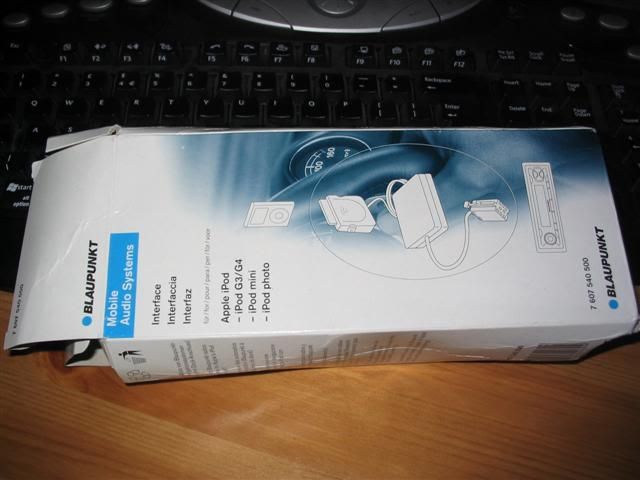
You get an interface unit, which bridges the headunit and the ipod (Interface.JPG), it has two simple connectors at each end - one which goes to the CD changer (InttoCDChanger.JPG) and one which routes to the cradle (InttoCradle.JPG). The cradle you receive will depend on the iPOD/iPOD-Mini you own - I have a 4th gen iPOD, so I get the ActiveCradle (Cradle.JPG). Everything is pre-wired, no soldering, no pinout diagrams - all very simple.
Next Step, "Wire it all in"
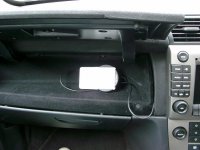
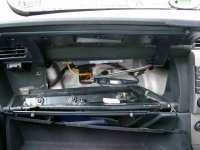
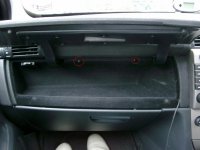
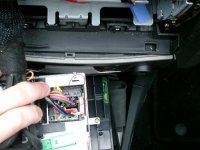
This would be the same for installing a standard CD Changer, I'm no electrican or car installer, I promise this took 10 minutes. The first step is to open up the glove box, there are two screws which need to be removed to allow you to take out the backing in the glove box, this takes time and don't rip away at it - it will come out, it just needs a bit of twisting and squeezing here and there!! I have marked the screw points in red circles to show them up (OpenGB.JPG). Once you get it loose, this is what you'll be left with (GBminusCover.JPG)
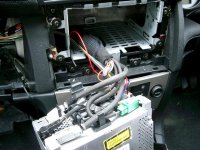
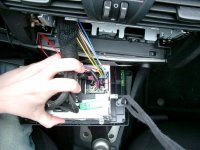
Look to the right hand side of the glove box and you'll see a hole where Fiat run the cables to the back of the Head unit. This is where you'll run the cables - but you need to get the headunit out first, I was able to do this without disconnecting anything and there should be enough free cable to let the head unit drop to just above the gearbox. My headunit was not secured in place - I placed my fingers through the cable run and pushed the back of the unit forwards, at the same time I placed my right hand on the front right side of the unit and wiggled it out of place. If yours will not move then you have to unclck two screws on the front of the head unit (HU.jpg) these are marked in red circles. Since I didn't have to do it, then I'm afraid I don't know what tool is needed.
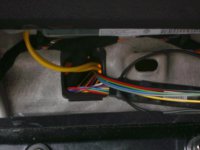
So far so good, with the head unit out, you simply need to plug into the CD changer interface port, this is a standard mini DIN connecter. The first picture (Without Connector.JPG) shows the unit without the cable connected I have highlighted the 8 pins you need to connect to. The cable will only go one way and it will clip into place, leaving I think 2 pins unconnected, here it is with the cable in (With Connector.JPG).
Still with me? Good ... Move the head unit back into place taking care with the cables. I ended up with excess cabling from the interface so I used the hole at the back of the glove box to feed the excess cable into (SpareCable.JPG).
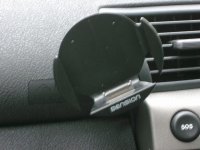
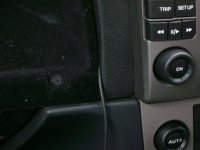
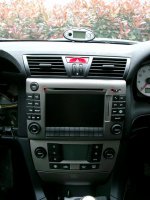
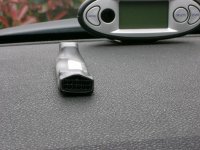
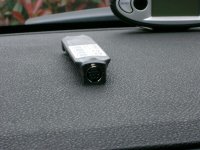
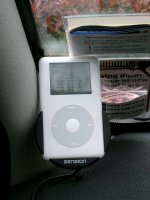
I'm not keen on drilling holes so I fed the cable from the interface down the right hand side of the glove box - there's a gap and it will hold just fine (GBCableRoute.JPG). Then I simply moved the glove box back into place (Final Place.JPG). I don't want the iPOD on show, it's nice having it on charge and ready to go, so I leave it where it is. But if you want you can mount the iPOD in a number of locations, here it's shown over by the front screen (iPODinCradle.JPG)
That's it ... I think! All I need now is working firmware!
Chris
ok here goes ... I apologise for any fuzzy images, and if you want the hi-res versions then please PM me. I don't know how to embed images into the post so please just look to the attached images and I'll reference this in the walkthrough below.
First Step, "What do you get?"
You get an interface unit, which bridges the headunit and the ipod (Interface.JPG), it has two simple connectors at each end - one which goes to the CD changer (InttoCDChanger.JPG) and one which routes to the cradle (InttoCradle.JPG). The cradle you receive will depend on the iPOD/iPOD-Mini you own - I have a 4th gen iPOD, so I get the ActiveCradle (Cradle.JPG). Everything is pre-wired, no soldering, no pinout diagrams - all very simple.
Next Step, "Wire it all in"
This would be the same for installing a standard CD Changer, I'm no electrican or car installer, I promise this took 10 minutes. The first step is to open up the glove box, there are two screws which need to be removed to allow you to take out the backing in the glove box, this takes time and don't rip away at it - it will come out, it just needs a bit of twisting and squeezing here and there!! I have marked the screw points in red circles to show them up (OpenGB.JPG). Once you get it loose, this is what you'll be left with (GBminusCover.JPG)
Look to the right hand side of the glove box and you'll see a hole where Fiat run the cables to the back of the Head unit. This is where you'll run the cables - but you need to get the headunit out first, I was able to do this without disconnecting anything and there should be enough free cable to let the head unit drop to just above the gearbox. My headunit was not secured in place - I placed my fingers through the cable run and pushed the back of the unit forwards, at the same time I placed my right hand on the front right side of the unit and wiggled it out of place. If yours will not move then you have to unclck two screws on the front of the head unit (HU.jpg) these are marked in red circles. Since I didn't have to do it, then I'm afraid I don't know what tool is needed.
So far so good, with the head unit out, you simply need to plug into the CD changer interface port, this is a standard mini DIN connecter. The first picture (Without Connector.JPG) shows the unit without the cable connected I have highlighted the 8 pins you need to connect to. The cable will only go one way and it will clip into place, leaving I think 2 pins unconnected, here it is with the cable in (With Connector.JPG).
Still with me? Good ... Move the head unit back into place taking care with the cables. I ended up with excess cabling from the interface so I used the hole at the back of the glove box to feed the excess cable into (SpareCable.JPG).
I'm not keen on drilling holes so I fed the cable from the interface down the right hand side of the glove box - there's a gap and it will hold just fine (GBCableRoute.JPG). Then I simply moved the glove box back into place (Final Place.JPG). I don't want the iPOD on show, it's nice having it on charge and ready to go, so I leave it where it is. But if you want you can mount the iPOD in a number of locations, here it's shown over by the front screen (iPODinCradle.JPG)
That's it ... I think! All I need now is working firmware!
Chris
Attachments
-
 Cradle.JPG102.6 KB · Views: 176
 -
 Final Place.JPG102.4 KB · Views: 283
 -
 GBCableRoute.JPG95 KB · Views: 191
 -
 GBminusCover.JPG113.1 KB · Views: 324
 -
 HU Removed.JPG142.2 KB · Views: 461
 -
 HU.JPG119 KB · Views: 365
 -
 InttoCDChanger.JPG127.9 KB · Views: 226
 -
 InttoCradle.JPG115.9 KB · Views: 208
 -
 iPODinCradle.JPG113.3 KB · Views: 231
 -
 OpenGB.JPG92.7 KB · Views: 190
 -
 SpareCable.JPG83 KB · Views: 208
 -
 With Connector.JPG121.3 KB · Views: 455
 -
 Without Connector.JPG114.8 KB · Views: 454
")