Stilo but it should be a similar process for any car! :thumbsup:
Tools you will need:
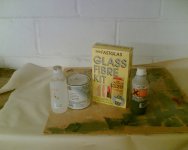
1. fibreglass repair kit.
2. release agent.
3. A pair of scissors.
4. 2 small G clamps.
5. Gelcoat. (optional)
6. P38 bodyfiller.
7. 1 can of filler primer.
8. 80 & 180grit sand paper.
9. 600grit wet & dry paper.
10. 1 hacksaw blade.
11. Patients & luck lol! :lol:
Please note whenever using resins/gelcoats or any hazardous chemicals or substances always use PPE (personal protective equipment). The fibreglass kit should come with gloves & if you have some wear goggles & a mask & always read the instructions carefully they are for your protection as well as giving you the correct mixing ratio.
STEP 1:
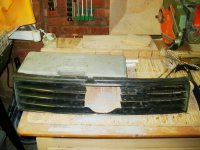
With the hacksaw blade cut the badge holder out as neatly as possible. With the 80 grit sand paper sand off any roughness from the cutting proceedure. Remove the fibreglass kit from the box & cut some strips of matting off to plug the holes in the top & bottom of the grille. Mix up some resin with hardener & apply to the matting & allow to dry, remember this is where patience comes into play, ideally you want at least 2 layers to plug the gaps.
STEP 2:
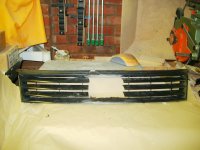
Mix up some filler, again always read the instructions, & apply to the gaps in the bottom & top slats & allow to cure. Once cured use the 80 grit paper to sand the filler smooth, spray a single coat of primer onto the filler as this will show up any defects & pin holes in the filler.
STEP 3, making a mould:
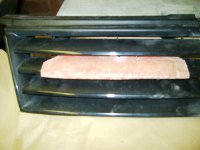
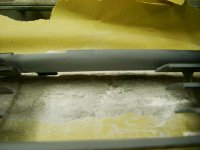
Spread release agent on one of the existing grille slats & allow to dry fully, the release agent should be applied using a brush. Once dry cut some strips of matting to fit the slat, remember the better the mould the better the slat will come out so take your time & pay attention. Note fibreglass does not bend round angles so you will have to cut out thinner strips in order to get the shape of the front edge. Mix the resin & apply the first layer & allow to dry fully. Then add 3 more layers so you get the right thickness. Once the resin has hardened take the grille & wash it under a tap. Gently prize the mould free from the grille, you can use a spatula of some kind or a very thin piece of metal, but go very gently as you don't want to break either the mould or the grille! :shock:
STEP 4, making the new slats:
Once you have your mould brush release agent to the underside which should be the shape of the original slats. Once dry you can brush gel coat on this will give a very hard & durable finish but isn't necessary & is expensive. Once the gel coat feels tacky apply your first layer of matting & resin allowing it to go off totally. Add 3 more layers & allow to cure.
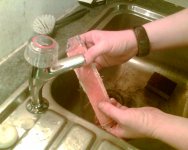
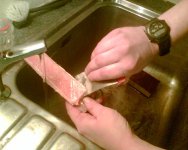
Once the resin has hardened wash the mould under the tap & carefully prize the new slat out from the mould. Repeat this process 3 times to get 3 new slats.
STEP 5, bonding the new slats in:
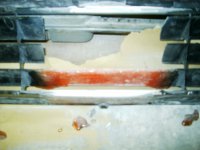
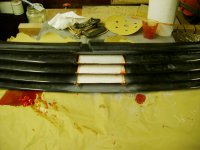
Trim the new slats so they are the exact shape & length to the existing slats. With the G clamps attach the new slat to the grille & turn it over onto it's front. Cut some smal peices of matting & apply them at the sides of the new slat & apply the resin, 2 layers should be enough. Rpeat this process until all the new slats are bonded in.
STEP 6, sanding & finshing:
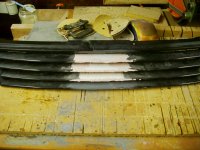
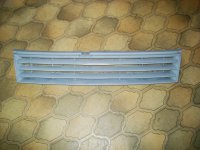
Mix up some P38 bodyfiller & apply to the edges of the new slats to seal in the joins. Sand smooth with 80grit paper spaying a little primer as you go to show up any defects. Once nice & smooth rub the whole grille down with 180grit paper & spray 4 reasonably heavy coats of filler primer, allowing 10mins to flash off in between, & allow at least 4hours to cure. Once cured rub down with 600grit wet & dry, do it wet, & clean it off with warm soapy water.
STEP 7, painting:
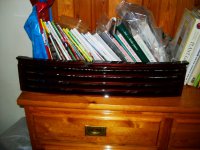
Personally I would give the grille to a bodyshop to paint but if you're brave enough then do it yourself, it'll only add to the satisfaction. If you go to any Halfords superstore they can mix spray cans to the colour of your car. I'm alright as I'm a bodyshop tech by trade :lol: but it should look like this!

Tools you will need:

1. fibreglass repair kit.
2. release agent.
3. A pair of scissors.
4. 2 small G clamps.
5. Gelcoat. (optional)
6. P38 bodyfiller.
7. 1 can of filler primer.
8. 80 & 180grit sand paper.
9. 600grit wet & dry paper.
10. 1 hacksaw blade.
11. Patients & luck lol! :lol:
Please note whenever using resins/gelcoats or any hazardous chemicals or substances always use PPE (personal protective equipment). The fibreglass kit should come with gloves & if you have some wear goggles & a mask & always read the instructions carefully they are for your protection as well as giving you the correct mixing ratio.

STEP 1:
With the hacksaw blade cut the badge holder out as neatly as possible. With the 80 grit sand paper sand off any roughness from the cutting proceedure. Remove the fibreglass kit from the box & cut some strips of matting off to plug the holes in the top & bottom of the grille. Mix up some resin with hardener & apply to the matting & allow to dry, remember this is where patience comes into play, ideally you want at least 2 layers to plug the gaps.

STEP 2:
Mix up some filler, again always read the instructions, & apply to the gaps in the bottom & top slats & allow to cure. Once cured use the 80 grit paper to sand the filler smooth, spray a single coat of primer onto the filler as this will show up any defects & pin holes in the filler.

STEP 3, making a mould:

Spread release agent on one of the existing grille slats & allow to dry fully, the release agent should be applied using a brush. Once dry cut some strips of matting to fit the slat, remember the better the mould the better the slat will come out so take your time & pay attention. Note fibreglass does not bend round angles so you will have to cut out thinner strips in order to get the shape of the front edge. Mix the resin & apply the first layer & allow to dry fully. Then add 3 more layers so you get the right thickness. Once the resin has hardened take the grille & wash it under a tap. Gently prize the mould free from the grille, you can use a spatula of some kind or a very thin piece of metal, but go very gently as you don't want to break either the mould or the grille! :shock:
STEP 4, making the new slats:
Once you have your mould brush release agent to the underside which should be the shape of the original slats. Once dry you can brush gel coat on this will give a very hard & durable finish but isn't necessary & is expensive. Once the gel coat feels tacky apply your first layer of matting & resin allowing it to go off totally. Add 3 more layers & allow to cure.


Once the resin has hardened wash the mould under the tap & carefully prize the new slat out from the mould. Repeat this process 3 times to get 3 new slats.
STEP 5, bonding the new slats in:

Trim the new slats so they are the exact shape & length to the existing slats. With the G clamps attach the new slat to the grille & turn it over onto it's front. Cut some smal peices of matting & apply them at the sides of the new slat & apply the resin, 2 layers should be enough. Rpeat this process until all the new slats are bonded in.

STEP 6, sanding & finshing:
Mix up some P38 bodyfiller & apply to the edges of the new slats to seal in the joins. Sand smooth with 80grit paper spaying a little primer as you go to show up any defects. Once nice & smooth rub the whole grille down with 180grit paper & spray 4 reasonably heavy coats of filler primer, allowing 10mins to flash off in between, & allow at least 4hours to cure. Once cured rub down with 600grit wet & dry, do it wet, & clean it off with warm soapy water.


STEP 7, painting:
Personally I would give the grille to a bodyshop to paint but if you're brave enough then do it yourself, it'll only add to the satisfaction. If you go to any Halfords superstore they can mix spray cans to the colour of your car. I'm alright as I'm a bodyshop tech by trade :lol: but it should look like this!


