

Hi All!
A mate and I like to do a bit of "Wheeler Dealering" in our spare time and our latest project was a 2005 Mk2B Fiat Punto 1.4 16v Sporting with engine code 843A1.000.
You can also find this guide at my mate Matt's blog mattinthelakes.blogspot.co.uk where you will also find records of our other mechanical projects which to date I'm pleased to say have all been a huge success! Mike and Ed would be proud......anyhow back to the matter in hand. Cambelt 1.4 16V Sporting!
This guide is a little thin on images so I have tried to be as accurate as possible with my words. Please comment or ask questions if unsure.
Background
To get this car ready for a new owner the car needed a new radiator, cam/timing belt and water pump (replaced as a matter of course as one always should). The radiator is an easy job but when swatting up ready for the cambelt job (always best to be prepared!), it turns out it’s quite different to the older Mk2 1.2 8v which (we can say from past experience) is relatively straight forward.
Having looked across the forums on the morning of the belt change (yes, we realise we maybe should have looked prior to the day of the job) and been presented with posts to the sentiment of “You must use the correct locking tools or the engine will be destroyed” we started to think maybe this isn't going to be so straight forward after all. However, following a lengthy discussion, debating the reasons for locking tools and the associated "official" timing method prescribed by fiat, we decided that there had to be a way to do the job without special tools and proceeded.
Here is the way we did it, without any of the special tools, but following the principles outlined in official repair procedures.
Disclaimer: The method that follows worked for us. We are not saying this is THE way to do it or that it is the best way to do it. We are just sharing this information so that it may help others. If done correctly, with a full understanding of what you are doing, then there is no reason why a DIYer/enthusiast should not be able to do a timing belt on this engine. In the absence of this information on the internet when we did the job we felt we should share our experience so that it may help others. The risk free way to do it is to pay a professional. If you disagree with our methods, don't understand our methods or don't feel confident in any way then don't do it! The locking tools are available on eBay to buy but they are expensive and this isn't likely to be cost effective to the DIYer. Ultimately if you try it and it doesn't work, well that’s just hard luck! I/we take no responsibility if you mess up your engine timing and cause expensive damage in the process. THIS IS AN INTERFERENCE ENGINE! PISTONS CAN MEET/HIT VALVES IF THE ENGINE RUNS OUT OF TIME!
Tools Required
Jack
Axle Stand
Piece of wood
A good selection of sockets/spanners/screwdrivers
Spark plug socket
A good selection of allen keys or hex bits
A 10mm allen key and a medium sized plastic wall plug
Two wooden barbecue skewers and a pen
Tippex
90-degree angled cir-clip pliers
Water pump pliers
A small mirror
Parts
Cambelt Kit (Belt and Tensioner) - We used Contitech CT1049K1 (try ebay)
Water Pump - We used KCP 1977 (again ebay)
Materials
Silicone Sealant (for water pump)
Coolant/antifreeze (red stuff)
Jubillee Clip (~40mm dia)
Method
As a final note, I'd just like to point out where we deviated from the official/fiat procedure and had to improvise. The official procedure says before fitting the new belt, take a cam sprocket holding tool (google "sealey VS173" for example) counter hold the sprocket whilst loosening the sprocket retaining bolt. This will then allow the sprocket to spin freely on the camshaft. Then providing you don't move the crank, you can fit your belt at any position. Applying full tension to the belt with the tensioner will then tension the whole length of the belt evenly as the cam sprocket is allowed to move independently of the camshafts. Finally re-tighten the cam sprocket retaining bolt at its rest position (counter-holding with the special tool), rotate by hand to check and set to normal tension. We didn't have the the VS173 and as the locking mechanism of the camshaft is NOT design to hold the force required to undo the sprocket retaining bolt we didn't attempt this method.
From past experience a cam sprocket holding tool would be a great addition to any mechanics tool kit, therefore if I had to do this again I may consider spending £15 on the tool and try the official method for the belt replacement on this engine.
Hope this helps someone out as many amateur guides and how 2s have helped me out hugely over the past few years.
A mate and I like to do a bit of "Wheeler Dealering" in our spare time and our latest project was a 2005 Mk2B Fiat Punto 1.4 16v Sporting with engine code 843A1.000.
You can also find this guide at my mate Matt's blog mattinthelakes.blogspot.co.uk where you will also find records of our other mechanical projects which to date I'm pleased to say have all been a huge success! Mike and Ed would be proud......anyhow back to the matter in hand. Cambelt 1.4 16V Sporting!
This guide is a little thin on images so I have tried to be as accurate as possible with my words. Please comment or ask questions if unsure.
Background
To get this car ready for a new owner the car needed a new radiator, cam/timing belt and water pump (replaced as a matter of course as one always should). The radiator is an easy job but when swatting up ready for the cambelt job (always best to be prepared!), it turns out it’s quite different to the older Mk2 1.2 8v which (we can say from past experience) is relatively straight forward.
Having looked across the forums on the morning of the belt change (yes, we realise we maybe should have looked prior to the day of the job) and been presented with posts to the sentiment of “You must use the correct locking tools or the engine will be destroyed” we started to think maybe this isn't going to be so straight forward after all. However, following a lengthy discussion, debating the reasons for locking tools and the associated "official" timing method prescribed by fiat, we decided that there had to be a way to do the job without special tools and proceeded.
Here is the way we did it, without any of the special tools, but following the principles outlined in official repair procedures.
Disclaimer: The method that follows worked for us. We are not saying this is THE way to do it or that it is the best way to do it. We are just sharing this information so that it may help others. If done correctly, with a full understanding of what you are doing, then there is no reason why a DIYer/enthusiast should not be able to do a timing belt on this engine. In the absence of this information on the internet when we did the job we felt we should share our experience so that it may help others. The risk free way to do it is to pay a professional. If you disagree with our methods, don't understand our methods or don't feel confident in any way then don't do it! The locking tools are available on eBay to buy but they are expensive and this isn't likely to be cost effective to the DIYer. Ultimately if you try it and it doesn't work, well that’s just hard luck! I/we take no responsibility if you mess up your engine timing and cause expensive damage in the process. THIS IS AN INTERFERENCE ENGINE! PISTONS CAN MEET/HIT VALVES IF THE ENGINE RUNS OUT OF TIME!
Tools Required
Jack
Axle Stand
Piece of wood
A good selection of sockets/spanners/screwdrivers
Spark plug socket
A good selection of allen keys or hex bits
A 10mm allen key and a medium sized plastic wall plug
Two wooden barbecue skewers and a pen
Tippex
90-degree angled cir-clip pliers
Water pump pliers
A small mirror
Parts
Cambelt Kit (Belt and Tensioner) - We used Contitech CT1049K1 (try ebay)
Water Pump - We used KCP 1977 (again ebay)
Materials
Silicone Sealant (for water pump)
Coolant/antifreeze (red stuff)
Jubillee Clip (~40mm dia)
Method
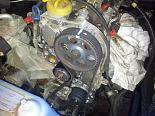
- Raise the vehicle on the offside side front sill and support with an axle stand. Remove the wheel and the piece of trim covering the crank pulley. This is held on by 2 or 3 screws one of which will require the front half of the wheel arch liner to be unscrewed and pulled back to get to it. These crosshead screws can get a little seized. One of ours just wouldn't budge so we got a small, blunt drill bit and drilled the centre of the crosshead. This put heat into the screw without damaging the head too much and free'd it off.
- Drain the coolant by removing the bottom hose of the radiator. If this clip has never been removed it will need to be broken off - pry it open with an old screw driver. A replacement jubilee clip will be required for re-fitting later.
- Remove the airbox.
- Remove the individual coils which are held in place with 10mm bolts. Remove the bolts and pull the coils out.
- Remove all 4 spark plugs.
- Important note on timing procedure: The correct way to change the belt on the engine is to do it with the pistons at mid stroke (NOT Top Dead Centre); specifically piston 1 (nearest the belt) on it's intake stroke. As described in the following paragraphs the camshafts are to locked at this position for the timing belt replacement procedure. Only the exhaust cam shaft needs locking and in turn the inlet cam shaft will also be locked.
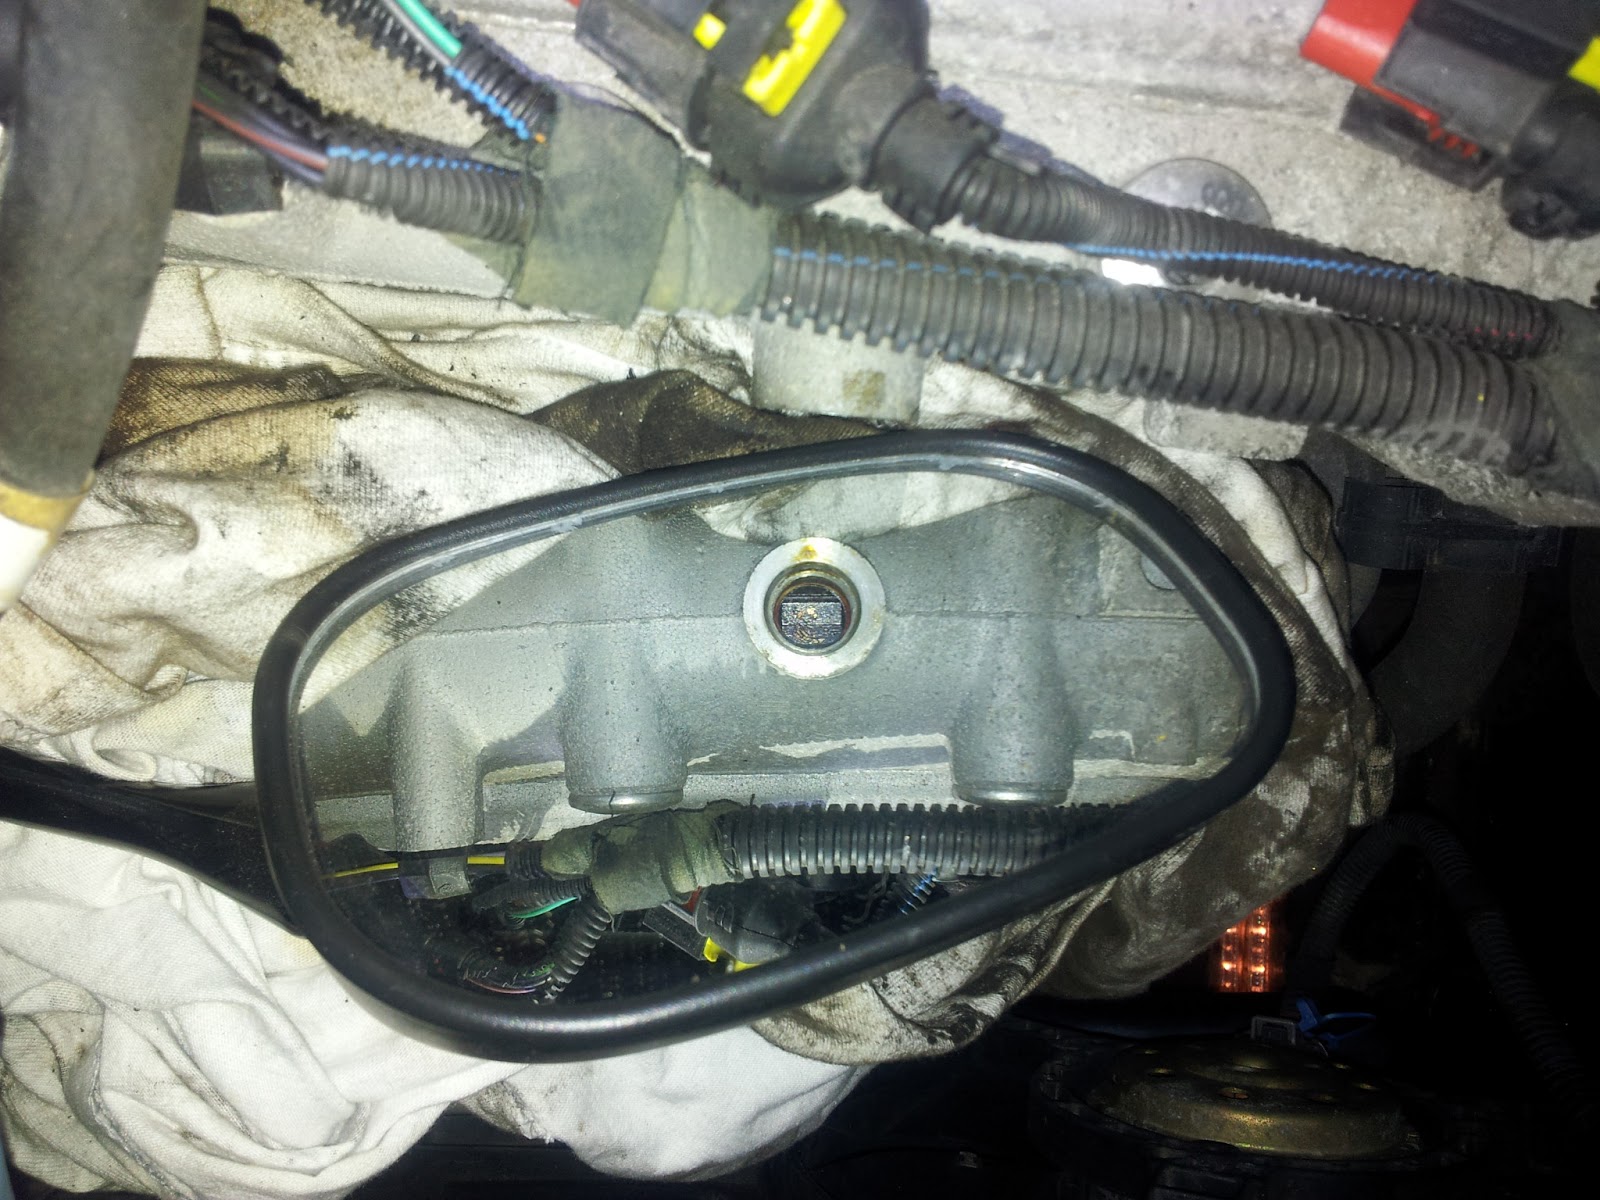
- Take a hex bit (6 or 8mm - can't remember) and remove the plug on the front of the cam cover roughly located above the right hand side of the exhaust manifold. This will reveal the exhaust camshaft through the hole. A mirror helps to see in the hole as it is below the level of the bumper.
- Support the engine by placing the jack under the sump. Use a piece of wood between the sump and jack to spread the load and prevent damage to the sump.
- Remove the offside engine mount and cam belt cover. There are 6 13mm bolts which fasten the bottom half of the mount to the cylinder head. One is deeply recessed in the centre of the mount - the best way we found to tackle this (due to the limited clearance down this side of the engine) is with a small 3/8" breaker bar or ratchet, universal joint and regular socket.
- Using a 13mm socket (12 point type is best) on a small breaker bar, turn the aux belt automatic tensioner clockwise to take the tension off the belt )(easier from underneath) and remove the belt.
- Remove the harmonic balancer pulley from the crank sprocket - 3 bolts hold it on (helps if you have a mate in the car to apply the brakes with car in 5th or 6th gear to prevent crank from turning).
- Raise the engine with the jack, getting it as high as possible without over-stressing the exhaust flex pipe and other hoses.
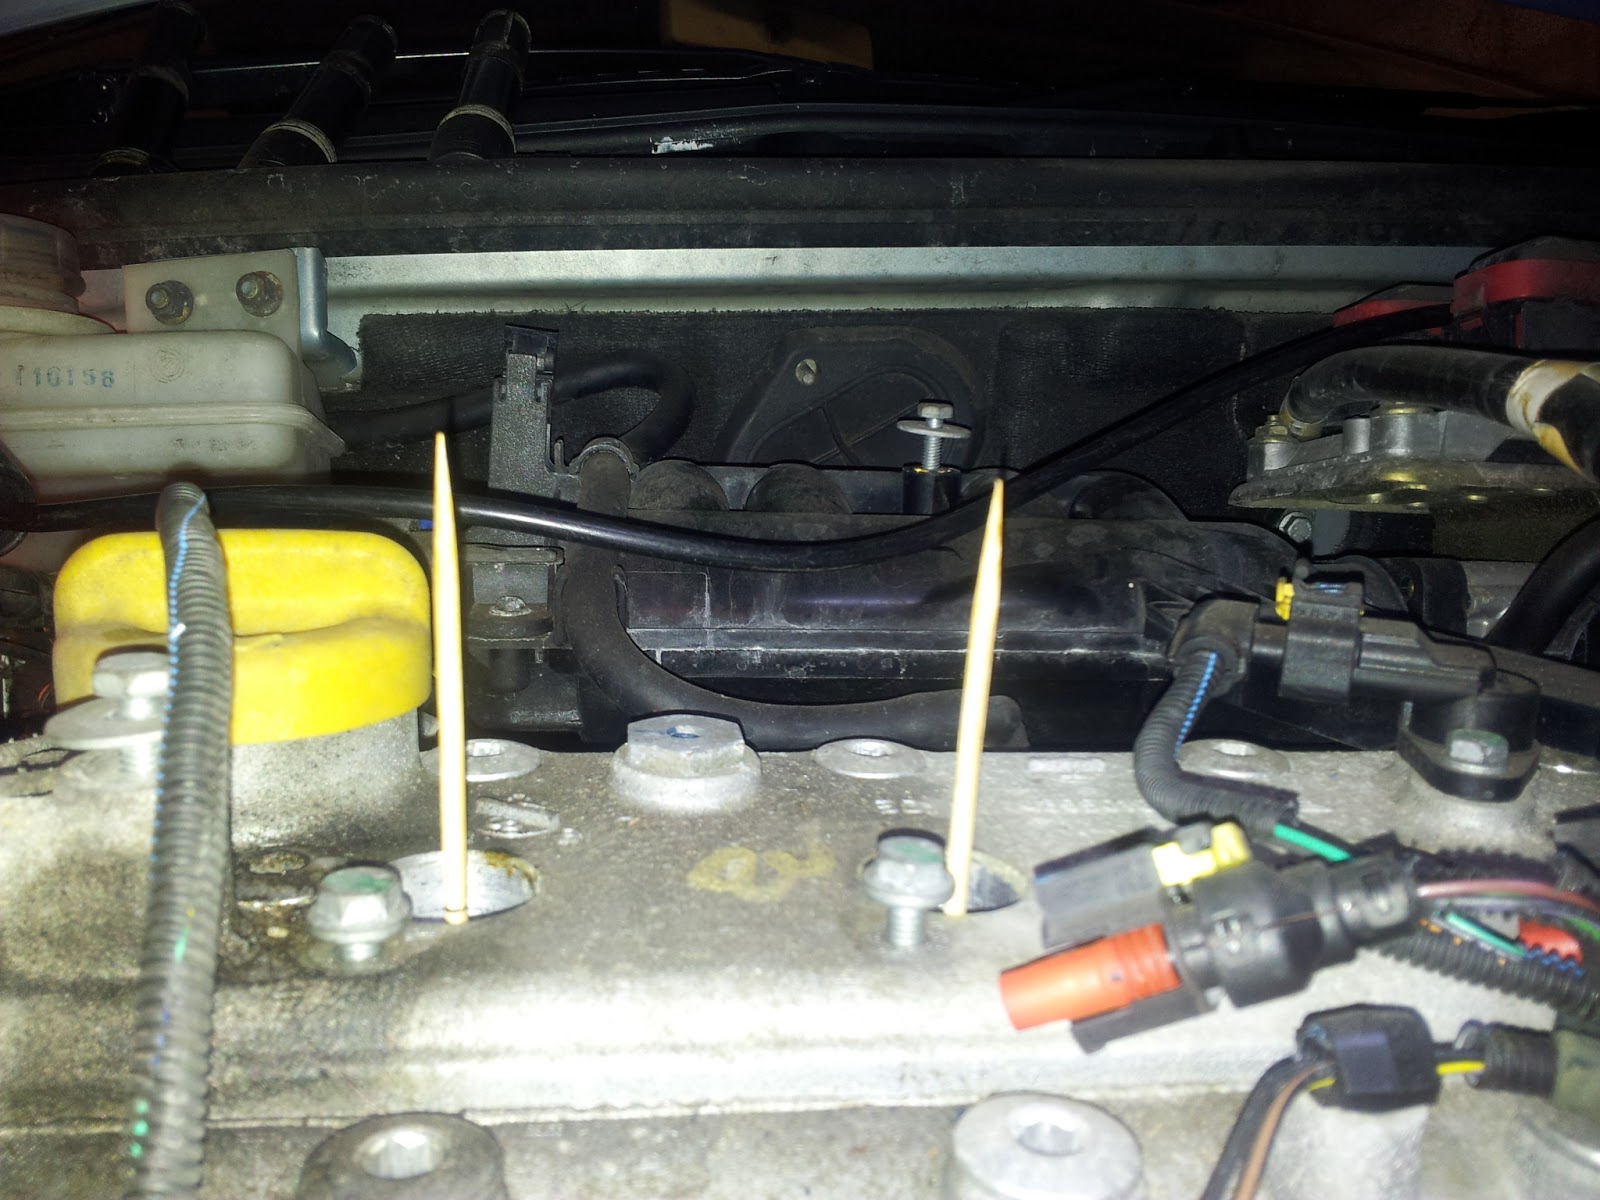
- As previously described, the correct way to change the belt on this engine is with the pistons at mid stroke. Place your 2 wooden skewers (of equal length!) down the spark plug holes of cylinders 1 and 2 so that they sit on the piston crowns. Use a big ratchet with 15mm socket to slowly rotate the crank. Keep rotating the crank until a SQUARE NOTCH appears in the cam case window (might help to have a second person to watch the window whilst the other rotates the crank) and the 2 skewers are roughly level.
- With the square notch in the hole, take a 10mm allen key and insert it though the hole and into the notch. If the engine pistons are not exactly at mid stroke then you may have to very slightly adjust the crank either backwards or forwards to get it to slot in - it's a snug fit. Check that pistons are exactly at mid stroke by marking the wooden skewers with a pen at the level of the cam cover, removing and comparing them - should be about right.
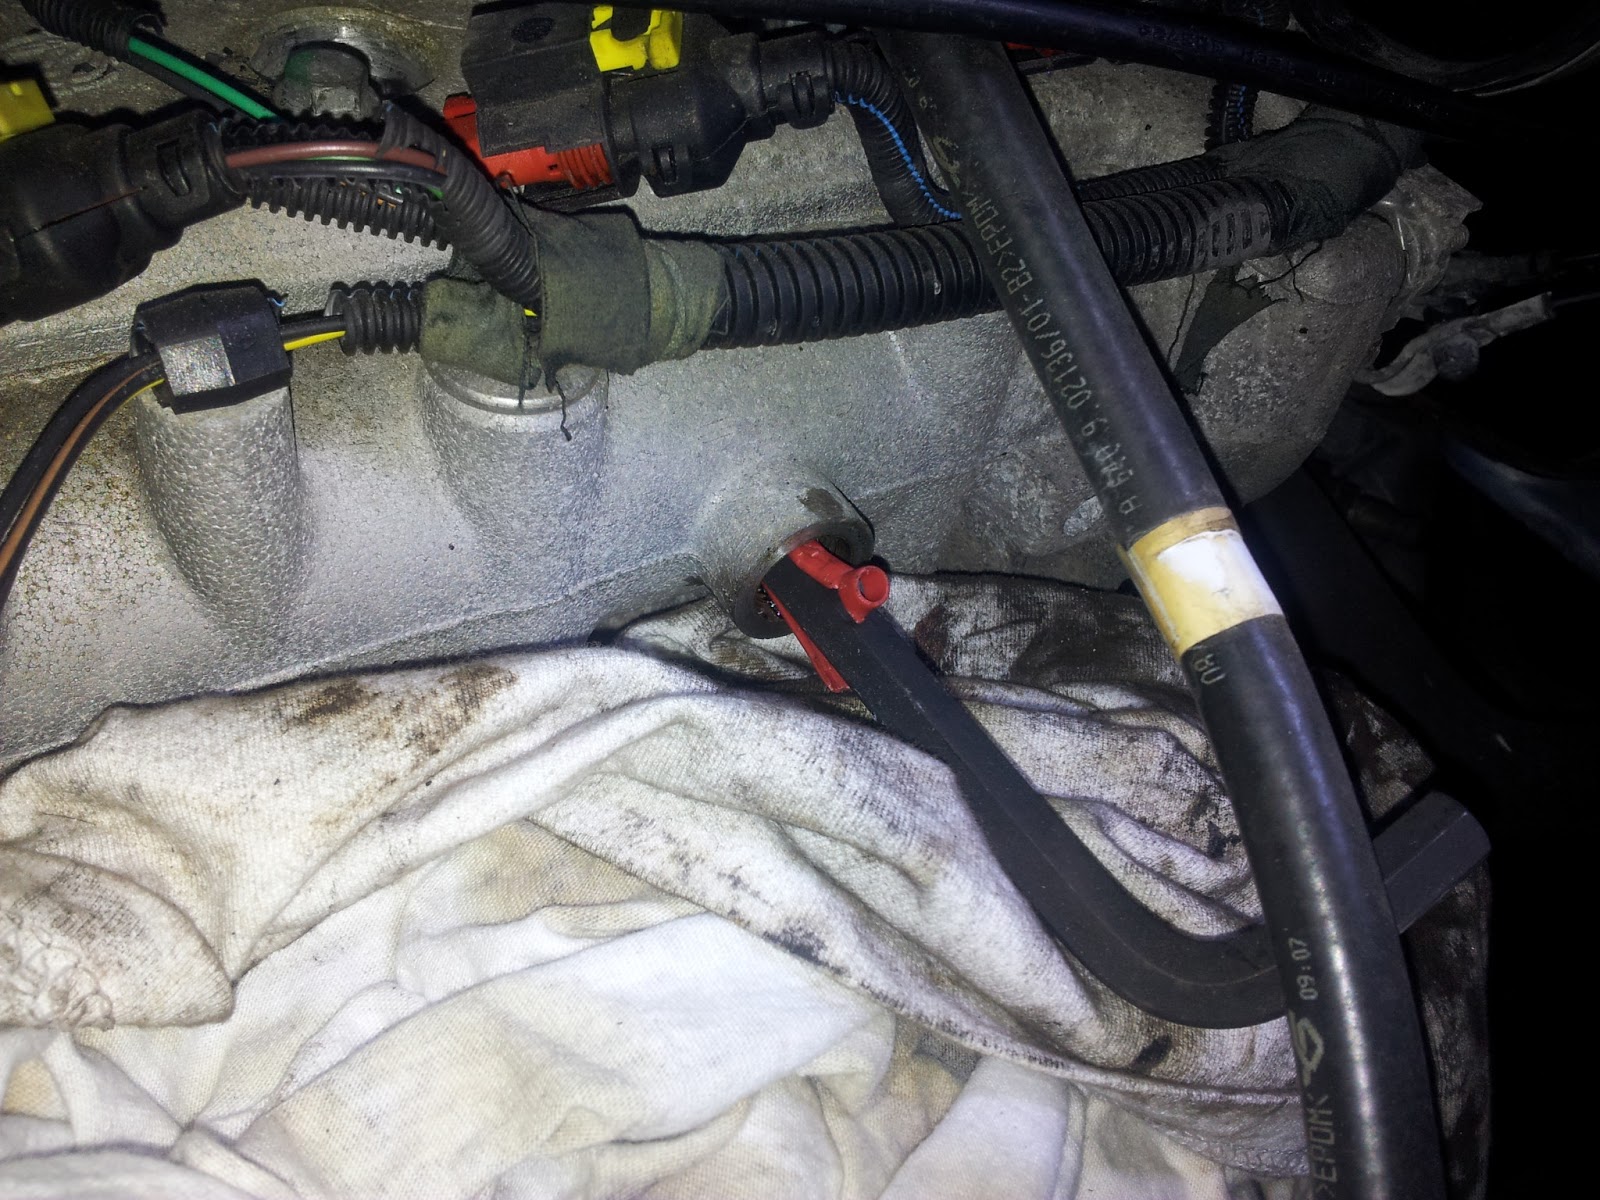
- The 10mm allen key is smaller than the hole in the cam case so to hold it in place take a medium sized plastic wall plug, break in half and wedge the allen key top and bottom. The cam shafts are now locked in place with your homemade/improvised locking tool!
- With the pistons level at mid stroke and the camshafts locked, use tipex to mark the position of the crank and cam sprockets relative to the block and cylinder head respectively. We also marked the old belt at these positions and the direction of rotation (there is a reason for this as will become clear).

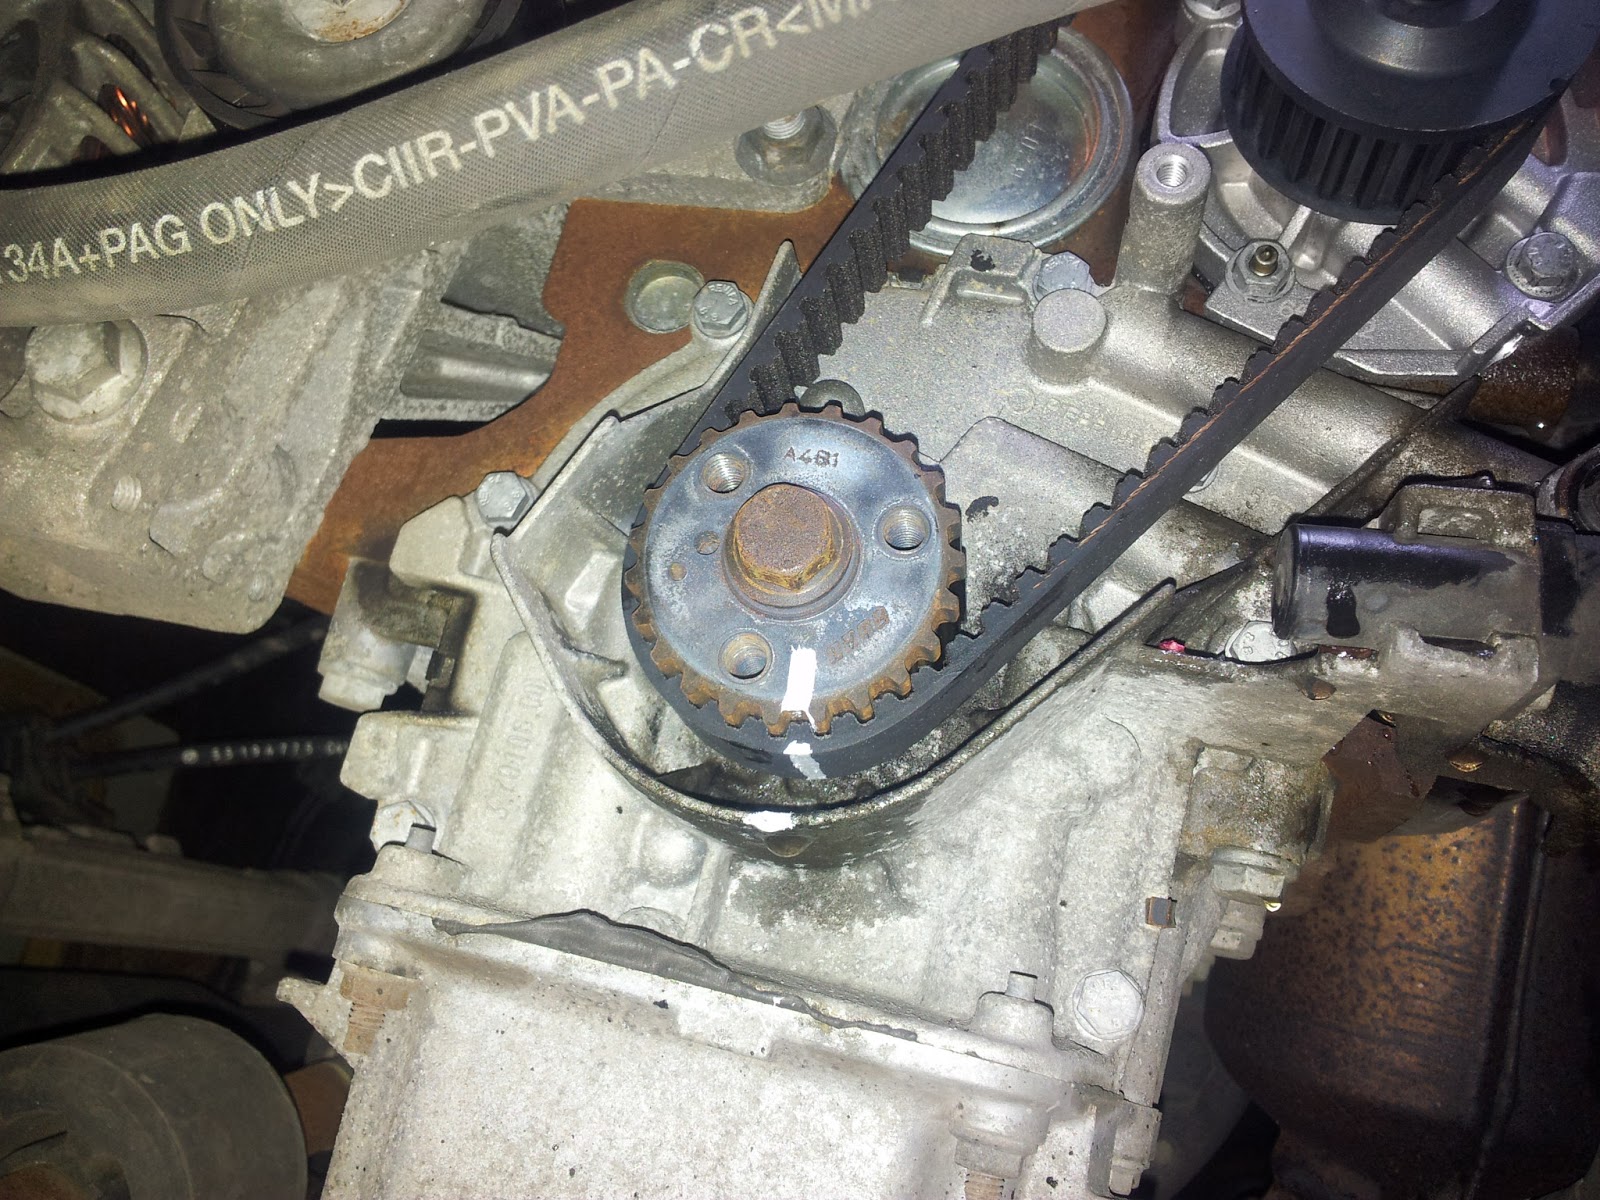
- Undo the retaining nut on the tensioner pulley and remove it with the belt.
- Before you attack the water pump, take the old belt which you have just removed and count the number of teeth between the two marks on the front side (i.e. the run between the cam, over the water pump and crank on the front side of the engine). We counted 61 teeth between the marks on ours but depending on exactly where you choose to make your timing marks could mean that you get a slightly different number.
- Put identical marks on the new belt. The reason we did this and the reason why we recommend you do this is so that when you come to fit the new belt, you can put the belt on and just line it up with your timing marks on the engine and sprockets. Be sure to note the correct direction of rotation of the new belt before marking it up and make sure you remember which marks are which (cam / crank).
- At this point remove the water pump and replace with a new one. Use a small stanley knife blade and a scouring pad to clean the block mating face of the old silicone.
- Fit the new water pump. Ours came with a paper gasket which required a bead of silicone sealant on BOTH sides of the gasket.
- Install the new belt. Start by lining up your cam sprocket marks, hold in place and then run it around the water pump and down to the crank sprocket. Here you will probably notice that without the tension on the front side of the belt, your crank mark on the belt is 1 tooth short (i.e. forward) of the crank mark on the sprocket.
- At this point turn the crank backwards (anticlockwise) very slightly (half a tooth max) and refit the belt round the crank. This should allow you to get the belt on with everything lined up.
- Now the tricky bit...tension the front side of the belt slightly by repositioning the crank back to its correct location whereby your mark on the crank sprocket is now back in line with your mark on the block. The cam sprocket cannot move as it is locked in position. This will give you just enough slack on the back side of the belt to install the new tensioner.
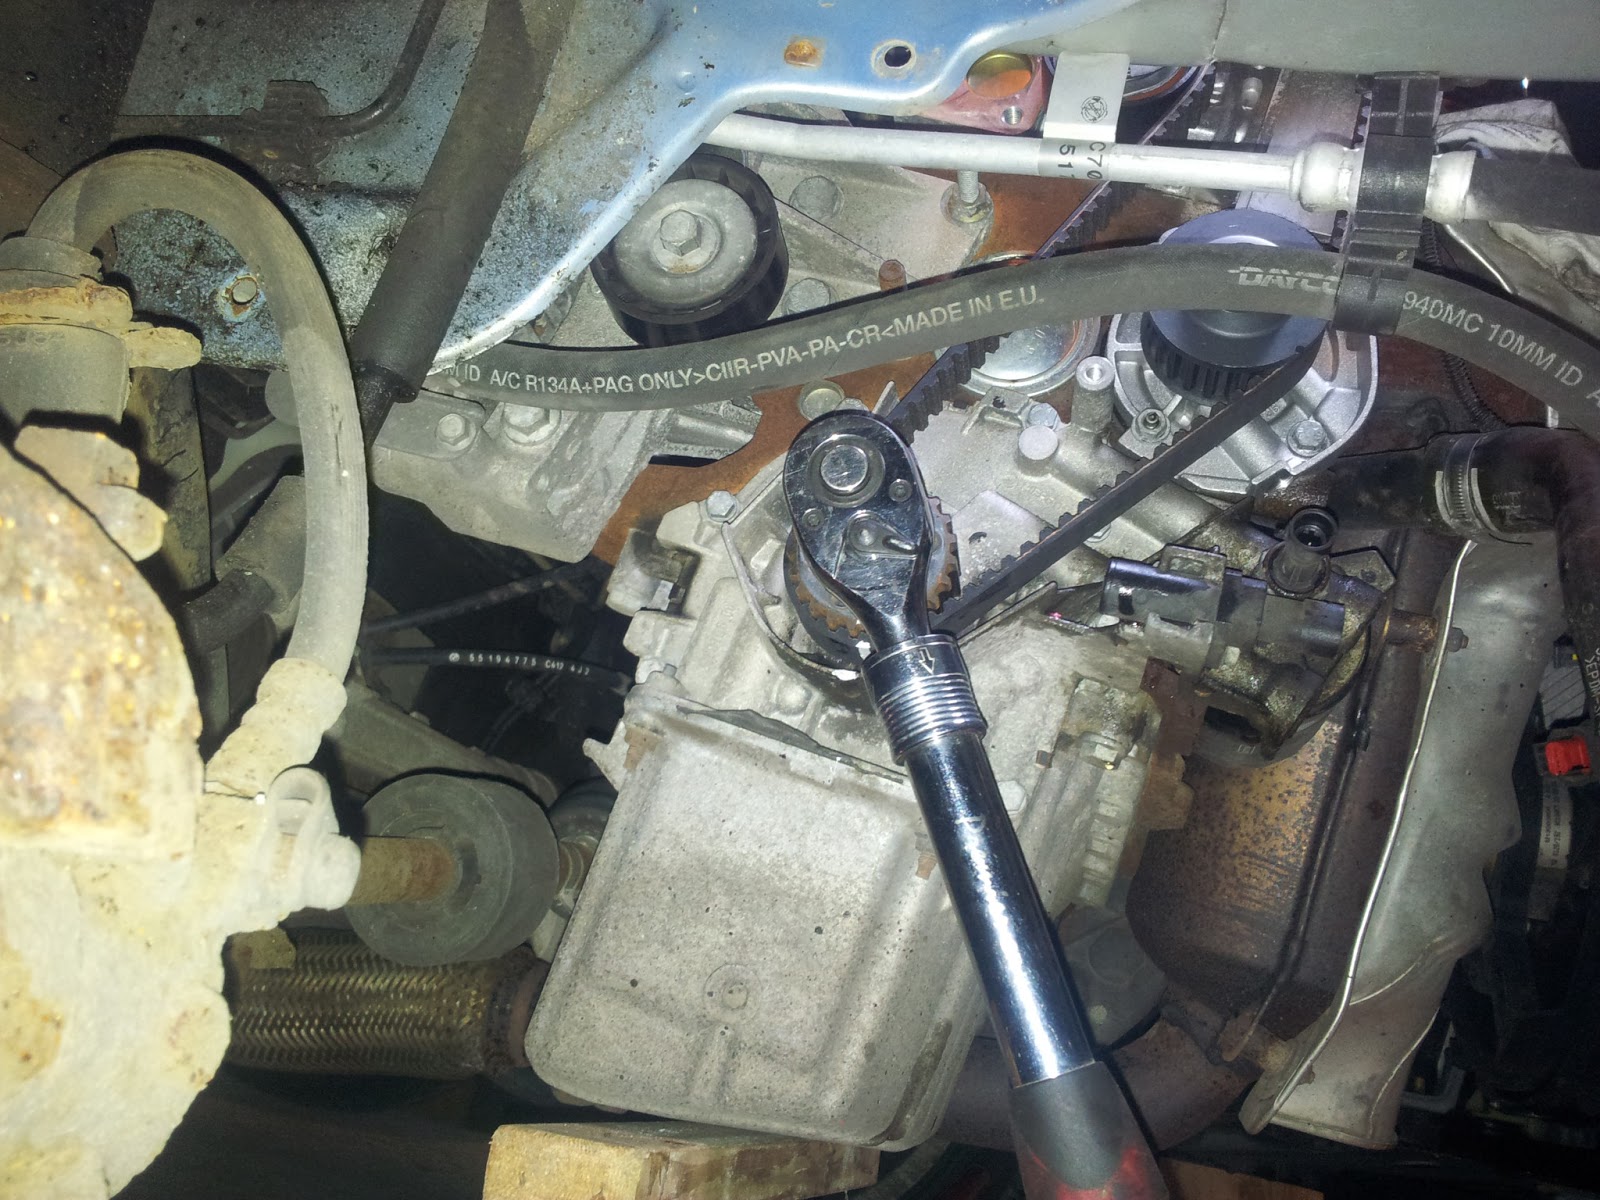
- Install the tensioner and with cir-clip pliers set the tension to max tension.
- Check all your marks are still lined up and if all looks good, remove the allen key and wall plug wedges from the cam shaft and turn the engine over by hand 1 full revolution (2 full turns of the crankshaft).
- At the end of 1 full revolution the marks on the sprockets should align with their respective marks on the cam case and block. Note however that the marks on the belt will not return to their original position after 1 revolution as the belt is longer than one revolution such that it is long enough to go round the water pump and tensioner. For piece of mind you can also check that the wooden skewers are level and your 10mm allen key should slot back into the camshaft locking hole.
- At this point, if you are happy, set the tension to the normal setting, turn the engine over again 1 full revolution and recheck your marks and tension. Again don't expect the marks on the belt to make sense. What is important is that the sprocket marks are aligned with their respective marks on the engine.
- Now as haynes say, refitting is the reverse of the removal procedure.
- Lastly, fill up with a 50/50 mix of water/antifreeze, bleed the cooling system and fire her up. Job done.
As a final note, I'd just like to point out where we deviated from the official/fiat procedure and had to improvise. The official procedure says before fitting the new belt, take a cam sprocket holding tool (google "sealey VS173" for example) counter hold the sprocket whilst loosening the sprocket retaining bolt. This will then allow the sprocket to spin freely on the camshaft. Then providing you don't move the crank, you can fit your belt at any position. Applying full tension to the belt with the tensioner will then tension the whole length of the belt evenly as the cam sprocket is allowed to move independently of the camshafts. Finally re-tighten the cam sprocket retaining bolt at its rest position (counter-holding with the special tool), rotate by hand to check and set to normal tension. We didn't have the the VS173 and as the locking mechanism of the camshaft is NOT design to hold the force required to undo the sprocket retaining bolt we didn't attempt this method.
From past experience a cam sprocket holding tool would be a great addition to any mechanics tool kit, therefore if I had to do this again I may consider spending £15 on the tool and try the official method for the belt replacement on this engine.
Hope this helps someone out as many amateur guides and how 2s have helped me out hugely over the past few years.
