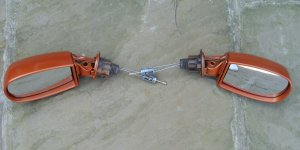
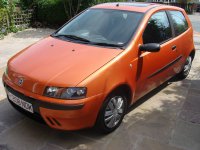
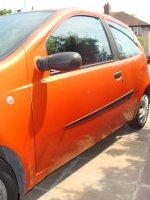
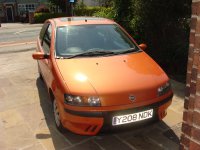
This guide should be all you need to colour code your wing mirrors, i finished mine this morning so thought id add pictures and make it easier for anyone else who wants to do it!
First of all what you need is:
-a can of plastic primer (got mine from halfords)
-a can of clear lacquer (again halfords job)
-a can of your specific car paint (the paint code for this is under your bonnet, actually on the bonnet, only 10.99, guess where from)
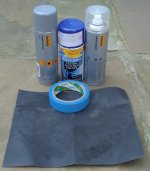
You also need wet/dry sandpaper, which is a finer type of sandpaper to your normal one to give your mirrors a better finish. Also anything to covoring up your mirrors....i just used masking tape.
You will be left for 24hours without your car aswell so plan ahead!
Step One (taking off the mirror for Mk2)
You need to take off the little rubber cover that is covering the mirror adjuster. You then need to unscrew the metal ring attached to this.
This rubber cover simply pulls off, lift the base of the cover off the metal ring and then pull it off.
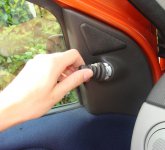
Unscrew the metal ring at the base. There is a little cover in the bottom corner of the attachment which holds a screw, unscrew this. The inside mirror is then held on by two clips so becareful when pulling it off.
View attachment 43370
Step Two (taking off the mirror for Mk2)
You are now left with the whole attachment hanging on by the mini speaker wiring, just ignore this, it isn't neccessary to unattach this.
As you can see, inside the hole, there is a black ring and if you look closly it has little 'L' shaped holes. You need to unscrew the black ring. This is holding on the wing mirror. What i used is to use a chizzle in the 'L' shaped holes and hammer them round. It unscrews anti-clockwise.
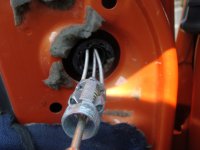
Now you can just pull the mirror out with the metal attachments with it. The rubber sleeve just pulls off. We're now ready to colour code!
Step Three (Sanding)
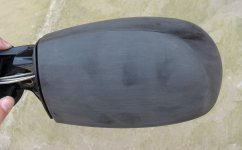
What you need to do now is sand down the plastic on the mirror, this enables the primer to take to the plastic better. Don't forget use wet/dry sandpaper and wet the mirror before you start sanding, this gives it a better finish....you will end up still sanding when it's dry but don't worry just keep sanding. I taped my mirror up at this point but you can tape it up afterwards or use newspaper, whatever works best with you.
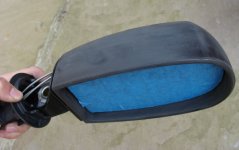
Take off all the shiny plastic until you're left with a very dull grey finish like so....
We're now ready to prime...
Step Four (Priming)
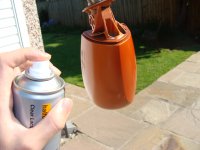
What i did here is hang my mirror on the washing line so I could get the whole mirror in one go!
Now you need THREE coats here to get the best finish. You need to prime as the primer lets the paint 'stick' to the plastic.
So to start off with just spray a nice mist over the mirror. As its the first coat don't worry that you're still left with black bits.
Allow 15 minutes for the primer to dry between coats.
Spray three coats until you're left with the mirror completely covered.
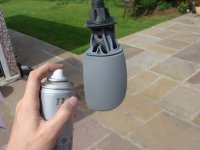
Give the mirror a little wipe over to get rid of tiny bits left on the mirror and then you're ready to paint.
Step Five (Painting)
As I said before allow the last coat of the primer to dry before you start painting.
As before you'll need THREE coats of paint to get the best finish.
To start of with spray a light mist over the mirror
With the piant you will need to leave ATLEAST 90minutes between coats, this is important to get the best finish.
When you're all done waiting spray three coats until the whole mirror is covered.
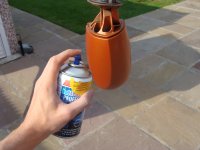
After the last coat you MUST leave 12hours before you start lacquering, you've got this far don't mess it up by not being patient.
Step Six (Lacquering)
By spraying laquer on the paint it creates a weatherproof and driveproof shield on your mirror to protect the paint and gives the paint that shiny look.
As before i used THREE coats here.
As with the primer allow 15minutes for the lacquer to dry between coats.
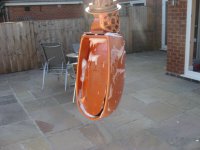
Before you start spraying make sure you wash the mirror with warm soapy water (like in the first pic) to wash away the greasy stuff left from the paint so you can get a nice coat of lacquer (like in the second pic).
First of all what you need is:
-a can of plastic primer (got mine from halfords)
-a can of clear lacquer (again halfords job)
-a can of your specific car paint (the paint code for this is under your bonnet, actually on the bonnet, only 10.99, guess where from)

You also need wet/dry sandpaper, which is a finer type of sandpaper to your normal one to give your mirrors a better finish. Also anything to covoring up your mirrors....i just used masking tape.
You will be left for 24hours without your car aswell so plan ahead!
Step One (taking off the mirror for Mk2)
You need to take off the little rubber cover that is covering the mirror adjuster. You then need to unscrew the metal ring attached to this.
This rubber cover simply pulls off, lift the base of the cover off the metal ring and then pull it off.

Unscrew the metal ring at the base. There is a little cover in the bottom corner of the attachment which holds a screw, unscrew this. The inside mirror is then held on by two clips so becareful when pulling it off.
View attachment 43370
Step Two (taking off the mirror for Mk2)
You are now left with the whole attachment hanging on by the mini speaker wiring, just ignore this, it isn't neccessary to unattach this.
As you can see, inside the hole, there is a black ring and if you look closly it has little 'L' shaped holes. You need to unscrew the black ring. This is holding on the wing mirror. What i used is to use a chizzle in the 'L' shaped holes and hammer them round. It unscrews anti-clockwise.

Now you can just pull the mirror out with the metal attachments with it. The rubber sleeve just pulls off. We're now ready to colour code!
Step Three (Sanding)
What you need to do now is sand down the plastic on the mirror, this enables the primer to take to the plastic better. Don't forget use wet/dry sandpaper and wet the mirror before you start sanding, this gives it a better finish....you will end up still sanding when it's dry but don't worry just keep sanding. I taped my mirror up at this point but you can tape it up afterwards or use newspaper, whatever works best with you.
Take off all the shiny plastic until you're left with a very dull grey finish like so....


We're now ready to prime...
Step Four (Priming)
What i did here is hang my mirror on the washing line so I could get the whole mirror in one go!
Now you need THREE coats here to get the best finish. You need to prime as the primer lets the paint 'stick' to the plastic.
So to start off with just spray a nice mist over the mirror. As its the first coat don't worry that you're still left with black bits.
Allow 15 minutes for the primer to dry between coats.
Spray three coats until you're left with the mirror completely covered.

Give the mirror a little wipe over to get rid of tiny bits left on the mirror and then you're ready to paint.
Step Five (Painting)
As I said before allow the last coat of the primer to dry before you start painting.
As before you'll need THREE coats of paint to get the best finish.
To start of with spray a light mist over the mirror
With the piant you will need to leave ATLEAST 90minutes between coats, this is important to get the best finish.
When you're all done waiting spray three coats until the whole mirror is covered.

After the last coat you MUST leave 12hours before you start lacquering, you've got this far don't mess it up by not being patient.
Step Six (Lacquering)
By spraying laquer on the paint it creates a weatherproof and driveproof shield on your mirror to protect the paint and gives the paint that shiny look.
As before i used THREE coats here.
As with the primer allow 15minutes for the lacquer to dry between coats.
Before you start spraying make sure you wash the mirror with warm soapy water (like in the first pic) to wash away the greasy stuff left from the paint so you can get a nice coat of lacquer (like in the second pic).


I hope this guide has helped, tried to make it as detailed as possible...let me know how you get on, good luck!


