As Ashley discovered this weekend, Haynes manuals aren’t all they're cracked up to be. Quite how the guys who wrote the manual managed to actually perform this task as detailed in their manual we don’t know? Oh and while I’m at it, your procedure for changing the rear registration bulbs on the MK4 Polo is a load of tosh too.

Anyway, without further a do here is how you really change the nearside main beam bulb and no doubt the others there too. First, pop the bonnet.
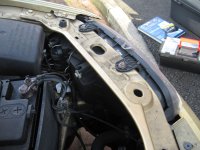
To be fair the only thing the Haynes manual doesn’t mention is that fact that to do this one really needs to free the whole headlamp casing. However, this is a fairly essential step as if it is neglected one will find that there isn’t enough room between the fuse box and the headlamp casing for the rear cover to actually be removed. Even if one was able to remove it I am sceptical whether there would be enough room to easily remove and replace the bulb.
So first of all remove the three screws that are holding the headlamp casing in place. Put the screws aside in a safe place and note which ones went where so you don’t have any problems when you come to put them back.
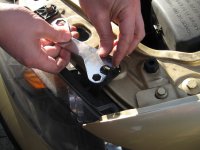
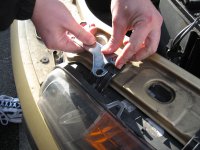
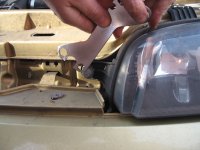
Then ease the whole casing away from the front of the car. We only want about an inch or so, one doesn’t need to remove the casing from it’s housing.
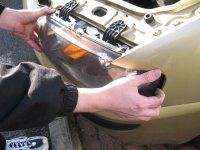
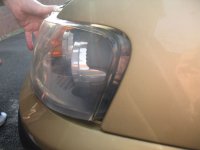
With that done the rest is actually fairly intuitive and if you’ve got a Haynes one can actually pick it up and start using it. However, for the sake of completeness here’s how to do the rest.
Release the spring clips and remove the rear plastic cover from the headlight unit. For those that have arrived at this guide after toiling with it and realising it wasn’t physically possible before moving the headlamp unit out a bit, actually removing this cover will invoke a great amount of pleasure. As Ashley demonstrates in the second picture.
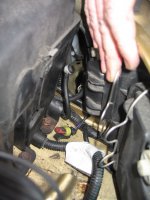
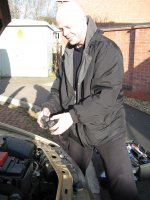
Then remove the bulb unit. There are two ways of doing this. One can either remove the wiring connector and then change the bubs in and out before reconnecting or one can do what Ash did and remove the bulb still connected to the wiring and then switch it out once it is out of the socket. Either way just make sure everything is turned off at this point as I assume there is a risk of shock.
When one does remove the bulb there is a retaining spring clip that needs to be released before one can get it out.
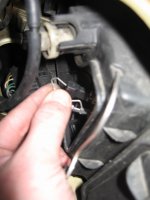
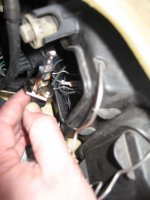
When putting the new bulb in make sure you’re careful with it and that your hands are clean. One doesn’t really want to break it or get it dirty.
When performing the swap make sure you remember the orientation of the old bulb so you can put the new one in the right way up. If you have problems here you can always examine the light fitting on the offside of the car for reference.
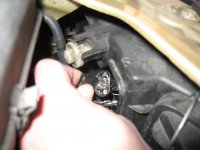
With the bulb replaced, connected and the retaining spring clip secure, test it to ensure the new one works. Note here, unless you’ve put the bulb back in the housing it won’t work as the housing seems to form part of the circuit.

After you’ve turned everything off again it should be a fairly straightforward task from this point on to replace the black plastic rear cover and secure it with the clip. Then push the headlamp fitting back into place and secure it with the screws again. If you do have trouble putting anything back just refer to the offside again and it should put you right.
Job done I would hope. Brmm Brmm. Now you can race the other chavs’ Puntos around the streets of Northampton safe in the knowledge that if you do get pulled the police aren’t going to do you for a blown headlamp, touch.
When we did this the only thing we weren’t sure about was whether moving the headlamp casing around affected the angle of the beams, if anyone can shed any light on this then please post below.

Anyway, without further a do here is how you really change the nearside main beam bulb and no doubt the others there too. First, pop the bonnet.

To be fair the only thing the Haynes manual doesn’t mention is that fact that to do this one really needs to free the whole headlamp casing. However, this is a fairly essential step as if it is neglected one will find that there isn’t enough room between the fuse box and the headlamp casing for the rear cover to actually be removed. Even if one was able to remove it I am sceptical whether there would be enough room to easily remove and replace the bulb.
So first of all remove the three screws that are holding the headlamp casing in place. Put the screws aside in a safe place and note which ones went where so you don’t have any problems when you come to put them back.


Then ease the whole casing away from the front of the car. We only want about an inch or so, one doesn’t need to remove the casing from it’s housing.


With that done the rest is actually fairly intuitive and if you’ve got a Haynes one can actually pick it up and start using it. However, for the sake of completeness here’s how to do the rest.
Release the spring clips and remove the rear plastic cover from the headlight unit. For those that have arrived at this guide after toiling with it and realising it wasn’t physically possible before moving the headlamp unit out a bit, actually removing this cover will invoke a great amount of pleasure. As Ashley demonstrates in the second picture.


Then remove the bulb unit. There are two ways of doing this. One can either remove the wiring connector and then change the bubs in and out before reconnecting or one can do what Ash did and remove the bulb still connected to the wiring and then switch it out once it is out of the socket. Either way just make sure everything is turned off at this point as I assume there is a risk of shock.
When one does remove the bulb there is a retaining spring clip that needs to be released before one can get it out.


When putting the new bulb in make sure you’re careful with it and that your hands are clean. One doesn’t really want to break it or get it dirty.
When performing the swap make sure you remember the orientation of the old bulb so you can put the new one in the right way up. If you have problems here you can always examine the light fitting on the offside of the car for reference.

With the bulb replaced, connected and the retaining spring clip secure, test it to ensure the new one works. Note here, unless you’ve put the bulb back in the housing it won’t work as the housing seems to form part of the circuit.

After you’ve turned everything off again it should be a fairly straightforward task from this point on to replace the black plastic rear cover and secure it with the clip. Then push the headlamp fitting back into place and secure it with the screws again. If you do have trouble putting anything back just refer to the offside again and it should put you right.
Job done I would hope. Brmm Brmm. Now you can race the other chavs’ Puntos around the streets of Northampton safe in the knowledge that if you do get pulled the police aren’t going to do you for a blown headlamp, touch.
When we did this the only thing we weren’t sure about was whether moving the headlamp casing around affected the angle of the beams, if anyone can shed any light on this then please post below.


