DSC_1551.jpg

Marea Marea Weekend Saint Moritz JTD 110

Introduction

After having been watching this car for over 4 months, i finally called the garage and made a deal, then the very next day my previous Marea threw a tantrum during a climb up a local hill at full pelt. she's not worth repairing and is now parked in the garden waiting to be stripped for useful parts.
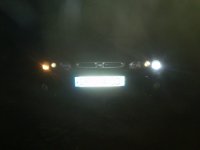
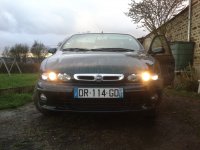
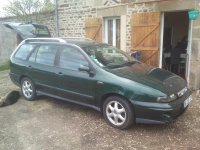
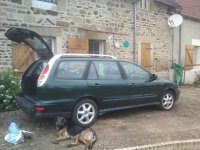
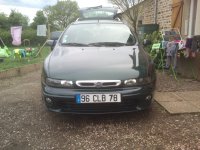
The new car is lovely, very tidy and has leather seats, but as with any car over 10 years old, she has quite a few things to do, but i have no money for this to be a project car, in terms of upgrades, she will remain vanilla as far as possible for the foreseeable future.

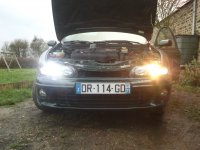
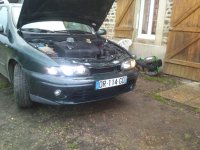
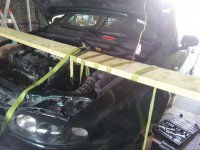
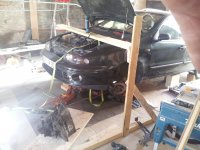
im amazed as to how much more open the JTD 110 engine bay is compared to the TD100, i have ABS and a whole load more other gubbins in there, but i have LOADS more room around the back of the engine, they did a great job of tidying it all up between 1999 and 2002. getting rid of the front air intake above the radiator was a good idea too
thumb.gif

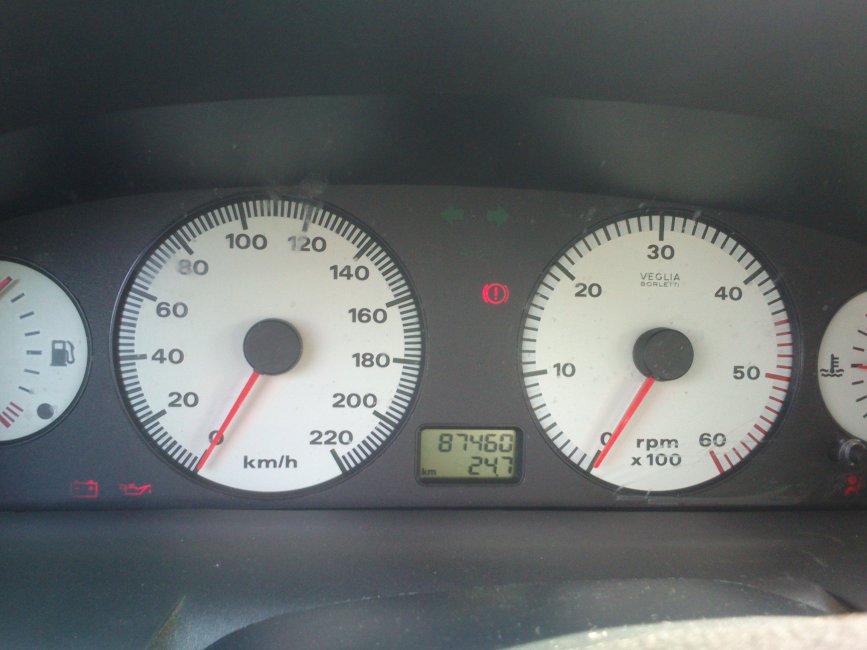
currently at 107,000km (66,000 miles) dash shows 87,000km due to a dashboard change at 19,000km
things on my to-do list:

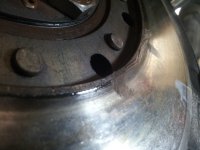
  • change front tyres, they're at the limit and have been run under inflated for quite a while, they're heavily scrubbed on the sides indicating **** poor parking skills by the previous owner. i would like to install some bigger tyres so i can to get some extra fuel economy, and to remove the discrepancy in the speedo, if i'm doing 90kmh, i want to see 90, not 86. ium thinking 195/60/15, maybe 65, maybe some R16 alloys, but i'll have to do some more research on this, suggestions welcome.
  • move across (or put in storage) all the new parts recently purchased for the old marea, steering tie rod ends, suspension drop links, wishbone bushes (i'll just move the whole wishbone over), rear flexible brake lines, and i'll take off the new starter motor i fitted and and keep it on a shelf.
  • see if i can repair the broken metal *spring* parts poking out the back of the drivers seat just above the lumbar support.
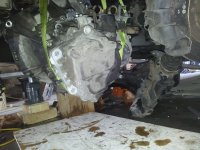
  • see if the non audible *clunk* when dipping and releasing the accelerator is related to the engine mounts, or some other suspension parts.
  • sun visor clip snapped off.
  • radio doesn't work, fuses checked and are ok, 12v at fuse contacts.
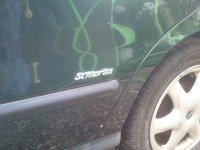
  • pull out the dent in the right hand wing, and repair the damaged paintwork which has pulled off the galvanised coat and is already starting to rust a little.
  • front passenger door stay kingpin missing
  • outside temperature sensor intermittent, sometimes showing erroneous temperatures, sometimes telling me "ERROR CLI" there is a rip in the rubber boot which shields the wiring between the door and the body.
  • figure out why i cant connect to the ECU
  • i'd quite like to try putting a coupe anti roll bar on there after reading Steve20VT's thread, i like the medium soft ride on the marea, but i always felt the cornering sway needed stiffening up a little, especially with a diesel lump up front.
there are lots more things to discover, and i have no doubt the to do list will grow and evolve, but i shall endeavour to keep this thread as up to date as possible, with lots more photo's to come in the near future.
got connected to the ECU for 10 minutes before the laptop battery ran out, seems the ecu odometer has 160,000 on the clock, :(
i was always under the impression that if you swapped a dash, it took the highest mileage from the two counters and updated the one which was lower. obviously not the case here. feeling a little swindled, i'll have to have another inspection of the log book and try to decipher the illegible handwriting underneath the garage stamps.
 
Changed the cam belt, water pump and pulleys today, only took 6 hours! this included many cups of tea and a good long headscratch of a lunch, but obviously having taken so long, it implies i had a small hand full of problems, first was the engine under-tray bolts that go into the subframe, the nuts had come loose from the subframe and so just turned without coming undone, i managed to get the left hand one off and just swung the tray out the way. I suspect i will have to grind off the right hand side nut if ever i need to completely remove the tray. (n)

Next was the axillary belt tensioner, it's WAY too hard to get the belt off with just a normal spanner, i had the spanner digging sharply into my hand while exerting as much force as my pain threshold allowed, i feared gravely for my knuckles should the spanner slip. I managed to get the belt off using my torque wrench (i should invest in a breaker bar) but when the tensioner returned to it's unloaded position, it trapped the torque wrench between the wheel arch, and if i put it back under load, i couldn't safely get the socket off the nut either! :bang:

the last major headache was when i came to change the water pump, in my previous cam belt change for my old TD100, it was due to the injection pump needing to be replaced, and the water pump was in good shape, so it didn't get changed and so i never realised that it is trapped behind the cam shaft sprocket, and cannot be removed without taking said socket off, needless to say, i don't have the correct tool to do this. After much :bang: and stress i decided that it was lunchtime, so i sat down and had a sandwich and a cuppa tea. While supping away, i found a few images on google of a tool that looks like a chain oil filter remover, but with a cam belt attached instead, then in the same image search i came across a very recent blog when some fella had cut an old cam belt up, and clamped using mole grips. I copied the idea and eventually got the cam shaft sprocket off, from there it was pretty much plain sailing, just put everything back as it came off, a bit more fighting to get the aux belt back on, but got in the end.

all done now, i just need to go and buy, and use, some thread lock for the belt tensioner, as the new one didn't come with a new nut, change the coolant, old stuff was brown and yukky.

good for another few years! :slayer:

coming soon, new anti roll bar drop links and tie rod ends, then rear brake lines and a complete brake fluid change. all parts were fitted new, less than 2 months ago to my old Marea.
 
Last edited:
Seems like a really good example and you know how to sort the niggles with your experience and spares collection!

As regards the tyres, I would keep it standard and just buy some decent rubber in the correct size, I never really understand why so many folks on the forum think they can improve on Fiat's design and specifications by fitting bigger things.

The silver looks great against that dark green, a really classy look that we probably won't see again...
 
i might have the radiator off, and get the hose pipe on the job if i get bored one day, but im not sure it's really nescessary to be honest, there was no gunk came out when i flushed the old stuff, and even after 30miles with some radiator cleaner and water, i still didn't have any gunk come out, so i think just the fluid change will do for now.

on the tyre subject, i just want to have an acurate speedo, i hate having to guess or use the GPS as my reference. This will have to wait as i have 4 good tyres for now, they might last another year at the front, so i'll have plenty of time to discuss and research the options.
 
good to see her..!!, :)
my identical ('ish) 105 visited similar French Rural properties in our time together:D

Temp sensor.. dodgy wiring almost certainly,

Door pin..simple enough - hope it's not masking another issue:eek:

glad you connected to ECU ,
any sign of Cruise connectivity (MES can "activate" dash tacho symbol)

assuming yours IS that much better equipped - aerial looks different;)

Charlie
 
i got the radio working how i want this evening, a bluetooth adapter connected to the blue AUX IN plug to eliminate the alternator, and charger feedback that i got while having the phone plugged in directly to the cable, and also to eliminate wear and tear on the phones headphone socket. A home made phone holder from a scrap piece of 1mm steel, a 9 Amp, 4 port USB charger, and a bit of soldering on the radio circuit due to the plug i bought not having enough mini iso pins!

photos can be found on this thread in the guide section, no point uploading duplicates here.

good to see her..!!, :)
my identical ('ish) 105 visited similar French Rural properties in our time together:D

Temp sensor.. dodgy wiring almost certainly,

Door pin..simple enough - hope it's not masking another issue:eek:

glad you connected to ECU ,
any sign of Cruise connectivity (MES can "activate" dash tacho symbol)

assuming yours IS that much better equipped - aerial looks different;)

Charlie

temp sensor, yes, it's clearly a wiring issue, i swapped over my old temp sensor from the old car, and it behaves exactly the same, i've also had the door cover off, and found that the loom has been butchered already, whoever did the work, did quite a good job in terms of it being soldered and heat shrink-wrapped instead of just taped up, and they put new glue backed cloth ribbon over the repairs too, but there are things that have been done which make no sense what so ever, i'll post photos next time i have time to take the cover off. To keep it simple, i think i shall just swap over my spare door loom, while i have spares, i see no interest in spending time deciphering why, how, and when, previous repairs were done.

door pin, still not got round to it, the door seems fine, i think it was just caught by the wind or some other such silliness, seeing as it's the passenger door, it hasn't annoyed me enough to make it to the top of the repairs list yet.

ECU, i haven't connected in a while, but last time i did, i had no luck in lighting up the cruise dash indicator, and i can't force enable the re-learn cruise enable option as i have only the free version of MES, and to click on the button, it tells me it's only available in the paid version.
 
Oh yes, and a really good radiator flush with some additive will probably be worthwhile... I generally do 2 flushes with 1/2 a tin of stuff in each flushing mix. The stuff that comes out... :yuck:

totally agree that flush is worth it.. I don't always use it when i change coolant but i did my bravo the other day and considering what was in it before i stuck flush in looked quite clean and i know its not really been in there longer than a few months - once the engine had been run with some flush in for a while what came out was not nice clean coolant - it looked more like milky tea.

11269969_10153254993496125_321120001_o.jpg

But i shalt be doing that next time, I change coolant every year but would only use actual flushing liquid every few years - normally just drain and fill with water and run upto temp and then drain and repeat until I only get nice clean water out, then fill with 50/50 coolant and water.
 
Last edited:
Not much has happened recently, i've been working long hours and the Mrs and kids have been keeping me busy the weekends, but i've decided to get my arse in gear and make an effort while the weather is good, to strip and empty the old donor car as much as possible before calling the scrapyard to have her shell taken away. I started with the wishbones, drop links, and track rod ends which were fitted new to the old car only a few months ago, and then fitted them to the new car today, the ones i took off were goosed! the knocking noise has gone, and the front end feels much more solid in general, but i still have some rubber to change, when pipping the accelerator, i still have a squeek and a bit of play, i feel the engine mounts all need changing, a job for when the subframe comes off i feel.

After lunch, i moved on to removing the old car's exhaust for refurb, and also took off the starter motor, bumper and headlights, i also started emptying the fuel tank, a tedious task when using a 5mm siphon tube into a 10 litre jerrycan. i did a good deal of crawling around to see what i could salvage from the underside, rear springs seem in better shape than the new car's, shocks look cleaner/newer although it's very hard to be sure,
future plans are, to remove and refurb the front subframe before swapping it into the new car, then refurbing the other one to put up for sale
 
When i bought the car then aircon was empty, i had it filled but within a short period, I noticed that there was a green fluid next to the inlet for the radiator (photos 1,2,5&7), i had vague hopes that it was just condensed coolant which had stuck around since the timing belt change as it rinced off with water very easily, but as the aircon got weaker and weaker, and the liquid came back, i knew what was going on.
so a quick check online for a cheap radiator came in at 100euros, trying to save a few quid, as im off on holiday this month, i checked on Eper, and saw that the condenser is the same for pre and post facelift models. To remove the condenser, i found it's possible to remove, without having to drain and remove the coolant radiator, just pull out the lights and remove the bonnet catch cross memeber (photos 3&4). after that, off came the piece from the old Marea, but hesitation as it had oily traces and caked on dirt (photo 6). I fitted the piece anyway and took it to the French Halfords (Norauto) for the cheapest refil in town, and after making sure that they only refill after a leak test, they did the refill, so far so good, at worst i've wasted 50euros on a refill, and delayed shelling out 100 on a new condenser, but such is the way of things when the budget is tight.
 

Attachments

  • DSC_1663[1].jpg
    DSC_1663[1].jpg
    1.4 MB · Views: 151
  • DSC_1665[1].jpg
    DSC_1665[1].jpg
    1.4 MB · Views: 175
  • DSC_2865[1].jpg
    DSC_2865[1].jpg
    1.4 MB · Views: 198
  • DSC_2866[1].jpg
    DSC_2866[1].jpg
    1.3 MB · Views: 206
  • DSC_1667[1].jpg
    DSC_1667[1].jpg
    1.3 MB · Views: 143
  • DSC_2873[2].jpg
    DSC_2873[2].jpg
    1 MB · Views: 185
  • DSC_2868[1].jpg
    DSC_2868[1].jpg
    1.4 MB · Views: 175
Last edited:
Not much been going on, had to get new tyres for the front, BF goodrich, nothing too fancy, and have just ben plodding to and from work. last week though i started having a slight problem with what i am sure is an EGR issue, hesitation after being at idle or decelerating, this is a problem when setting off from lights, and especially hill starts, i have stalled it more than a few times. The times it doesn't stall, or i'm going round a corner and have some momentum, i press the go pedal, but nearly nothing happens, a few seconds later, a shudder and it kicks back into life and i'm off again. during the last week it's been getting more and more frequent so today i too apart the whole EGR assembly and gave it a good clean. Plenty of carbon build-up everywhere, but that's to be expected, the problem seems to be in the solenoid, the spring loaded inlet valve moves freely and easily, but when testing the actuator in MES, it only works properly half the time, it sticks and wont budge, sometimes open, sometimes closed, so i hope that is the culprit. i put the whole thing back together again but left off the solenoid, effectively blanking the EGR system, i would prefer to have the car in full working order, and so will try and clean the solenoid assembly as best i can, but it is a sealed unit with no way to disassemble. Something else i found slightly concerning, was the oil on the underside of the air inlet pipe. I assume it's normal for the turbo to send *some* oil back into the intake, but enough to leak out and drip down the intake pipe? i'm not sure that's normal.

on a side not, i have started on a mission to change all my lights, as many as legally possible to LEDs, i started with my sidelights, and liked them, so i went and bought some more. for the poly ellipticals i have some 35watt HID xenons on the way, the main beams i have already put in some osram nightbreakers, first i tried in the diupped beams, but honestly i saw NO difference what-so-ever, then i tried in the full beams, and the difference is not great, certainly not 130% more light. but they are slightly whiter. compared to the bulbs i got in the supermarket for 5euros, i don't feel that the 15euro price is worth the money. still im not too fussed, i rarely use the full beams so it's no big deal.
I have an order on the way for 8 LED P21Ws for the whole of the rear end, and orange ones for the front indicators, i hope that they are as much of an improvement as the sidelights were.

photos are
1: sidelights: left filament bulb, right LED
2: dipped beams with supermarket halogens
3: dipped beams with OSRAM Nightbreakers
4: full beams with supermarket halogens
5: full beam with OSRAM Nightbreakers
 

Attachments

  • DSC_3098.jpg
    DSC_3098.jpg
    1.7 MB · Views: 208
  • DSC_3092.jpg
    DSC_3092.jpg
    1.6 MB · Views: 129
  • DSC_3091.jpg
    DSC_3091.jpg
    1.5 MB · Views: 145
  • DSC_3090.jpg
    DSC_3090.jpg
    1.5 MB · Views: 425
  • DSC_3080.jpg
    DSC_3080.jpg
    1 MB · Views: 220
bon vacances (athiest) :p
compared to my TD100, the JTD has nearly nothing below 1500rpm, and i suspect that that is done on purpose to protect the bottom end bearings. the power curve is very linear on the JTD compared to the TD100 too.

what exactly is the stored code you have, and where is it stored? im not exactly sure what you mean by communication error, could it be just a latency issue? i have a slow atom processor netbook, which sometimes struggles with the demands of the connection.
 
a small update, i have tried using shiftybloke's EGR guide from the alphaforum http://download1399.mediafire.com/599r5s9ks9gg/nxgz2frzy0y/How-to+Fix+the+EGR+on+a+1.9JTD.pdf
but have had no luck in knocking out the pin, no matter how hard i hit it, all that seems to happen is that what ever i use as a punch bends under the impact ( i do have a proper punch, but it is tapered and gets stuck in the hole before touching the material below), and damages the hard plastic inside the solenoid. i have even upgraded to my 1.5kg lump hammer but nothing budges, i dare say that the Pierburg solenoid is not compatible with this technique
I changed my angle of attack at this point, i managed to pull the plunger out from flush to the housing and clamped it in the chuck of my high speed drill, filled the insides of the solenoid with carb cleaner through the hole i had already drilled, and took it for a whiz with the drill underneath the solenoid so all the fluid drained out the plunger side! once all the very black carb cleaner had worked its way through, i repeated the process and left to dry for an hour or so, came back and repeated the process with WD40. it moves freely now, and is as close to as it should be as i can achieve. it is back in the car now, but i just need to go for a drive now to make sure all is in working order.

with regards to the OSRAM nigtbreakers, i retract my previous assessment, i have done a bit more night driving, and my initial tests did not show the full capabilities of the bulbs, they are in fact much better than supermarket halogens, and i would recommend them as an upgrade compare to OEM bulbs.
 
Last edited:
Its MES saying i had a stored code for glowplug circuit. And another for EGR..lost communication (historic)...but I clear it. Then it'll be back after a drive..
I'm
I've never fiddled with any engine stuff on this old marea... I'm hoping to just run through the winter.then do a refresh in the spring.

Have a good break.
Charlie
 
Last edited:
got my HIDs today, i had a spare half an hour to see what they looked like, but not enough time to install them properly with the ballasts securely attached, and a hole cut through the dust cap for the wires to pass through.
35watt 6000kevlin, me likey.
 

Attachments

  • DSC_0001.jpg
    DSC_0001.jpg
    1.2 MB · Views: 126
  • DSC_0002.jpg
    DSC_0002.jpg
    1.2 MB · Views: 148
  • DSC_0003.jpg
    DSC_0003.jpg
    1.4 MB · Views: 75
Been a while since anything major happened with the car, been keeping routine servicing strictly under control, new oil and filter every 10,000km, i passed 140,000km yesterday, so this weekend will see me doing that again. She also gets and a good wash every time I fill her up with fuel. She's been running quite happily despite the dodgy EGR valve and a temperature gauge which seems to read 1/8th lower than it should (i suspect a corroding or dirty contact somewhere).

There had been a few occasions during July and August where changing gear would be less than smooth, and sometime a slight challenge, especially in the morning, so i had my eye on the clutch, but the bother came early September. I was ferrying the family to a wedding 800 km away in the Vendee, me the wife and 2 kids, and a boot full of stuff, i was pulling up a hill in 5th at 90km, 2300rpm, and the revs shot up to 3000, NUTS!!! I was only 150km into the 1600km total, and so I changed my driving style to limp mode.

once home i ordered a new Valeo clutch kit, and waited, once it arrived, i set a weekend aside and got stuck in. I have never changed a clutch and so i was very apprehensive and reluctant to take any definitive steps in case i get stuck. I got the battery tray and all the components above the gearbox off, and set to the underside, but on one of the 13mm bolts, my socket sheared, split right down the side, and the release of grip made me round the corners off the bolt. :bang: nothing would sit on there tightly enough and i made it worse with my spanner, which was a poor fit anyway. so off to the internet to order a set of bolt extractors.
http://www.irwin.com/tools/screw-bolt-extractors/9-pc-metric-bolt-extractor-set
these ones to be exact, they are bloody wonderful!

next weekend came along and i set about it again, i had read on the multipla forum that it might be possible to remove the box without removing the subframe, so I went down that path, big mistake, huge waste of time.
another mistake i made, was not draining the box oil before taking it off.
Eventually i got the box on the floor and took a look at the clutch, but was very surprised to see that it was in rather good condition, obviously worn but nothing drastic, the spring pressure plate fingers and push mechanism were much more tired looking (consistent with the careful, old, 1 previous owner).
What i did find, was that the flywheel had a coat of oil all over it and a thick greasy build-up around the inside of the disk, seems the joint is leaking slightly. (n)
Anyway, time was flying past, it was Sunday morning and i had been at it all day saturday, and i still had to put it all back together again. I was using my worksite as a garage, and HAD to be finished for Monday morning so my colleagues could actually do some work, no time to go and buy new joints, i had to get it back together ASAP, i cleaned up the worst with acetone soaked rags and sprayed degreaser (similar stuff to brake cleaner) thinners from an aerosol can to get the last of the oil off the flywheel before fitting the new clutch.

Putting it back together was fairly straightforward, but i was in agony, 2 days straight lying down on a concrete floor and working the ratchet had taken it's toll, in the end I finished Monday lunchtime, luckily my workmates could work around me and it was more amusing than annoying for them. I lost half a days pay, but saved 500euros, but know that at some point in the future i will have to do it all again, when the seal leaks enough oil out to compromise clutch grip again, or perishes completely.

Anyway, next job is to get 2 new winter tyres and put my summer alloys in storage.

My house purchase should go through very soon, i will be the very happy owner of a *proper* garage/woodworking workshop for the first time ever! 35m2 or 90 square feet for those of you still stuck in the 60s :p
 

Attachments

  • 20161002_115123.jpg
    20161002_115123.jpg
    2.4 MB · Views: 151
  • 20161002_133110.jpg
    20161002_133110.jpg
    3.5 MB · Views: 182
  • 20161002_133041.jpg
    20161002_133041.jpg
    2.8 MB · Views: 90
  • 20161002_111827.jpg
    20161002_111827.jpg
    2.9 MB · Views: 171
  • 20161002_115143.jpg
    20161002_115143.jpg
    2.3 MB · Views: 89
Back
Top