In this guide, we'll clean up the buttons of the Visteon HU and clean the LCD pins in order to fix a low-contrast problem of the display.
We'll need:
In long story short, i recommend window cleaners fluid.
Let's dismount the HU.
Cut of the wired hanger in to U shapes.
Stick each of the U's in the 4 holes of the HU and pull. (I bet you all 've done that before)
Having the HU out, you'll finde 4 Torx screws on the back face. 2 on each side.
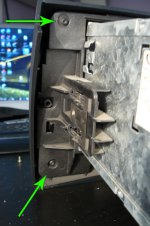
After undoing the screws, the front face will be released BUT beware on the data cable still connected with the main HU.
Gently pull back to unlock.
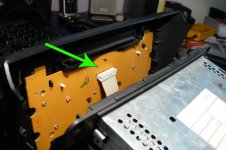
Now you can see the screws need to be undone on the back of the front face.
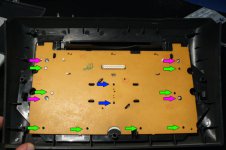
Attention: Each color is different type of screw! Don't mix them up!
Once all are undone, you get the circuit board off.
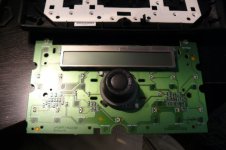
Back to the face plate you'll see this:
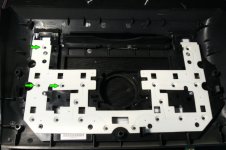
I suggest not to touch the little graphite buttons marked with the green arrow above. These are the "switches" that the buttons use and need to be clean and moisture free. If you wish, clean them with pure alcohol. (No! Not whiskey!) .
.
Removing the black frame that holds the rubber surface, we are finaly on our buttons.
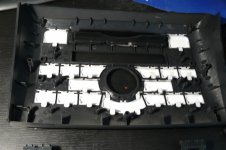
Easy to come off, take them and put them on a glass filled with the window cleanter.
Leave them swim in there in order to make the glue-ish surface start rinkle and get unstable.
For the Vulume button, take some strips of cleaning tissue soaked in window cleaner and wrap it around.
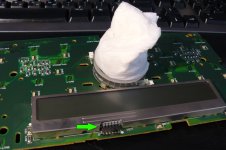
If you want to refresh the LCD's connector, using the pliers, you bent some metal locks of the circuit board as shown below, and gently pull off the LCD.

Now, with the 800 sand paper or with the electrical contact cleaner (Recommended) we gently clean the pins as shown on the above pic.
After having our buttons soaked, we take each one of them and start rubbing them with cleaning tissues and more window cleaner.
Needs patience and persistence.
If you are growing nails for any reason (i'm note here to judge ) it's time to use them.
BUT try not TOO much cause you might rip off the black paint (see my 4 button)
Results:
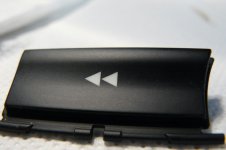
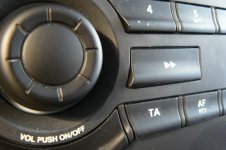
Be patience, be persistent and you'll be rewarder!
Good luck!
PS: Forgive any English language mess up. Even we, Greek Gods, make mistakes! :worship:
We'll need:
- One Torx screwdriver 06x50 and one 08x50.
- A metal wire shirt hanger (for the HU dismounting)
- Sand paper (P800 for example) or electrical contact cleaner instead.
- Nose pliers.
- Cleaning tissues.
- House window cleaning fluid.
In long story short, i recommend window cleaners fluid.
Let's dismount the HU.
Cut of the wired hanger in to U shapes.
Stick each of the U's in the 4 holes of the HU and pull. (I bet you all 've done that before)
Having the HU out, you'll finde 4 Torx screws on the back face. 2 on each side.

After undoing the screws, the front face will be released BUT beware on the data cable still connected with the main HU.
Gently pull back to unlock.

Now you can see the screws need to be undone on the back of the front face.

Attention: Each color is different type of screw! Don't mix them up!
Once all are undone, you get the circuit board off.

Back to the face plate you'll see this:

I suggest not to touch the little graphite buttons marked with the green arrow above. These are the "switches" that the buttons use and need to be clean and moisture free. If you wish, clean them with pure alcohol. (No! Not whiskey!)
Removing the black frame that holds the rubber surface, we are finaly on our buttons.

Easy to come off, take them and put them on a glass filled with the window cleanter.
Leave them swim in there in order to make the glue-ish surface start rinkle and get unstable.
For the Vulume button, take some strips of cleaning tissue soaked in window cleaner and wrap it around.

If you want to refresh the LCD's connector, using the pliers, you bent some metal locks of the circuit board as shown below, and gently pull off the LCD.

Now, with the 800 sand paper or with the electrical contact cleaner (Recommended) we gently clean the pins as shown on the above pic.
After having our buttons soaked, we take each one of them and start rubbing them with cleaning tissues and more window cleaner.
Needs patience and persistence.
If you are growing nails for any reason (i'm note here to judge
BUT try not TOO much cause you might rip off the black paint (see my 4 button)
Results:


Be patience, be persistent and you'll be rewarder!
Good luck!
PS: Forgive any English language mess up. Even we, Greek Gods, make mistakes!

