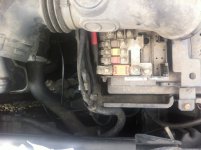
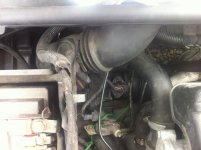
Boost Solenoid valve symptoms
Failure of the boost solenoid valve is a common occurrence on Stilo JTD's, indicated by spurious lack of power - mines normally been when going uphill and was quickly restored by dipping the clutch. Diagnosis (by Examiner or FiatECUscan) will often reveal a P0235 boost fault code.
Whats caused the failure?
My Stilo's suffered 2 failures in the last 2 years, both caused by driving through largish puddles. On early Stilo's the boost solenoid is hidden under the nearside headlight, just in front of the wheel - almost impossible to see. The early ones (Part No 55188059) had a square body housing a mesh type filter, later ones (part No 55203202) have a round body containing a small foam filter fitted. Both have a solenoid fitted which I believe are controlled by a variable frequency input. Neither likes getting wet! Once they get wet, they dont seem to respond to being dried out. At about £50 from Fiat, replacement doesn't hit the wallet too hard, but if all you do is simply replace it, you're likely to need to replace it more than once.
What's the solution?
Within the forum, there are many references to moving the solenoid, some as Fiat dealership modifications - the question is exactly where? Whilst collecting my new solenoid from Pewsham Fiat, Chippenham; I asked whether Fiat had recommended a modification. The answer was that there have been 4 different locations for the solenoid:
Under the NS headlight,
Under the battery tray,
On the side of the battery tray, and
and
Behind the turbo! :doh:
Personally, the only sensible place to resite the solenoid is on the side of the battery box. The following may help you to resite your boost solenoid and hopefully avoid further failure.
Start here
Remove battery cover.
Reaching down behind the NS headlight, remove the 2 10mm bolts that hold the solenoid bracket to the front panel. Access is tight, but is possible with only a few scraped knuckles. Dont worry about disconnecting the electrical plug or vacuum pipes, they're easier to disconnect later.
Pull the solenoid and bracket up between the battery tray and headlight, then disconnect the 2 vacuum pipes and electrical connector (push the metal clip in and pull connector up)
Now unbolt the solenoid from the bracket. Remove the sleeves from the rubber grommets and prise one of the grommets from the bracket.
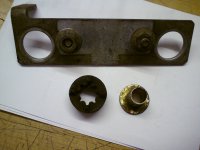
Cut the grommet in half to form 2 rubber washers.
Using the solenoid as a template, position it on the side of the battery tray as shown in the photo - 2 vacuum pipes at top, electrical connector at bottom and drill 2 6mm holes - being careful not to drill through the battery cables inside!

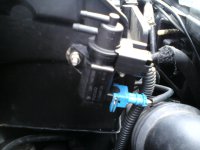
Using 5 or 6mm bolts mount the solenoid on the battery box, sandwiching the rubber washers between the two.
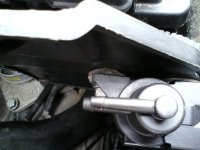
Reconnect the electrical connector and 2 vacuum pipes, large connector to turbo actuator, small to vacuum pipework under EGR valve. Secure pipes with cable ties to prevent rubbing.
Refit battery cover - dependant on solenoid position, the cover may need trimming - easily trimmed with a hacksaw.

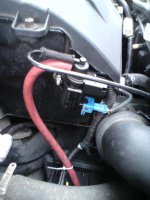
Close bonnett, job done
Failure of the boost solenoid valve is a common occurrence on Stilo JTD's, indicated by spurious lack of power - mines normally been when going uphill and was quickly restored by dipping the clutch. Diagnosis (by Examiner or FiatECUscan) will often reveal a P0235 boost fault code.
Whats caused the failure?
My Stilo's suffered 2 failures in the last 2 years, both caused by driving through largish puddles. On early Stilo's the boost solenoid is hidden under the nearside headlight, just in front of the wheel - almost impossible to see. The early ones (Part No 55188059) had a square body housing a mesh type filter, later ones (part No 55203202) have a round body containing a small foam filter fitted. Both have a solenoid fitted which I believe are controlled by a variable frequency input. Neither likes getting wet! Once they get wet, they dont seem to respond to being dried out. At about £50 from Fiat, replacement doesn't hit the wallet too hard, but if all you do is simply replace it, you're likely to need to replace it more than once.
What's the solution?
Within the forum, there are many references to moving the solenoid, some as Fiat dealership modifications - the question is exactly where? Whilst collecting my new solenoid from Pewsham Fiat, Chippenham; I asked whether Fiat had recommended a modification. The answer was that there have been 4 different locations for the solenoid:
Under the NS headlight,
Under the battery tray,
On the side of the battery tray,
Behind the turbo! :doh:
Personally, the only sensible place to resite the solenoid is on the side of the battery box. The following may help you to resite your boost solenoid and hopefully avoid further failure.
Start here
Remove battery cover.
Reaching down behind the NS headlight, remove the 2 10mm bolts that hold the solenoid bracket to the front panel. Access is tight, but is possible with only a few scraped knuckles. Dont worry about disconnecting the electrical plug or vacuum pipes, they're easier to disconnect later.
Pull the solenoid and bracket up between the battery tray and headlight, then disconnect the 2 vacuum pipes and electrical connector (push the metal clip in and pull connector up)
Now unbolt the solenoid from the bracket. Remove the sleeves from the rubber grommets and prise one of the grommets from the bracket.

Cut the grommet in half to form 2 rubber washers.
Using the solenoid as a template, position it on the side of the battery tray as shown in the photo - 2 vacuum pipes at top, electrical connector at bottom and drill 2 6mm holes - being careful not to drill through the battery cables inside!


Using 5 or 6mm bolts mount the solenoid on the battery box, sandwiching the rubber washers between the two.

Reconnect the electrical connector and 2 vacuum pipes, large connector to turbo actuator, small to vacuum pipework under EGR valve. Secure pipes with cable ties to prevent rubbing.
Refit battery cover - dependant on solenoid position, the cover may need trimming - easily trimmed with a hacksaw.


Close bonnett, job done


