Technical Shimming Fuel Pump or Disable W/ Electric Pump

Currently reading:
Technical Shimming Fuel Pump or Disable W/ Electric Pump

FizzyNose

New member
Joined
Dec 29, 2008
Messages
12
Points
3
Location
Galway
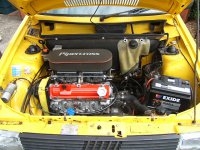
1990 Uno 1.0 engine, manual fuel pump.
Car cut-out in the middle of crossing a major road... coasted to the shoulder just in time to avoid a collision, whew!
Checked for spark - got. Checked for fuel in the in line filter - none. Tryed to get a pump here locally (Ireland) not a hope, even from the Fiat dealer.
By chance a person walked up to me and asked what was wrong, I guess he saw my Italian plates and thought I was a fellow country-man, I told him the problem and told me that of the dozens of Uno he had worked on (he was a retired Fiat mechanic, what were the chances of that!) with this problem it turned out to never be the fuel pump, but the push rod that operates off the cam that actually pumps the fuel pump.
The cam, I guess is wore past spec for the pump push rod.

So, what to do: he said
1.) Remove one of the the gasket shims on the pump, thus bringing the pump closer to the push rod thereby increasing the fuel pressure.
But I didn't have any shims just one 3mm hard gasket.

2.) Refit the manual pump and block off the fuel ports.
Buy an electric pump and route the fuel line through it.

Clipboard Image (1).png

My questions.

1.) Has anyone installed an electric pump in place of a manual one, if so what make/ model /PSI of pump, Haynes says 0.176bar/ 2.55 PSI to the carb but this sounds very low.
2.) If I can get some soft gasket material is it feasible to make a handmade gasket of 3 mm and then compress the soft 3mm to 2.5 mm
when I put the 2 pump retaining bolts back on? This would move the push rod closer to the pump.
I don't think I can cut a hard gasket to the shape of pump face.

Any help would be appreciated... Lance
 
This does sound like a possible fix to the problem.

It won’t be out by very much (maybe half a millimeter), so you could just remove that spacer and clean off any gasket material that’s there and maybe give it a bit of a sand...

Of course you could check the fuel pump for correct operation by pushing that push rod in and out of the pump and see if it pumps anything...

As for the fuel pressure, that’s probably right. Carbs don’t need high pressure like injectors do.

If this does fix the problem then its probably a sign that oil changes haven’t been happening often enough as this shouldn’t wear.
 
Hey Thanks jj
The oil changes haven't been 100% timely, also the car has 121,000 km/ 75,000 mi. on it. I bought some 0.75 mm gasket paper today, Im gonna put hand cut 4x75 gaskets and hope that the compression of the bolts will pick up the ware on the cam. The gasket paper is soft so I hoping for the best.


I would like to replace with 3x75 and I don't think the PSI at the carb would be too high, as I would expect the excess gas would flow back to the tank. Doing so might fix the problem for a longer period of time.

Thanks again... Fizzy
 
Last edited:
I dont have any shims on my pump (just a thin gasket on each side of the plastic block). That plastic block needs to stay on there as it holds the push rod in place.

If you are going to go with an electric fuel pump, you would probably be best to remove the entire fuel pump assembly and replace with a blanking plate.
 
1
i dont have any shims on my pump (just a thin gasket on each side of the plastic block). That plastic block needs to stay on there as it holds the push rod in place.


if you are going to go with an electric fuel pump, you would probably be best to remove the entire fuel pump assembly and replace with a blanking plate.

---------
Geez, good thing i checked your post before i placed the soft gasket. I didn't realize that the push rtod needs to be kept in place by the plastic. I thought the whole thing was just a gasket. I should have known when the gasket came off with my thumb nail that it wasn't just a gasket.

Im gonna clean up the plastic and do a bit of sanding and check the result.
Like you said in the first place... Tx again -fizzy
 
Hi Ya Alex
Thanks for the welcome.
The push rod looks fine, no rounding at the cam end at all and just a tiny tiny deformation at the pump end.

I don't understand why...
"the exact thickness/adjustment really isn't that important."
I used my finger as the push rod and the mechanism that the rod pushes doesn't have that far of a stroke (4mm?) b4 it hits the interior of the housing.
I don't know if 4mm is a flexible adjustment range or not. I guess ur saying its a flexible adjustment range?

The first thing I did (yesterday) was test the pump, I tyred to pump it with my finger and it didn't suck any petrol, however I thought that I couldn't pump it fast enough to make it suck... so I attached a spare fuel line and gently blew into the intake port. The diaphragm seems to work fine as it took a little pressure to feel the air flow come out of the carb port. With just a faint blow the air wouldn't exit the carb port.
I took this to mean the pump could hold a vacuum.

I cleaned-up and sanded down the 3mm plastic gasket (today) put back the pump and didn't get a drop of petrol. I let the battery crank the engine a good 60 seconds 3x in a row. No fuel.

Anyways, If there are no further suggestions Im gonna hand cut the gasket material I bought and try to move the pump closer to the rod by putting together three 0.75mm gaskets. I should end up replacing the 3mm with 2.25mm.

If you guys can think of any else I should do let me know... until then Happy New Year and thanks again 4ur expertize. Fizzy
FP1.jpg

FP2.jpg

FP.jpg
 
I can't believe it! I don't know how I seen a spark when there wasn't any. I must have hallucinated I thought for sure I seen a spark.
Well, I finally took off the distro cap and rotor not moving. I can only conclude it's the timing belt, although It got so cold so quick this afternoon I didn't want to open the cover to see.
I apologize to the two more-than-kind people that assisted me with my fuel pump non problem.

I looked at Haynes and it doesn't look especially hard to change.
Friday I will take off the cover and have a look.

Question:
Here is my VIN
ZFA146000*06412454
What can I tell from this num? Actually, what could somebody in this forum tell me about this number?
I ask cuz after searching the net my Uno doesn't match most of the pictures I have stumbled upon.
How can I tell if I have a FIRE engine?
 
The easiest way to tell them apart is by looking at the cam cover, there are three types.

The FIRE has a big square cover with the oil filler on a raised square section at the timing belt end (most people appear to have the FIRE). The fuel pump on the FIRE is on the top at the back next to the distributor (which is driven directly by the cam shaft).

The Lampredi engine often has a pressed steel cover with ribs on it (some of them have an alloy cover, but I've only seen this on an X1/9 and Uno turbo). This cover is on about a 45 degree angle facing forward. The fuel pump on this engine is on the bottom front of the engine (on the block), just above the oil filter. The attached photo shows my Lampredi engine.

The old OHV engine has a dome like steel cover and the distributor sticking out the top.

If it is a broken cam belt then I'm not holding out much hope for your engine. The Lampredi engine is a non-safe engine, so the valves often hit the pistons and bend when the cam belt brakes. Of course if you have a FIRE then you are sweet with a broken cam belt and they are really easy to replace. If you have the OHV engine then you wont have a cam belt.
 

Attachments

  • DSCF1873.JPG
    DSCF1873.JPG
    122.3 KB · Views: 139
Last edited:
I pretty sure I have a FIRE the as the fuel pump is high on the engine not near the oil filter. At least that one mystery sloved...thanks

The timing belt is broke and Im on my way to pick up a replacement.
 
Hi Lance,

Sorry - I was a bit slow to respond!

I should qualify what I said before - what I meant to say was that the thickness of the gasket on the fuel pump spacer (i.e. 2.5mm instead of 3mm) won't make the difference between the fuel pump working, or not working at all. Yes, it will make some difference to the amount of fuel supplied, but you should at least get SOME fuel out of the fuel pipe (when disconnected from the carburettor and with the engine cranking over). If there's no fuel at all, then either the fuel pump diaphragm has split (try another pump) or the pickup in the fuel tank has snapped off/blocked.

Also, what I was trying to say was that when the pushrod end wears over where it touches the pump operating lever, it usually wears by several millimetres, so will have more of an effect than the gasket alone. Anyway, yours sounds fine then :)

The reason for getting no fuel is, of course, that the camshaft isn't turning (just in case anyone reading this thread hasn't twigged yet!) You should have no problems with the belt change, but remember to find the notch in the cylinder head to the left side of the cam pulley (and align the fine line in the cam pulley with that notch). Also, clean out any stripped teeth that you find in the bottom of the aluminum shroud around the crankshaft pulley...

Note to JJ Hepburn - 1372cc Uno Mk2 70 has an alloy cover with rectangular plastic oil filler (same as the FIRE) (y) and is definitely an interference engine. Most common on South African Unos which are mostly 1372cc. Still I think you wrote a great guide there. Hard to cover all bases. In this case it's obviously the FIRE so everyone's happy :)

-Alex
 
Last edited:
Hi Ya Alex
I understand now what you are saying about the gasket, thanks.

The notch in the cam was very easy to align, however when I took off the crankshaft pulley I stuck a 18" screw driver between one tooth and some adjesent metal housing thereby binding the crankshaft so I could loosen the 3 pulley bolts.

So, when I looked for the stationary crankshaft mark on the engine housing I found a very distinct mark.
I aligned the crankshaft to that mark, but something didn't feel right. I cleaned off the the immediate area around the mark and didn't see anything that looked like an alternative mark. I determined that I had made the very distinct mark with the screwdriver a moment before.

So then I pryed opened the rubber fly wheel window and found the zero degree stamped on the housing and a 1 1/4 inch long vertical notch on the flywheel. I algined these two and this moved the crankshaft mark to point at what might have been a stationary mark on the engine housing, I don't know ... didn't look like much of a mark to me. Anyways, finally I checked that the piston in the first cylinder (next to the cam pulley) was at the top of it's stroke. I guess this is correct and after a few trys I got the new belt on, rotated belt two rounds, checked both marks were still aligned and tightened belt. Didn't start the car yet as I ran out of daylight.

Let me know if this synchronization of flywheel and piston TDC would achieve the the same alignment as would - aligning the crankshaft mark (which I did clearly see) and the stationary mark on the engine housing that I really couldn't definitively determine. Thanks Lance
 
Hello Lance,

Yes, perfect technique there (y) Great write-up. I'm guessing you've done this sort of thing before! It should start up fine.

I always use the flywheel notch, as (like you say) there isn't a clear mark on the front pulley. Some engines (1108cc I think) have three ridges in the plastic cover that line up with a thin notch on the pulley edge, but even then it's hard to see. The clearest mark is on the camshaft sprocket (which you can see with the pulley removed) and it lines up with a raised ridge in the aluminium oil pump housing (the part behind the sprocket). But in practice it's always easier to use the flywheel mark. It's more accurate anyway because it's on a larger radius ;)

You also use the flywheel notch to set the ignition timing (i.e. by shining a timing light on it); the flywheel notch should be 'frozen' by the flashes of the light at 5 degrees BTDC (some books say 3 degrees) idling at about 850-900RPM with the vacuum advance unit disconnected and vacuum hose plugged. It might be worth checking this just in case the cam timing was wrong before?

Hooking up the vacuum advance should cause the timing to advance to about 12-15 degrees and the idle speed will increase.

The FIRE is a great engine to practice the belt change on before you tackle a quad-cam engine like the Alfa V6 :D Well, those engines (and most twin-cams) are best done with locking tools, as it's so hard to keep everything aligned.

Just one other suggestion from me - the cambelt doesn't have to be over-tight. That 'just able to twist through 90 degrees' technique (used by most people) can lead to an over-tight belt, which causes whining and even rumbling noises. And, it's hard on the tensioner bearing (particularly if the tensioner isn't new). Most of the belts that I've seen changed by 'professionals' (i.e. garages) are too tight ;)

Basically, I set the belt so that I can easily twist it through a bit over 90 degrees with thumb and forefinger on the longest part between pulleys, and then I watch the front part of the belt (with the cover removed and engine running) to make sure it's not whipping back and forth (which shows it's too slack). There won't be any whining noise with the belt at the correct tension.

Some older engines (e.g. 70's FIAT 128) had a spring-loaded tensioner that really wasn't that strong. It was after working on these that I realised how easy it was to over-tighten the spring-less eccentric tensioner. I used to use a big tyre lever, but now I use a short screwdriver!

Cheers,
-Alex
 
Last edited:
Hi Ya` Alex
Thanks for the compliment. About 30 yrs. ago I was stuck in a massive traffic jam inching along and happened to spot a "Machinc's Helper Wanted" sign and pulled in to apply. I had never worked on cars before but was unemployed so nothing to loose. The owner hired me and let me take apart the repairs for him, in my own time with his tools, he would then come in and perform the experienced work and then he would go back into the office and not come back nor help me until my part of the reassembling was done. Now these jobs were massively complex jobs for me, rebuild an engine, change a tranie, head jobs, struts - not changing battery's or shocks or anything like that.
I was so pathetically lost that the other 5 real machincs would constantly coach me across the garage floor by shouting what to do next and sliding the correct tool across the floor. I learned alot and am forever grateful to those guys.

I read a related post of yours about tightening and I think I set the twist to about 120 deg. I left the blue plastic cover off and I will check the slack as the engine is idling.
Anyways, I stripped a stud on the fuel pump and need to buy a tap on Monday. After this , I will start-er-up and see what happens.
Thanks again .... Lance
 
Back
Top