Technical Rear brake drum seized on

Currently reading:
Technical Rear brake drum seized on

Cinq999

Established member
Joined
Jul 1, 2012
Messages
425
Points
226
To set the scene, I adjusted my rear brake shoes/drums back at the beginning of February for the MOT. Every year the handbrake needs adjusting for it to pass.

So I adjusted both sides, set the handbrake so it just started to bite after 3 clicks, all has been fine in the 7 or so weeks since.

Yesterday I was going along a main road at around 55, when all of a sudden the car stank of burning friction material. Fortunately I was nearly home, so when I stopped and got out, the rear N/S stank of burnt friction material......I touched the drum....OUCH!! It was blisteringly hot.

So this morning I jacked it up.....and the wheel span freely.

I took the wheel off, and the drum would turn freely by hand. However, as soon as I tried to take the drum off, it was stuck solid on the shoes. A hammer and pry bars managed to get it off in the end.

There was nothing obviously wrong inside.....the shoes and springs were in place, adjuster was in its correct place, cylinder (all the rear brake components are just over a year old) was fully compressed in as you'd expect.

So I adjusted the shoes in a bit, and refitted.....and it was fine this afternoon.

Has anyone got any idea what might have caused it?

What confuses me is that it began while driving on a straight road, and not even touching the brake or handbrake.
 
the handbrake should only need adjusting when new brake shoes are fitted.
3 clicks is too tight, should be 5-7
Constantly tightening the handbrake up means that the self adjusting mechanism can't do its job.
An over tight brake cable would mean that if putting any load in the car or going over large bumps the brakes may apply, which I think is your problem. and if the shoes self servo they may have jammed on.
slacken the handbrake and disconnect the brake cables at the drum tap around the drum with a rubber mallet see if the shoes unstick, be careful with a metal hammer or the drum could shatter.
 
I took the wheel off, and the drum would turn freely by hand. However, as soon as I tried to take the drum off, it was stuck solid on the shoes. A hammer and pry bars managed to get it off in the end.

A few pointers..

The lip of non.contact inner bore will be enough to bind on the shoe :eek:

In most cases.. look at the two large holes in the drums mounting face (where the 12mm head studs fit)
They will have a thread in :)

Some are an odd Metric Fine..

But if you are lucky its the same thread as the wheel bolt (y)

Spin the hub so these 2 holes miss all holes in the hub face..so you are pushing against a flat face

You can 'walk it off' with these bolts


Far more controlled than prybars..

On my GP I bought in 2018 the drum was well lipped .. had your issue..

Used 2 wheel bolts.. added a little tension ( it will try and bring the shoes away with it )

Being my 1st GP I had no spares.. so used a jack handle as a lever to spin the hub and drum.. winding the bolts in a turn a rev.. it came off ok


Dealing with the lip..

THE LIP is pretty much the original bore dimension.. so a massive lip means LOTS of wear.. and a big change in braking surface diameter ;)

There will be a max. ###.#mm figure cast into the drum - often 220' odd mm

An awkward size to measure :(


My fix for a minor wear lip:

Mount the drum to the hub 'in reverse'..
So it is facing outwards

Give it a flick to get it spinning..

Use a dremel to whittle away the lip..
Because the drum is spinning.. and driven round by the dremels friction.. you can get pretty uniform metal removal :)
 
Last edited:
the handbrake should only need adjusting when new brake shoes are fitted.
3 clicks is too tight, should be 5-7
Constantly tightening the handbrake up means that the self adjusting mechanism can't do its job.
An over tight brake cable would mean that if putting any load in the car or going over large bumps the brakes may apply, which I think is your problem. and if the shoes self servo they may have jammed on.
slacken the handbrake and disconnect the brake cables at the drum tap around the drum with a rubber mallet see if the shoes unstick, be careful with a metal hammer or the drum could shatter.

starts to grab at three sounds about right

fiat specs are it shouldn't travel more than 5 to be fully on
 
most likely a sized wheel cylinder

As the drum changes size with heat from rubbing it jams on worse

frees itself when it cools down

as the shoes don't move in enough for the adjuster to work properly the hand brake will need to be adjusted from time to time

You can't take chances with brakes. Both sides will have to be stripped down and checked

Adjuster really need a Good clean and winding right in. Should be a nice click as you operate the brake from both sides.

There a small chance air has got into the system. As this heats up it will expand causing the brakes to seize
 
So I adjusted both sides

What ???


There self adjusting


You wind the adjusters fully in. Loosen the hand brake. Press the brake lots of times. Adjust the handbrake so its fully on at less than 5 clicks. Release the handbrake and make sure the wheel spins freely.


there's no adjusting both sides ????
 
They have provision for selfadjustment

But dont take much to stop them..

An overtight handbrake cable being one potential cause

absolutely

its the brakes.

they should be working as per factory.


Every one I looked at one lately have needed a full set. I peel the wheel cylinders dust covers back. One or other side either has started to weep or one of the pair of pistons doesn't move smoothly.


I can usually find a kit with all the springs adjusters shoes and cylinder cheaper than just changing the shoes and cylinders

never need adjusting again. Set and forget.

drums shouldn't groove that badly unless aggressive shoes have been used. My 200,000 mile were still Good for another 100K
 
This post contains affiliate links which may earn a commission at no additional cost to you.
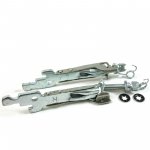
I took it apart this afternoon, and it looks like the adjuster is broken...... there's nothing stopping it adjusting either way.....the knurled nut freely turns in both directions. I'm guessing it must of slowly been pushing the shoes out over the last few weeks.

It had completely brand new everything both sides last January. Drums, shoes, cylinders, spring kit, adjusters, ABS sensors, wheel bearings, new brake pipes, handbrake cables the lot.....and not using cheap parts either.

Even then, around 3 weeks later it failed the MOT on insufficient handbrake performance.....same as year before.....and again this year. Sometimes wouldn't even hold the car on a hill.

Each time I have to adjust the shoes up, so when the handbrake is pulled, they really do lock on......even then, it's only "okay" looking at the reading at the MOT centre.

Then when it's passed, I back them off again. The adjustment never seems to have worked properly. The mechanics at the garage can't make head nor tale of it either.

For the cost of the parts, I'll probably strip it completely down and fit new parts again and give it another go.

Maybe look at stripping the handbrake mechanism as well, make sure it's not something going on there.
 
Last edited:
If everything is working correctly the handbrake works well

you should be able to put the handbrake on. Put the car in reverse and slowly release the clutch and the rear of the car rise up without the wheels moving. Don't go too mad 4 inches
 
I took it apart this afternoon, and it looks like the adjuster is broken...... there's nothing stopping it adjusting either way......
.

If its assembled and working correctly this isnt possible. That will be your problem

pictures needed I think
 
Last edited:
I'm finding it difficult to contribute something which either you yourself or the other contributors haven't posted here. However here's my wee ha'penny worth.

I had terrible trouble getting a good handbrake on our old Felicity (1992 Panda) which I eventually solved by modifying the standard setup and because the old Pandas had a very different adjusting mechanism (spring loaded friction washers anyone?) That "fix" wouldn't be any use here but the extensive investigations I made on it, and other self adjusters over the years, lets me make a few observations.

The type of self adjuster used in this application works by one end - the rear end - bearing on the lever fixed to the top end of the trailing brake shoe with the other end bearing on the top of the leading brake shoe. When you pull the handbrake lever in the car up it pulls on the cables which are fitted to the bottom end of the levers on either side and moves them forward which pushes the back end of the adjuster bar forward and so pushes the top of the front (leading) brake shoe outwards towards the drum. Go back now to thinking about the top end of the lever which is riveted to the top of the rear (trailing) brake shoe. Just below this rivet is where it's pushing against the adjuster bar and that bar, as the lever is pulled on, will stop moving when the front (leading) brake shoe comes into contact with the drum so the leverage will now be operating between the end of the adjuster bar where it's acting on the lever and that rivet, so the top end of the raar (trailing) shoe will now be moved outwards until it contacts the drum. So now both shoes are in contact with the drum and any further force exerted on the handbrake assembly (by pulling up on the lever between the seats) will "jam" the shoes tighter against the drums. Of course the whole thing resists turning with the drum because the bottom end of both shoes rests on the fixed mount at the bottom of the backplate.

If that was all there was to it then as the linings wear down the lever would have to move further to account for the wear on the facings which would increase the gap between the linings and the inside of the drums. So too would the pistons in the cylinders have to extend further and further out of the cylinders to take up this extra clearance and in the end you would end up with a brake pedal going to the floor before it managed to get the linings to contact the drums and likewise a handbrake lever which was pulling up to the roof to apply the hand brake!

The self adjuster gets round this by being able to lengthen itself to advance the resting position of the shoes/linings as they wear by being able to screw one end (the front end) out to take up this play so that the shoes do not return so far as the lining wears. For it to work this adjusting mechanism must be in good order physically - ie no broken bits - and free to rotate as necessary (often they are seized).

What many people don't give consideration to is the mechanical advantage of this levering system in relation to the rivet in the top of the rear shoe and the point at which the self adjusting rod bears on the lever. The lever - I'm talking now about the one attached by that rivet/pivot to the top of the trailing shoe - needs to be as far back as you can manage. This will be achieved if you back off the handbrake cables until the levers on both sides are fully back as far as they can go and resting on their stops. Now, hopefully with the self adjusters fully freed off, pop the drums back on and stomp on the brake pedal quite a few times. This should cause the self adjusters to ratchet up as far as possible and reduce the clearance between the linings and the inside of the drums to the correct running clearance. If you have wear on the self adjusters they may not take the clearances up tightly enough and you can temporarily "cheat" by rotating the adjuster screw ratchet with a screwdriver until the linings just skim against the drums when you put the drums back on (you'll be taking the drums off and on a few times to get a good adjustment and just do a few clicks at a time or you'll end up making them too tight!).

What you are trying to achieve is reducing the clearance between drums and linings to a minimum with the levers FULLY BACK AGAINST THEIR STOPS - so handbrake cables quite loose. When you think you've got it right, with the drums reinstalled, depress the brake pedal a few times quite forcefully and yank the handbrake up and down a few times - it'll come up much further than usual of course because you haven't yet adjusted it - this will settle the shoes into their running positions. Just sometimes you may now find, if you are working with worn adjusters, that you'll need to get back in and put a few more clicks on the adjusters. If the adjusters are in good order they will self adjust and take up the clearance themselves.

What you've now done is to reduce the shoe/lining to drum clearance to a minimum running clearance - so the drums should be able to be turned by hand but may rub slightly especially if new shoes have been fitted.- with the levers on the shoes fully back against their stops (so hand brake cables still slack). Now, and only now, with the drums off, start to tighten up the cables until you see the shoe levers just pull away from their stops against the shoes. Pop the drums back on and try the lever. You'll probably find it comes up 3, 4, 5 or maybe 6clicks. If it does don't adjust it any tighter. Adjusting tighter is pulling the levers further away from their stops and reducing the mechanical advantage angle between the end of the adjuster rod and the top/pivot rivet which will reduce the leverage applied to the linings and consequently reduce the clamping effort that the linings can apply to the drums.

If you understand about this levering effect you'll realize it applies to a lot of self adjuster mechanisms. The number of clicks the lever comes up is almost irrelevant - the days of adjusting to get 3 clicks, which was the "Holy Grail" all us old mechanics aimed for, is in the past! You are trying to achieve a "reasonable" number of clicks - which will often depend on how fine the handbrake ratchet quadrant is - but with the operating lever at the drum (or disc caliper) just pulled away from it's resting stop. That way you'll achieve the best possible clamping effect of linings/pads against drums/discs whilst also ensuring the self adjusters will work correctly. The worst thing you can do is to tighten up your cables which will take the levers "over centre" and actually reduce the clamping effect whilst at the same time virtually guaranteeing the self adjusters will be taken out of range and stop adjusting! If you do all this and still can't get a good lever nine times out of ten you'll need to replace the adjusters.
 
Last edited:
If as you say the brakes were all new, they should never need prybars to remove the drums, even if they weren't new using pry bars means something needs fixed.
When you say the brakes were new, are the drums new, if not do they have a lip, then buy new drums or grind the lip off - when the shoes are adjusted it should still be possible to remove the drums without using pry bars.
There are only a few things that cause brake bind, If you know what you are doing with brakes it should be fairly easy to determine what is wrong.
 
Even then, around 3 weeks later it failed the MOT on insufficient handbrake performance.....same as year before.....and again this year. Sometimes wouldn't even hold the car on a hill.

Each time I have to adjust the shoes up, so when the handbrake is pulled, they really do lock on......even then, it's only "okay" looking at the reading at the MOT centre.


Revisiting this..

If the foot brake is good enough.. both in power AND balance

Your basic friction is ok

You seem to be struggling with handbrake leverage

My Grande went from 'scraping through' to a good handbrake just by fitting new cables.. they were collapsing so not at all positive
 
another daft question


some kits come with some washers that aren't used.


They weren't fitted by accident.
 

Attachments

  • temp.jpg
    temp.jpg
    122.4 KB · Views: 33
The hand brake adjuster is under the floor bin cover between the seats (retained by three M6 nuts IIRC). As Jock says slacken the cables off before setting the brake adjusters. When done you can tighten and adjust the cables. If one side is too tight the balance bar will be at a crooked angle which will reduce the cable efficiency adding to any brake shows adjuster issues.
 
the original poster has stated that they can turn the auto adjuster both ways


this isnt correct, it should ratchet and click outwards direction only and needs sorting before messing about with anything else. The only way to wind them in the reverse direction is to push the latch out of the way
 
Back
Top