I know from reading about that a few people have struggled with these, so I thought I’d share some pics of my install.
Use these instructions at your own risk, exercising caution and common sense. I’m not responsible for any injuries or damage you might cause by following them and I’m not a professional when it comes to any of this. I’ve just fitted a lot of head units over the years.
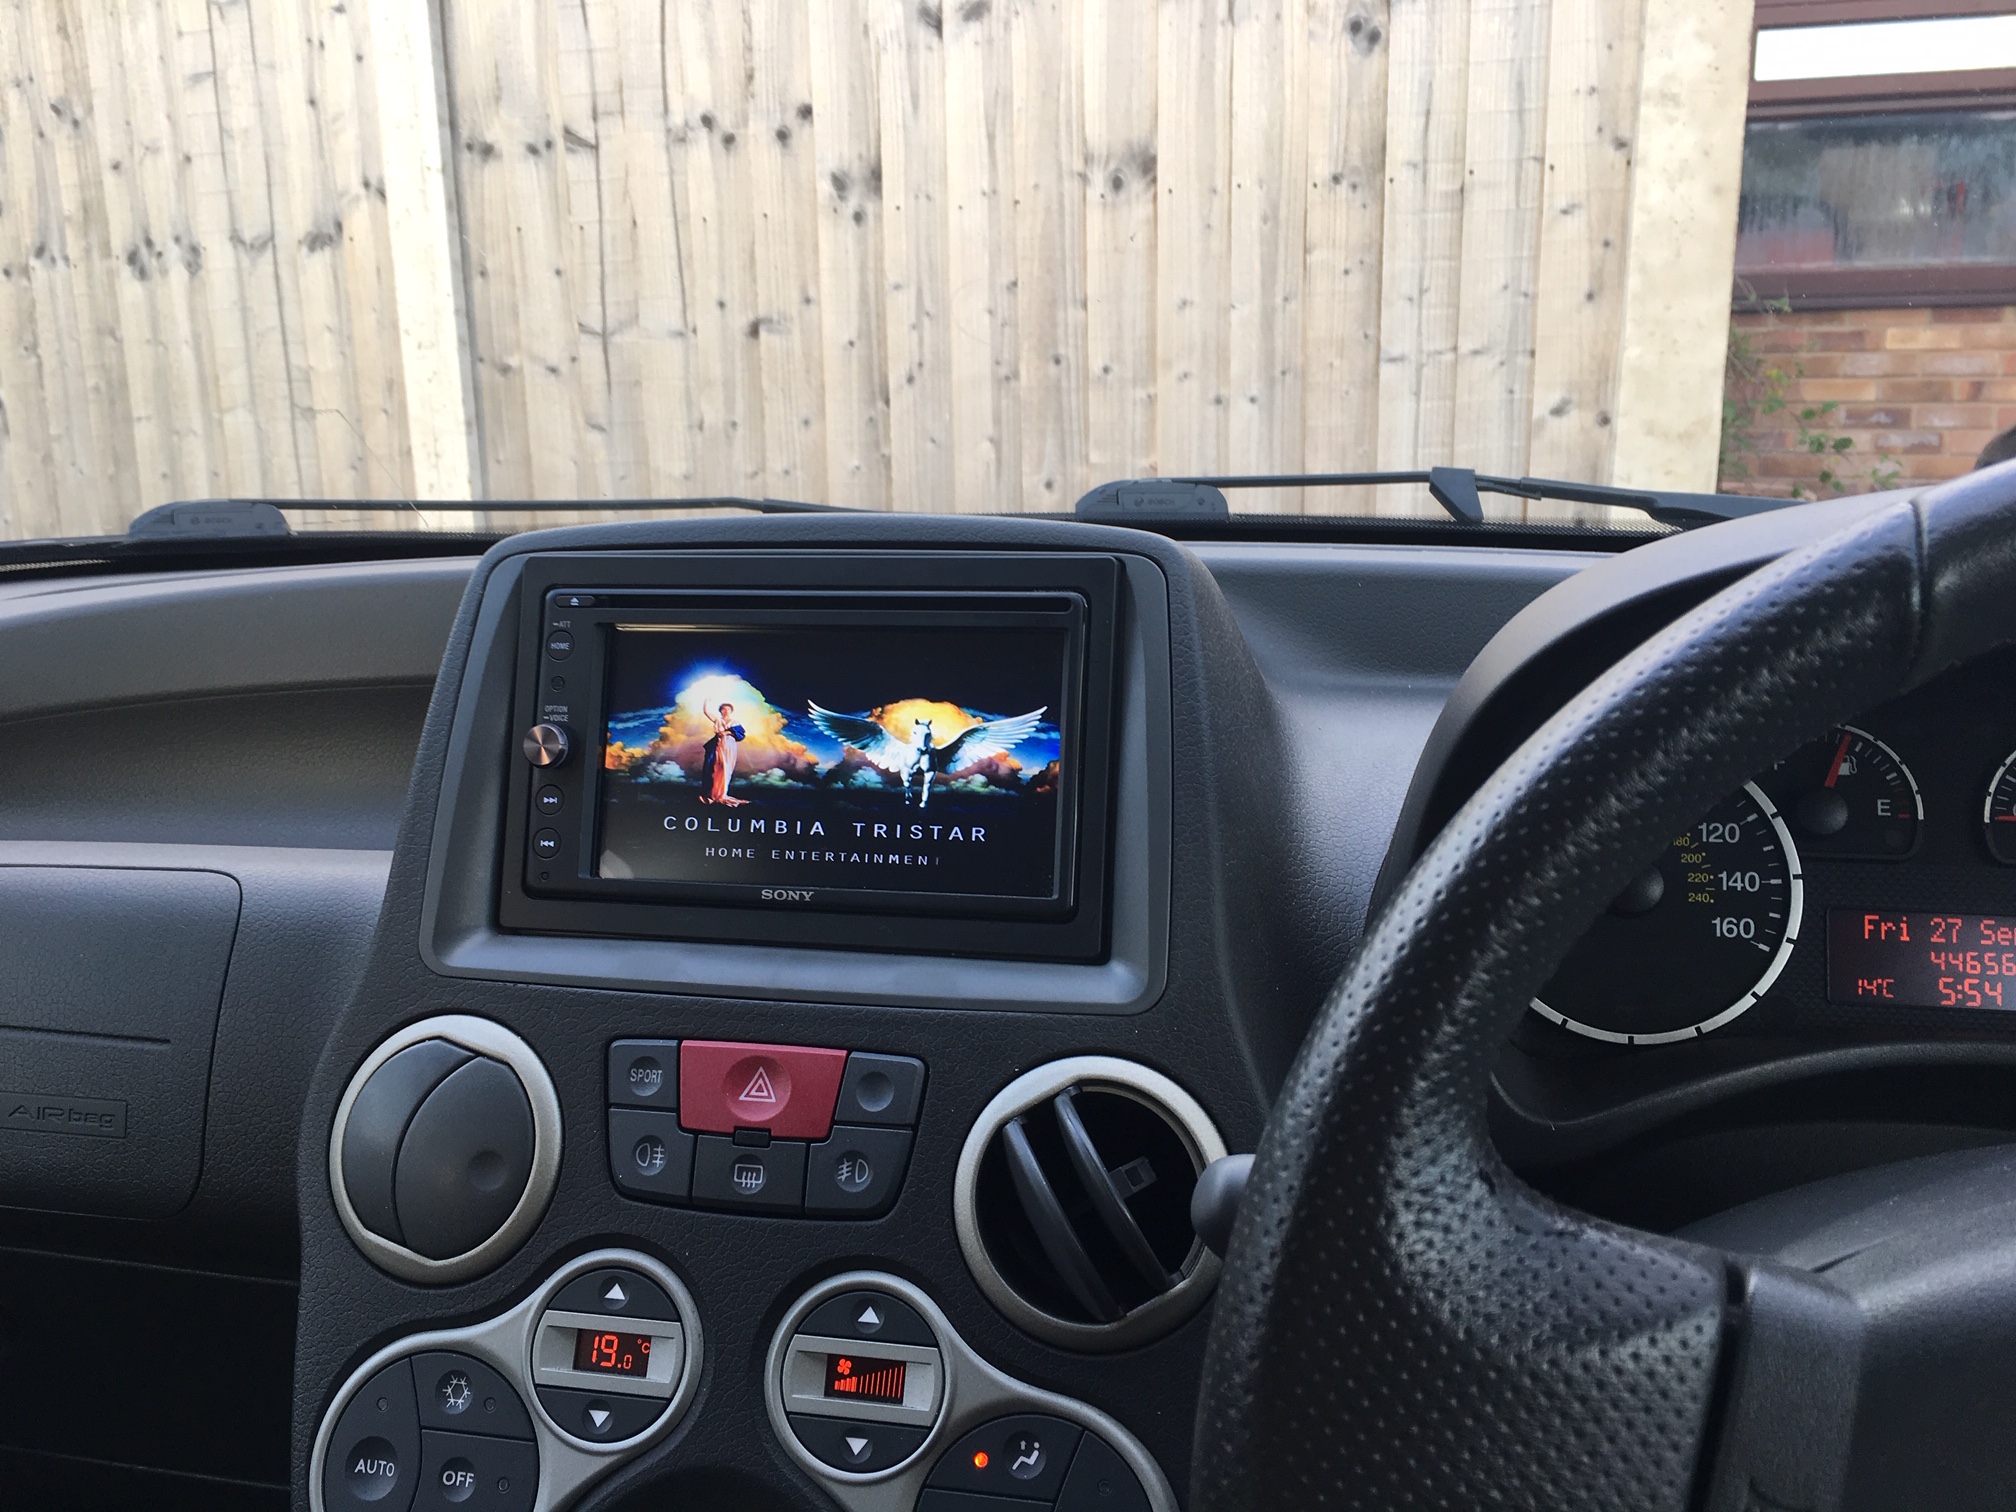
This is a Sony XAV-AX200, which is fairly large as far as current double DIN screens go, due to having a DVD player. The model below it, the XAV-AX100 doesn’t have this and is much smaller, but I found a great deal on a used AX200, so went for it. Bear in mind that both units have now been superseded, but are still available for purchase in many places.
The AX200 also has some other cool features I’ll be making use of, including 3x camera inputs and higher-voltage amp preouts. Watch this space for some ridiculousness!
I used an Autoleads double DIN facia adapter, which is a piece of crap when it comes out the box. It won’t fit correctly and you’ll end up with gaps and bulges around your HU. Luckily I’m a nerd and spent a big part of my life building plastic Games Workshop miniatures (yes, I do have a girlfriend") ). With some simple model making tools, you can do a perfect job here.
). With some simple model making tools, you can do a perfect job here.
To follow my advice, you’ll need the following (all available cheap on eBay):
*Diamond model making files.
*Some small pin vices and drill bits. These are basically tiny hand drills. I think I used a 1mm and 3.2mm drill bit, from memory.
*A set of dentist’s picks.
*A stubby screwdriver (pozi).
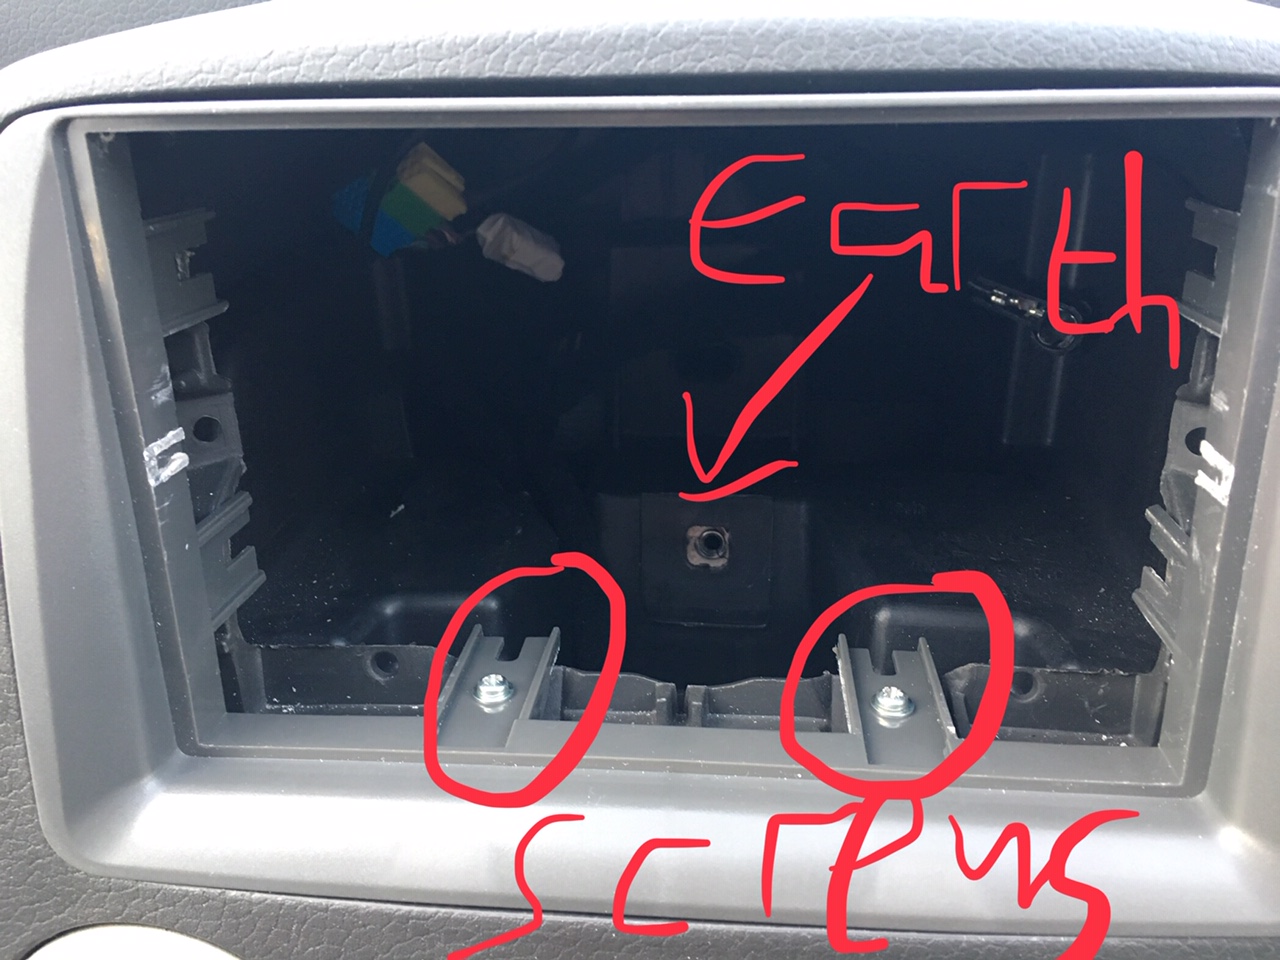
If your original HU cage was as tight a fit as mine, then you’ll also want a ratchet and extension to undo the main bolt (think it’s 4mm hex head). Mine was way too tight for an Allen key. As a note, I reused this bolt as a place to earth the DVD player cable rather than run it all the way to the handbrake like you're 'supposed' to. Obviously don’t watch it while you’re driving. Just add a fork connector to the cable and you’re golden.
OK, now you’ve bought all of those nerd tools, the first thing to do is to trial fit your Autoleads HU surround. To do this, first remove your head unit. I'm assuming you know how to do that. Next you’ll want to remove the four metal clips where the original HU cage screwed in. Mine were a ballache to get out until I tried a dental pick. Use the pick that’s like a spike curved 90 degrees. I was able to pop them straight out by levering out the Centre section of the clips.
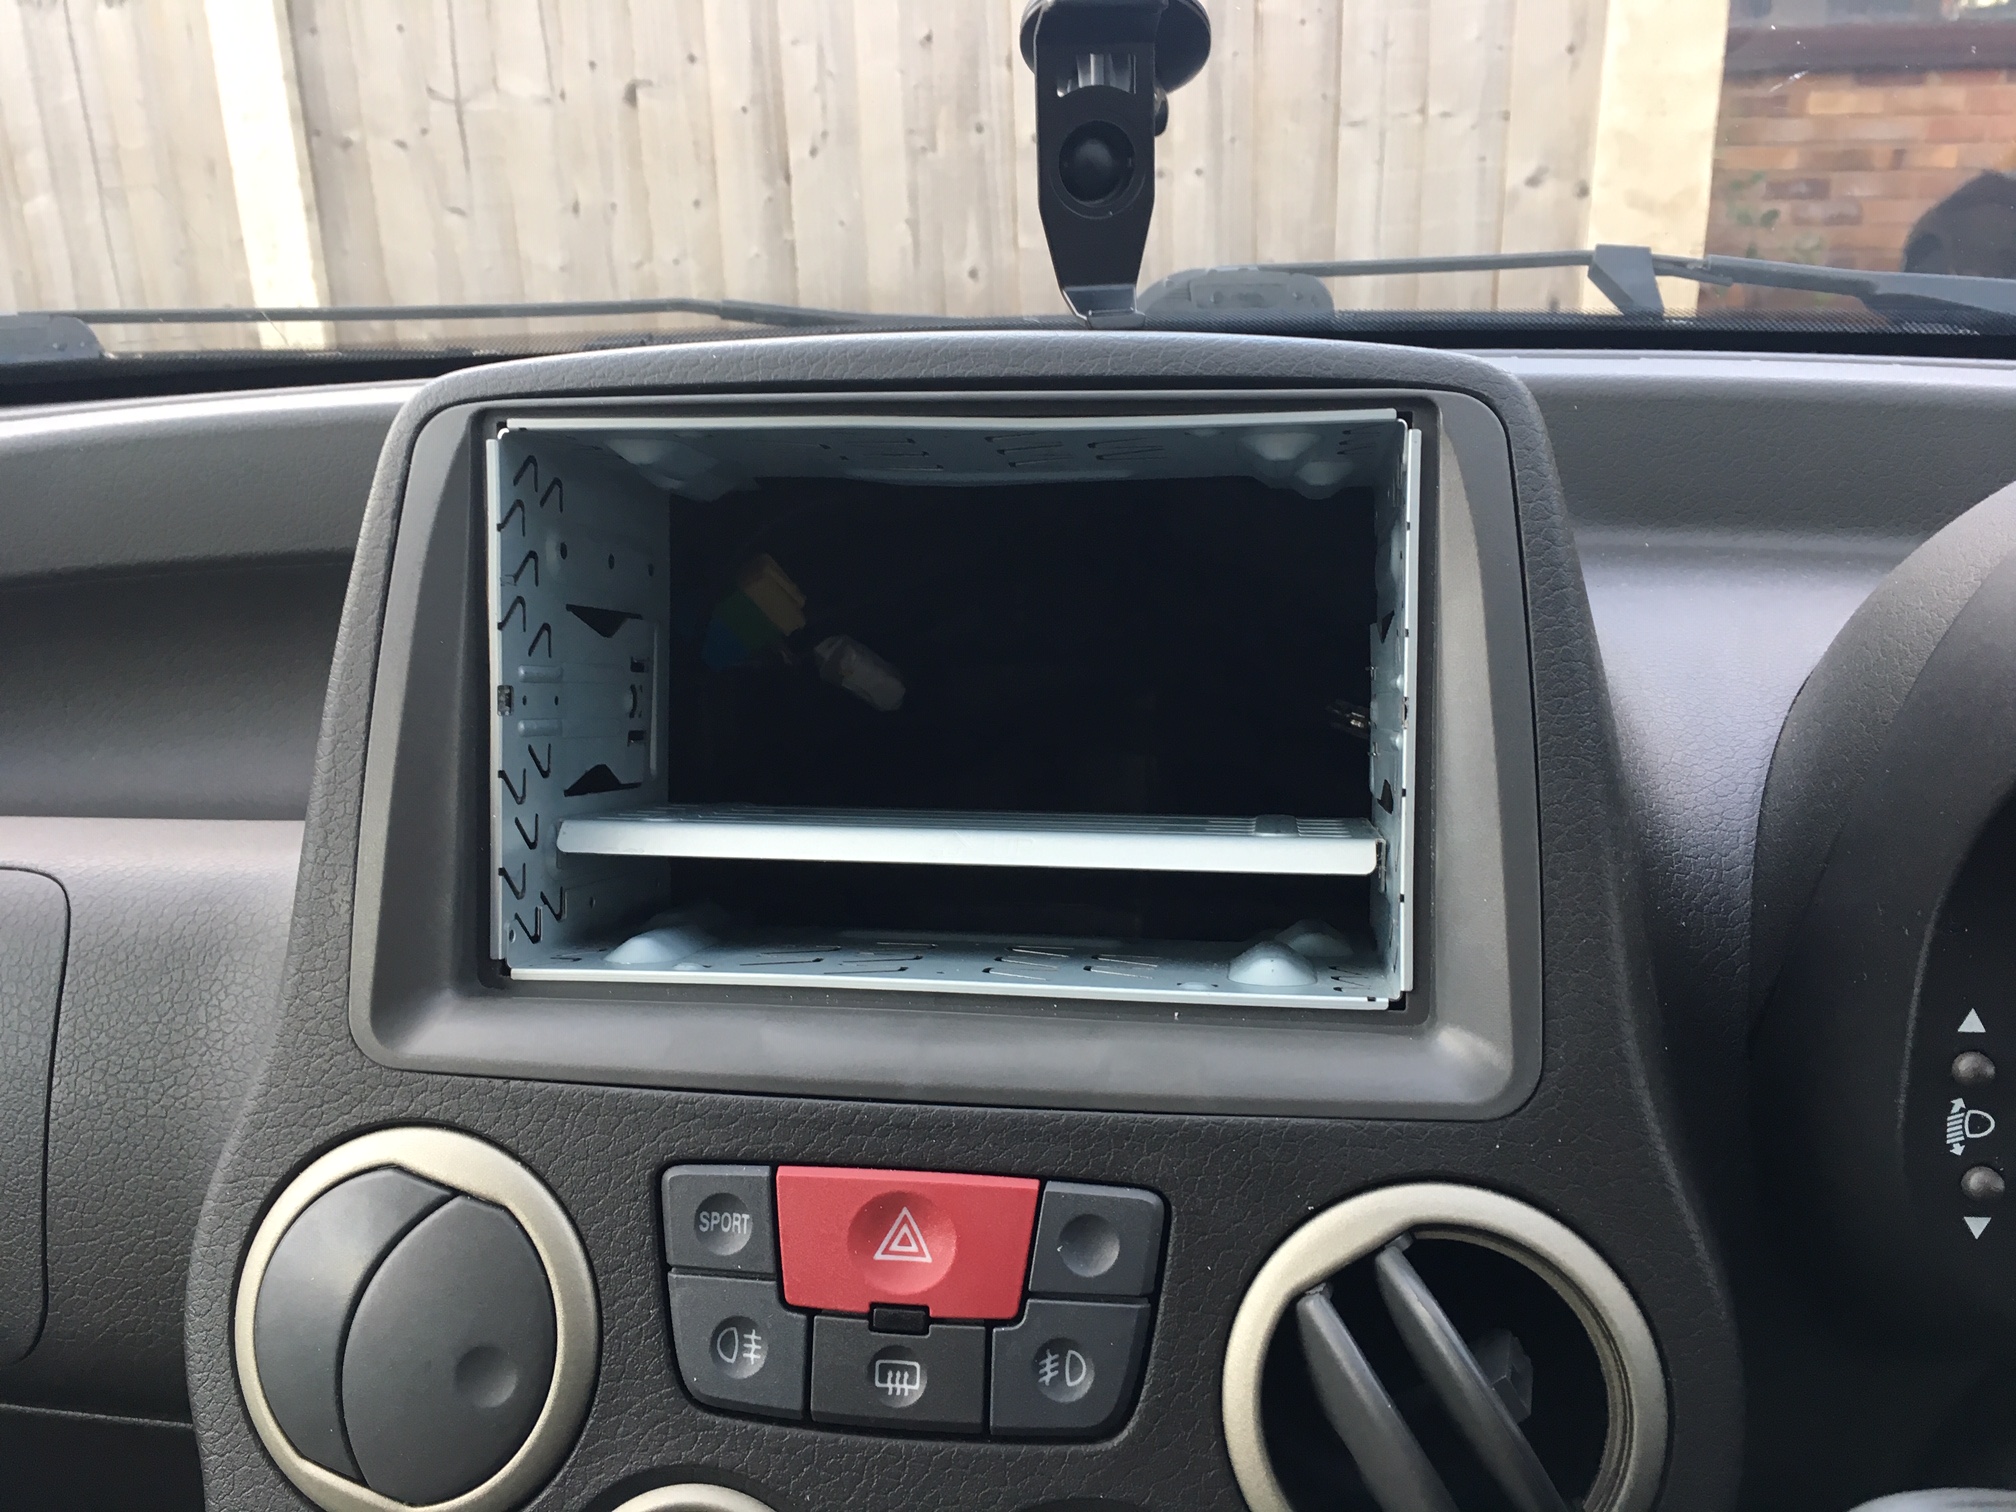
If your adapter is like mine then you’ll find it’s a poor fit. Use the diamond files to adjust the plastic Autoleads surround for this. Pay special attention to the two points at the top where it is the wrong shape for the dashboard. I used a square file to make two indentations here so it grips the dash slightly.
But it will still bulge a bit. This is where we get medieval on it. Using a pin vice, drill pilot holes in the locations indicated in my photo on the bottom side of the adapter. Start with the 1mm drill bit and work your way up to a larger one. You’re going to reuse two of the screws and washers from the original HU cage. Once you have these holes, push the adapter in place until it doesn’t bulge (you’ll need to hold it hard). Then drill through your holes into the dash below using the same technique of making pilot holes. You need to use a pin vice to do this, because of the delicacy of the job and the fact you wouldn't get an electric drill in such a small gap. Once you’ve drilled your pilot holes, you can remove the adapter to make it easier to drill the big holes. Then refit the adapter and fit the screws, using the stubby screwdriver. It should now be a perfect fit and won't be able to squeak.
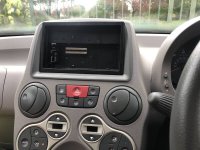
At this point you can add the Sony cage and push out some fins to hold it (note that I haven’t done this yet in my photo). Next, plug in your HU. You’ll find you can route the USB cable for your phone to the Panda glovebox without removing any trim - there’s a hole in the top of the glovebox. Use this. Finally, push the HU into the cage until it clicks.
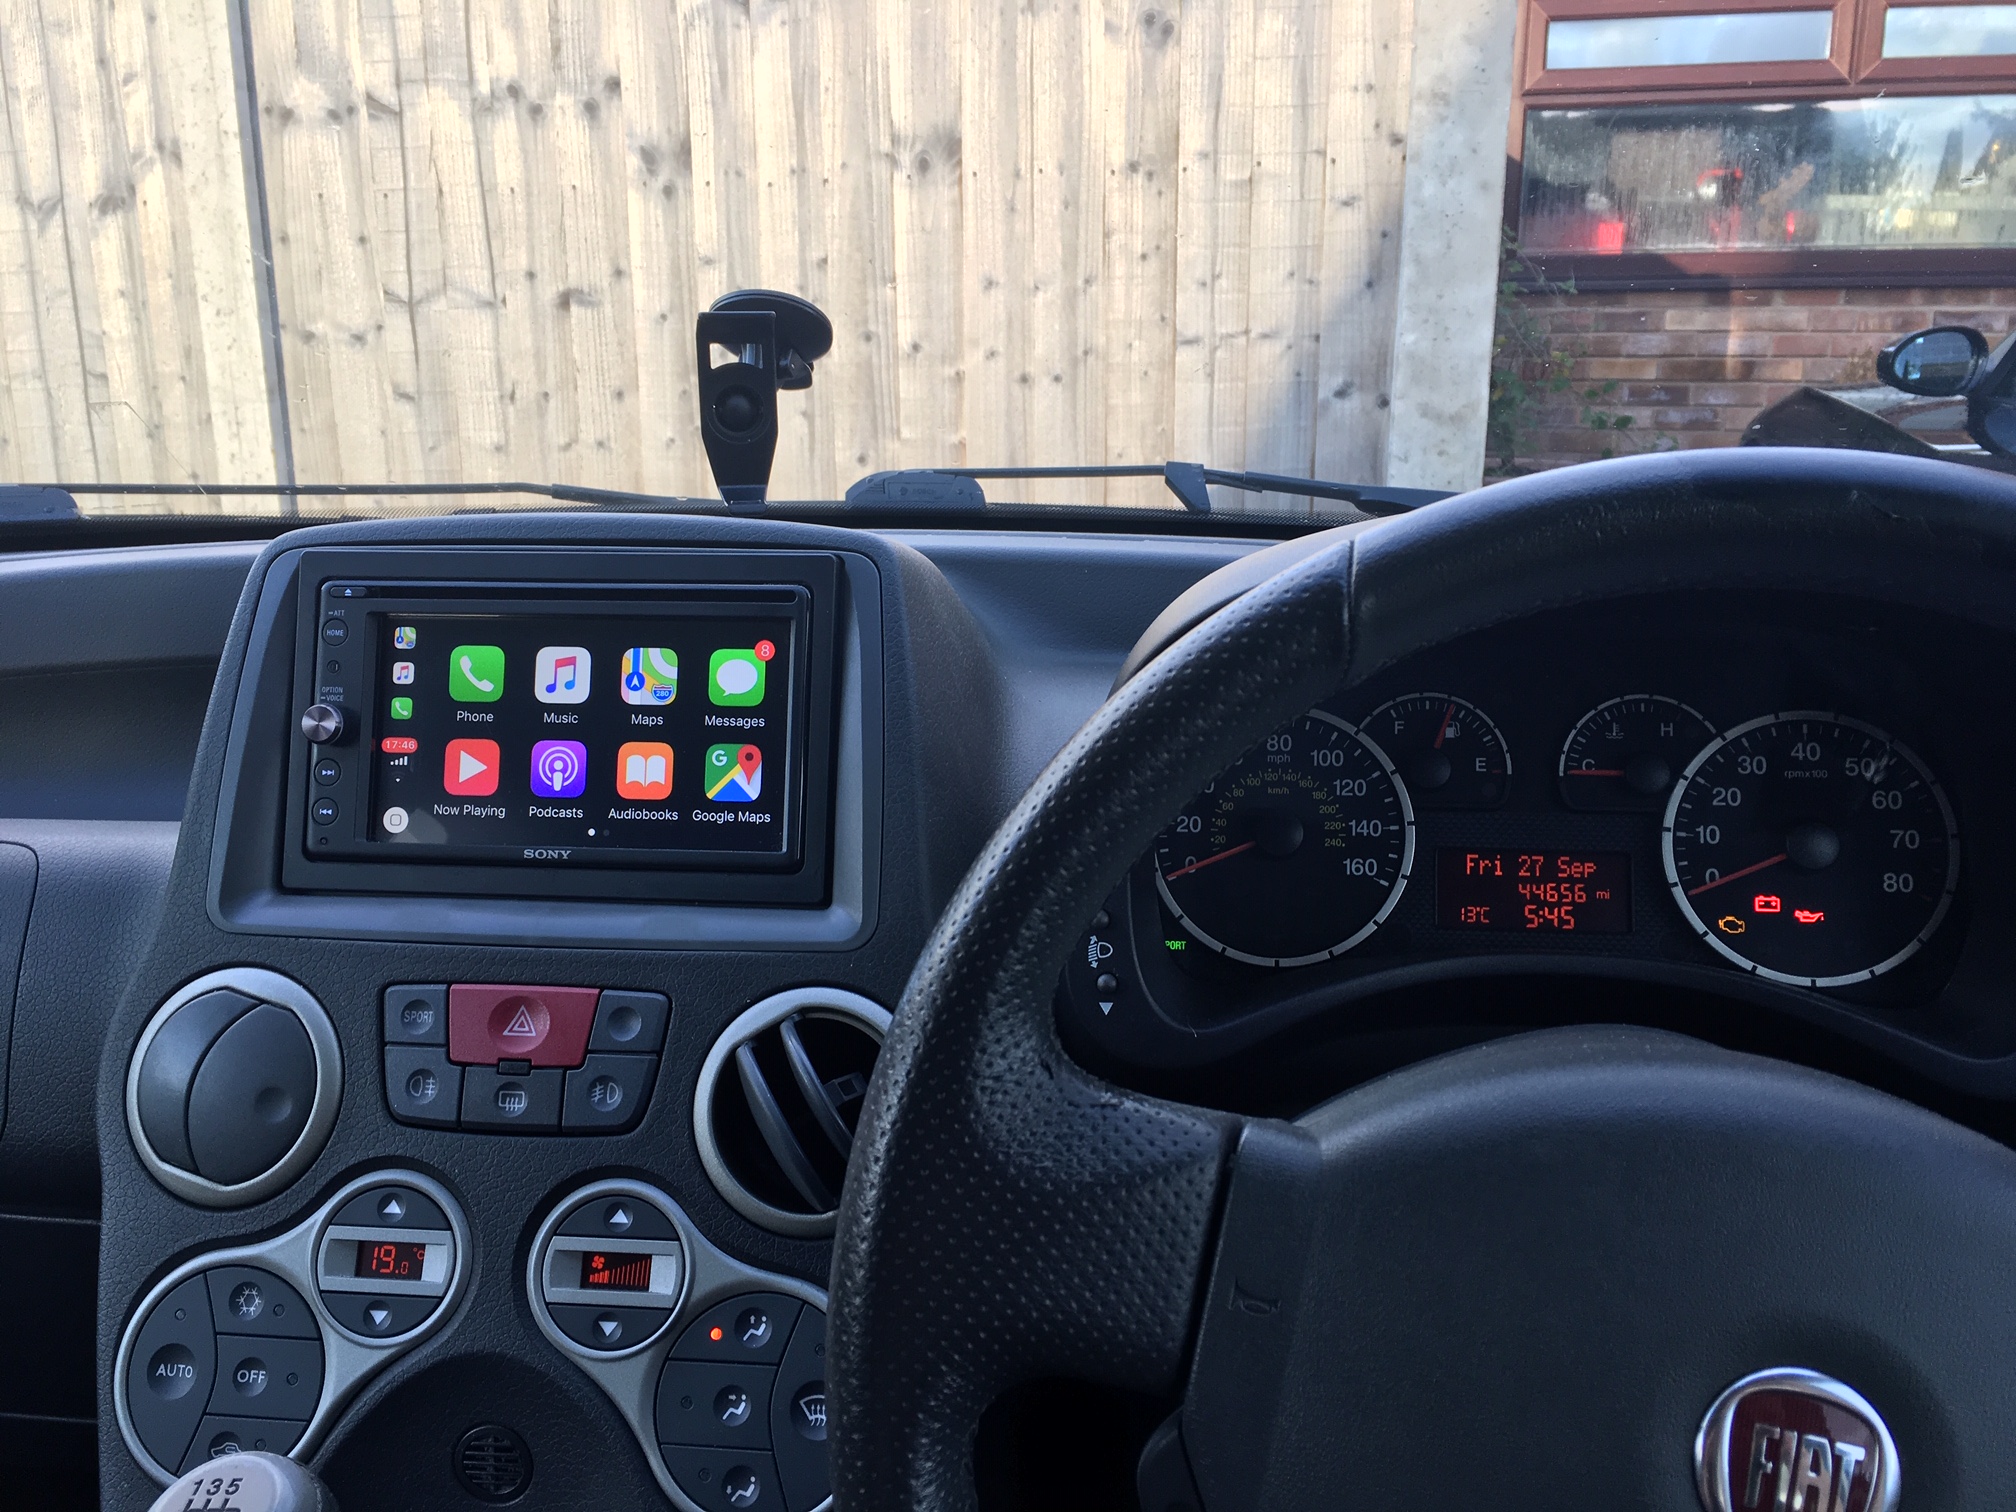
Add the Sony surround trim and you’re done. It doesn’t look like it fits properly at the top in these pics, but it’s perfect in real life - it’s just the angle of the camera making it look that way.
With the AX200, you can even customise your button illumination and menu background so they look properly factory. I believe they changed the custom menu background option for the newer model, which is actually the main reason I bought a used one (Sony are idiots).
Hope this helps, and enjoy! Remember to take all my advice with a pinch of salt and trial fit everything before cutting or drilling! I’m not responsible if you injure yourself or damage your car. Cheers.


Use these instructions at your own risk, exercising caution and common sense. I’m not responsible for any injuries or damage you might cause by following them and I’m not a professional when it comes to any of this. I’ve just fitted a lot of head units over the years.
This is a Sony XAV-AX200, which is fairly large as far as current double DIN screens go, due to having a DVD player. The model below it, the XAV-AX100 doesn’t have this and is much smaller, but I found a great deal on a used AX200, so went for it. Bear in mind that both units have now been superseded, but are still available for purchase in many places.
The AX200 also has some other cool features I’ll be making use of, including 3x camera inputs and higher-voltage amp preouts. Watch this space for some ridiculousness!
I used an Autoleads double DIN facia adapter, which is a piece of crap when it comes out the box. It won’t fit correctly and you’ll end up with gaps and bulges around your HU. Luckily I’m a nerd and spent a big part of my life building plastic Games Workshop miniatures (yes, I do have a girlfriend
). With some simple model making tools, you can do a perfect job here.To follow my advice, you’ll need the following (all available cheap on eBay):
*Diamond model making files.
*Some small pin vices and drill bits. These are basically tiny hand drills. I think I used a 1mm and 3.2mm drill bit, from memory.
*A set of dentist’s picks.
*A stubby screwdriver (pozi).
If your original HU cage was as tight a fit as mine, then you’ll also want a ratchet and extension to undo the main bolt (think it’s 4mm hex head). Mine was way too tight for an Allen key. As a note, I reused this bolt as a place to earth the DVD player cable rather than run it all the way to the handbrake like you're 'supposed' to. Obviously don’t watch it while you’re driving. Just add a fork connector to the cable and you’re golden.
OK, now you’ve bought all of those nerd tools, the first thing to do is to trial fit your Autoleads HU surround. To do this, first remove your head unit. I'm assuming you know how to do that. Next you’ll want to remove the four metal clips where the original HU cage screwed in. Mine were a ballache to get out until I tried a dental pick. Use the pick that’s like a spike curved 90 degrees. I was able to pop them straight out by levering out the Centre section of the clips.
If your adapter is like mine then you’ll find it’s a poor fit. Use the diamond files to adjust the plastic Autoleads surround for this. Pay special attention to the two points at the top where it is the wrong shape for the dashboard. I used a square file to make two indentations here so it grips the dash slightly.
But it will still bulge a bit. This is where we get medieval on it. Using a pin vice, drill pilot holes in the locations indicated in my photo on the bottom side of the adapter. Start with the 1mm drill bit and work your way up to a larger one. You’re going to reuse two of the screws and washers from the original HU cage. Once you have these holes, push the adapter in place until it doesn’t bulge (you’ll need to hold it hard). Then drill through your holes into the dash below using the same technique of making pilot holes. You need to use a pin vice to do this, because of the delicacy of the job and the fact you wouldn't get an electric drill in such a small gap. Once you’ve drilled your pilot holes, you can remove the adapter to make it easier to drill the big holes. Then refit the adapter and fit the screws, using the stubby screwdriver. It should now be a perfect fit and won't be able to squeak.
At this point you can add the Sony cage and push out some fins to hold it (note that I haven’t done this yet in my photo). Next, plug in your HU. You’ll find you can route the USB cable for your phone to the Panda glovebox without removing any trim - there’s a hole in the top of the glovebox. Use this. Finally, push the HU into the cage until it clicks.
Add the Sony surround trim and you’re done. It doesn’t look like it fits properly at the top in these pics, but it’s perfect in real life - it’s just the angle of the camera making it look that way.
With the AX200, you can even customise your button illumination and menu background so they look properly factory. I believe they changed the custom menu background option for the newer model, which is actually the main reason I bought a used one (Sony are idiots).
Hope this helps, and enjoy! Remember to take all my advice with a pinch of salt and trial fit everything before cutting or drilling! I’m not responsible if you injure yourself or damage your car. Cheers.