Technical Becky's leaky strut

Currently reading:
Technical Becky's leaky strut

Joined
Oct 1, 2017
Messages
7,348
Points
2,303
Location
Edinburgh Scotland
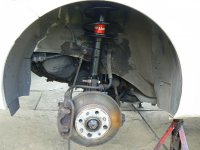
A bit more than a week ago I posted somewhere on here about Becky's spectacular strut blow out. I'll try to load some pics now.
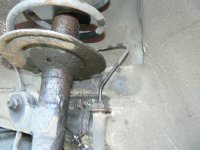
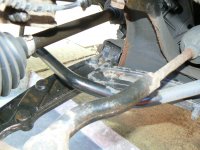
P1080546.JPG

P1080547.JPG

Thanks Ben that seems to be working good now.

So about a week ago I had an in depth look at it all and came to the conclusion I might as well do both sides properly - struts, springs, bump stop/gator and top mounts - as I can see issues with them all. I've also got a N/S (LH) gearbox driveshaft seal to do so might as well get that out of the way too.

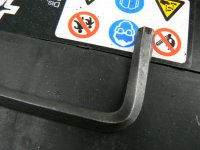
I've been busy with other stuff - Motor cycle/lawnmower repairs etc - so Becky has been "limping" the 2 miles to the shops and back with Mrs Jock this week past whilst I decided exactly what I was going to buy. The only real variable was whether the strut pinch bolts were going to be reusable so I gave them a very vigorous brushing with my wire brush and soaked them in Plus Gas (twice) a good 24 hours before giving them a try. It took my power bar to get any movement at all, seemed to be moving but tight and didn't have a "nice" feel to it. More Plus Gas and worked it back and forward a few times when, Oh dear, it all went slack and the bolt sheared!
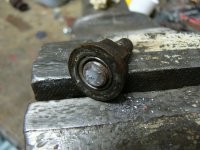
P1080562.JPG

You can see from the next pic that the thread really looked quite good (after being attacked with the wire brush) but obviously just really corroded into the threads.
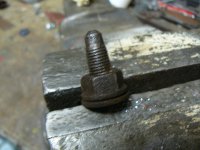
P1080561.JPG

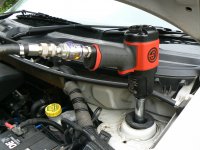
I could probably get them to undo with heat but I prefer to just get 4 new bolts and nuts for safety. I'm going to try my big CP "rattle" gun on the next one just to see if it will move it.

Regarding the driveshaft seal in the gearbox. When I've got the old strut off (he said with confidence?) that will leave the hub sitting in the bottom ball joint. Anyone know if it can be moved far enough outwards without undoing the bottom ball joint to allow the inner driveshaft joint to be withdrawn from the diff so I can replace that seal? or am I better to just split the hub away from the bottom arm altogether?
 
The strut pinch bolts get badly rusted so best replaced anyway. At least you didn't spend ages working the nut off to find the bolt pitted with rust.

Personally, I would remove the entire hub from the car. It's one of those things that will be a horrible struggle without.

When I did my wheel bearing I forgot to loosen the driveshaft centre bolt with the wheel on the ground. A length of stiff angle iron with a 12mm hole for a wheel bolt kept it from turning. I don't have a heavy rattle gun.

While you are in there, check the bottom arm rear rubber bushes.
 
Last edited:
Thanks Dave. Looks like it's easiest just to take the shaft right out then? Mind you I'm going to be most of the way there anyway. I'll be sure to slacken that centre bolt before anything else because regardless of which method I use it's still going to be easier with the wheel on the ground.

Thanks also for the mention about that back bush but in fact that arm was replaced when the clutch was done last year for exactly the reason that the bush was well past it's best. I'll have a good look at the other side when I do it as she's had a very very slight pull to the nearside since that N/S arm was done which might point to the O/S one being needing to be renewed.

The oil was renewed with genuine Tutela last year when the clutch was done and I'm trying to make my mind up whether to risk trying to save it and pour it back in or use new stuff. - worried about possible contamination if I try to reuse the oil.

Regards
Jock
 
The oil was renewed with genuine Tutela last year when the clutch was done and I'm trying to make my mind up whether to risk trying to save it and pour it back in or use new stuff. - worried about possible contamination if I try to reuse the oil.

If the oil is well within service life then just drain it into a clean tray and decant that into a clean bottle for re-use. If your usual drip tray is too dirty to trust, you could cut the side out of an old oil bottle.
 
If the oil is well within service life then just drain it into a clean tray and decant that into a clean bottle for re-use. If your usual drip tray is too dirty to trust, you could cut the side out of an old oil bottle.
Complete gearbox oil change done back in late spring, when the clutch was done, so still well in service life. I'm just obsessed with trying to ensure nothing abrasive gets into the box to spend the next 45 to 50 thousand miles abusing the internals! I take great care to lightly wire brush and wipe (with an oily rag - to trap particles) around filler plugs before removing them. Just me being overly cautious I suppose!

By the way, How do you include two quotes in one answer? I could have answered both your and PB's posts in one go - just can't figure it out.
 
By the way, How do you include two quotes in one answer? I could have answered both your and PB's posts in one go - just can't figure it out.
At the bottom of the post, where you click the 'quote' balloon, you will see to the right of the word, a double quote balloon.

As you look down the posts, click the double balloon for each one you wish to use, then at the last one, click the single balloon. Once into the editing box you can cut and paste to move them around and change the order if you wish, or like this one, to delete some of the post to keep only the bit you need. (You probably already knew that bit.)

It does of course allow you to edit the 'quote', and I've found occasionally what I've said has been changed, changing the meaning. Haven't bothered calling anyone out about them. The last time this happened, recently, I think they were trying to make a point, but I've no idea what, so I ignored it.
 
I write one quote message and save it. Then open another, copy the leatest quote text including square brackets. Delete this (now) empty message. Open the original, paste the quote text and add notes as required.
 
Complete gearbox oil change done back in late spring, when the clutch was done, so still well in service life. I'm just obsessed with trying to ensure nothing abrasive gets into the box to spend the next 45 to 50 thousand miles abusing the internals! I take great care to lightly wire brush and wipe (with an oily rag - to trap particles) around filler plugs before removing them. Just me being overly cautious I suppose!

By the way, How do you include two quotes in one answer? I could have answered both your and PB's posts in one go - just can't figure it out.

Any crud in the oil would go back but its quite new so wont be worse than if you'd left it alone. You could pour the collected oil into a container thought filter paper folded into a funnel. There wont be any mega fine stuff so kitchen paper towels are fine.
 
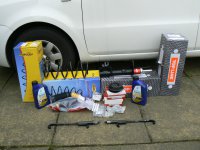
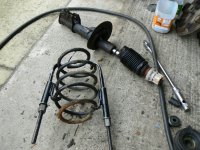
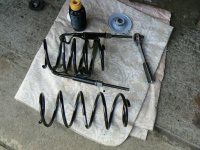
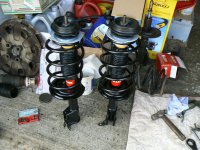
Now it's getting exciting! all the bits arrived yesterday at 15.45 - The order (S4p) was placed around tea time on Saturday and arrived, remember I'm away up here in Edinburgh, 15.45 hrs yesterday (Tuesday) so just 2 working days, pretty good I thought. - I just couldn't resist laying it all out and taking a picture for you all!

P1080575.JPG

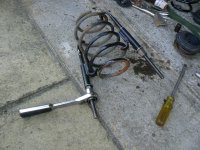
2 struts, 2 shiny new springs, 2 bump stops/gators, 2 top mounts and a load of fixings. Also the N/S gearbox driveshaft seal (which is starting to leak). You'll notice I decided on new oil for the box guys, just decided not to take the chance. (I'm going to save the drained stuff in a clean empty engine oil container and let it settle for a few weeks - thanks Dave. Then suck off the top 3/4 of it and keep for topping up when I do the seal on my boy's Punto) I looked out my home made spring compressors too - they are the metal "hooky" things lying in front of the parts - and gave them a quick clean and oil (haven't used them for maybe 6 or 7 years) You'll notice they are true "suicide" design with no safety retaining clips but I made them maybe 40 years ago, used them many times, never had a problem but I am very careful with them.

So now the strut top nuts are gently marinading in Plus Gas as are the 3 remaining pinch bolts on the bottom of the legs although they can snap for all I care as I've got 4 new ones. The nuts with their captive washers are a wee bit pricey aren't they?

P1080576.JPG

I thought, looking at her the other day, that she was a little low on the N/S/F so I found a nice really flat bit of hard standing and measured the front ride heights - Centre of stub axle vertically to wheel arch - 342mm on the N/S (LH) 345mm on the O/S (RH). Historic moment there folks. Did you notice? I quoted something in metric! Although the difference is very small and may be due to the ground not being perfectly flat, If anything I would have expected to find the O/S lower than the N/S? I'll check again with the new springs, expecting it to ride a wee bit higher. What has been very interesting is that, as I was on a nice flat piece of hardstanding, I decided I would check the toe setting. Here's the markings on my gauges.

P1080578.JPG

Those of you who saw my bit some time ago about my diy tracking gauge will be able to better appreciate what you're looking at here. You'll see two pencil lines just to the left of centre of the screen. (The one with the little "tick" is the "behind" measurement). If the wheels were parallel these lines would be on top of each other as one is taken across the back of the front wheel rims and the other across the front. (Look to the right and you'll see what looks like one single line upper right? this is the result when I checked her just before her MOT in the early spring and shows she was tracking parallel). In fact though these two marks are showing a toe out of just shy of 5mm! So I just found why the steering started showing a slight pull to the N/S after the clutch was changed in the spring. Lifting gearboxes out and in is becoming just a little too much for me now so I got our local Fiat indy to do it for me (and a very nice job they did too). Whilst working on her they found the N/S front suspension arm bushes were in a poor state and, as they had the hub disconnected anyway, offered to fit a new arm for more or less the price of the arm when they were putting her back together. Oh yes please said I! My guess is though that they didn't check or set the tracking. To be fair I wasn't charged for it either. Interestingly I just remembered that when I was driving along a narrow lane on the way to the Fiat Scotland day out (very enjoyable) I noticed that, whereas she was pulling to the left on "normally cambered roads" when going along the little lanes leading to the event I was encountering reverse camber on the narrowest parts of the lanes and there she was pulling to the right! Got to be the excess toe out!

If it's a nice day tomorrow I'll probably make a start on her - Although Mrs J is muttering on about a dripping bathroom tap! Feeling just very slightly nervous about doing the driveshaft seal - not the seal itself actually but the "snap" ring which holds the inner joint into the diff. I remember these rings on the front CV joints on the old BL stuff. Every now and then these rings would break into several pieces not too bad on a CV, you could retrieve the bits, but in a gearbox? Even worse was that very occasionally the broken bits of ring would jam the shaft in the CV making it's removal virtually impossible were upon a new shaft had to be fitted. Again, inside a gearbox? oh dear, there will be tears! However I've also removed many without any hassle at all and I'm sure Becky knows I love her and she'll cooperate!

More to come I'm sure
Regards
Jock
 
Last edited:
Who really knows, but Ive always suspected the old Lucas (BL) driveshaft snap rings were just a bit too thin and loose in the retaining slots. My method was to ease the CV joint back against the ring then give the joint body a sharp tap with a lump hammer. Not having any slack between the ring and the taper it was supposed to slide into avoided it getting trapped. Some cars needed a narrow angle (fox) wedges between the case and the CV joint but the still needed the same careful taking up the slack.
 
Well today got off to a poor start. I was up at around 7 am ready for some wheatabix and an early start on Becky but that bathroom tap had other ideas! wouldn't turn off beyond a persistent dribble - too much to ignore. Up into the loft, bung in cold outlet from tank, have breakfast, dismantle tap jumper (why is it called a jumper?) to find the washer (Delta type) is so perished a bit of it has become detached. Luckily I had one in the toolbox so fixed quite quickly but it's the last one so note to self - visit Toolstation and buy 1/2" and 3/4" delta washers and small tub of plumbers grease.

Now around 10.45 so cup of tea and into the garage. Jack Becky up and put axle stands under her front. In deference to my neighbours I tried undoing the top mounts with an Allen key and my Vortex go through sockets. Very tight so got a short length of pipe on the Allen key

P1080579.JPG

but all that happened was the key started to twist! Oh my, this is tight!

P1080580.JPG

Ah well I'll just have to get "Hooligan" out!

P1080581.JPG

Three short "burps" later and the nut is off. Don't want it off yet so screw it back on a few turns to stop the strut dropping out of the wing. I bought the Vortex sockets as an indulgence a few years ago and thought that once the job I bought them for was done They would probably live on the shelf a lot. Although they didn't work on this occasion I've been surprised how versatile they are and use them quite a lot.

I thought I was going to have to remove the driveshaft to fit a new seal to the gearbox and my plan had been to just remove the whole hub/driveshaft complete. The fly in the ointment is the ABS sensor. I wondered if it would come out of the hub. Tap/shocked the Allen screw and I was amazed to find it unscrewed without snapping off!

P1080582.JPG

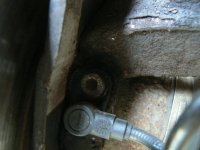
Unfortunately the sensor is solid in it's hole. If I ever have to replace it it'll probably be destroyed on removal. So I put a wee dod of ceramic grease on the screw and reinstalled it. Ok then, let's just get this strut out of the way (N/S first as it's the leaky one). Brake flex and ABS wire separated from the strut and now there's just the two pinch bolts. You'll remember I've already snapped the top bolt a few days ago. Most of the bolt is still in the hole. I tried punching it out with a drift but it's just not moving. I find I can get it to rotate slightly with my 15mm ring key - about 1/4 of a turn. Flooded it with plus gas and started on the bottom one. Didn't mess about with this one. It's already had a good wire brushing and soaking with PG when I broke the top bolt and now I give it some more and turn "The Hooligan" loose on it. It fights but slowly, slowly it turns - with me expecting the bolt to snap at any minute. But no, the gun suddenly races away and the nut is spinning across the slabs. The bolt though is still solid in the upright. Swop the 19mm for a 15mm socket and let the gun attack the bolt. slowly and reluctantly it turns with me whacking the protruding threaded end until it finally pops out. Back to the top bolt and let The gun attack it. Got it spinning and then whack it out with a punch and 2lb hammer. A couple of turns on the top nut and the old strut is on the ground. Spring clamps fitted and tightened and Allen key with Vortex socket fails to slacken the top mount nut! Turn the "hooligan" loose again but all that happens is the shocker rod spins round. Clamp my biggest "Mole grips" as tightly as I can manage to the shaft (it's junk so doesn't matter if I mark it and ------ It just spins again! Thinking about a bit of emery cloth to give grip when I notice the top of the shaft is severely corroded This might give enough purchase for the Moles? Yippee! off she spins! So here's what we have:
A quite rusty spring.

P1080583.JPG

Must admit the Vortex sockets are "magic" with the spring compressors.

P1080589.JPG

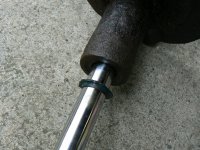
A very leaky and corroded strut completely missing it's seal retainer and with the remains of the seal about half way up the damper rod.

P1080585.JPG

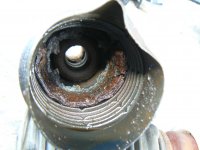
Oh, look, there's the remains of the seal retainer stuffed up the old bump stop/gator shroud.

P1080593.JPG

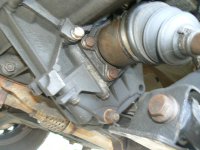
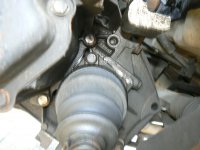
Now for that drive shaft seal. Crawling underneath to remove the drain plug (with the wrong size Allen key) I had to crawl out again to get the right one when I notice the drive shaft leak looks "funny".

P1080588.JPG

P1080587.JPG

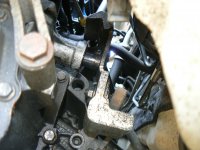
Not as much oil dribbling down but quite a bit higher up? Oh damn, its the gear change shaft! (Oh well, now I've got a spare d/shaft seal)

P1080586.JPG

Ah well might as well get the O/S strut off. It turns out a complete replay of the one I've just done only I didn't mess about with the Vortex sockets, just let the "Hooligan" loose. Complete replay even down to the top pinch bolt snapping and both fighting me to resist removal. So let's have a look at what I ended up with before calling it a day. Struts and springs first:

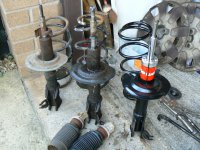
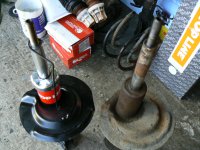
Two very knackered struts, one leaking copiously, both missing their seal retainers and springs? Well maybe I could have reused them but there is some quite deep pitting in places so I'm glad I got new ones. (on the right for comparison)

P1080592.JPG

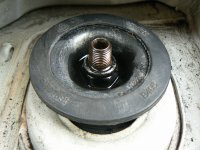
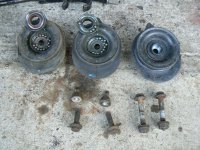
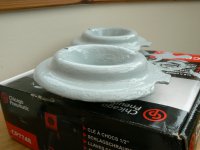
Top mounts were interesting.

P1080590.JPG

The one on the left was the O/S and is in a bit of a state - Probably why the rod stuck up into the engine bay a bit. The middle one looks quite new and was on the N/S. New "Original Birth" from S4p on the right. I'll keep the "nearly new" one as a spare. You can also see some of the mangled pinch bolts

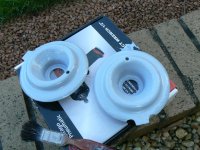
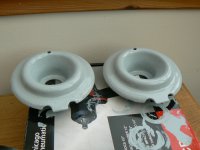
The spring top plates were pretty rusty so I rubbed them down with course emery an painted them with Lidl/Aldi anti rust paint.

P1080594.JPG


I'm thinking of painting the rear axle with this so it'll be interesting to see how it fares.

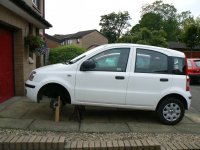
So here's Becky waiting patiently for me to put her all back together again tomorrow.

P1080595.JPG
 
I decided to give the recommended 2nd coat of paint (says so on the tin!) to the top spring plates so now waiting for them to dry and cure. They're now baking gently in the sun shine. Looking pretty good I must say?

P1080596.JPG

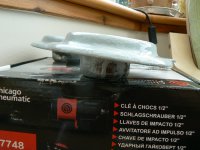
Looking closely at them I notice the face that bolts up to the ball race in the top mount is not at right angles to face the spring sits on, as you can see here

P1080597.JPG

It'll be all to do with the spiral of the spring I suppose. As many of you will know, when reassembling the strut the manual makes a big point of getting you to line up the "tab" on the top plate

P1080598.JPG

with the mountings for the upright (hub) at the bottom of the strut. (where the pinch bolts fit) When I dismantled the struts I found the one on the O/S (RH) complied with this but the one on the N/S (RH) had it's tab positioned at about 1.30 (looking down on the top plate - 12.00 O'clock being to the rear of the car) That N/S strut was the one with the nearly new top mount - looks like whoever replaced it wasn't a Fiat man or he/she would have known about this. The bottom spring mount, which is part of the strut, has a register for the end of the spring. The top plate does not so it's not obvious from the mount as to how it fits - if you don't know about the Tab that is. Bet this was contributing to the pull to the left.

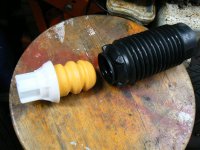
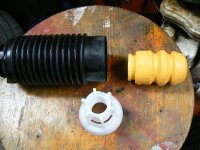
I gardened this morning and then spent this afternoon "fettling" parts which will be reused on the build up. Nothing of great interest except the bump stop and gators. They come, fresh out the package, like this - bump stop and gator separate

P1080599.JPG

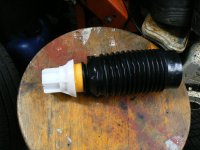
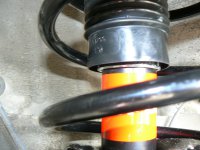
After a great deal of struggling I found out it just isn't possible to push it over the "stop" end of the bump stop but, if you remove the white plastic end which fits into the top spring plate, you can stick it into the bottom of the gator

P1080600.JPG

and, with a bit of silicone grease to ease it along and a lot of huffing and puffing you end up with this

P1080601.JPG

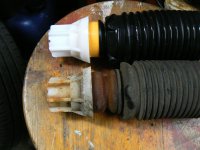
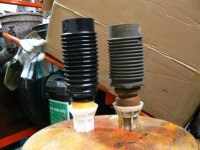
With which I was feeling very pleased until I looked at the old ones

P1080602.JPG

Anyone know which is correct? I have found a picture of one in the Haynes manual which seems to show it fitted like my new one but then why were the old ones, which in all likely hood are the original factory fitment, fitted to the second groove?
 
Just had to post this. After all my struggles with Becky, Oh how nice it would be to live in a hot, dry country where rust is not the problem it is over here. Except I'm not good in the heat!


Far from his pinch bolts shearing he seems to be undoing them with a poorly fitting socket - look at the points of the hex nuts. If I'd used it on mine i think the nut would have rounded instead of shearing. The pinch bolts themselves look almost new compared to mine! Can't believe how easily the top nuts come off and then the larger top mount nut too - Lucky sod! Also he initially refits the stepped nut which holds the top mount to the damper rod the wrong way round (but by the time he's finally tightening it up he must have realized because it's the other way round - step downwards. His bump stop/gator looks very similar to my old ones - going to have a careful last think about mine and "trial fitting" tomorrow before finally fitting for good.

Must say, I think he could have got quite a few more miles out of them? Can't see any sign of leaks? Interesting to see how the seal retainer is starting to corrode (mine had both gone totally AWOL!) Maybe it failed the "bounce" test? I do congratulate the chap on his efforts though. True DIY effort with a minimum of tools - reminds me of happy days when I was much younger (and blissfully unaware) changing clutches on escorts and the like lying in the gutter with two wheels up on the pavement for clearance. Don't remember (the future) Mrs Jock ever holding torches and uttering supportive words of encouragement though?

PS. Useful knife? I used to always have a pruning knife in my pocket but stopped carrying it when I gave up professional gardening around 7 years ago because I don't fancy having to justify it to the "Boys in blue".
 
Last edited:
Yesterday was a beautiful sunny day so I had my porridge sitting on the bench beside my back door in the garden - Lovely way to start what turned out to be a very satisfying day. It was around 10 o'clock when I started on Becky and my first thought was that (not withstanding the general advice that shockers are always replaced in pairs) there was no doubt that the other strut, O/S, was utterly shot too! Just look at it compared with the new one.

P1080604.JPG

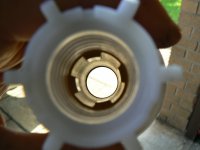
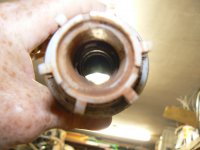
I'd been wondering about the assembly of the new bump stop/gators and you'll remember I decided the way I'd assembled them was correct. I had also been wondering exactly what stops the bumps stop/gator from sliding down the damper rod (as has been reported in a number of posts I've read) Well, turns out, there are 4 moulded in "pads" inside the bump stop which grip the top of the damper rod - You can see them here.

P1080605.JPG

that seems to be all that keeps it in place, just the "tightness" on the damper rod? Doesn't seem to be an awfully good way of doing it to me. You can see on the old one how these "pads" become compressed over time and so are likely to loose their grip.

P1080650.JPG

Here it is in place with the car still on axle stands so the strut is fully extended. That'll do me nicely thank you!

P1080622.JPG

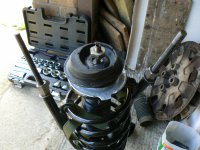
Here's an interesting picture which illustrates exactly how much the new spring had to be compressed to get it on the new strut. The other new spring is beside it for comparison. I can't over stress how important it is to get your compressors exactly opposite each other on the spring. If it starts to "banana" as you tighten them STOP immediately, slacken off, reposition, and tighten up again. It doesn't take much of a "banana" to develop before a clamp will slip. You may notice I use some strapping to protect the finish on the new spring and reduce the chance of a clamp slipping. Obviously you don't want to compress the spring any more than absolutely necessary and try to get hold of as many coils as you can. If you only grip, say, a couple of windings you'll have to compress them so much you may weaken the spring.

P1080606.JPG

These springs, as we all know, are very powerful and I'm always nervous and anxious when compressing them. I'm much happier when I can get the retaining nut back on the top of the strut!

P1080607.JPG

So here we are with all the nice new shiny "bits" assembled and ready to lift back into the car.

P1080610.JPG

And here's the N/S (LF) one in place with everything reconnected.

P1080611.JPG

As I came to replace the pinch bolts I found myself unable to remember which way round they went. Do they go in from the front or from the rear? and is it important which way they go anyway? Then I remembered that when the top bolt sheared off I had been using my deep socket (because the length of thread means a normal socket can't be used) and I was "attacking it from the rear! Great, so they must go in from the front. But hold on a minute, I remember doing exactly the same thing, using the same socket, on the O/S (RH) strut, only the nut was on the forward side of the strut! So the ones on the N/S had been inserted from the front and the O/S from the rear. That just can't be right, can it? Of course, if in doubt and as a last resort, consult the manual. Mr Haynes, bless him, shows them inserted from the rear and actually has it in writing. I always tend to try, where possible, to try to "hide" threads from the worst attacks of the weather and road spray so my inclination would have been to insert them from the front. I trial fitted one this way and I think there is a small chance the end of the threaded section has the possibility for contact with the brake flex hose if you do it this way. So I fitted them, as you can see according to Mr Haynes advice. For the umphteenth time, thanks once again John! By the way, why are they so long? Can't see the reason. If they were shorter rust on the threads when they age wouldn't be such a big problem for us.

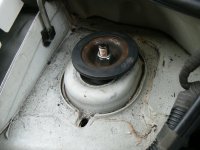
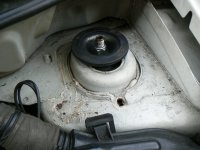
When I put her back on the ground to tighten up the retaining nuts I was very pleased to see the top of the struts rods were now protruding much less and that they were of equal protrusion where previously the O/S one stuck up more (now known to be due to that fatigued top mount)

P1080617.JPG

P1080619.JPG

So that's her done. Think I'll stop this post here as she's now on her wheels. I need to take her for a "settling in" drive and then check and reset the Toe if needed (which I think will be)
 
Back
Top