

You are using an out of date browser. It may not display this or other websites correctly.
You should upgrade or use an alternative browser.
You should upgrade or use an alternative browser.
Technical horn not working and airbag light on?
- Thread starter foggymx5
- Start date
Currently reading:
Technical horn not working and airbag light on?
My horn doesn't work and my airbag light has been on since I bought the car, I have done some reading and I suspect the clock spring. I need to find one cheap and I am not sure how to fit it. And advice is hugely welcome.
Cheers
someone posted a guide about how to change this but not sure which car it was on either panda or punto will keep looking for it for you
someone posted a guide about how to change this but not sure which car it was on either panda or punto will keep looking for it for you
Thank you that would be hugely helpful, I will have a look myself too.
Thank you that would be hugely helpful, I will have a look myself too.
I have just picked up a second hand set of stalks with the clock spring already on it from a slightly newer panda.hopefully I can work out how to fit it without breaking it!
I have just picked up a second hand set of stalks with the clock spring already on it from a slightly newer panda.hopefully I can work out how to fit it without breaking it!
When doing this work the key to protecting the clock spring is to ensure that it hasn't been rotated whilst out of the donor car, plus ensure when removing the steering wheel that the road wheels are set at their straight-ahead position.
I haven't replaced one on a Panda, but have done on several other vehicles and the sequence is:
1. Disconnect battery earth cable and leave for 20mins before starting the disassembly;
2. After 20 mins start by removing the airbag. This is accomplished by turning the wheel first left until you can access the 1st locating spring from behind the wheel via a slot, using a small flat bladed screwdriver insert into slot and lever it until the spring trips and the airbag releases slightly; now turn the wheel to the right to locate the 2nd slot and do the same.
The final slot is at the bottom of the wheel, so it doesn't matter which way you turn it, you just need to find the slot, trip the spring and the airbag is removed.
3. Carefully unplug the connectors and set the airbag to one side.
4. Before proceeding ensure the steering wheel is in the straight-ahead position;
5. Now remove the locking nut and by gently rocking the wheel front to back (gripping at 3 and 9 'o clock), remove the wheel;
6. You should now be able to see the clock spring/levers set. Carefully remove and disconnect the electrical plugs - install the replacement set and re-install all components, ensuring all plugs are re-connected.
7. Re-connect battery cable - eh Voilà !!
Dave
When doing this work the key to protecting the clock spring is to ensure that it hasn't been rotated whilst out of the donor car, plus ensure when removing the steering wheel that the road wheels are set at their straight-ahead position.
:yeahthat:
Also need to make sure it had or hasn't got the trip button on the end of the wiper stalk and that this matches your original, otherwise it may not work with full functionality.
When doing this work the key to protecting the clock spring is to ensure that it hasn't been rotated whilst out of the donor car, plus ensure when removing the steering wheel that the road wheels are set at their straight-ahead position.
I haven't replaced one on a Panda, but have done on several other vehicles and the sequence is:
1. Disconnect battery earth cable and leave for 20mins before starting the disassembly;
2. After 20 mins start by removing the airbag. This is accomplished by turning the wheel first left until you can access the 1st locating spring from behind the wheel via a slot, using a small flat bladed screwdriver insert into slot and lever it until the spring trips and the airbag releases slightly; now turn the wheel to the right to locate the 2nd slot and do the same.
The final slot is at the bottom of the wheel, so it doesn't matter which way you turn it, you just need to find the slot, trip the spring and the airbag is removed.
3. Carefully unplug the connectors and set the airbag to one side.
4. Before proceeding ensure the steering wheel is in the straight-ahead position;
5. Now remove the locking nut and by gently rocking the wheel front to back (gripping at 3 and 9 'o clock), remove the wheel;
6. You should now be able to see the clock spring/levers set. Carefully remove and disconnect the electrical plugs - install the replacement set and re-install all components, ensuring all plugs are re-connected.
7. Re-connect battery cable - eh Voilà !!
Dave
Than you very much, you can't say fairer than that! My only query is how do I work out when the new unit is centered so to speak? I don't want to put it on then ruin it the first time I use full lock.
On the picture the new unit seems to have the button on the end of the stalk so should be all good.
Than you very much, you can't say fairer than that! My only query is how do I work out when the new unit is centered so to speak? I don't want to put it on then ruin it the first time I use full lock.
You can't, unless you've removed it, which is why its always strongly recommended you use a new clock spring as they're centred and have a securing lug fitted that you snap off once fitted in place.
Bugger, is there no way of checking other wise?
Nope, just utmost good faith in the seller.
My current unit does have a red lug on it that I was bemused by, guess that's what it is.
Thats the bit, you'll notice when straight a oval round section is over it, and this is where the tab would come through to secure it in place.
Thanks for the help. could I perhaps count the amount of rotations on my old unit, then gently turn the new one to the end of its rotations then back half way if you catch my drift?
Absolutely NOT !!!
DO NOT TURN THE REPLACEMENT UNIT BEFORE IT IS INSTALLED
When removing the old clock spring and the levers as a unit, note carefully any markings on the clock spring.
Usually there are plastic locating lugs on the front and rear of the unit, rear to hold the outer case steady and front to locate onto the rear of the steering wheel. It's usually pretty obvious how they fit together.
Perhaps you could post some close-up pics of the front and back of the replacement unit?
Dave
Absolutely NOT !!!
DO NOT TURN THE REPLACEMENT UNIT BEFORE IT IS INSTALLED
:yeahthat:
Its not just a simple case of 'X' number of turns like lock to lock on a steering rack is.
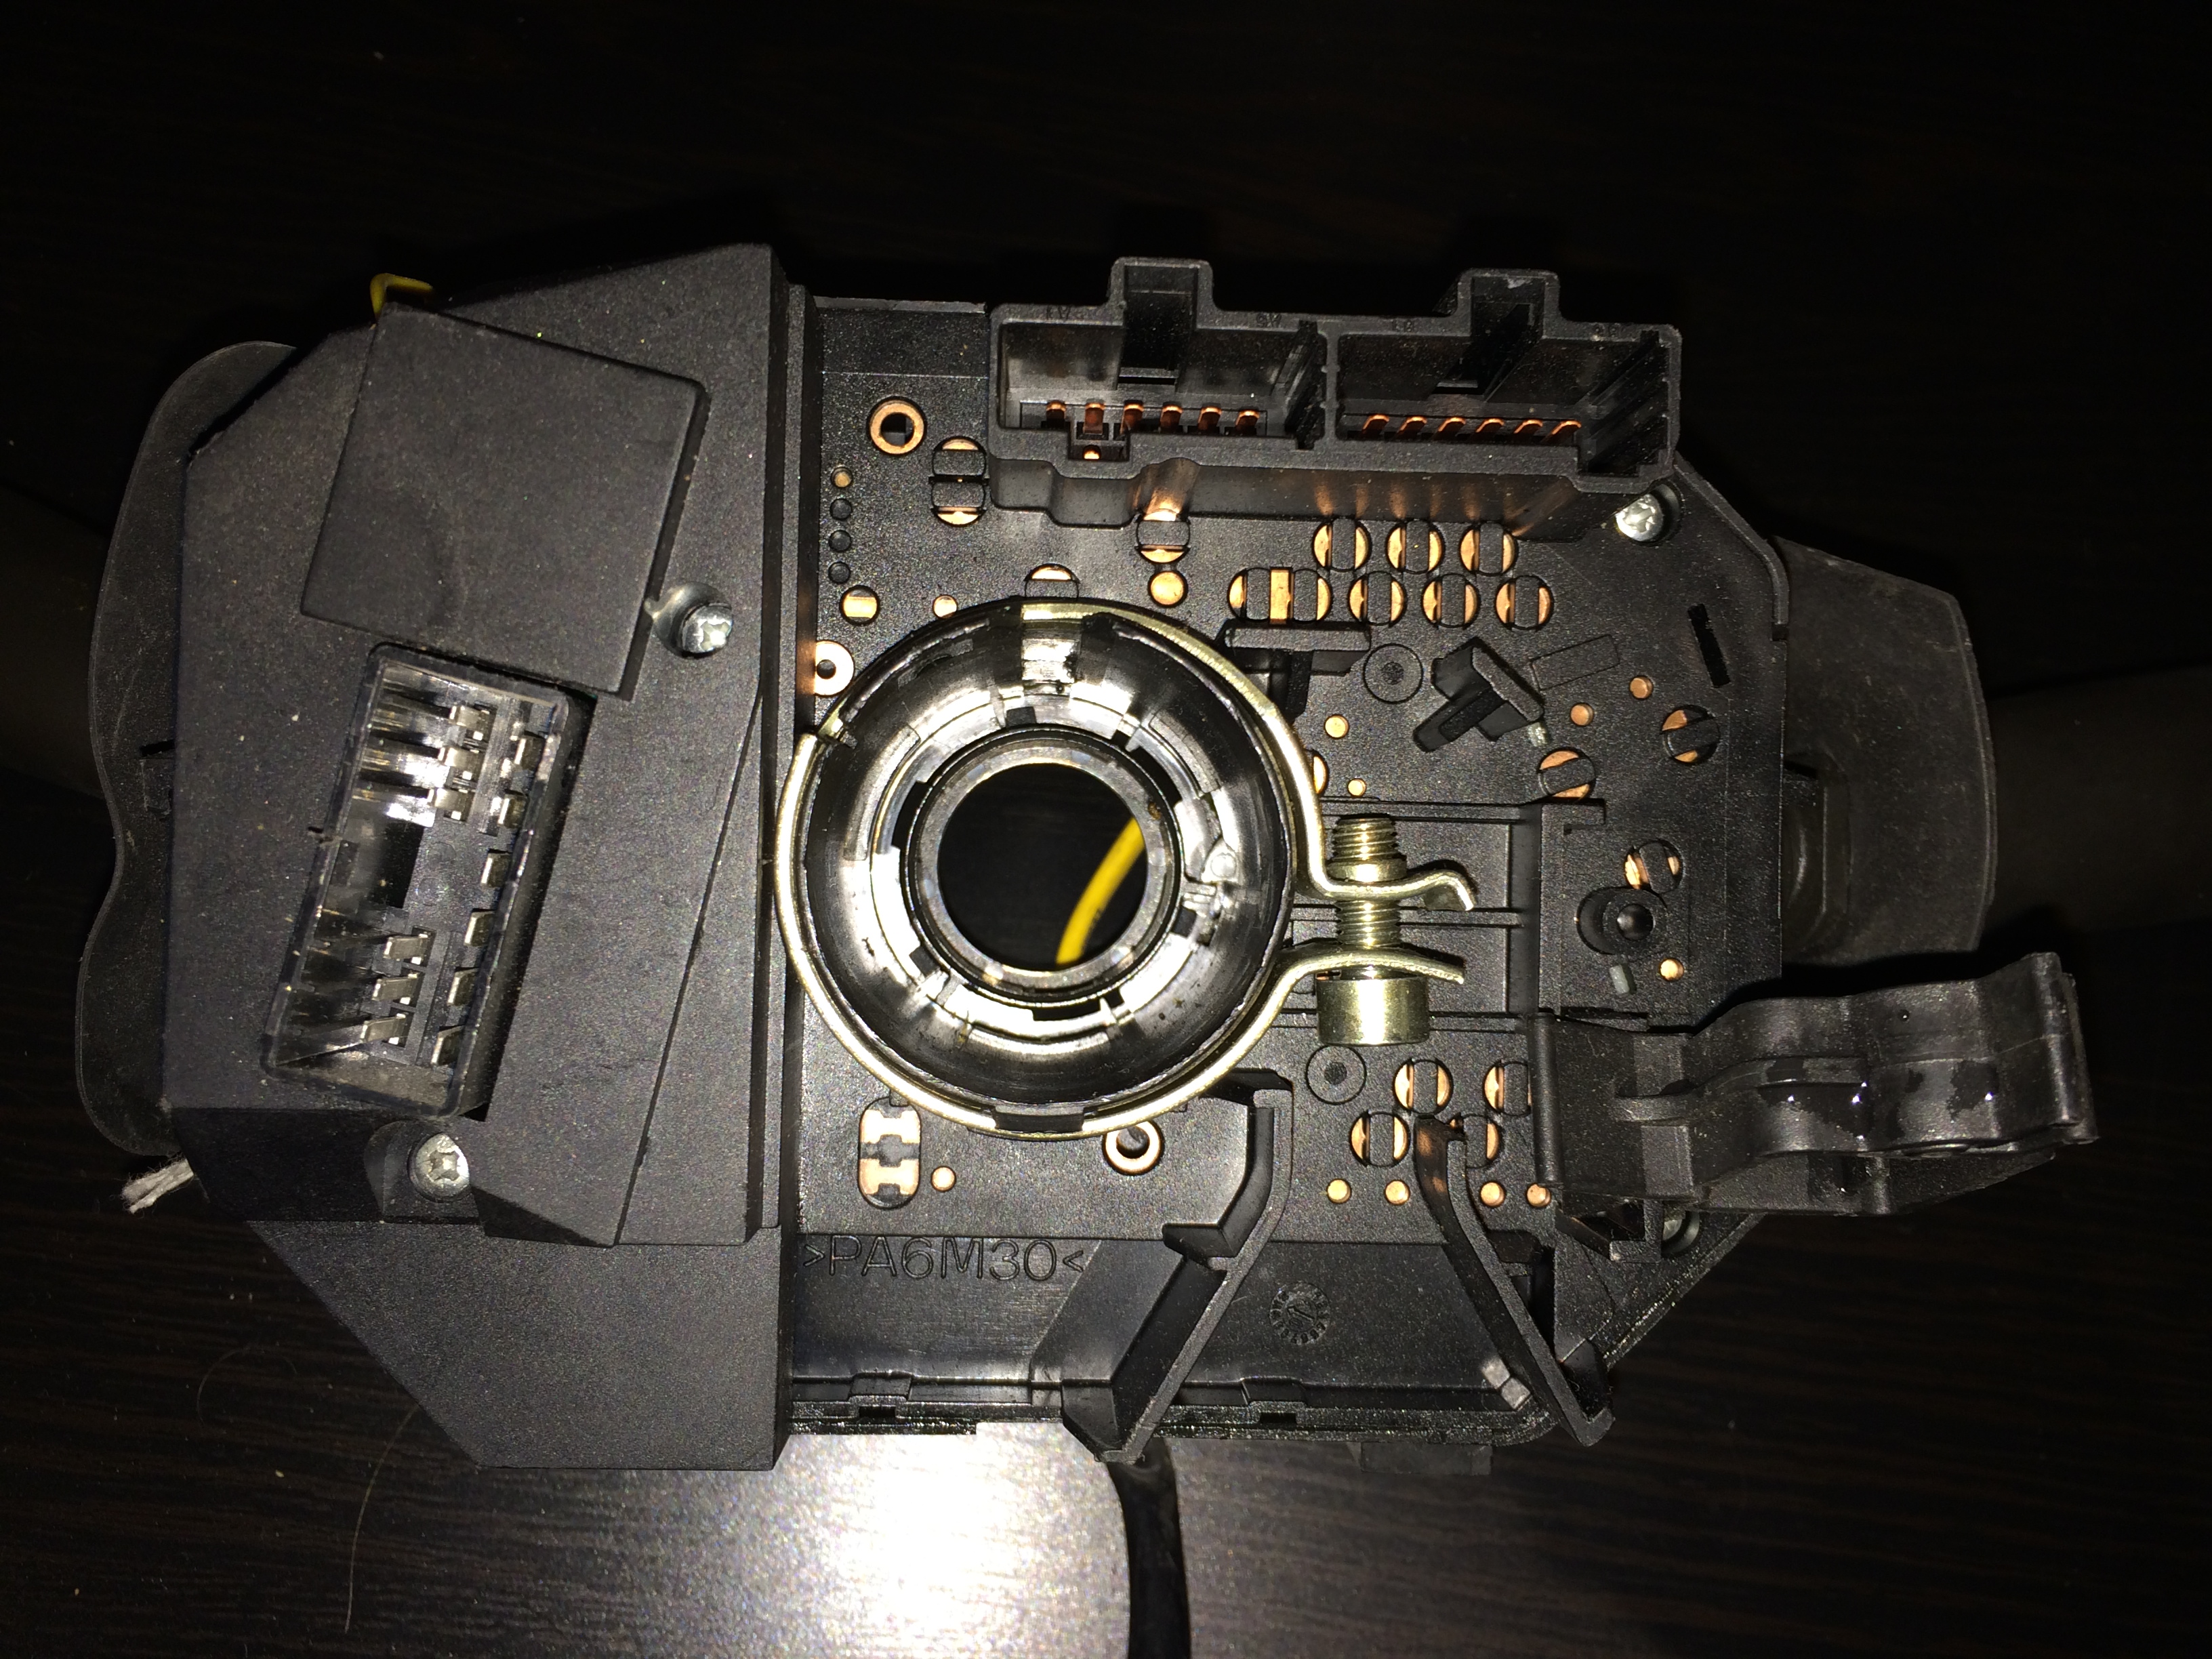
Ok folks so this morning the wrong part came(stalks without the button) but the company have just hand delivered the correct unit at 8pm,fair play!
Now to work out how to centre it,here are some pictures...
Also the stalks are black where as in my car they are a light grey,can I take this clock spring and put it on my old stalks?
Cheers.
Now to work out how to centre it,here are some pictures...
Also the stalks are black where as in my car they are a light grey,can I take this clock spring and put it on my old stalks?
Cheers.
I believe they can be removed, but not easily. What I'd do, and what is easier IMO, is swap the stalks over by disassembling the main body of the stalks housing unit.
Like this")
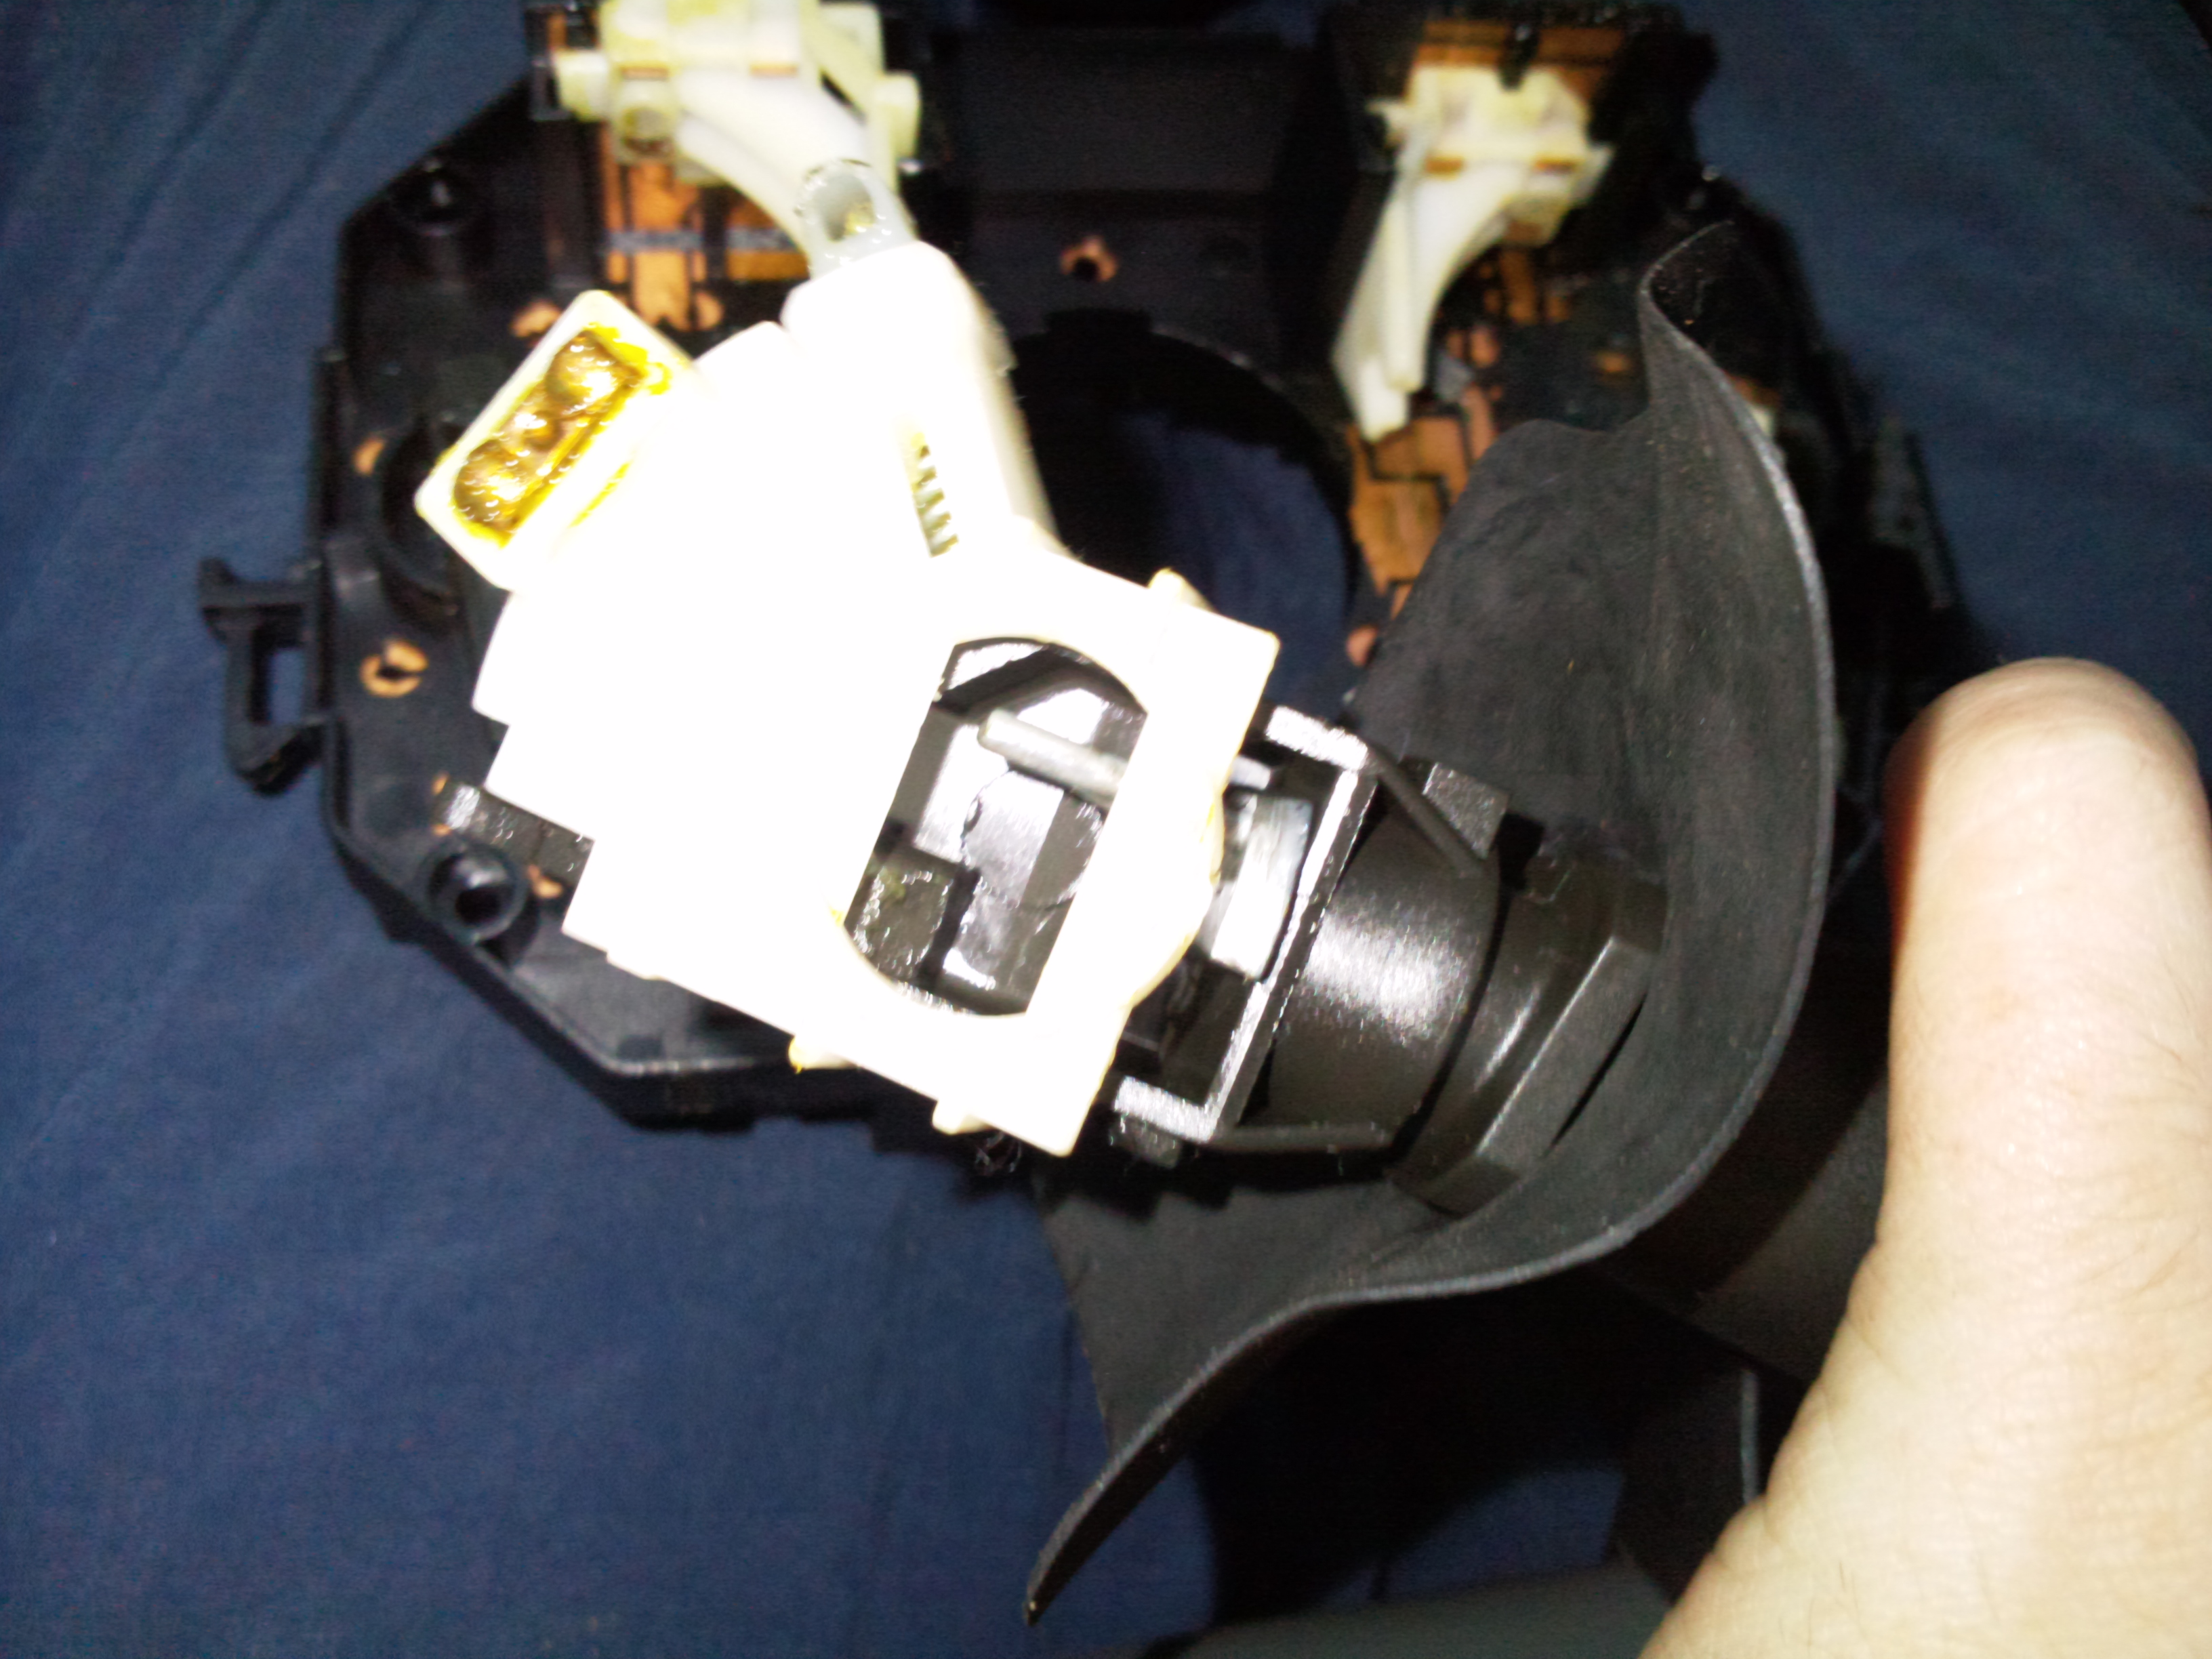
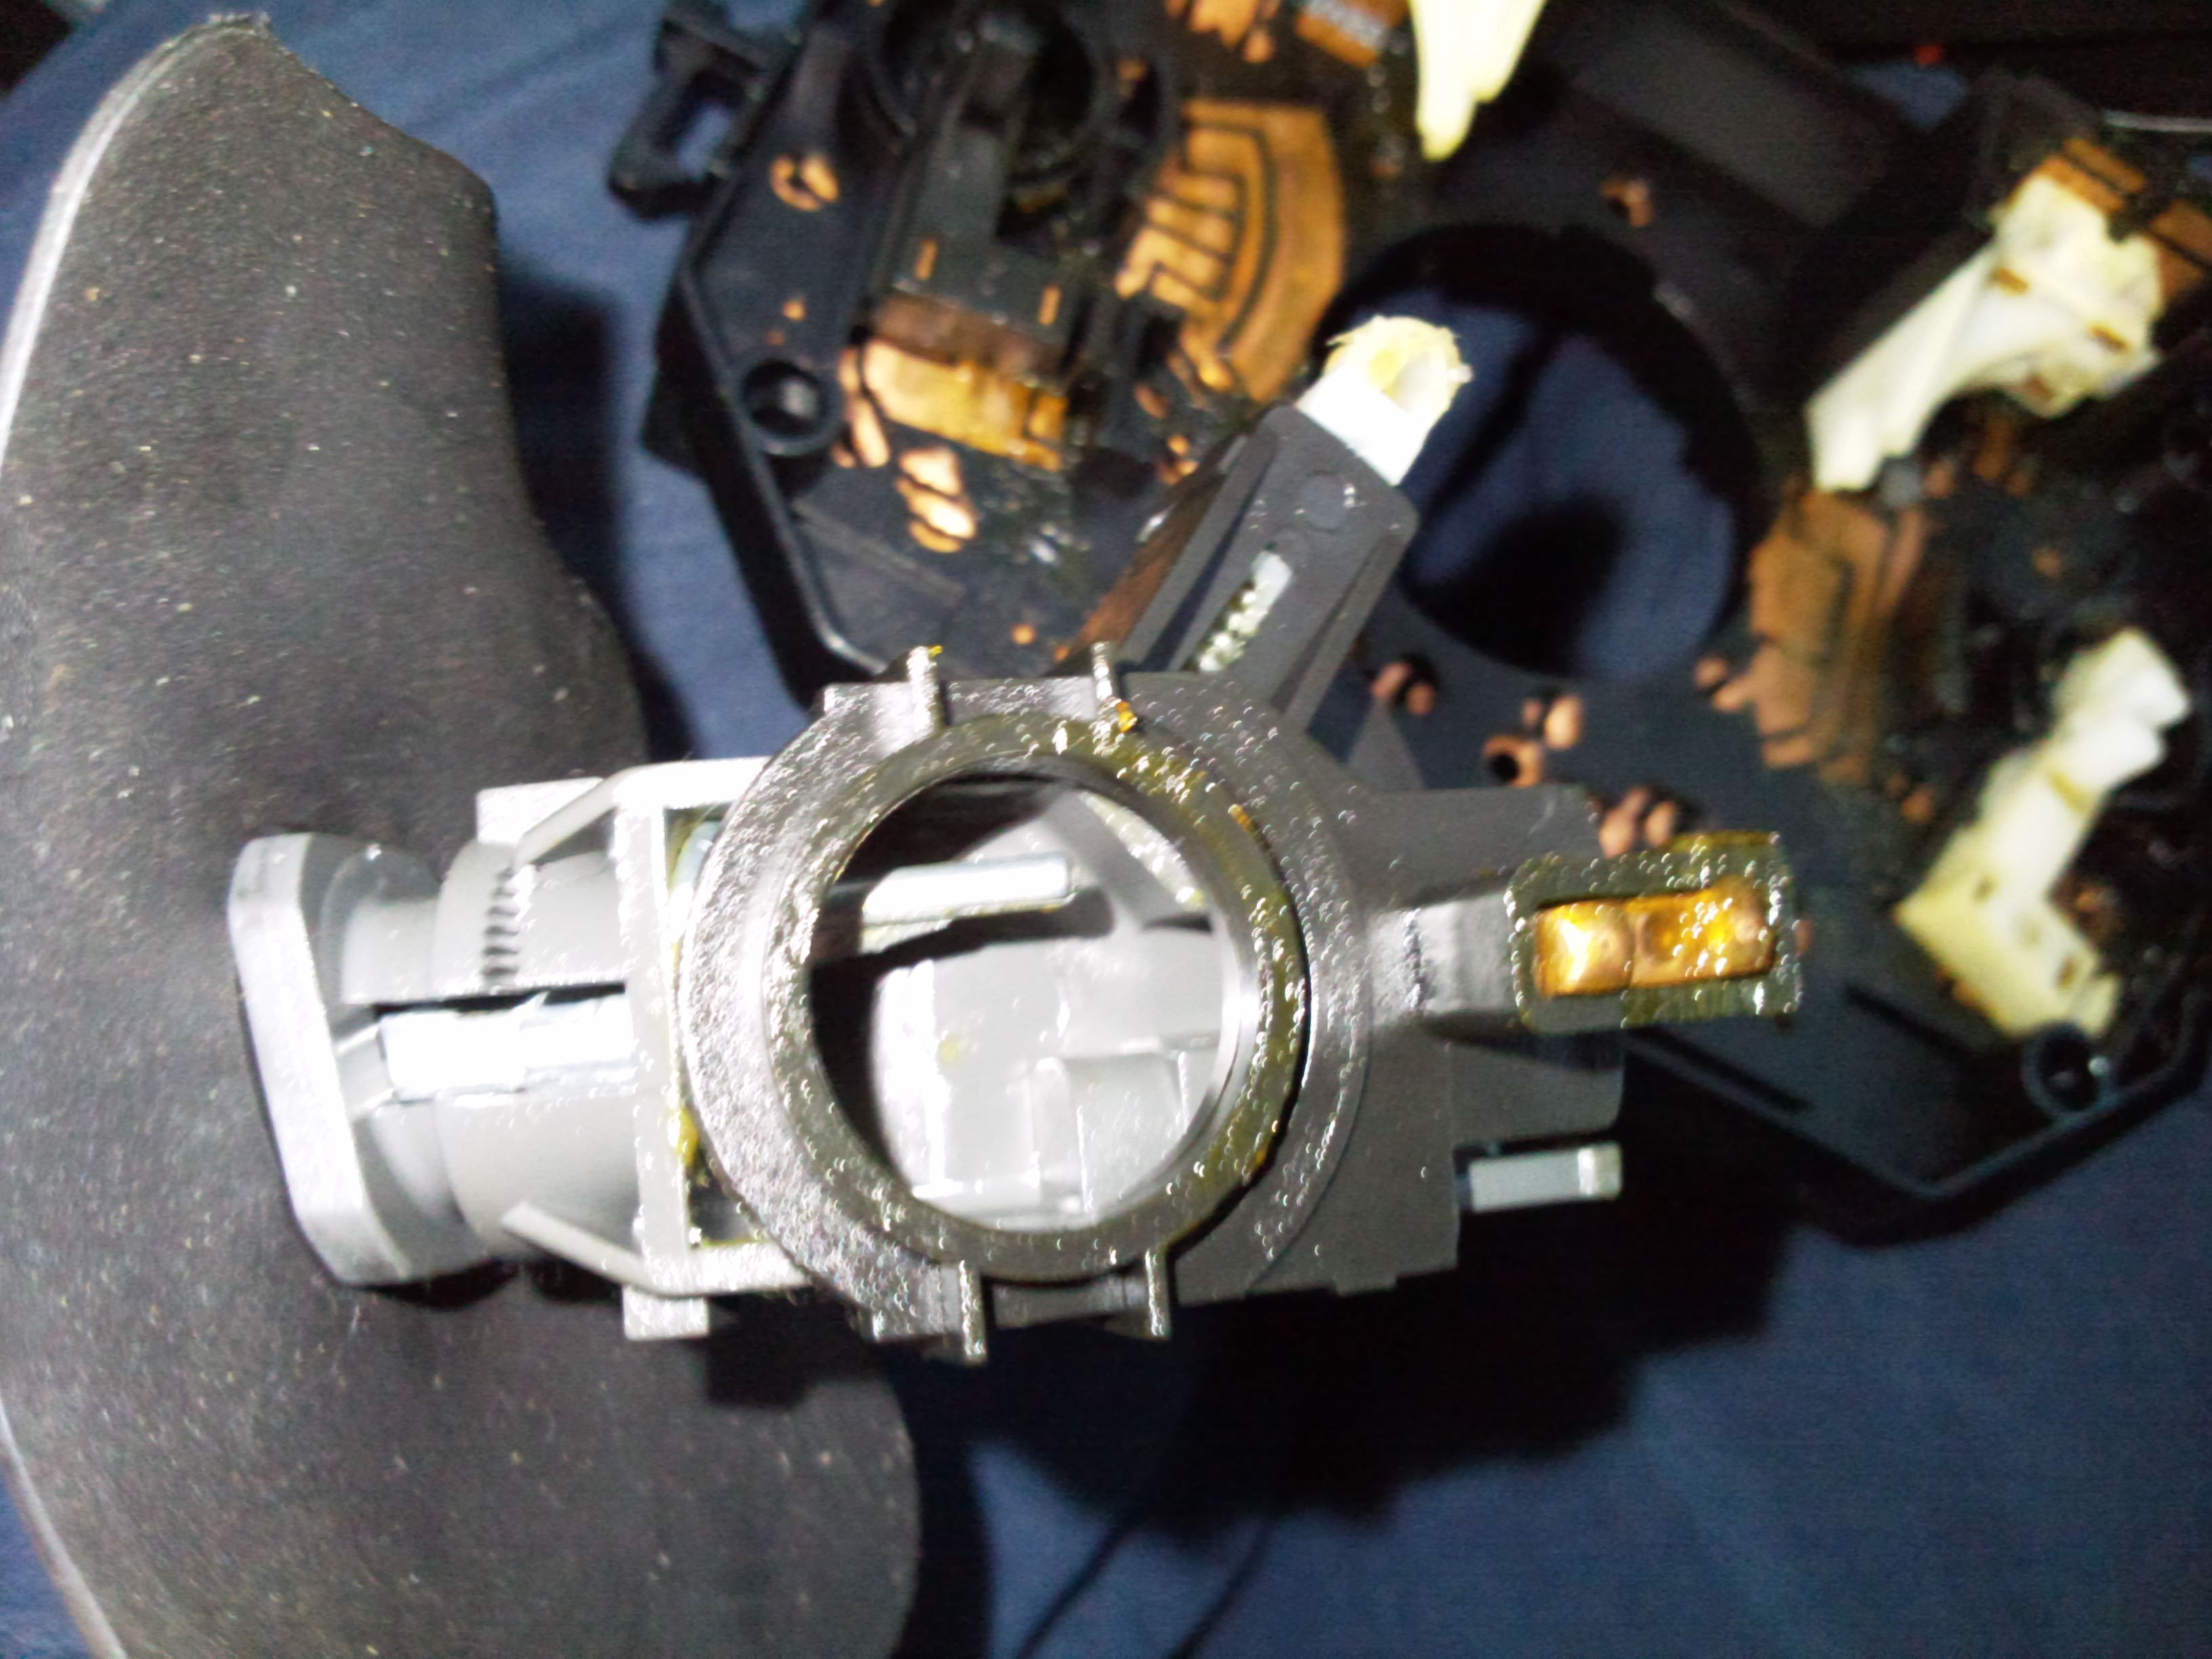
These pics are a tad naff, but seem to be the only ones I've uploaded. When the body is disassembled the stalks should just lift out iirc.
Like this
These pics are a tad naff, but seem to be the only ones I've uploaded. When the body is disassembled the stalks should just lift out iirc.
Cheers MEP I shall do that,I may even grease up the stalk mechanics whilst I am at it as the indicator in particular is quite stiff.
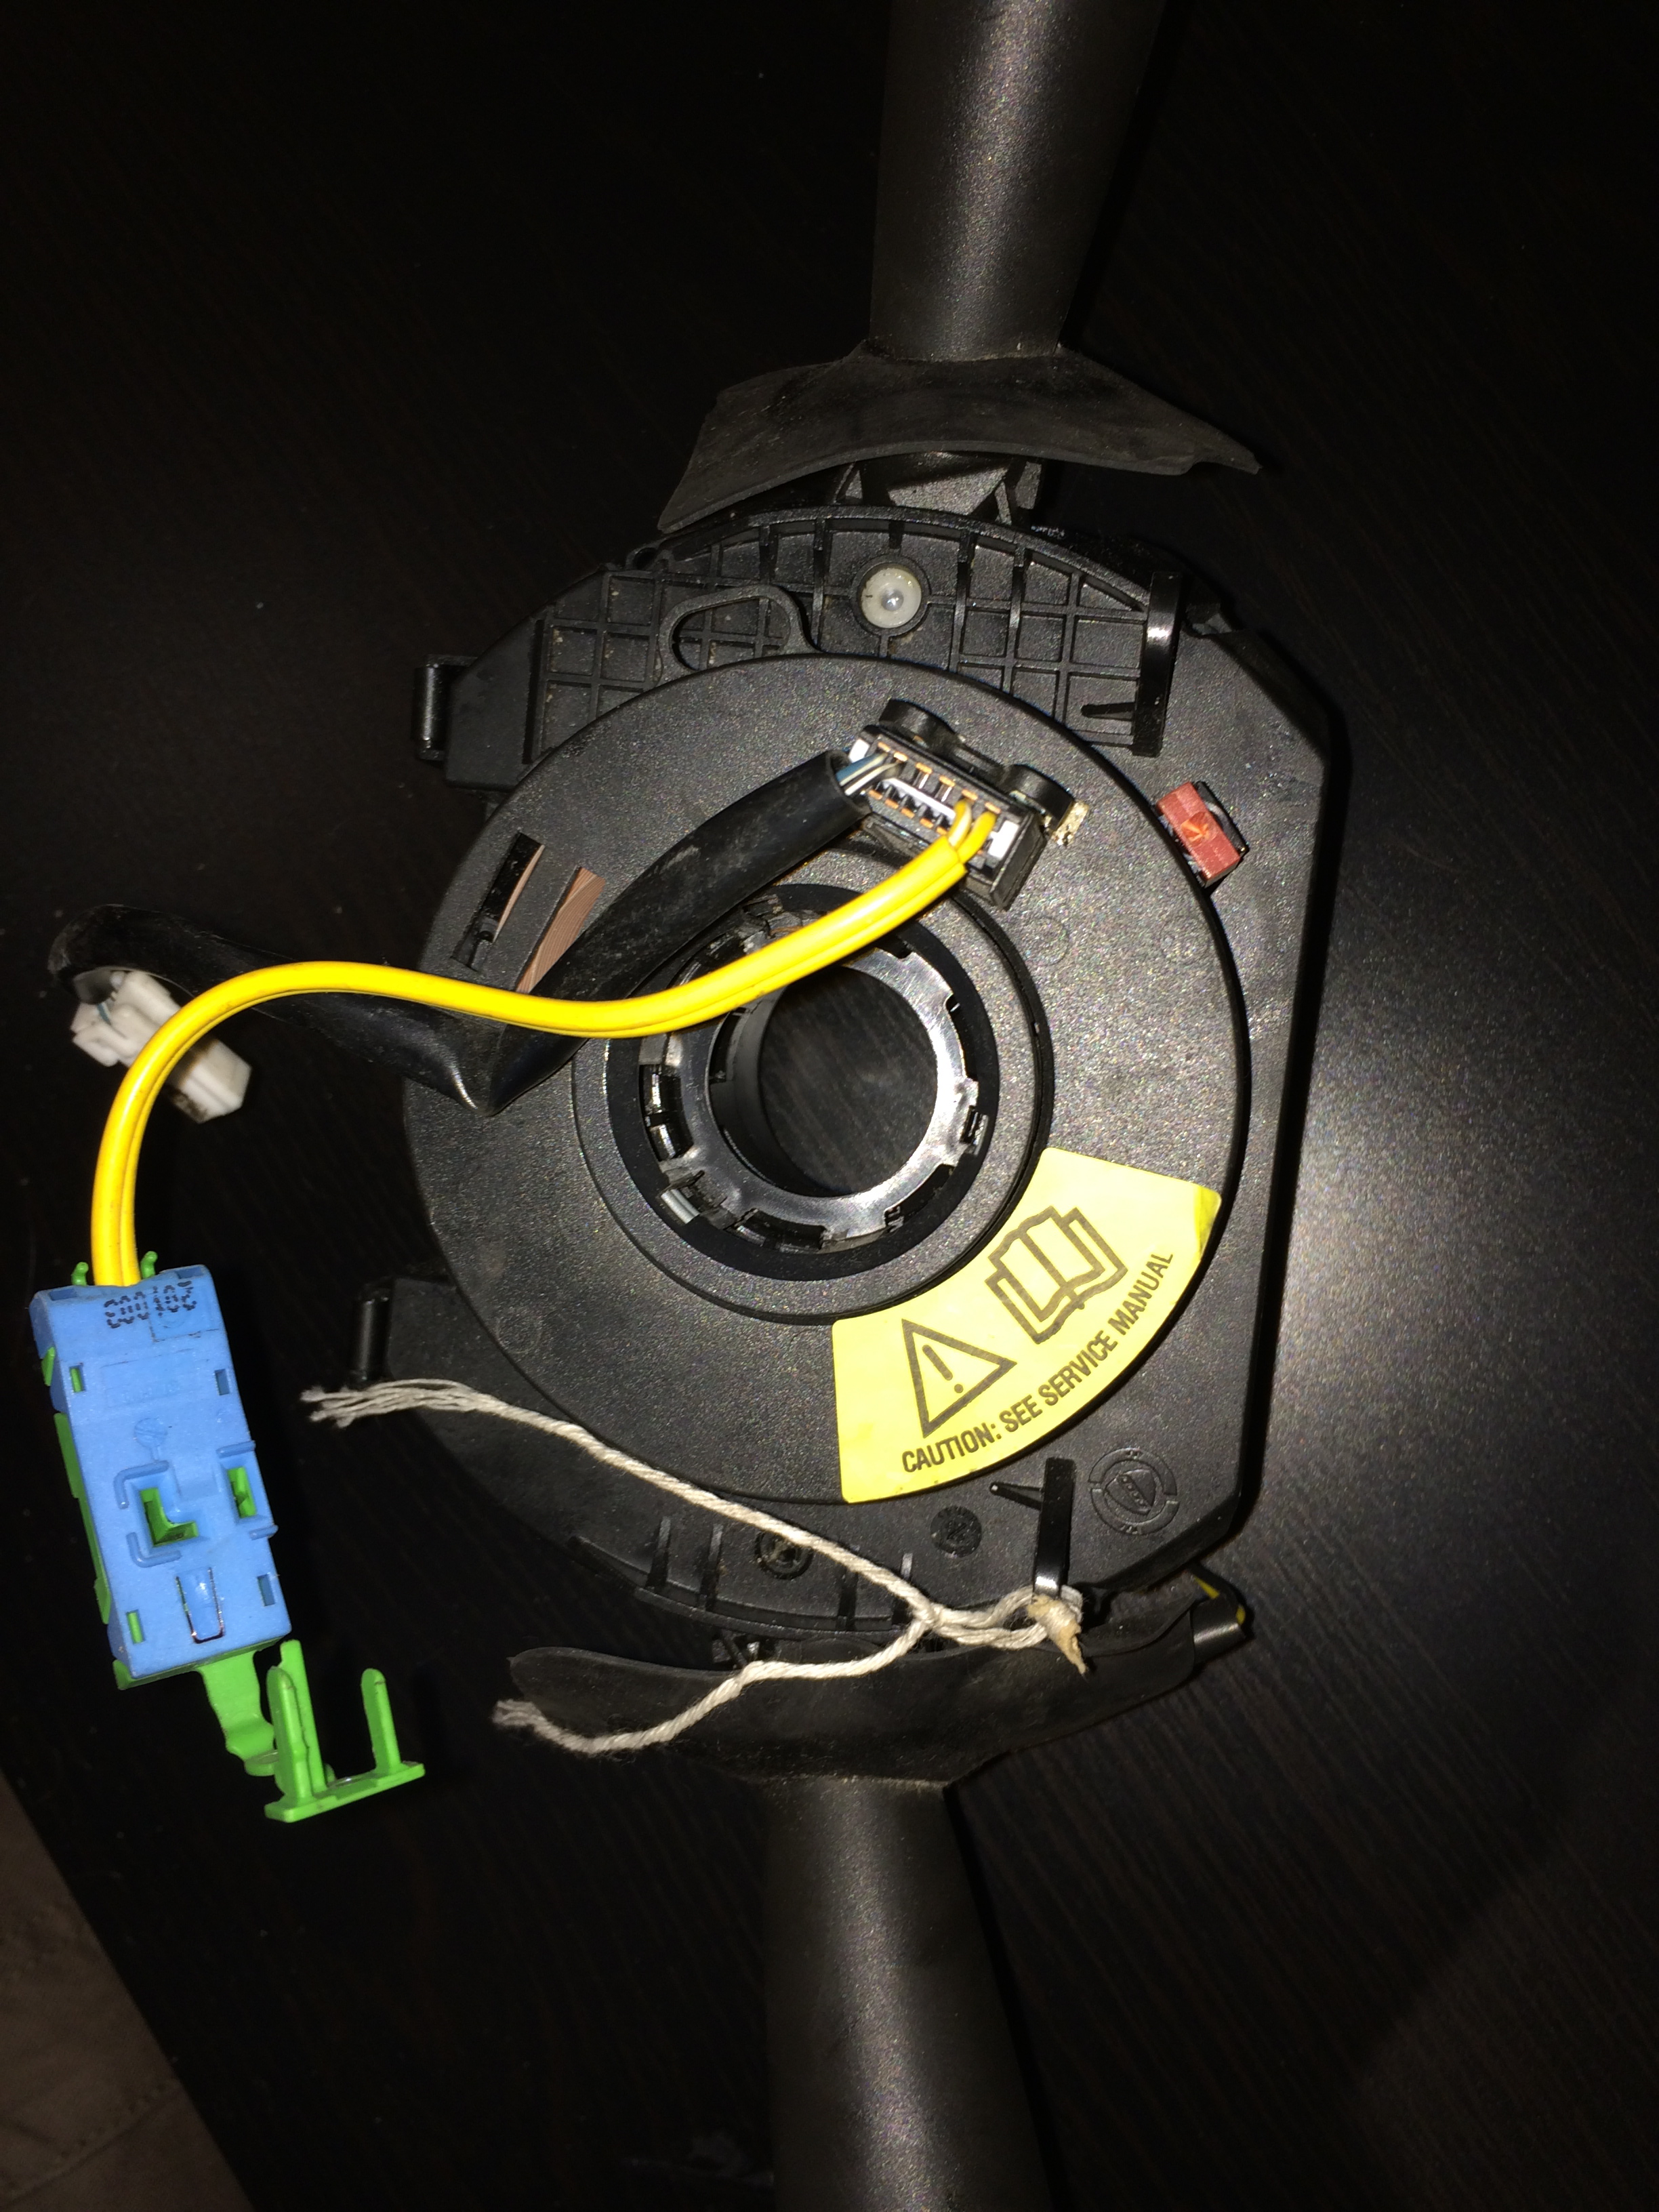
Do you have any idea from those pictures as to whether the clock spring is in a useable position?I don't dare touch the thing!
Do you have any idea from those pictures as to whether the clock spring is in a useable position?I don't dare touch the thing!
From this pic, assuming its not more than a turn out, it needs to be taken just under 1/4 of a turn clockwise.
The little oval ring at the 11 o'clock position should move over the snapped red tab at the 2 o'clock position
Similar threads
- Replies
- 4
- Views
- 530