agavins
New member
Well it appears to be the same on the new 319 4x4 Panda as the old one - clockwise for both sides. If its not, I have busted a caliper and will find out shortly.... ")


Thank you!Hi all,
...
Rotate the hub a bit until the first 8mm hex head is lined up with that odd cut-out in the back end of the training arm assembly. ...
Do the dealers know about this?
"If I ever meet the person who designed that ......."
Can anybody advise on an appropriate form of words to complete the sentence?
No, the rear axle does not need to be removed. See @YellowCar's post three posts back, where the procedure is explained in detail (with photos in the next post). The designers designed in access... so long as those doing the job know that its here. Was yours done at the dealer?Hi, My Panda 4x4 (65 reg) has just had all its brakes replaced.Apparently the rear axle has to be removed to get at some bolts.Great Italian design.
You will be fine. I've driven several Fiats with only one dowel or bolt (or in some cases even none).
gr J
Hi all,
I am mid way through changing rear disk rotors and pads on 2014 panda 4x4 Cross.
There is a simple solution.
I will post pictures tomorrow if it is not too wet.
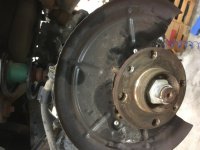
Jack up car, remove road wheel.
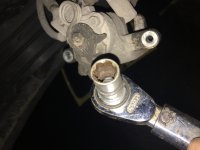
Remove the slider pin bolts on caliper and lift it free.
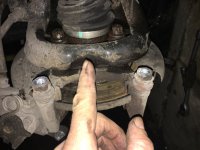
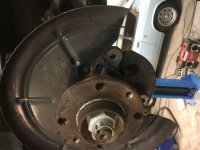
Now because the caliper guide frame (8mm hex) bolts are obscured, we must renove the 4 star-head / torx bolts that hold the hub to the trailing arm.
I used a 14mm “wall drive” socket - it fits!
These are hard to reach so you need a long ratchet or breaker bar and short and long extensions - percevere!!
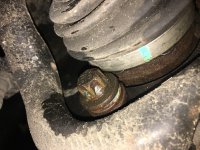
It is vital that the last one you undo is the lower rear as it is easiest to remove (i applied wd40 to all).
Once all of these awkward bolts are out, the hub will move freely.
There is a fair amount of wiggle room and wiggle you must.
Rotate the hub a bit until the first 8mm hex head is lined up with that odd cut-out in the back end of the training arm assembly. Stick hex wrench in and remove it. Now rotate hub and line up the other 8mm hex head with the cut-out and remove it. (I stuck a meaty screw driver into the guide frame to prevent it rotating and damaging cv boot as I undid the hex bolts.
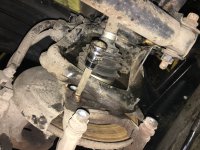
Now the caliper guide frame is free.
Remove the pins from the disk (12mm ring spanner).
Tap the disk free from the hub.
Now build back up with new disk rotor, pads etc.
Take care to remove all rust scale under the spring clips and lubricate carefully with the correct lubricant to prevent pads sticking in the caliper as this will trash your disk again.
Use threadlock where needed.
I hope this is useful!
No need to remove driveshaft, hub bearing, or hub nut. Integrity of hub bearing is not affected.
Do the dealers know about this?
Did this job today, it was not as bad as I thought.
Thanks to you guys for posting how to do it, with your help it was a breeze. (Just accept that it takes some time)
Everything came apart ok, had to put some new rivets on the braking shields as they had come loose.
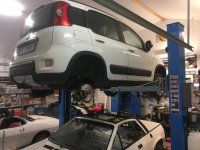
Now it is hanging on the lift waiting for new pads, which should arrive shortly.
The panda allways looks a little odd on a ramp especially with the rear wheels off with it being so smallDid this job today, it was not as bad as I thought.
Thanks to you guys for posting how to do it, with your help it was a breeze. (Just accept that it takes some time)
Everything came apart ok, had to put some new rivets on the braking shields as they had come loose.
Now it is hanging on the lift waiting for new pads, which should arrive shortly.
Just wondering how many hours labour does this job take?
This is going to be the next job needed on my 2014 4x4 Antarctica.