General Front wheel Hub/bearing replacement

Currently reading:
General Front wheel Hub/bearing replacement

Joined
Mar 27, 2004
Messages
13,622
Points
2,047
Location
West Cumbria
It will make no difference whether the panda is 2 or 4wd for this procedure.

Tools Required:-
Torque wrench
32,19,17,13 & long 12mm sockets
19,17,13mm Ring spaners
Good quality ball joint removal tool (This is optional as there are two methods of removing the bearing this procedure does not require the ball joints to be removed).
Knackered large screwdriver.
Small screwdriver.
Small or large hammer
Axle stand.
Plenty coffee if it's cold.

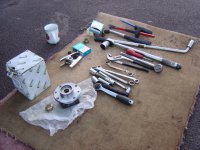
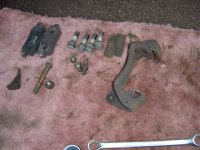
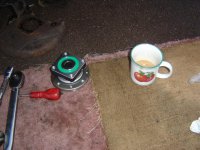
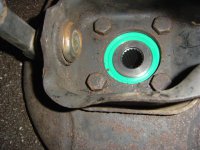
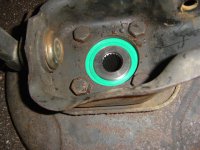
So Sort out your tools (you don't need as many as shown) and your shiny new Hub bearing

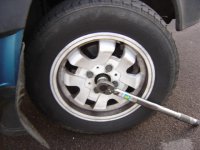
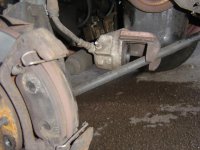
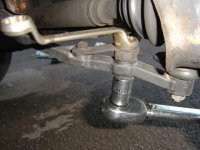
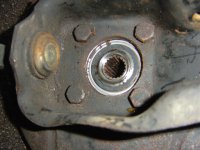
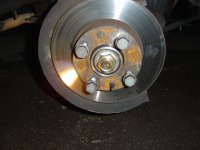
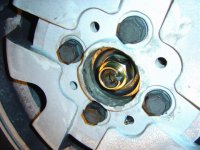
First remove front wheel hub cap and whilst vehicle is still on the ground loosten the front Hub nut see below & wheel nuts but do not remove at this stage(if the handbrake is poor leave the car in first or reverse gear and in any case chock the wheels on opposite side)

Next raise the car & remove the front road wheel (this would be handy as there is no point in removing the rear wheel:) )

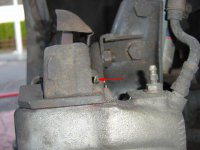
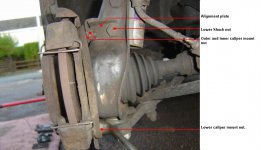
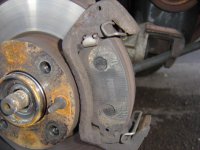
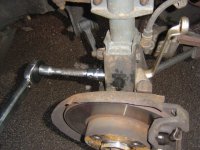
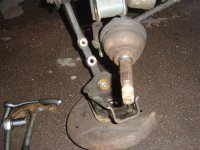
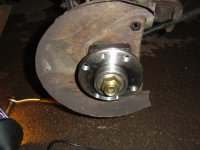
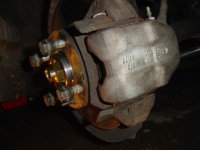
Next using the small screwdriver remove the caliper sliding plate clips top and bottom.

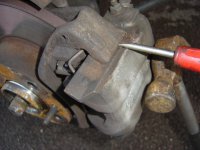
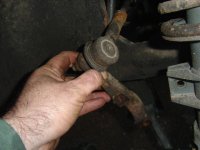
Then using the old screwdriver and the hammer tap out the sliding plates top then bottom then lever the caliper down then pull it out and tie it up out of the way (I normally sit it over the tie bar due to it's shape)
 

Attachments

  • Bear2.JPG
    Bear2.JPG
    91.5 KB · Views: 62
  • Bear1.JPG
    Bear1.JPG
    58.3 KB · Views: 32
  • Bear3(1).JPG
    Bear3(1).JPG
    50.7 KB · Views: 29
  • Bear5.JPG
    Bear5.JPG
    55.9 KB · Views: 28
  • Bear6(1).JPG
    Bear6(1).JPG
    38.8 KB · Views: 24
  • Bear7.JPG
    Bear7.JPG
    63.5 KB · Views: 34
Next remove the brake pads noteing the anti-rattle clips.

The next item to remove is the wheel aligning bracket this is done by removing the lower shock-piller 19mm bolt and the outer caliper mounting nut 17mm.

Next the caliper mount remove the two 17mm bolts, the upper bolt has thread on both sides of the bolt/nut and remove the Caliper mount (you should now have a nice little pile of parts :) )

Remove the Brake disc by un-doing the securing and wheel aligning nuts using the long 12mm socket and place the disc where it cannot be scratched or covered in grease.

Next undo and remove the 19mm & 13mm Tie bar to swing arm bolts to allow free movement of the swing arm therefore allowing driveshaft to be removed without undoing the wheel pillar ball joint.

To prevent the requirement of removing the tie rod (steering) ball joint you can undo the 2x13mm bolts securing the steering arm to the shock arm.

Next remove the upper 19mm Shock-wheel pillar nut (I know the pic shows the lower nut but se la vie)
 

Attachments

  • Bear12.JPG
    Bear12.JPG
    78 KB · Views: 27
  • Bear9(1).JPG
    Bear9(1).JPG
    56.1 KB · Views: 42
  • Bear8.JPG
    Bear8.JPG
    60.6 KB · Views: 29
  • Bear17.JPG
    Bear17.JPG
    61 KB · Views: 28
  • Bear16.JPG
    Bear16.JPG
    49.6 KB · Views: 22
  • Bear10.JPG
    Bear10.JPG
    75.9 KB · Views: 25
Last edited:
The Wheel pillar can now be swung out and downwards and at the same time give the driveshaft a tap, it can be awkward but just keep pushing down the pillar whilst pulling the driveshaft out (this procedure will save you knackering your ball joints so stick with it)

Eventually the driveshaft will release and you will be left with the hub/bearing, disc cover and caliper mounting plate attached by 4x17mm bolts to the wheel pillar. remove the bolts and hey-presto the hub/bearing will drop off.

Now clean the surfaces of the inner and outer side of the pillar, disc cover and caliper mounting plate (you don't want crud getting into your new bearing)

Your halfway so overdue a coffee.

Now get the New bearing, disc cover and mounting plate and arrange in the order shown now attatch using the 4 bolts to the wheel pillar. You will probably still find crud on the bearing after bolting the new one on so give it a clean once the bolts are attatched.

Now go into the house and shout at the Mrs for not giving you coffee in your fav mug (Jim, Paulo make your own arrangements :) )
 

Attachments

  • Bear22.JPG
    Bear22.JPG
    92.1 KB · Views: 24
  • Bear23.JPG
    Bear23.JPG
    84.8 KB · Views: 22
  • Bear21.JPG
    Bear21.JPG
    96 KB · Views: 25
  • Bear20.JPG
    Bear20.JPG
    59.2 KB · Views: 28
  • Bear19.JPG
    Bear19.JPG
    85.8 KB · Views: 33
  • bear24.JPG
    bear24.JPG
    75.8 KB · Views: 20
  • Bear26.JPG
    Bear26.JPG
    73.5 KB · Views: 22
  • Bear25.JPG
    Bear25.JPG
    67.4 KB · Views: 20
Next feed the driveshaft back through the bearing (not forgetting the inner spacer) and loosely tighten the driveshaft nut again don't forget the washer and look proud of your new shiny part's

Put all back as was disconnected. I will list the more important bits...

When replacing the disc I always find that it aligns better if you loosely fit the 4 wheelnuts before replaceing the two fixing bolts (remove the wheel nuts once in place or the wheel wont go back on :nutter:)

Do not forget to replace the alignment bracket between the shock & caliper mount.

On replacing the pads don't forget the anti-rattle clips just push the clip down as you are fitting them.

When replacing the sliding plates on the caliper smear a little copper grease between the surfaces and tap back into position (you may have to lever the caliper up or down for the plates to fit in. Once in replace the pins the flat of a screwdriver will help push them back in if they are tight (watch your fingers)

Replace the wheel and lower the car to the ground then tighten the Hub nut to the required torque? (can't remember)

Finally tap in a grove on the hub nut to prevent it comming off later (n)
 

Attachments

  • Bear28.JPG
    Bear28.JPG
    56.9 KB · Views: 28
  • Bear29.JPG
    Bear29.JPG
    54.4 KB · Views: 24
  • Bear30.JPG
    Bear30.JPG
    44.9 KB · Views: 19
  • Bear31.JPG
    Bear31.JPG
    70.3 KB · Views: 23
Last edited:
Some may be wondering about my method but as the ball joints are gennerally ruined by removal, this saves that problem. If you want to remove the ball joints use a decent removal tool or you can gaurantee they will be knackered.

The only ball joint left on the car to be replaced is the o/s tie rod all the others are new.

The original bearing I replaced if you noticed is completely different on the inner surface of the second replacement so may have been the reason for the noise.

Sorry about the dirty wheels.

I've done this to help the members so if the admin want to PDF it move the pics about etc to make it look better help yourself :D

I'm outa here.
 
Last edited:
Back
Top