Navin Talati
Member
- Joined
- Oct 23, 2006
- Messages
- 106
- Points
- 97
Dear friends,
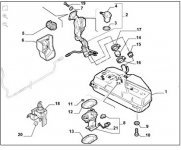
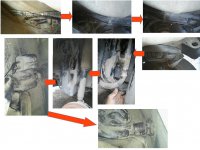
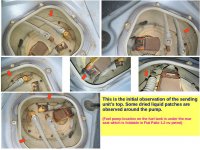
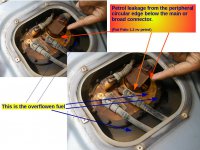
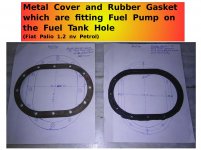
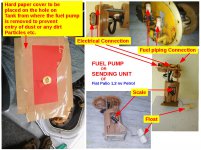
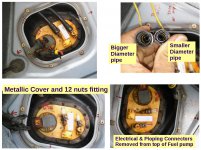
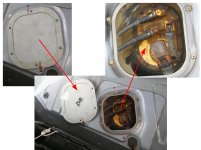
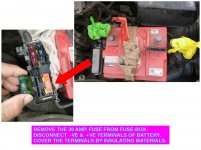
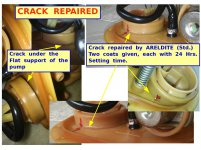
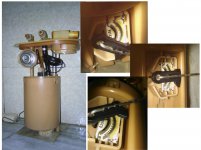
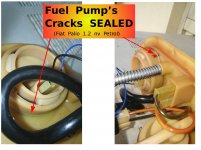
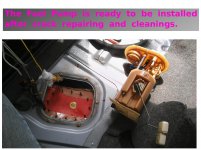
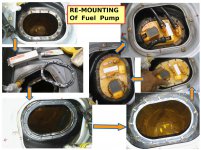
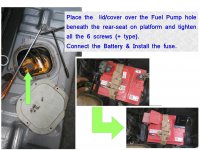
My car is Fiat Palio 1.2 nv Petrol - 2004 dec.Model.
For last TWO times, I have observed that the petrol is dripping (in substantial quantity) while filling the petrol at petrol pump. It gets poured on the floor. Some quantity is coming out and then onward there is no issue. I suspect that either Filler Hose is cracked/loosen or some other pipes-connection might be the culprit.
I seek your guidance for resolving this issue with relevant pictures, literature, and appropriate information. How should I proceed to assess the problem and what may the possible causes?
Thanking you all in anticipation.
")