Hi all,
well progress has been glacially slow since the start of the year due to work and family commitments. Usually a couple of hours each weekend is all that is available, but managed to get a few days time in lieu off work recently to achieve some results.
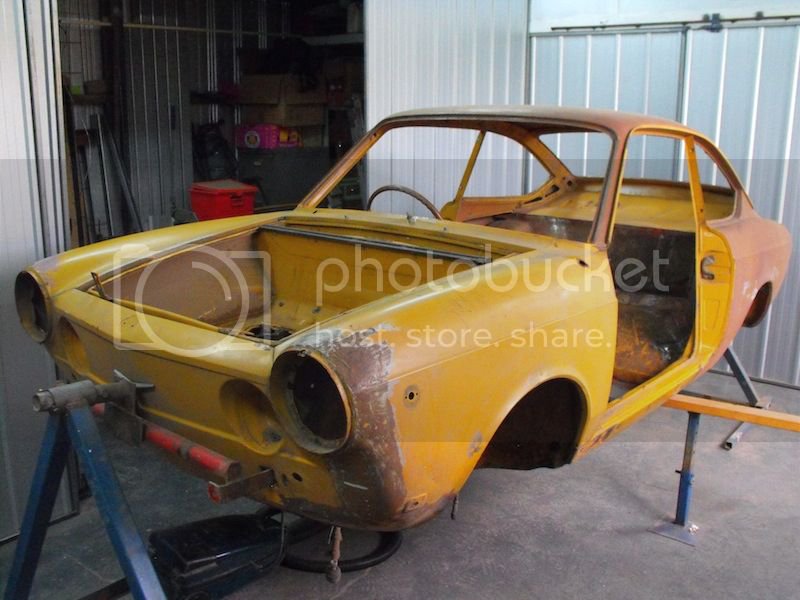
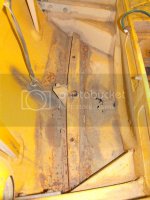
Picking up from December's post, I finished off fabricating the drivers side seat mounts but was vacillating about the results, and whether to do the same for the passenger side. The problem was that results (which you can see in the lower right of the last photo of 22-Dec) clearly not out of the factory, and frankly UGLY.
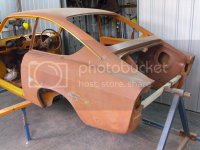
After a lot of chin scratching I grabbed the big angle grinder and chopped them out.
Side note: Those that know me, know that I'm not adverse to letting the sparks fly with the grinder. I've had a small 4" grinder forever, but recently picked up a bigger 6" grinder with speed control. Loving the capability of having a bigger cutting disk, as it makes it much easier to cut through box sections with a single plunge. Second, also found that disk manufacturers are now making ultra thin cutting disks that make it possible to make fast surgical slices less than 1mm wide, instead of 3-4mm wide cuts if using the standard old school cutting disks. Only drawback is that they wear quickly, and are easily damaged.
After cleaning up welds and hammering flat the car floor, it was time to mark out the location of version 2 seat mounts. I've found that red pencils borrowed from the kids school bag are very useful for marking out, as the colour stands out against the grey steel. For my seat, I've moved it inboard by about 15mm compared to the original seats.
Once the location had been established, I mocked up the sides of the seat mounts using alternating layers of masking tape and cardboard.
Top tip: Use a datum line to establish the cutting lines. In this case a length of angle iron was set on top of the sills on either side of the car, and a measuring gauge aided the transfer of shape from the inner sill to the cardboard. The astute among you might say "you could have used a profile gauge for that!" Well maybe, but I dont have one, and the cardboard templates are make it easier to visualize the result and verify before cutting steel.
Fortunately the original mounts were still on the shelf, rather than tossed in the garbage bin months ago. Using a box cutter to remove the cardboard from the car, the template was laid on the original seat mounts, and the cutting line traced on.
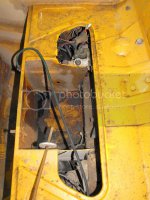
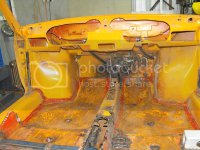
After removing the seat rails and general cleanup, the mounts were trimmed and test fitted to the car several times until right. It pays to take your time here, because at most there should be a 1mm gap between mount and floor of the car prior to welding. Remember to paint inside the mounts before welding too - you can't get in there afterwards.
The mounts were tack welded in, checked again for squareness and level. And double checked again! Finally they were slowly mig welded in, taking time at each spot weld to cool, and minimise heat distortion, then ground back welds with a die grinder and carbide burr.
Hopefully the neighbours will talk to me again after making so much noise!
Other tidbits of info
1) The central tunnel tapers in width from the rear of the car to the front of the car
2) The seats rails in the 850 are not aligned straight ahead, they are pointed slightly inboard.
3) The clear space between the inner sill and the tunnel is about 10mm wider on the passenger side of my car. Don't take it for granted that the car is symmetrical!
4) For reference the standard seat rails are 348mm centre to centre.