634.jpg

Cinquecento FIAT Cinquecento Trofeo Stradale

Introduction

Hi :),

Since this forum has been a great source of knowledge that I used in my build I think it's appropriate to show the result of what it helped me to create.

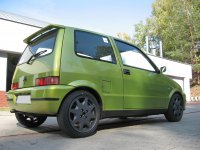
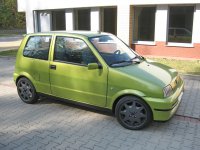
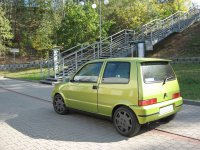
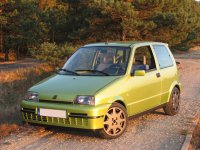
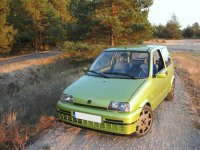
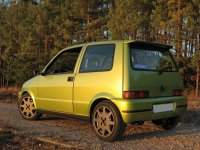
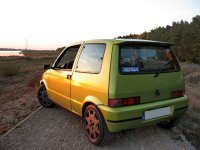
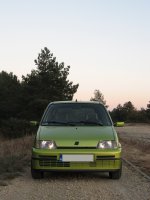
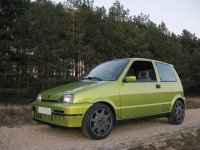
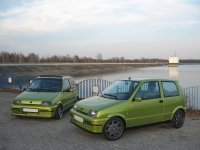
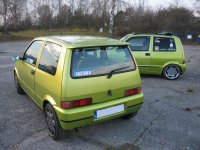
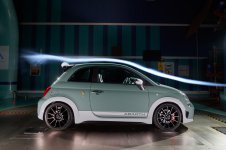
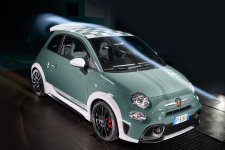
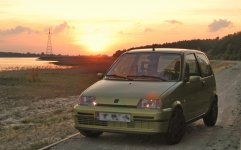
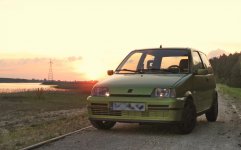
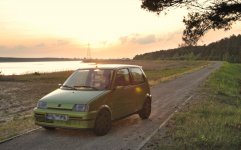
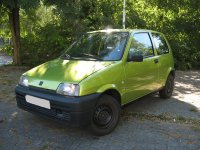
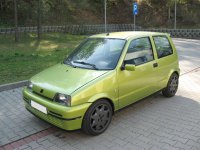
The car is a 1997 899. I used it for a few years as a daily before I decided to turn it into my own idea of how a street version of the Trofeo rally car could've looked like if it was ever made. I didn't want a car that was too low, looked weird or was dynamically compromised in some way. I wanted it to look like it could've been made by FIAT and it had to be a street car that can deal with less than ideal roads. It's not finished work, this is only a first incarnation of the idea, there will be another chassis with a roll bar, bigger engine, serious seats, harnesses and a collection of small changes plus all the bits that got modified until now.

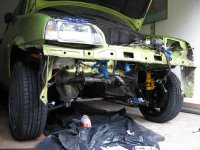
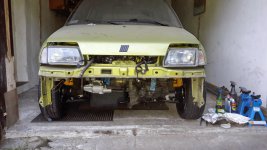
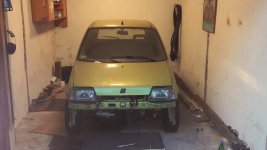
It started like this.
233.JPG

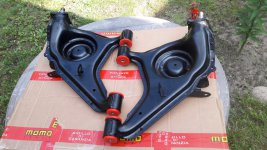
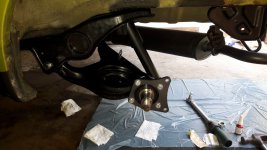
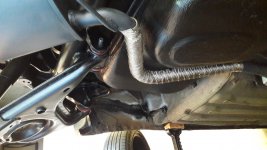
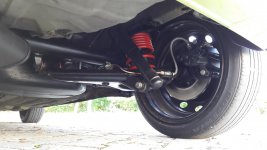
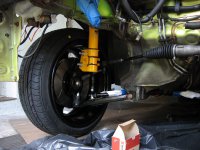
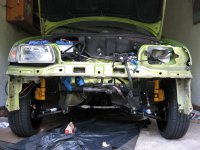
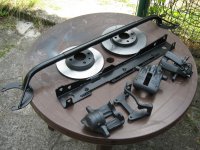
I decided to change the whole suspension front and back using as many new parts as possible, upgrade the brakes and replace every part that was old and worn to ensure this car drives like a new one. Up front only the steering knuckle was reused. At the rear there is a used beam and control arms from Italy (18 year old parts and only a smidge of rust :eek:). Short steering rack. Suspension is MTS Technik 60/40. Works well on bumpy roads and is firm enough to give a sporty ride.
360.JPG364.JPG366.JPG447.jpg458.jpg460.jpg488.jpg

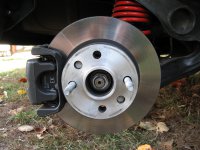
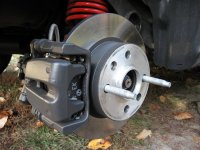
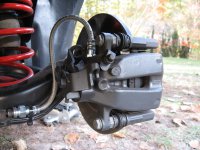
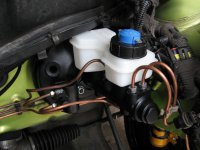
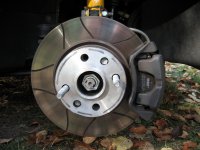
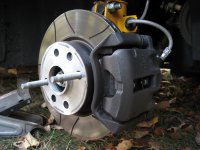
Brakes are my favourite part of the car. The stopping power is exceedingly satisfying and you have to be a butcher to overheat them which I still didn't manage to achieve - light car doesn't require exotic materials to perform well. :cool: I still have to get a custom made handbrake cable but that's no more than 40 quid to make.

Front
- Calliper: Alfa Romeo 155/FIAT Punto 1 GT Turbo [FIAT 9946828, TRW BHW156E] + AUTOFREN SEINSA D025138 + FRENKIT 808001 + AUTOFREN SEINSA D4073
- Disc: Brembo MAX 09.5870.75 257mm
- Pad: Ferodo FDB370

Rear
- Calliper: Abarth 500 [TRW BHQ284E] + custom flanges
- Disc: Magneti Marelli PBD031 240mm
- Pad: TRW GDB1981 (not 100% sure)

Pipework
- Flexhose (steel braided custom made): 2x front 500mm + 2x rear calliper 300mm + 2x rear arm 280mm

System
- Master cylinder: Magneti Marelli 360219130158
- Fluid: Millers Performance Brake Fluid DOT 5.1
IMG_2676.jpgIMG_2678.jpgIMG_2686.jpgIMG_2688.jpgIMG_2694.jpg369.JPG

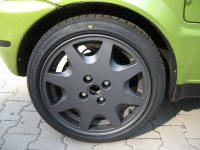
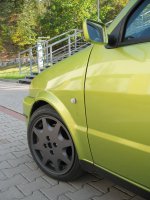
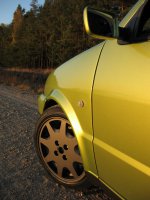
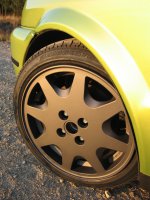
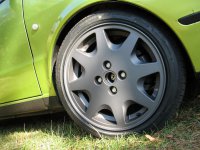
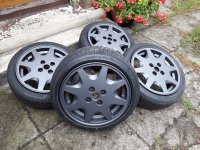
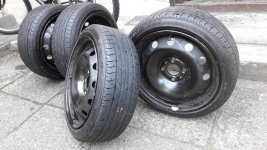
I got the idea for wheel and tyre combo from J333EVO. Fifteen inches, 165/50 tyre. I think the Lancia wheels suit this car exceptionally well. The tyres are good too but they are discontinued now so I will need to think of something else after I wear them out. Would like to try 185/55R15 Yokohama Advan AD08.
359.jpg414.jpg419.jpg420.jpg

The engine remains the same for the moment. I wanted to see how this car drives before I pour money into engine swaps. Now I have a chassis that can take any engine. The car will be developed further as time goes by.
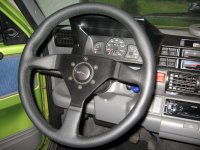
351.JPG373.JPG508.jpg

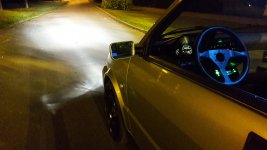
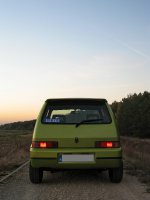
I am pleased with the overall result. It is a drivers car now, that was my primary goal. It looks competent and not overly shouty. Like most project cars it needs fine tuning, some bugs still have to be ironed out but it's a promising start. This topic will be updated. :)
627.jpg634.jpg636.jpg638.jpg639.jpg643.jpg659.jpg660.jpg661.jpg662.jpg663.jpg664.jpg
665.jpg666.jpg667.jpg668.jpg
669.JPG670.JPG671.jpg
Which springs and dampers are you using? I know that a professional setup will achieve best results but it will also be expensive as hell to pay someone to set it up. Besides, the suspension in Cento doesn't give you much choice, I have custom camber plates for the front and that's basically all you can do with the geometry other than through ride height and spacers.

I'm thinking about the rear roll bar with extensions to the floor at the base of A pillar. I don't want to smash my head on a metal pipe.

On both my cinqs I used to have the KW V1 coilover kit with OMP and Sparco cages, standard front ARB and the OMP top and bottom braces.

Now I am fitting double adjustable Avo coilovers allround 300lb front springs and 275lb rear (will most likely be changed once it gets on the road/track again), adjustable front top mounts, modified Sparco cage, Eibach front ARB and a through-beam rear ARB.

I would seriously recommend a full cage, not just for protection in a crash but stiffening the shell up, there's pictures on here somewhere of a B-pillar that cracked due to a stiff suspension setup.
Lowering a bucket seat which requires cutting the floor a bit and a decent harnesses should prevent you from hitting your head. All depends how serious you are on going as fast as possible.

Look into upgrading the diff to a plate or ATB unit if you have loads of cash to burn, plenty of reports of the improved cornering with one fitted.

Back to the spoiler idea, probably worth looking into some books on aerodynamics, or university papers from formula student etc.
 
How did the V1's work out for you? How is the Avo different? Do you have coilovers at the rear?

This will always be a road car for occasional track use or hard mountain touge. The suspension has to be supple enough to handle bumpy roads so that I can go places. The cabin will remain trimmed. I am willing to lower the seat but I don't want to have the steering wheel any higher as a result. I think I could drop the wheel by 2 cm.

The cage is controversial. I think I could live with a roll bar with door extensions to the front of the floor pan. Not as stiff as a whole front section but I don't think a cage without A-pillar welds would stiffen the chassis that much more, would it?

I love the idea of a Quaife diff but from what I understand it makes the steering heavier and the current steering effort is the maximum what I consider acceptable. Electric steering could be an option but not at the cost of diminishing the feel. I would have to test drive such a Cento to know for sure. I didn't come across any satisfying opinion on that.

I could use a deep analysis of the Delta. Then just take a scrap boot lid, weld a piece of metal to it at 70 degree angle and test it at the next track day. I could also do old school aerodynamics - fit a smoke flare to the car or use the string method. If that proves successful then make a final version nice and proper.
 
Last edited:
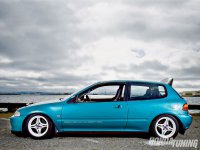
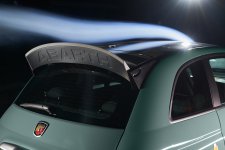
I've read about the ducktail type spoilers (which the Delta Integrale spoiler classifies as) and it looks like a viable option. It should give good results on autocross at slower speeds. This type of spoiler gives high downforce at the cost of high drag so it will be a good idea to mount it on brackets like in the Delta to allow high angle of attack or zero angle of attack to be set depending on the situation. The plus point of utilising it in a hatchback is that the spoiler will sit in good, non-turbulent airflow at the end of the roof. Since I plan on installing the rear ARB which reduces grip this spoiler should be a good addition and countermeasure.

The brackets can be cut using CNC but the biggest problem I see is making the actual wing. Either mill it from a piece of aluminum or 3D print or make wooden forms and try my luck with fiberglass and resin. Which do you recon would be the most affordable in terms of cost and time? If I'm going to do this I take into account that I might want to make a few sets for potential buyers.

honda-civic-hatchback-v-1992-models-209920.jpg1.jpg2.jpg3.jpg
 
Last edited:
Which solution is most affordable depends on what your skills are and who your friends are...

Billet aluminium sounds cool but requires CAD skills, a large CNC milling machine and a **** load of very expensive time if you're paying for it - just a billet blank that size would run into several hundreds of £'s. It would be pretty heavy too unless you did some serious and time consuming hollowing out.

3D printing is a good option if you know CAD and have access to a printer. There aren't many 3D printing machines around big enough to build in one piece so it might have to be printed in sections.

The classic DIY option is to carve your shape out of P.U. foam then cover with fibreglass or make a silicone mould of it so you can produce more than one. Not that difficult or expensive, just dusty and stinky and very time consuming.


The spoiler you have already (I have the same one) has a separate aerofoil shaped 'bar' running left to right between it's two 'endcaps' that attach it to the car - how about cutting the bar from the endcaps then reattaching it with metal plates on the cut faces that have a hinge pin through them that will allow it to swivel upwards when needed. A few location/adjustment holes on the metal plates would lock it in the desired position. Does that make any sense..!?

I've recently taken my spoiler off to re-shape it a bit so it has more of an upward kick, not as extreme as you want but there is actually quite a lot of spare material on those spoilers - I reckon you could probably get a fairly steep angle just by carving and shaping/filling the one you have.
 
I think I could handle fiber glass. The idea about modifying the spoiler that I own is not a bad one but only for the purpose of making a prototype. This will be a custom part so I don't want any limitations. I believe the only way to get any result from this exercise is by making the spoiler crazy steep like in the Delta.

The biggest problem I see is making a mould that will be symmetrical and reusable. I have no experience in this matter but I guess I could design the spoiler in CAD, 3D print a prototype from plastic and make a mould based on that but out of which material I have no idea. Any tips?

On a side note: can you elaborate on the effect of having a rear ARB in your car? How did the car's behavior and feel change?
 
Last edited:
Phew, where do I start...

I've been trying to think of positive suggestions that won't put you off; I'm finding that quite hard.

I have a lot of profesional experience with mould making/resin casting and I have to say, it definitely falls into the category of "a dark art" - there are tips and tricks and knowlege that apply to each individual project that can only be learnt through years of experience. Add to that, the possibly infinite ways/options/methods to achieve your goal and things start getting very complicated. Every person with experience you consult on a project like yours will have a completely different personal solution to the problem.

So, without knowing your particular skills/facilities/buget/designs I couldn't recommend 'the' way to do it but can suggest a couple of likely ways...

If you know CAD then 3D printing is a great way of getting the design and symmetry perfect. With a well designed internal structure and the right material choice, theres no reason why you couldn't finish, paint and fit the print straight to your car - no need to mould and cast. Drawbacks here would be (unless you can get a 3D scan, in which case, I'm intersted in that data...) the difficulties of designing it without knowing how it looks, feels and/or attaches to the car before you've paid for it to be printed - expect to make 2/3 prototypes before you are happy.

With your CAD data you could also have it machined (routed) out of a dense P.U. foam - much lighter, faster, cheaper than milling billet ally. The first unit will involve set up time so be more costly but an order of ten+ would reduce unit cost considerably.


For moulding extra units, however you construct the original, (personally, I would hand carve it on the car - that's the only way you can see/feel it from all angles in relation to the real car in the real world) you'll need to make a two part mould with a silicone core and glass fibre jacket for stiffness. There'll be youtube videos on this I'm sure. It is not a simple, quick, easy or cheap process for a beginner.

You could then cast a two part expanding P.U. foam (this is how your existing spolier is made) into the mould to produce copies. Once youv'e got to this stage you'll be popping one out every 15 minutes for a few £'s worth of resin.


Other tips: All resins, particularly GRP/polyester (5-7%), have shrink rates that need to be taken into account... Most industrial suppliers of resins/silicones/foams have helpful technical deptartments who can advise on material hardnesess/densities/properties - talk to them. Buy three times more material than you think you need - you will f**k up your first attempts and the larger containers are much, much, much better value per kg.

If I were you, I'd buy a block of medium/high density P.U. foam and carve it on the car, seal with polyester or polyurethane resin then paint and fit it - worry about moulding it afterwards if you get enough interest.


I've got my rear ARB on it's mildest setting - within a mile of test driving, I realised the balance had shifted (front roll now relatively too soft..) and I was gonna need a thicker front ARB to make full use of the rear one.


N.B. If anyone reading this knows of a Novitec/Eibach thicker cento front ARB for sale, please let me know!

Generaly, the car turns in better, has less understeer, less roll, and you can feel the rear playing it's part not just coming along for the ride. I can now get it to lift off oversteer if I really try. It feels like I when I used to have adjustable dampers and I wound up just the rears super stiff - same effect but without the crashy ride - it's a road car and my local roads are terrible. Because the front ARB is now relatively soft, the outside front wheel is digging in and the inside rear is cocking up and locking up under hard cornering+braking, causing my spin.


A thicker front ARB will be the last thing I do to interfere with my suspension I swear - I can then move the rear up a notch and it'll be perfect..!


t.
 
If I were you, I'd buy a block of medium/high density P.U. foam and carve it on the car, seal with polyester or polyurethane resin then paint and fit it - worry about moulding it afterwards if you get enough interest.

Now that is a post of the month! Thank you for your insight.

I think I will do as you proposed in the quote above. It should be relatively straight forward and cheap to carve out a satisfying shape this way. Being able to verify it against the car as I go along will also help tremendously to design the supporting brackets. Then 3D scan the result, correct it in CAD and as you said, worry about production. Makes sense.

What parameter PU foam should I look for?
 
Last edited:
blu73: I'm a designer/modelmaker/setbuilder in the film a tv industry, so have had to use just about every tool and material you can imagine over the years: need a six foot remote controlled toblerone with arms and legs that will explode in the final scene? come to me...

You know where I am - I'm always happy to drink beer and give free advice!


Not sure you'd want to pay me though - the hours it takes to do one-off custom stuff is frightening when you're paying someone else to do it: I added up the hours I put into my front bumper alone to over a hundred; imagine paying the going rate for that...
 
P.U. foams come in a massive range of densities. You are balancing weight and strength and workability - low density is lightest and easiest to carve, shape and sand but more fragile when it's on the car; very high density is virtually solid, very heavy and hard to work by hand, more expensive too.

A reasonable compromise would be somewhere around the 80-90kg/per metre cubed range.


Something like this: https://www.easycomposites.co.uk/#!...ing/high-density-polyurethane-foam-block.html


Suppliers will send you (for free if you sound like a potential big business customer..) sample blocks for you to dig your finger nails into.

The best option is to find a supplier you can visit in person - they'll be able to advise and you'll be able to pick pieces up to get a feel for them, they are also likely to have off-cuts that they'd sell you cheap for cash.

You're looking for composites suppliers to the tool/prototype/model making industries, not people who sell foam insulation products for housing. It's different stuff with different qualities.
 
I only plan to use it for prototyping, a finished product will have to be made out of very durable material because of the dynamic air pressure it'll be subjected to.
 
Last edited:
Back
Top