AIB_0331.jpg

Panda APY joins the fleet

Introduction

I was looking for something to use while Scrappy (1988 4X4) is having work done that I don't want to rush (headlining out, DAB aerial, new drums, discs and wheel repaint) and found APY over in Harwich.

41k and FSH with all additional bills, mine!

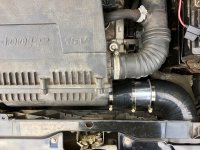
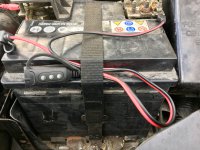
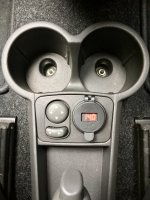
There may be some little 'jobs' that this one needs, but nothing to stop the fun / aircon / bluetooth until Scrappy is upgraded :D

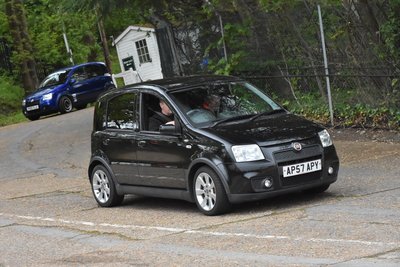
APY clean and tidy and making his first appearance at Auto Italia...
  • Like
Reactions: Kung Fu
Job one: Manky knob

300 grit sanding to provide a key

Plastic primer for stickiness

Grigio 683 (borrowed from APY's older 4X4 cousin) + Clearcoat
 

Attachments

  • 300 grit.jpg
    300 grit.jpg
    2.1 MB · Views: 44
  • Plastic primer.jpg
    Plastic primer.jpg
    894.2 KB · Views: 43
  • Paint and clearcoat.jpg
    Paint and clearcoat.jpg
    2.2 MB · Views: 52
Job Two: USB power

I don't need a cigarette lighter, I do need power. While shoving a convertor into the cigarette socket was an option, I wanted something that looked a little more OEM and was reversible.

Less than a fiver later, with a multimeter and crimp tool in hand, I did this...
 

Attachments

  • USB power.jpg
    USB power.jpg
    2.5 MB · Views: 54
Job Three: More noise

Reading through the forum, the Cooperman mod seemed pretty popular and I liked the growl the little 100HP made, so I did some shopping on eBay.

A week later, after 30 minutes of cutting and shutting, I have new shiny bits in the engine bay.

As the car may be sat for a while (I work away a lot) I added a CTEK charge lead with indicator to keep the battery at peak charge,
 

Attachments

  • Cooperman.jpg
    Cooperman.jpg
    3 MB · Views: 45
  • CTEK.jpg
    CTEK.jpg
    2.9 MB · Views: 43
Loving the work so far. Have you any more details on the cigarette lighter conversion, that's an inspired idea that I quite dance doing myself.
 
Loving the work so far. Have you any more details on the cigarette lighter conversion, that's an inspired idea that I quite dance doing myself.

The socket came from Amazon Universal Waterproof Dual USB Charger Blue LED: Amazon.co.uk: Electronics It fits the hole left when you take out the cigarette lighter perfectly. It comes with a couple of blade connectors, among other options. I've used one on my classic 4X4 and it works perfectly

The centre (cigarette lighter plug) wire is the +ve, I used the black -ve and left the other wire connected to the original plug. Battery negative disconnected, it took less than 20 minutes. (y)
 
Last edited:
The socket came from Amazon Universal Waterproof Dual USB Charger Blue LED: Amazon.co.uk: Electronics It fits the hole left when you take out the cigarette lighter perfectly. It comes with a couple of blade connectors, among other options. I've used one on my classic 4X4 and it works perfectly

The centre (cigarette lighter plug) wire is the +ve, I used the black -ve and left the other wire connected to the original plug. Battery negative disconnected, it took less than 20 minutes. (y)

Neat but how do you power the electric tyre pump?
 
Cheers for the info P1nky, I will have a go at this mod. Looks to be a far better idea than my current tangle of wires.
 
APY was rewarded for transporting me + 2 to Auto Italia with a USB upgrade to add a (discrete) voltmeter. Now I can check on my battery health without popping the bonnet :D
 

Attachments

  • APY voltmeter.jpg
    APY voltmeter.jpg
    2.8 MB · Views: 39
I looked at the voltmeter versions after you posted the Amazon link, but have opted for a simple version to start with (just waiting for it to arrive)

What do you think of the voltmeter?
 
I looked at the voltmeter versions after you posted the Amazon link, but have opted for a simple version to start with (just waiting for it to arrive)

What do you think of the voltmeter?

It's quite useful for a quick check. I'm pretty sure my battery is past it's best (I think it's still the original one). APY's one of four I use, so I like to keep them ready to go.
 
APY's rear badge was a little manky anyway, but after a bit of poking it came off :mad:

Some 800 grit, satin black vycote and No More Nails later, it has been updated in a matching shade of black. Now I just have to make the front one match...
 

Attachments

  • Rear badge before.jpg
    Rear badge before.jpg
    3 MB · Views: 32
  • Rear badge after.jpg
    Rear badge after.jpg
    1.6 MB · Views: 26
Back
Top