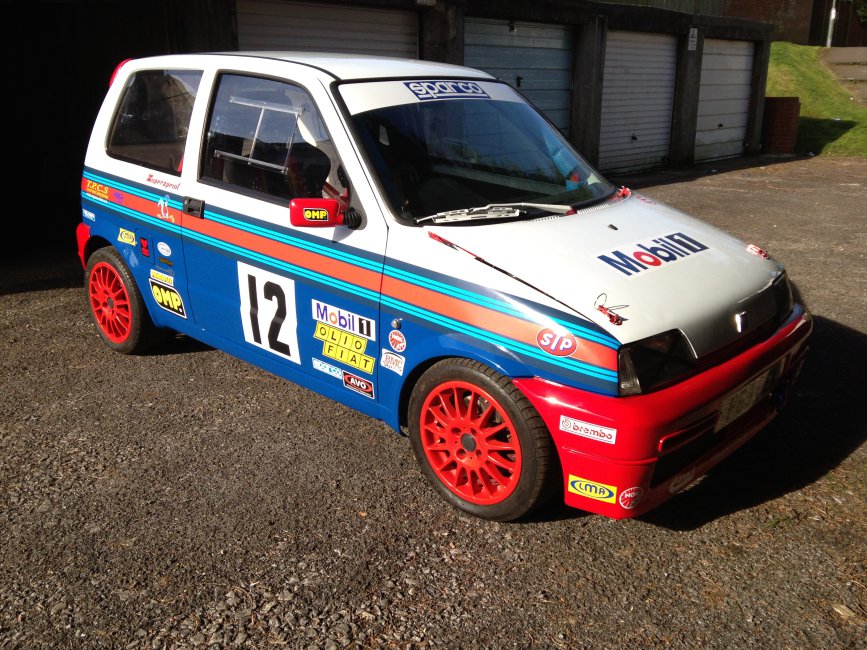
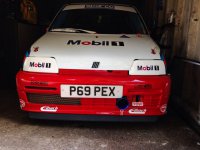
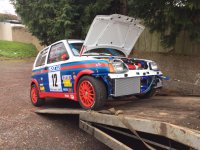
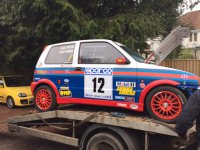
IMG_1196.JPG

Cinquecento My Project Track Car PEX

Introduction

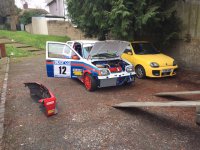
Hi all I have been on here for a while and thought it was about time to post a few pics.
To many he is known as PEX and has been my project car that has been going on forever due to a tight budget.
Have done a load of work to it since I first bought him in 2008 when it was a stock gunmetal Cinquecento sporting.

Here is what I have done so far.

Suspension

1) Powerflex polyurethane bushes front and rear.
2) Eibach uprated anti-roll bar.
3) Avo coilover adjustable suspension front and rear.
4) Front top Sparco strut brace.
5) Lower front OMP strut brace.
6) Rear strut brace.


Engine Mods

1) Running a P60 SPI
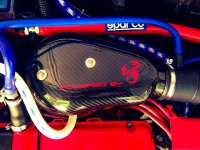
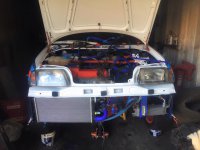
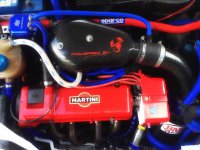
2) Complete cloosed forced air induction system which is a carbon
Dexcraft bob with carbon pipe with Samco reducer onto a BMC carbon
can with filter with intake in the front bumper.
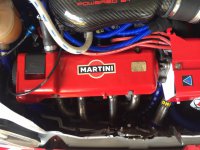
3) 4-2-1 Stainless Supersprint manifold.
4) Decat Power flow stainless exhaust system.
5) Ecu McCritch Chip.
6) Magnacore KV85 V5 Ht leads.
7) ‘Tricker’ 40mm Throttle Body, replaces the stock 30mm throttle body.
8) NGK spark plus.
9) Ported and polished inlet manifold and bellmouth outlets.
10) Samco engine silcone hoses.
11) Alloy oil catch tank.
12) Mocal oil cooler.
13) Seicento coolant tank.
14) P75 866 cam.

Shell/Chassis/Body

1) Lightened Shell due to weight reduction, Stripped out the inside of the
car, Dashboard still inside nothing else (no rear seats, brackets, seat
belts, soundproofing, headlining).
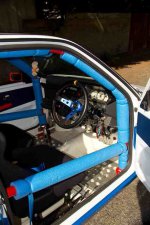
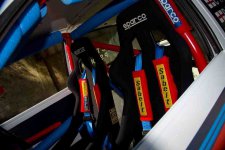
2) 2 x Sparco Sprint bucket seats.
3) 2 x Sparco 3 point race harnesses.
4) 6-point full OMP roll cage, bolted and welded.
5) Black flocked clock surround
6) Lightweight Alloy race fuel tank
7) Panda front single wiper.
8) Full set of polycarbonate windows with front window sliders.
9) Roof spoiler.
10) Quick release front bumper.
11) Bonnet on bonnet lifters and pinned.
12) Painted in two pack paint.
13) Plumbed fire system.
14) Pull cable power kill switch.

Brakes / Wheels

1) Punto GT caliper conversion at the front.
2) Brembo Motorsport drilled/vented discs for a Punto GT on the front
3) Black diamond predetor pads
4) DJ alloy wheels (rare) 175-50-R14’s
5) Falken tyres on 195-45-R14’s.
6) Locking Wheel nuts.
7) Goodridge Braided Hoses at the front.
8) Goodridge Braided Hoses at the rear
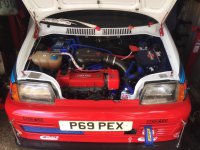
This is how the engine now looks all back together with all the refurbished and new parts and I can say that it is all worth doing even if it did take ages to do.
Every little detail makes it look good.
 

Attachments

  • 12805731_10153946746349043_9015934108911588974_n.jpg
    12805731_10153946746349043_9015934108911588974_n.jpg
    66.7 KB · Views: 53
  • 13010776_10154075577299043_817684491677460390_n.jpg
    13010776_10154075577299043_817684491677460390_n.jpg
    80.3 KB · Views: 64
  • 13173689_10154113034184043_8104761410156695947_n (1).jpg
    13173689_10154113034184043_8104761410156695947_n (1).jpg
    75.7 KB · Views: 48
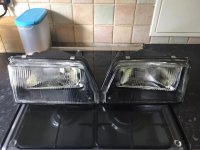
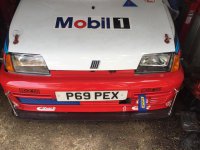
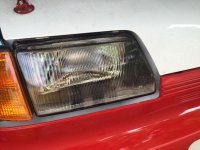
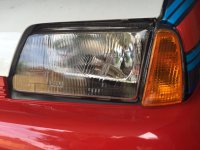
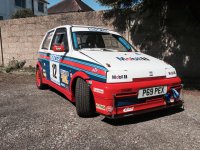
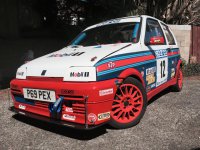
The way I have done PEX is in early 890's retro race style so I ditched the clear indicators and got the orange ones and bought two new headlights to finish it off.
 

Attachments

  • 13312628_10154180501494043_73007717743368959_n.jpg
    13312628_10154180501494043_73007717743368959_n.jpg
    75.6 KB · Views: 46
  • 13413021_10154180501549043_5167264063159519013_n.jpg
    13413021_10154180501549043_5167264063159519013_n.jpg
    84 KB · Views: 58
  • 13233146_10154126752984043_4259392022440683021_n.jpg
    13233146_10154126752984043_4259392022440683021_n.jpg
    87.7 KB · Views: 48
  • 13344738_10154180501564043_7769456236355358496_n.jpg
    13344738_10154180501564043_7769456236355358496_n.jpg
    78.4 KB · Views: 53
  • 13322091_10154180501569043_7318457142576393529_n.jpg
    13322091_10154180501569043_7318457142576393529_n.jpg
    78.7 KB · Views: 56
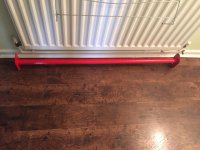
Thanks to my good friend Robert Leadbeater he made this read brace for me so that I can wrap my harnesses around it and his work is No1 so really happy for PEX to have some of his work in the car.
I have painted it in red Hammeright smooth.
 

Attachments

  • 14937373_10154634723819043_5664089232493575716_n.jpg
    14937373_10154634723819043_5664089232493575716_n.jpg
    72.2 KB · Views: 52
Looks great! Need some action shots now

My only concern is that harness bar....I hope it doesn't happen but in the event of a big crash, with two people in the front, all the force from the four shoulder straps is going through 4 fairly small bolts (can't remember the size??) As a shear force (n)

weld a bar into the cage.

That is a good point I don't know how to weld but I will pay my mate to do it that way it won't budge.
 
Can't remember if your cage is gusseted to the shell or not but if not it would certainly help some to bolt that bar in and then weld to cage to stiffen the back end up (y)

simply cannot wait to see Pex in the metal!

The cage has been bolted and welded to the car so he is very rigid I will get the rear bar welded as well.
|I will be going to Brooklands this year.
 
Hi Leon and thanks for liking him he has taken many years to get him into what I want him to look like. I have paid a lot of attention to every detail to get a retro motorsport look.
The splitter I made last year as I had a MK1 golf splitter on there and again it was to have a part on there made of carbon that no other cinqs have had.
I was thinking about making a few but they are pricey to make but it looks good.
 
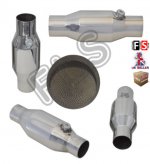
This week I had to buy a sports cat as my mate said there is no way PEX would pass the MOT without it so I had a look on eBay and found it so £85.00 lighter it arrived and that went straight down to the garage.
It is a 200 cell cat in stainless steel and I was told by the chap at the garage that it will pass the MOT fine with it but won't restrict the flow like most standard cats as it is only 200 so I am happy with that.
 

Attachments

  • s-l500.jpg
    s-l500.jpg
    30.2 KB · Views: 39
I will be going to Brooklands this year.

Everyone goes to Brooklands and i have never been able to go :cry: Its always right near the mrs' birthday which is also near the anniversary of her sisters death and this year also right near my wedding... one year i will make it damn it!
 
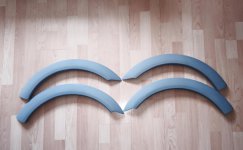
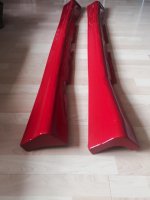
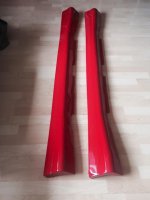
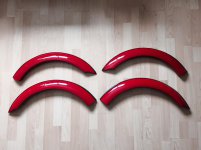
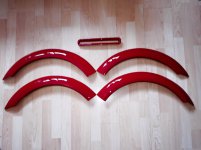
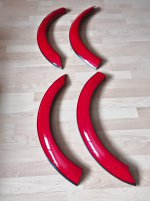
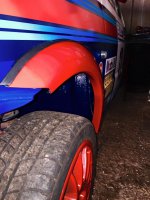
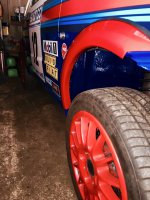
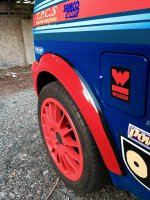
I decided to buy a set of sideskirts and a wide arch kit off ebay so it adds a bit more shape to PEX and bought some Tigerseal and a few metres of rubber U piping.
 

Attachments

  • 1939991_10153067614454043_4531419733292961709_n.jpg
    1939991_10153067614454043_4531419733292961709_n.jpg
    41 KB · Views: 43
Everyone goes to Brooklands and i have never been able to go :cry: Its always right near the mrs' birthday which is also near the anniversary of her sisters death and this year also right near my wedding... one year i will make it damn it!

Well I will have to hope they do another show later so you can have a look and see what you think.
The Mrs always has to come first and good to hear that you are going to be tying the knot.
 
I then sent the parts to my mate who resprayed PEX in his race colours and he sprayed him in two pack.
i also got a spare bumper vent done at the same time as I modified the bumper vent and made it active so that it would cool the oil cooler.
I wanted them to be painted in the same red that the bumpers and rear spoiler were painted in and it matches the red, white and blue theme that goes with the Martini and Mobil 1 colours.
 

Attachments

  • 11138551_10153144530149043_3680038860782457564_n.jpg
    11138551_10153144530149043_3680038860782457564_n.jpg
    33.2 KB · Views: 34
  • 11110877_10153144530099043_5741767862956492836_n.jpg
    11110877_10153144530099043_5741767862956492836_n.jpg
    32.5 KB · Views: 39
  • 11072174_10153108413179043_204721760834656011_n.jpg
    11072174_10153108413179043_204721760834656011_n.jpg
    51.2 KB · Views: 32
  • 11052015_10153090534869043_8002730915918527934_n.jpg
    11052015_10153090534869043_8002730915918527934_n.jpg
    50.8 KB · Views: 34
  • 10409249_10153108413244043_5769302269164325392_n.jpg
    10409249_10153108413244043_5769302269164325392_n.jpg
    51.1 KB · Views: 37
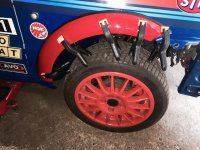
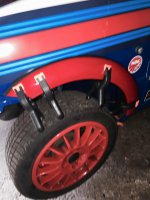
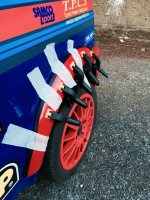
Once they were back from paint I cut the rubber U piping to the length of each arch and put a small amount of Tiger seat on the edge of each arch then applied the U piping.
When that had set I then put more Tigerseal to the rubber piping that will be connected to the cars body and clamped them until they had all set.
 

Attachments

  • 11058795_10153109884769043_6205258621874369417_n.jpg
    11058795_10153109884769043_6205258621874369417_n.jpg
    89.9 KB · Views: 48
  • 11041670_10153109884959043_7053122469525740192_n.jpg
    11041670_10153109884959043_7053122469525740192_n.jpg
    60.8 KB · Views: 35
  • 11058396_10153108413744043_4862529105058441601_n.jpg
    11058396_10153108413744043_4862529105058441601_n.jpg
    136.5 KB · Views: 33
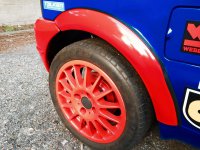
Once it had bonded to the car I took all the clamps off and was happy on how it looked and that the arches fitted the car very snug.
 

Attachments

  • 10422251_10153108413459043_882993322552236974_n.jpg
    10422251_10153108413459043_882993322552236974_n.jpg
    115.9 KB · Views: 37
  • 1907605_10153108413344043_2094561426881727938_n.jpg
    1907605_10153108413344043_2094561426881727938_n.jpg
    104.6 KB · Views: 41
  • 1604451_10153112184429043_2093266650286486342_n.jpg
    1604451_10153112184429043_2093266650286486342_n.jpg
    82.6 KB · Views: 38
  • 11356_10153112184239043_8326100314205236432_n.jpg
    11356_10153112184239043_8326100314205236432_n.jpg
    88.9 KB · Views: 42
Then I put the sideskirts I put these on by using Tigerseal and self tappers.
I think it really does look good and choosing this kit was important as I wanted a kit that wouldn't look out of place on a track car and not a boy racer kit.
It is a very good quality kit and there is no need to trim or modify them to make it fit.
The sideskirts actually have slots that slot into the arches.
 

Attachments

  • 11136724_10153167851554043_4211058281997718782_n.jpg
    11136724_10153167851554043_4211058281997718782_n.jpg
    148.6 KB · Views: 51
  • 10923442_10153167851449043_5985285168147263583_n.jpg
    10923442_10153167851449043_5985285168147263583_n.jpg
    124.6 KB · Views: 56
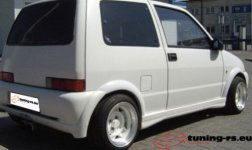
Should any of you want to know where I bought the body tit from I have listed it here to help.

For the arches I got from ebay traders tuning-gt and the side skirts from tuning-rs
 

Attachments

  • s-l500 (1).jpg
    s-l500 (1).jpg
    20.8 KB · Views: 49
  • !B-Ndu0wCWk-$(KGrHqR,!igEzNvSe,jtBM8C3NYBEQ--0_12.jpg
    !B-Ndu0wCWk-$(KGrHqR,!igEzNvSe,jtBM8C3NYBEQ--0_12.jpg
    20.4 KB · Views: 47
Last edited:
Looks good(y)

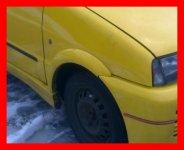
I've got the hormann narrow and wide arch kits, so I will be using the wide kits arches and rear bumper and the narrow kits skirts. Will end up looking very similar:p
Still need some track pictures
 
Back
Top