PA300484_2.jpg

Bravo (Classic) Fiat Bravo HGT 155

Introduction

I've not been in a Fiat for quite some time now. Had a brief stint in a MK1 Punto Sporting around a year ago but that didn't end so well...

Following on from this thread : https://www.fiatforum.com/bravo-brava/331170-my-new-hgt.html .. A few weeks ago I left work to catch a train to Carlisle where I met F1ANG (and his puppy :D) only to drive away half an hour later in yet another Fiat. Number 25 infact...

PA300484_2.jpg

IMG_0199.JPG

PB090424.jpg

PB150466.jpg

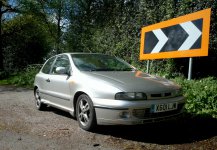
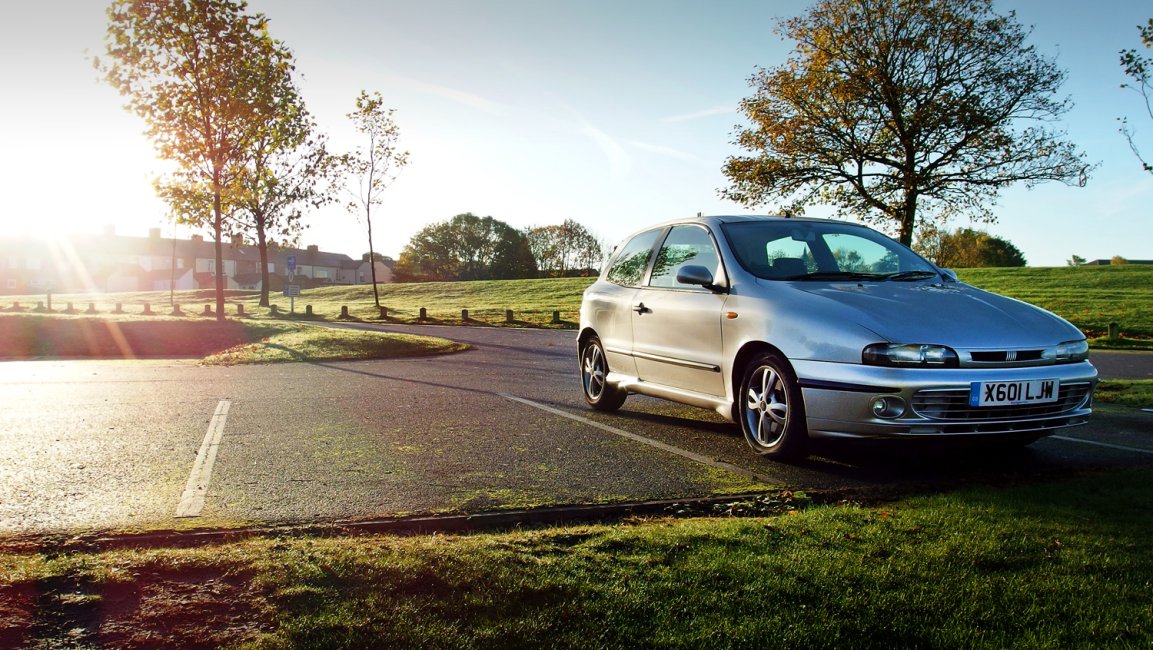
It's a Fiat Bravo HGT 155, pretty much as it left the factory. Obviously well looked after by F1ANG and previous owners. Lovely car to drive and that 20v, 5 pot sound is just glorious.

There's a few bits and bobs I want to sort, namely the handles (typical perished affair) and this and that. Today I set about replacing one fault, a broken check strap.

PB150449.jpg

Interesting how it was broken. The mount on the chassis itself was snapped in 2 with the check strap itself pushed right in. I ordered up a replacement part from ebay (used) which arrived yesterday. Day off today so set about getting it swapped...

PB150458.jpg

Old strap out. Actually seems to be in good condition. Cleaner than my replacement but something must have caused the mount to snap so I ditched it regardless...

PB150463.jpg

Replacement strap ready to go in...

PB150464.jpg

And there we go! All done and the door now holds itself open, which is nice :) Shame it came off a car of a different colour. Should have sprayed the mount before fitting actually but never thought to :bang:

I'll keep this thread updated as I go and hoping to get to some events and meets soon. Most likely be at the usual bigguns next year (y)
Day off, the suns out, what else is there to do except finally fit those door handles :idea:

IMG_20140411_113431.jpg

The condition of the old handles. Looking pretty shabby. The previous owner removed the rubber from around the key section as it was so poor, leaving only the rubber on the handle section.

IMG_20140411_115902.jpg

After lots of fiddling and swearing.. No handle!

IMG_20140411_135842.jpg

After lots more fiddling and swearing.. New handle!

P1040272.jpg

P1040273.jpg

P1040274.jpg

Car and cat on the drive :D

So finally, after having them sat here for 4 months, they're done! Told you I would do them eventually :p

Bit of a downer after fitting though. I rolled the car back down to the flat section of the drive and noticed a small patch of fresh oil on the drive :bang: .. Quick look under the car and there is a small patch of pooling on the bottom of the gearbox. Sump is bone dry so I'm assuming coming from the join between the gearbox and block. (n)

I checked the oil (probs first time in over a month) and it's still on the level I recall it being last time I checked. Also I've checked the road area I usually park (and where the car was parked prior to putting on the drive) and there is no oil there. There is also no new patch under the car after being rolled down the drive onto the flat section :rolleyes::confused:

Oh well.. I've cleaned up the bottom of the gearbox as best I can and will keep an eye on oil level and the condition of the bottom of gearbox and tarmac under where I park, see if I notice it again :cry:
 
sounds like rear crank seal, or its housing, or both. Bit of a nightmare job really - not hard as such but anything that involves dropping the gearbox and flywheel off is considered a nightmare in my head. Of course it could just be from the sump up that edge but sods law states it will be the harder more involved job :shrug:
 
Bit of an update for the Bravo.. Been a very hectic week :(

First off I decided I would do an oil change on the old girl. Realised I had been topping up with the wrong grade (5w30) and I had no idea what was in it already or how old it was.

IMG_20140426_192618.jpg

Old oil drained, new 10w40 semi synth oil and filter in... sorted (y)

That was the easy bit though. Ever since I've owned the car, the windows have misted up when having the heater on. It's always only been minor so I just ignored it, but the last 2 weeks it got a lot worse. Windows misting instantly when the heater came on and the smell of coolant flooding the car :yuck: ... Heater matrix time...

I wasn't really looking forward to the job as the only other time I've replaced heater matrix is in a MK1 Punto... A job that required removing the entire dashboard and heating system to do it... Fortunately, Fiat thought about the design on the bravo and luckily, there's a little hatch in the drivers footwell to access the matrix :worship:

IMG_20140504_181257.jpg

Old matrix out next to the nice shiny new one (y)

IMG_20140504_190721.jpg

New matrix in it place, all plumbed in. As easy as the hatch is to access, it's a bloody fiddly job. Very little room to move down in the footwell (n)

I refilled the cooling system with fresh coolant and bled the system. All good to go until ... :bang: Spotted a drip coming from the back of the car :bang::bang::bang:

Under further investigation, it was slight petrol coming from what appeared to be a join in a fuel hose coming from the tank :bang:

IMG_20140504_201004.jpg

^ that one to be specific. My first thoughts was that the leak was coming from the join. I thought it odd that there was no clip securing the join so I assumed it must have worked it's way loose over time. Attempts to push the join further together didnt get me very far so I attempted to fit a jubilee clip to see if it would seal the join... :bang: Nope.. made it worse... much worse...

IMG_20140505_194106.jpg

Not much I could do at this point but sit back and let the fuel tank drain... I had only just brimmed it the day before too (n)...

About 15l later and the leak stopped. The level in the tank dropped below where the hose joins the tank... Nothing else to do now but get the hose off and see what I could do...

IMG_20140507_184504.jpg

The offending hose... Wasn't the join afterall... the hose had been rubbing on the ARB for so long that it had worn the wall down and created a hole :bang:

I decided it would be best to just replace the whole hose so I purchased a length of fuel hose and plumbed it in this evening..

IMG_20140507_200850.jpg

New hose attached at the fuel pump end

IMG_20140507_202628.jpg

New hose attached at the tank end, and routed differently this time to avoid the ARB as much as possible :D

Been out for a shakedown run this evening and all seems well. No petrol leak and the heater in the car works a treat. No misty windows or stinking coolant! :yuck:

Been meaning to get out and get some nice piccies of the HGT too at some point but I just never seem to have the time, or when I do, it needs a clean... I did get this pic the other week near my work though when my HGT met it's younger, lowerspeced brother :devil:

IMG_20140423_082604.jpg
 
ah yes, i remember you saying now.. I was thinking about getting a bravo 155 as a daily the other day, one has come up really cheap on ebay but its a bit of a mission away to get a car without tax and mot. Is the only one i can find anywhere though - rare as you like it seems bearing in mind how many bravo's you saw back in the day. I guess they are getting old now, older than they look!!
 
No update on the car really..

The new fuel line is spot on. No leaking or petrol smell after a run (y) Looking to replace the rear disks and pads soon as they've started squeaking on runs and doing my head in :bang: The rear disks look like they've seen better days anyway :p

Quick photo of the HGT today after a blast at the jetwash..

IMG_20140518_184701.JPG
 
Day off today and luckily the rain has held off so I decided to fit the new rear discs and pads I ordered the other day. Full set of Mintex parts.

The old discs and pads were starting to annoy me with squeaking so it was time. I never quite realised just how worn they were though until I removed the wheel...

FT010498.jpg

FT010490.jpg

I also noticed something else.. Nothing much of a concern but frustrating none the less... Spot the odd one out...

FT010499.jpg

Yup, a steelie bolt holding my alloys on. I've not checked the fronts but it needs to be replaced. I imagine there will be a good few rolling around in the garage at my mums house considering the number of Fiats I've taken apart or broken there :D

After much swearing and hammering, the old discs came off.

FT010504.jpg

They took a proper battering to get off. Like they were welded on!

FT010507.jpg

Side by side, old discs and pads with the new. The old are badly scored and pitted and whilst the pads have a lot of friction material left, they are unevenly worn and pretty much scrap. Looks like the pads were replaced without new discs at some point in the past.

FT010502.jpg

Henry came to join me whilst fitting the new bits :D

FT010509.jpg

£32 for a fancy tool from Halfords I'll probably never use again... I did try first without the tool but couldn't turn and apply pressure at the same time so gave up and bought the part :bang: Ah well.. Something to add to the collection of useless and expensive specialist tools in my shed :D

FT010511.jpg

All done and looking great! As is the car ...

FT010519.jpg
 
good work, when you finally finished replacing the rest of the car for new bits you can sell it to me if you like ;)

And for the record, new pads and leaving discs is acceptable so long as the disks are ok and you bed the pads in gently. The other way, changing discs and not pads, thats what is not acceptable maintenance. But it is of course best practice to just change both when you consider how cheap discs for a normal car are.
 
Well.. an update! The first mod to the car. Nothing too extravagant but a nice personalized touch...

My missus has an embroidery machine which she uses for her business. I'm a bit handy with it so thought I would have a play :D

hgt3.jpg

Quick something based on the 90s Fiat logo but in red with HGT across it. Intended originally as a red fill for each square and black outlines but after a test run on some scrap, I wasn't feeling the block red so ditched it for a red outline instead...

hgt1.jpg

Fresh off the machine. Appologies for the crap quality pics. Phone not up to much in the dark :bang:

hgt2.jpg

And all back together. One HGT embroidered rear head rest! .. Second rear is on the machine currently and will look at the fronts another day. Can't even work out how to get them out of the car at the moment :D


If anyone wants something similar doing, drop me a line :)
 
Sooooo... Bit of an update. Been a while :)

Mostly just been driving the Bravo since Stanford Hall. Not missed a beat as usual but the dreaded MOT was due at the end of August and sadly, it failed :cry: Leaky front shock absorber, warn front ball joint boots, worn rear bearing, corroded front brake pipes and it needs a bit of welding somewhere at the back.

Suspension stuff no probs. Bearing, no probs but brake lines and welding, well, I can't weld and i'm not a fan of brakes so would prefer not to touch them.

The garage gave me some outlandish figure for the work so I decided I would buy the parts I could and fit myself. I will, however, have to put it in the garage for the brake lines and welding, which is going to set me back around £2-250 depending just how bad the area that needs welding is once they start cutting metal out. :bang: After pricing up the parts I can buy and adding on the garage costs, i'm looking at around £450ish to get the Bravo through the MOT...

I did initially think I would break the car or would sell as a whole and reluctantly listed it but backed out pretty quickly as I don't really want to part with the car...

Orders all the bits ...
bearing.JPG
View attachment 143257
shock.JPG
wishbones.JPG

And then I decided it was all still a waste of money so listed it for sale again.. and very quickly backed out...

I'm still unsure what to do but with a free afternoon today, I decided I may as well start fitting the bits I bought for it.. Starting with the front shock absorber...

1.JPG

2.JPG

The cat had to supervise behind a protective screen :D

3.JPG

Always handing working on 90s Fiats...

4.JPG

5.JPG

New shock with the old complete shock, ready to swap all the bits over...

6.JPG

Swapped!

7.JPG

And in!

Next time I get a chance, I'll get the wishbones changed, and probably put it back up for sale again in the mean time... :rolleyes:

I did get a great deal on a monthly bus pass though.. I feel honored to be a monthly subscriber to the loser cruiser once again. Bloody fiats.
 
Last edited by a moderator:
There is connectors in front of the rear subframe for the brakelines.

I changed them myself on 155 Weekend with readymade pipes + one gender swap (legal as there is connector, making your own connector where has not been one is illegal).

Old ones had to be cut to get hex socket on the corroded connector, vicegrips holding on the other part as brakelinetools were loose on the corroded connectors...
Also heated the connectors with mini torch and discovered brakefluid burns with green flame.


Also welded under the seats but I got MIG here so its not an issue for me.

But gotta say that looks pretty rusty, even more than mine, which is suprising as they salt the roads here.
 
Back
Top