
Introduction
Hi All,
After over 2 year on this forum I've finally decided to set members motors thread for my Panda as I'm currently doing some body works.
Some of them may have some benefits to other forum users, and it will be a bit easier for me to ask an advice.
As some of you know as seen my Panda personally it is not bad example, but as most of them she is not perfect.
On the last MOT test this June I've been told by the tester that there is small rust hole at the inner sill/ floor recognized as an advisory.
So, lets have a closer look....
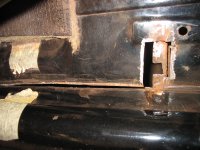
At that time I was aware of small (20mm) outer sill bottom edge flange missing, but I was wrong as that was not the only one rust point.
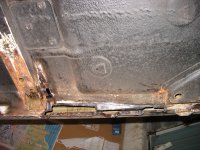
Thats how it looked like, the hole was enlarge by only using my fingers - yellow marking is still visible. After having a play with screwdriver and angle grinder - situation seams to be under control.
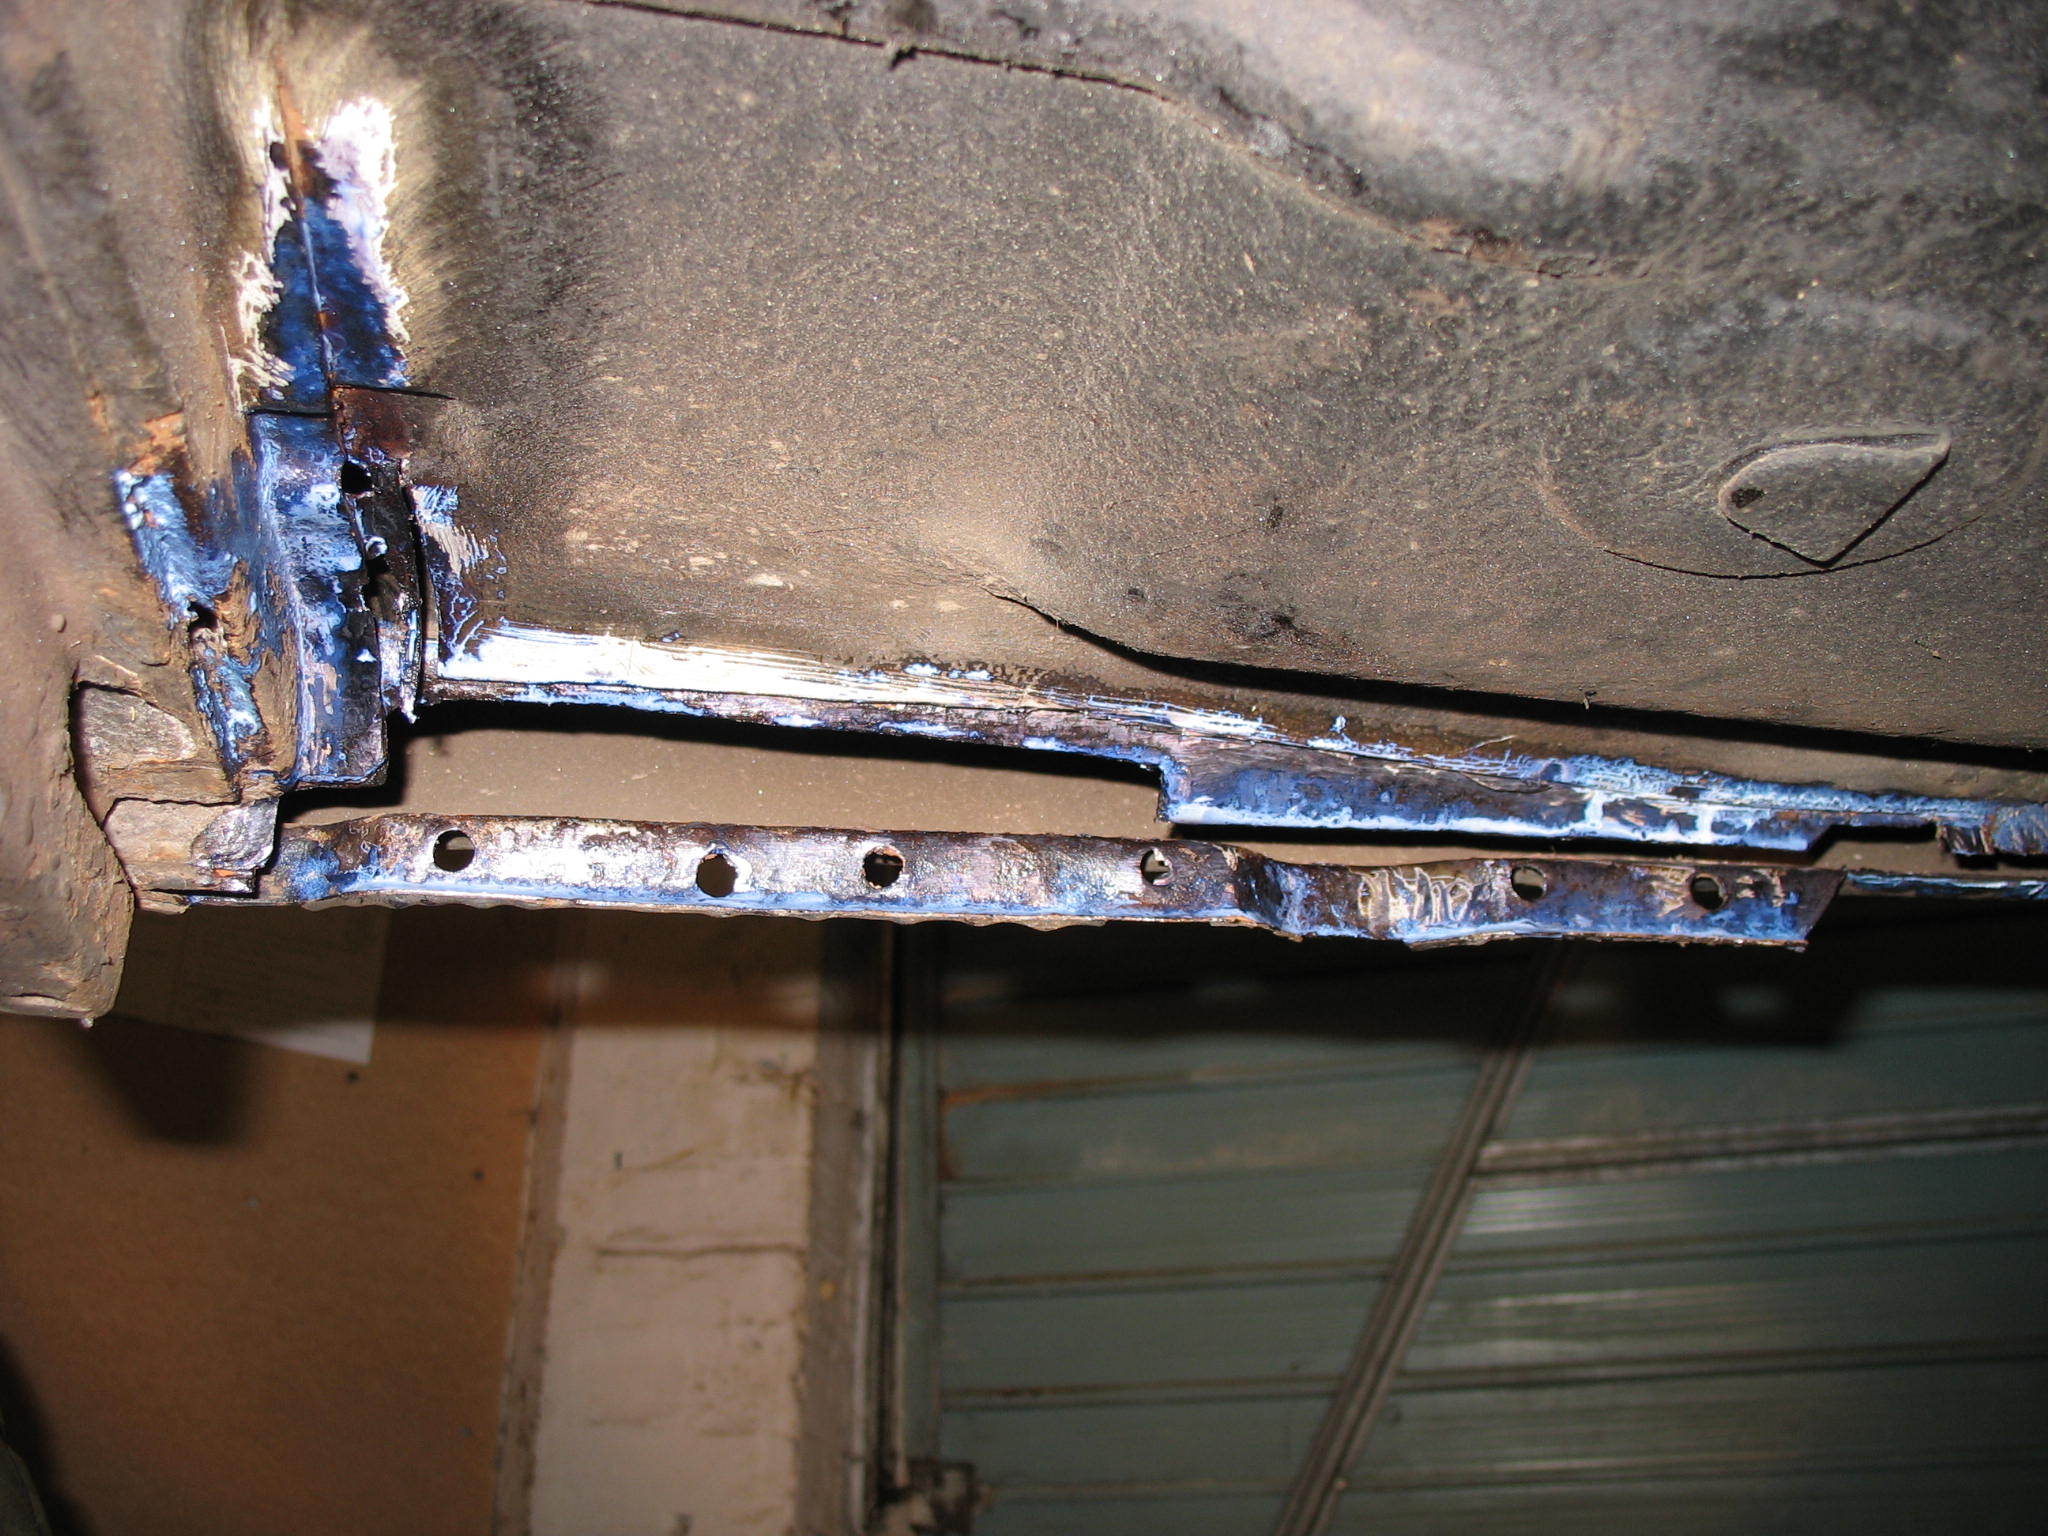
No, it's not.
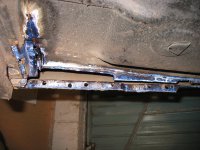
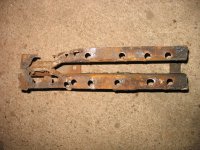
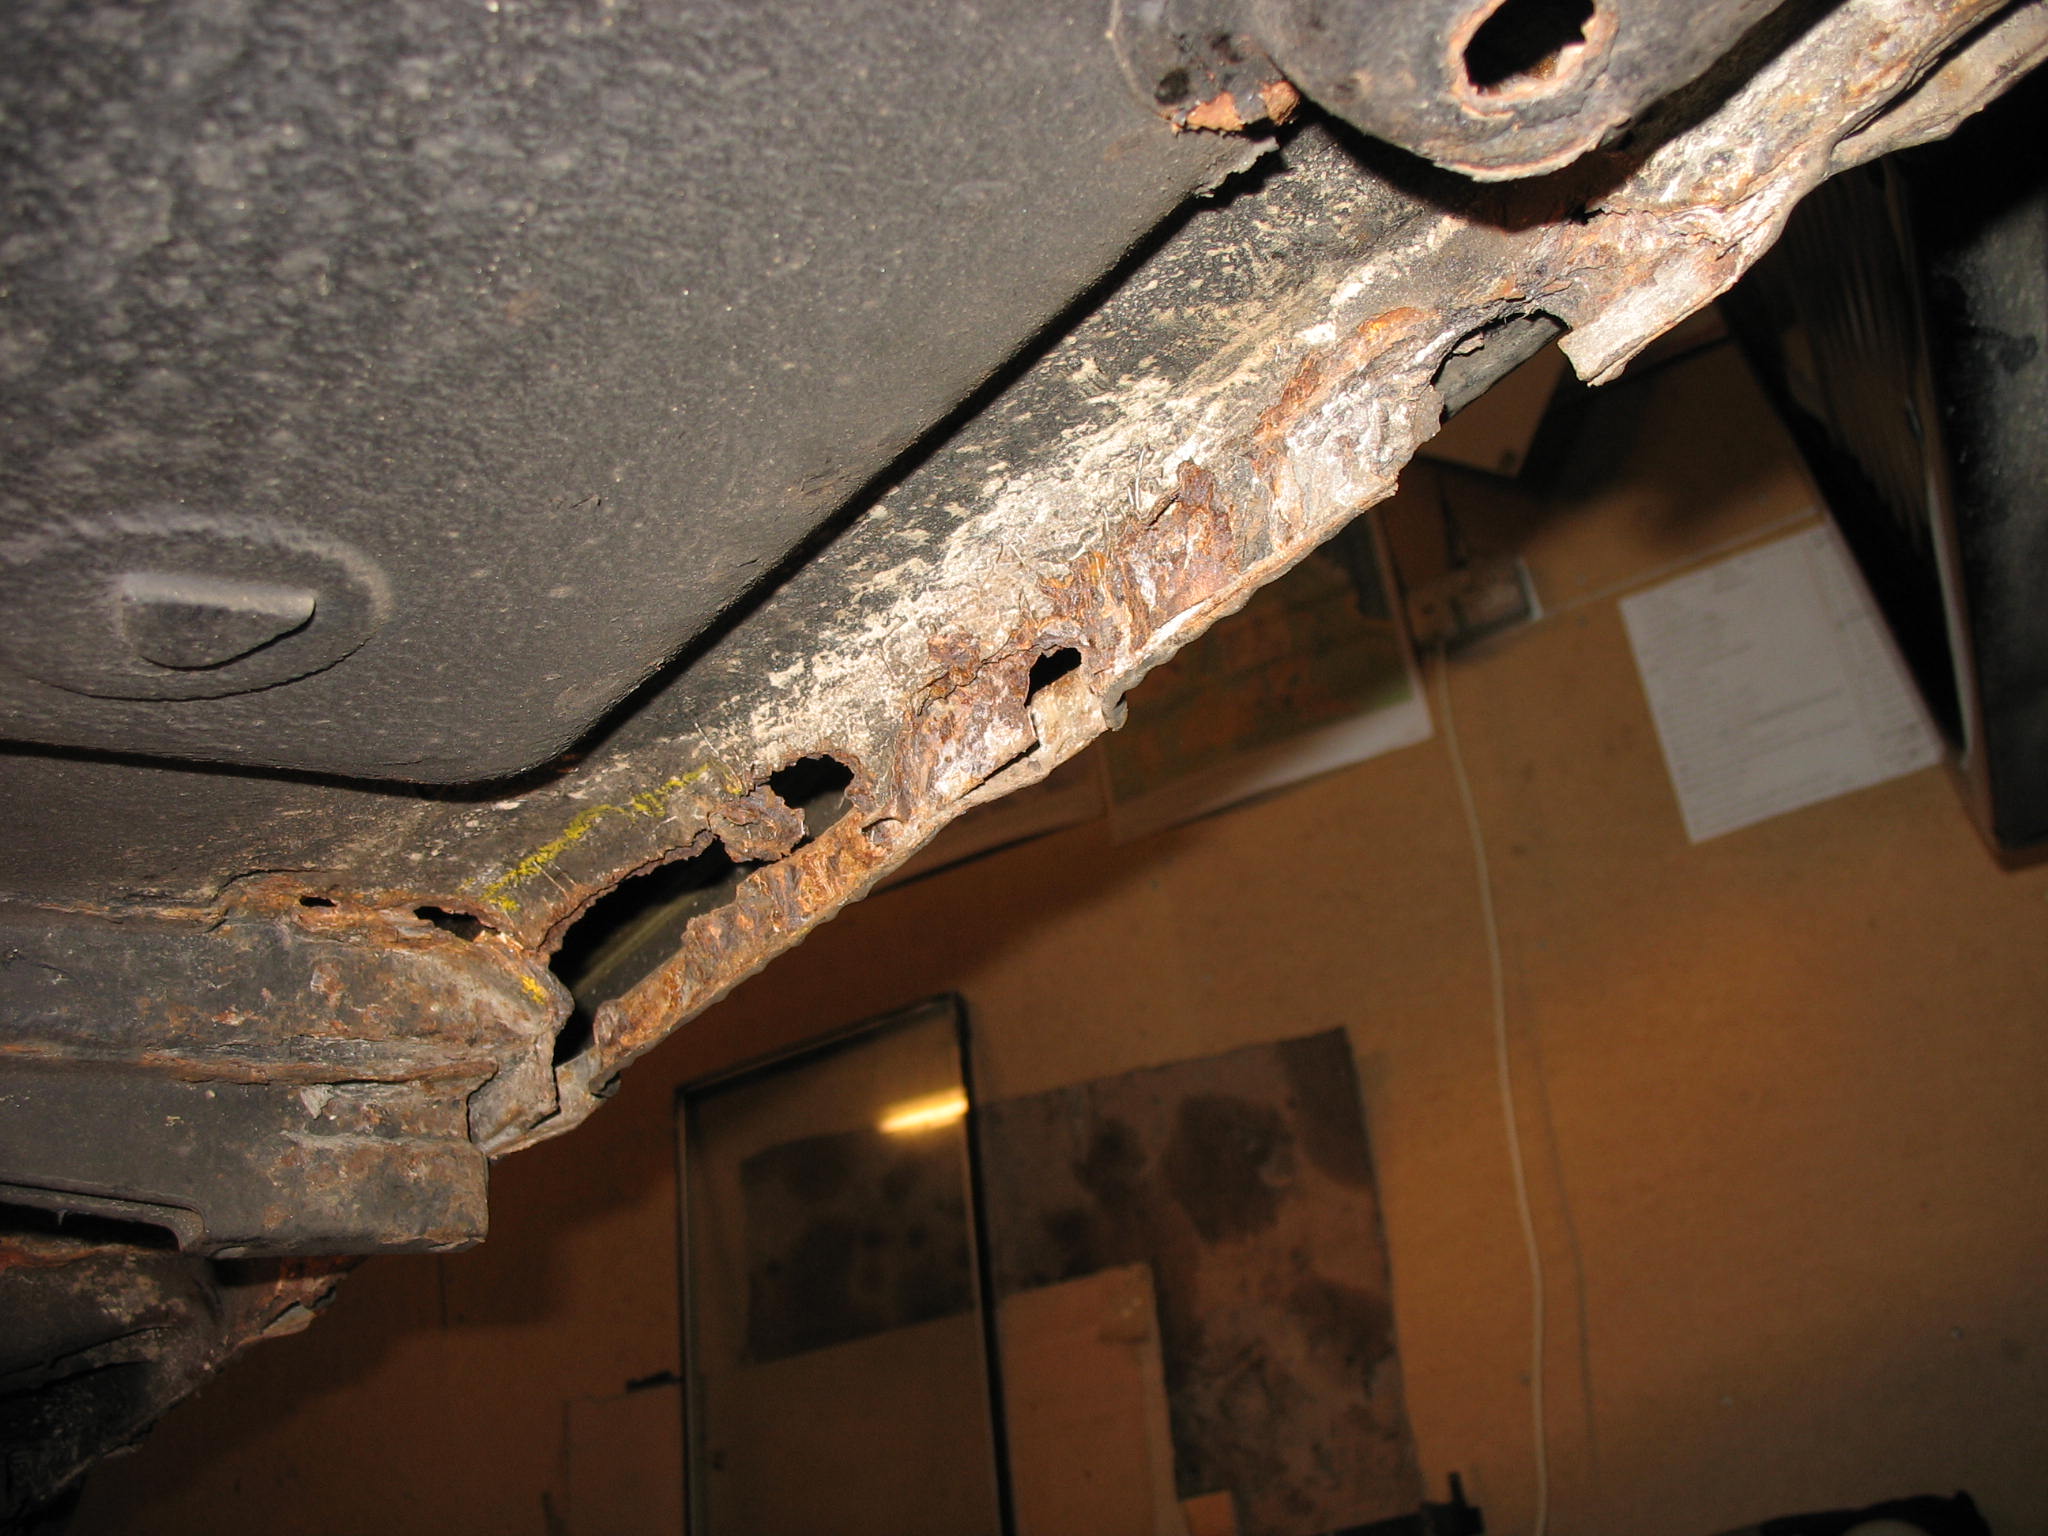
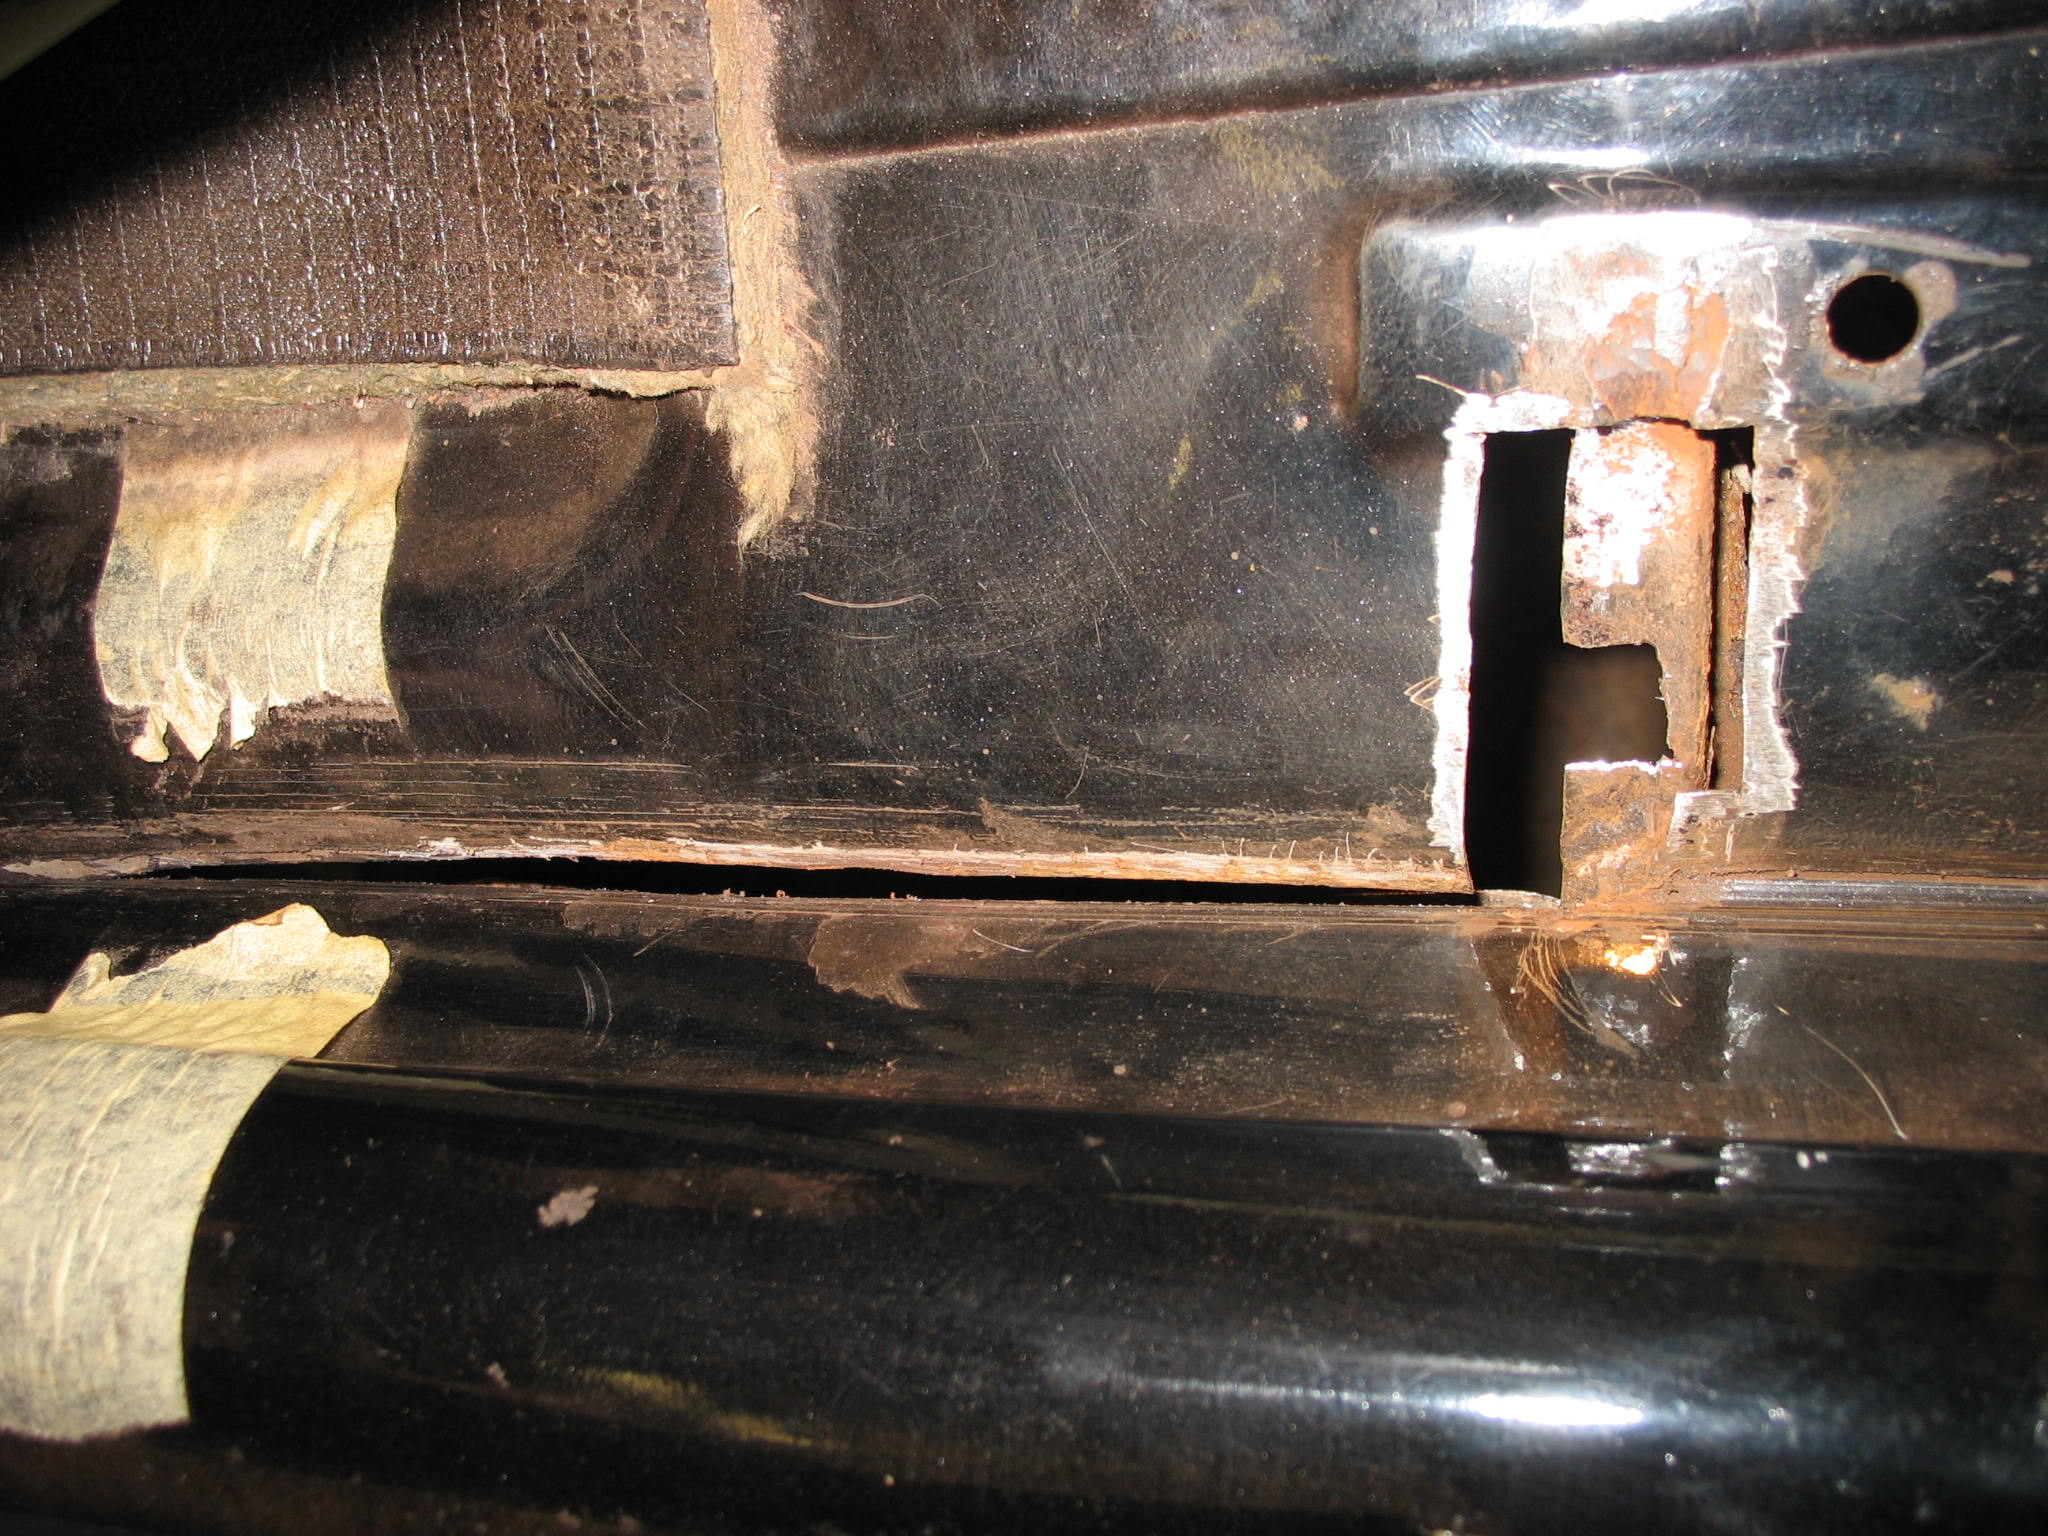
As you can see there is a right mess under the jacking point, and the far end of jacking point itself is badly corroded same as the cross membrane.
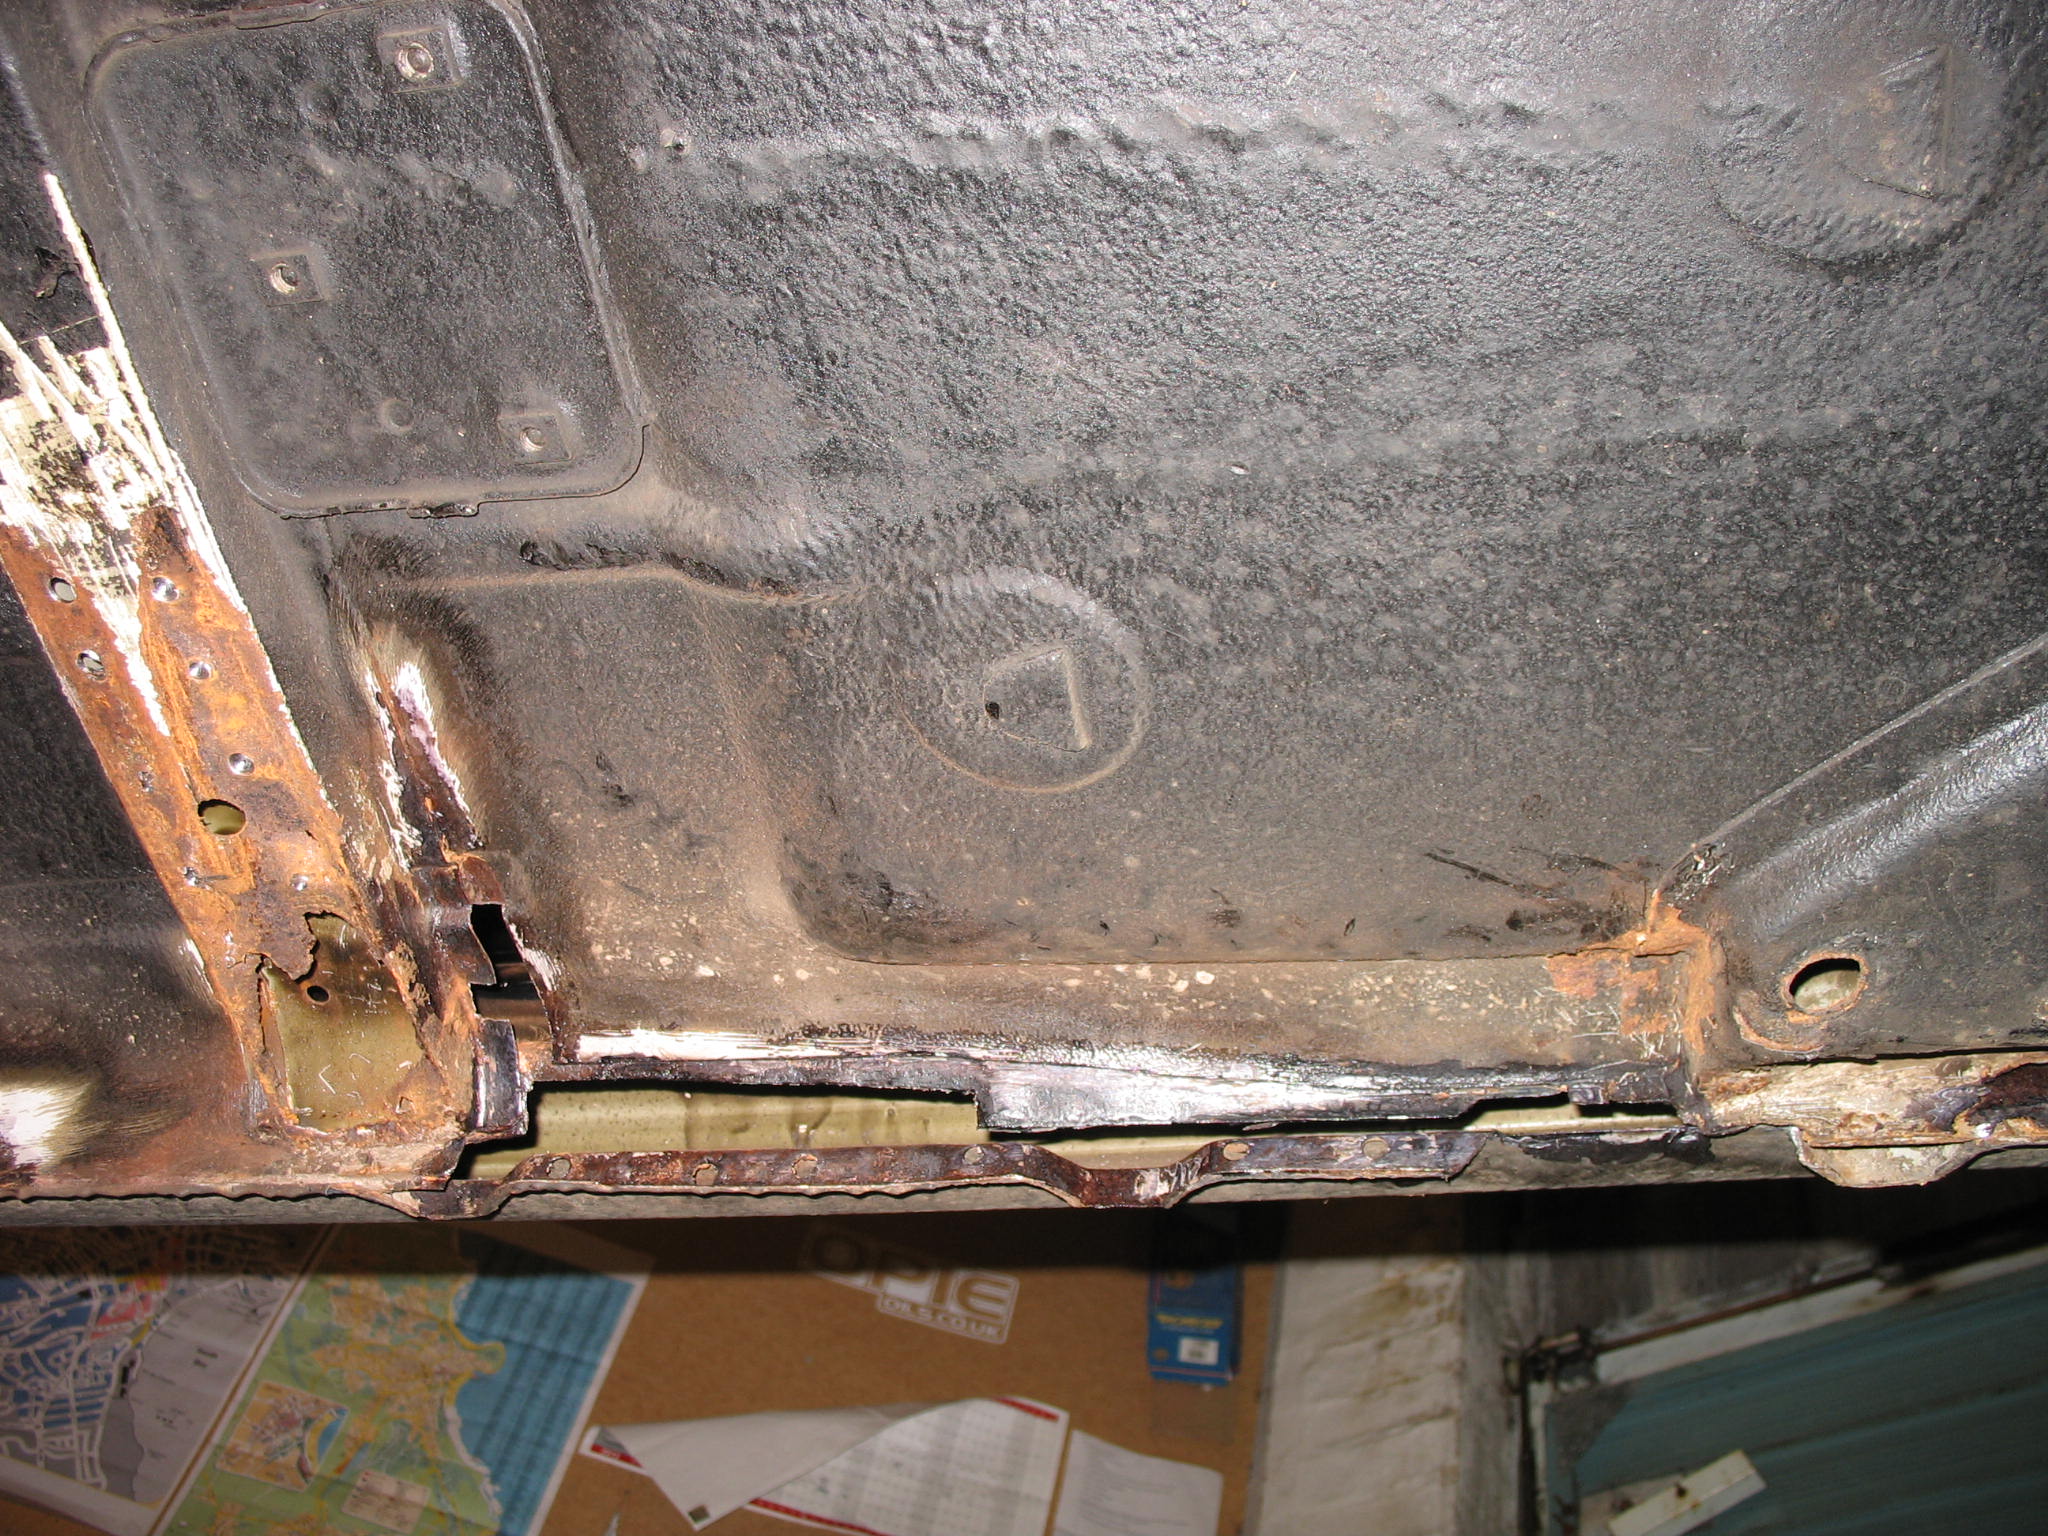
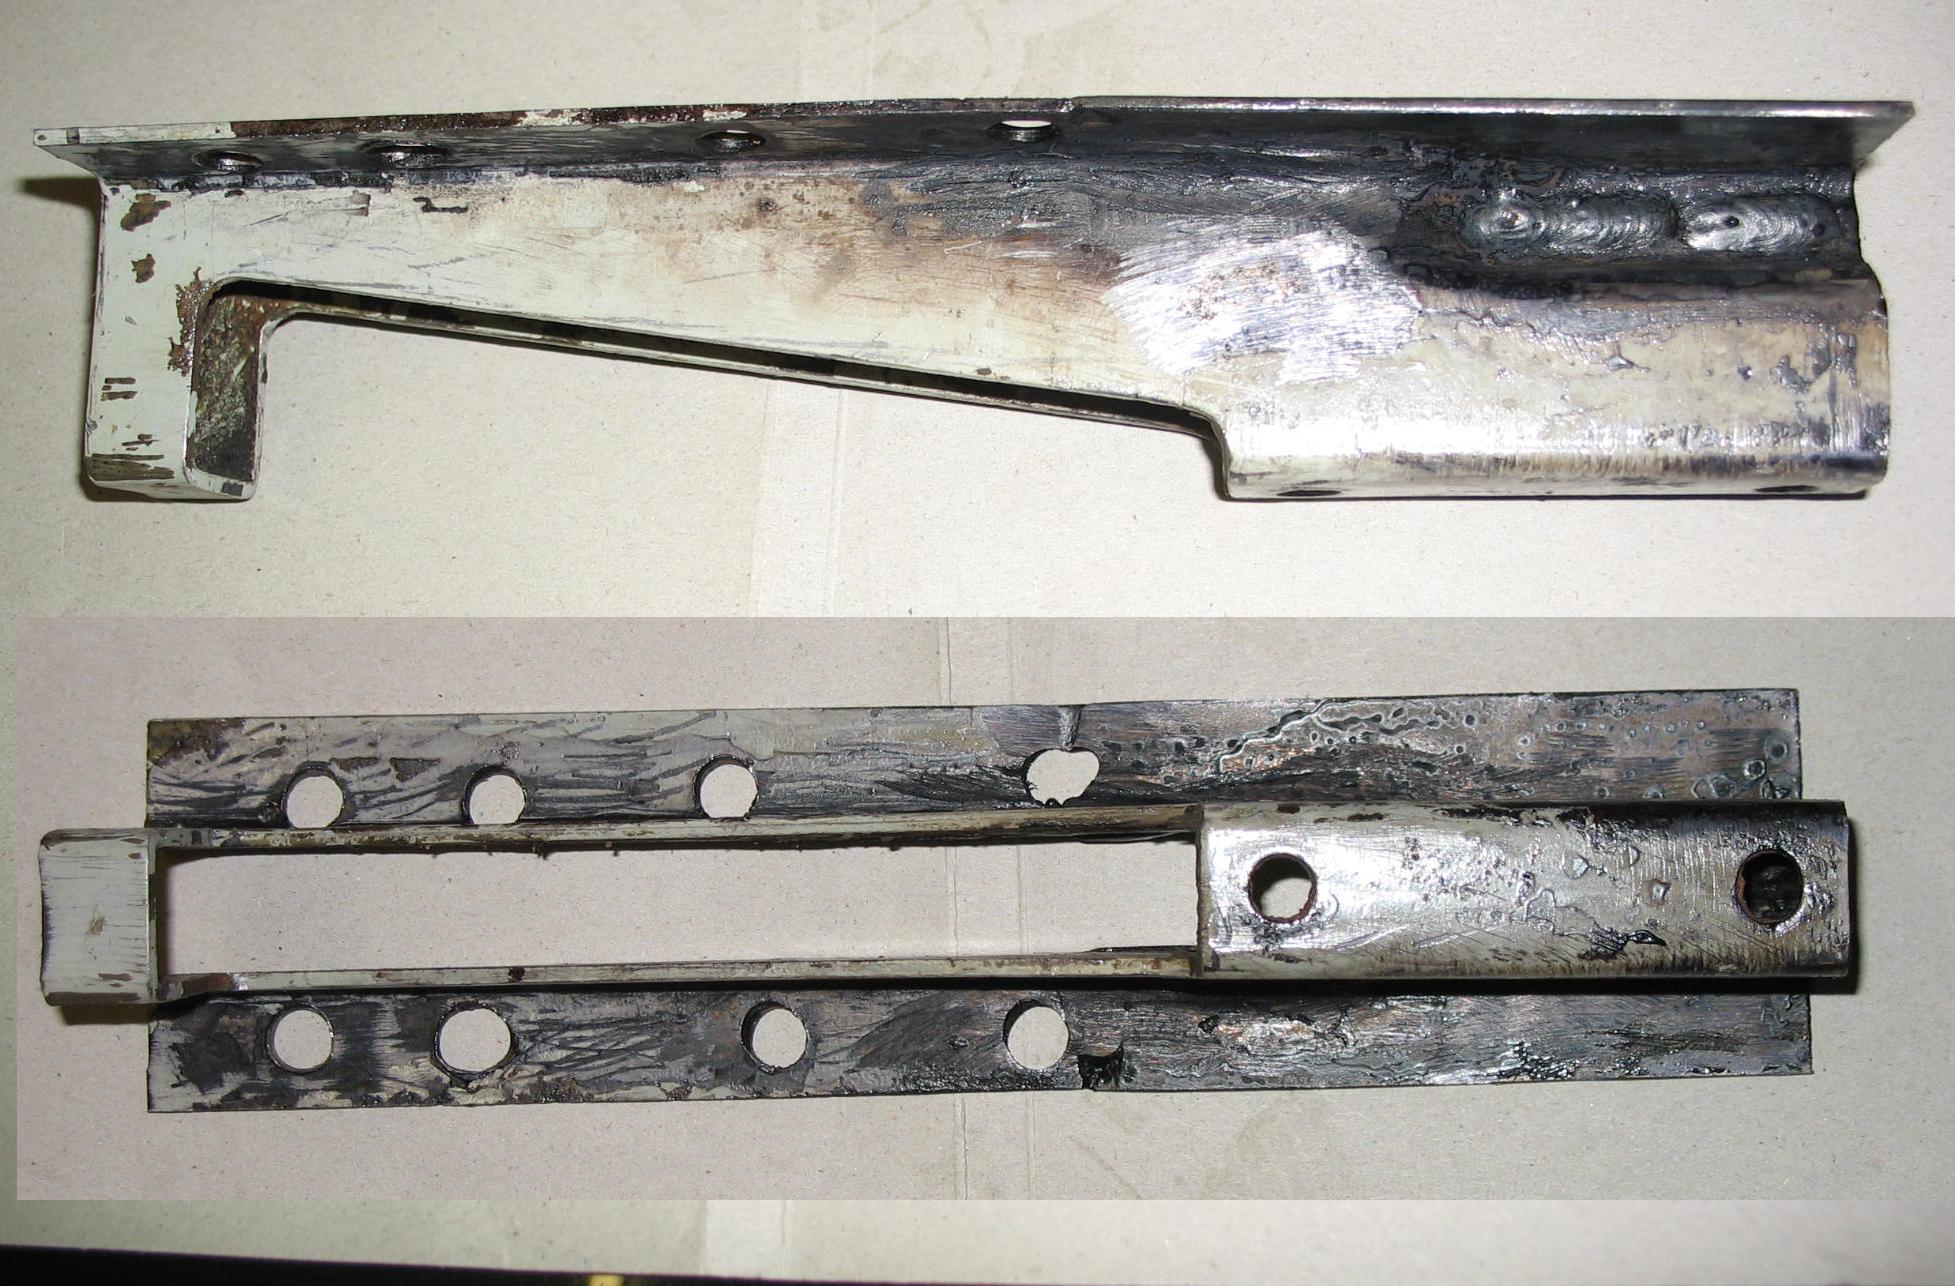
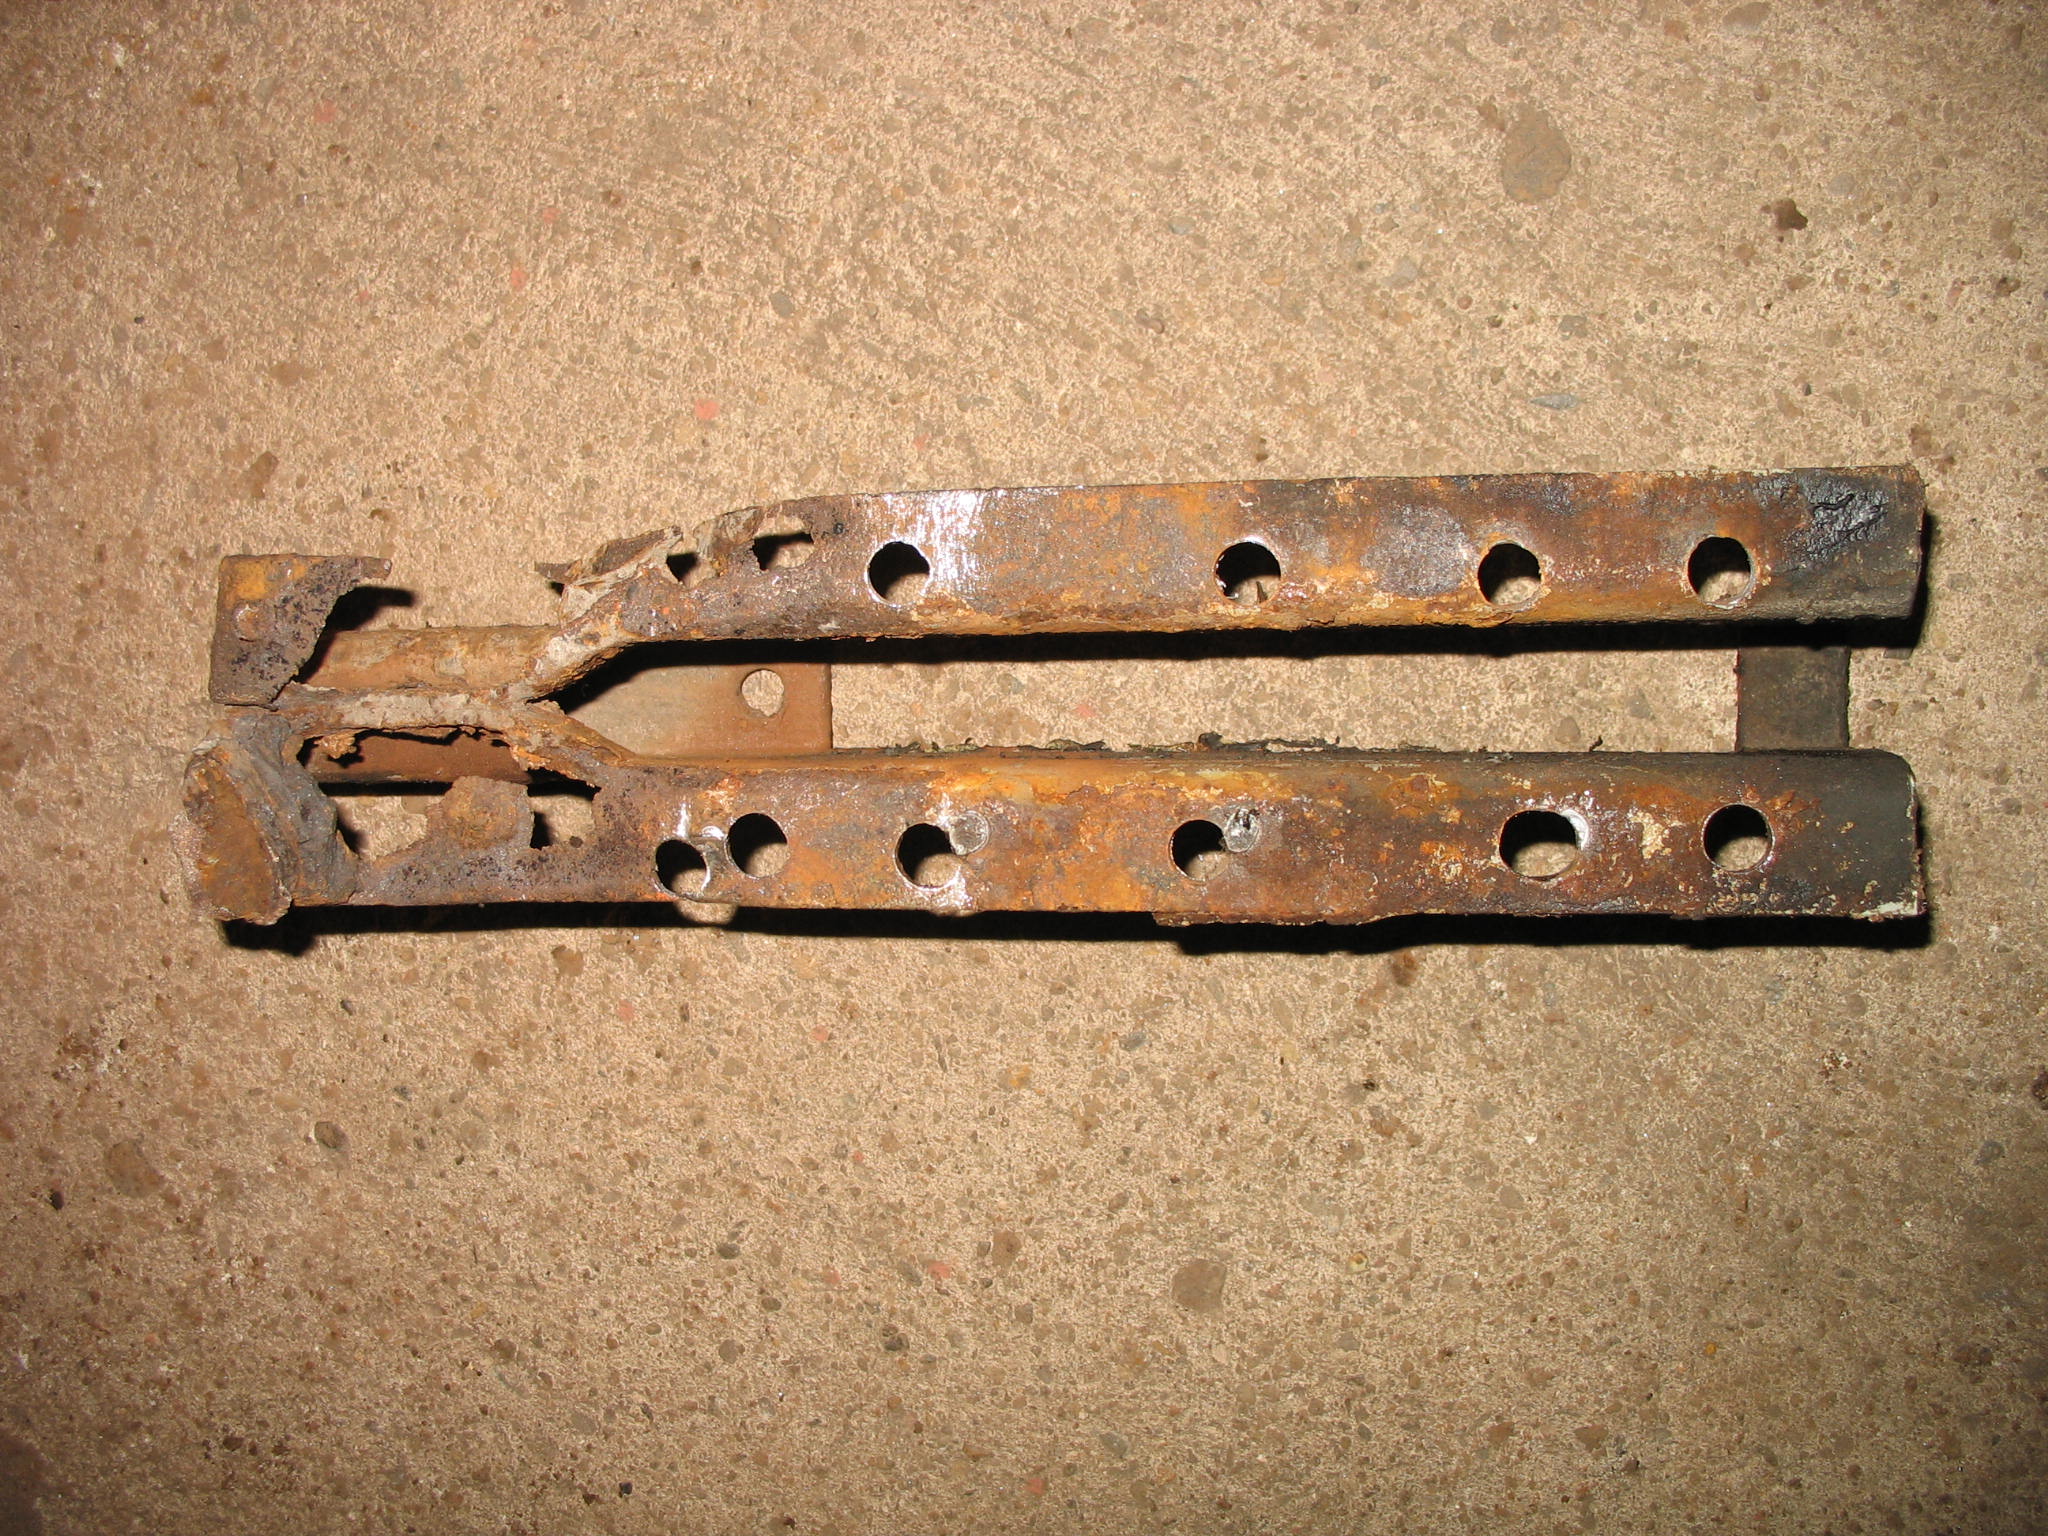
And the jacking point
The following plan for is :
- cut the and of the membrane, to gain clear access to the floor and inner sill,
- repair floor and inner sill section under the membrane,
- weld in the rest of the floor and inner sill cut out,
- fabricate cross membrane section and weld it back in to original position,
- repair jacking point using 3mm thick steel,
- spot weld jacking point back to ori position,
- prepare surrounding area for stone chip paint, closed profile conservation, etc...
Now I'm after some 1.5mm steel sheet for the membrane rebuild, and 1-1.2mm for floor/sill.
Any suggestions, tips&trics are welcome.
After over 2 year on this forum I've finally decided to set members motors thread for my Panda as I'm currently doing some body works.
Some of them may have some benefits to other forum users, and it will be a bit easier for me to ask an advice.
As some of you know as seen my Panda personally it is not bad example, but as most of them she is not perfect.
On the last MOT test this June I've been told by the tester that there is small rust hole at the inner sill/ floor recognized as an advisory.
So, lets have a closer look....
At that time I was aware of small (20mm) outer sill bottom edge flange missing, but I was wrong as that was not the only one rust point.
Thats how it looked like, the hole was enlarge by only using my fingers - yellow marking is still visible. After having a play with screwdriver and angle grinder - situation seams to be under control.
No, it's not.
As you can see there is a right mess under the jacking point, and the far end of jacking point itself is badly corroded same as the cross membrane.
And the jacking point
The following plan for is :
- cut the and of the membrane, to gain clear access to the floor and inner sill,
- repair floor and inner sill section under the membrane,
- weld in the rest of the floor and inner sill cut out,
- fabricate cross membrane section and weld it back in to original position,
- repair jacking point using 3mm thick steel,
- spot weld jacking point back to ori position,
- prepare surrounding area for stone chip paint, closed profile conservation, etc...
Now I'm after some 1.5mm steel sheet for the membrane rebuild, and 1-1.2mm for floor/sill.
Any suggestions, tips&trics are welcome.