314015_263000770481284_675395348_n.jpg

Punto (Mk1) Work in Progress...

Introduction

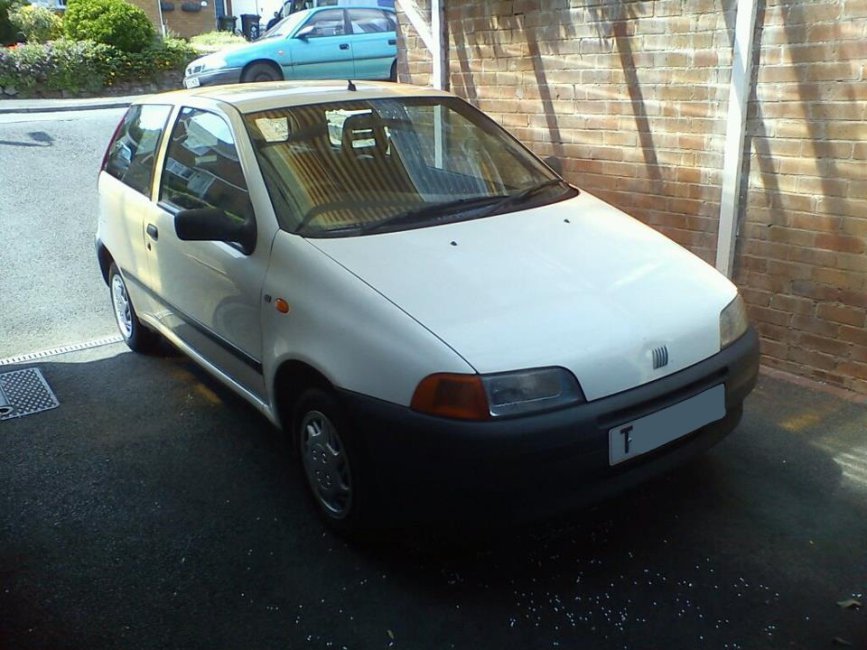
When i first bought the Punto s 60 before work begun it was plain white as you can see,
314015_263000770481284_675395348_n.jpg

I then went on to giving the car a "ratted" look by primerring the bonnet and sloping the number plate, but then found out it looked to tacky.. i removed rear windows to clear around the rubber seals where there had been mold growing and all clumps of dirt,
376705_266670873447607_1862422885_n.jpg

i took the bonnet off again and sanded the primer so it was smoother and then thought, "ahh peoples been painting there cars with rollers" so id give the Punto a better look and paint the bonnet matte black, with emulsion paint!! firstly filling the bonnet badge and sanding it smooth.
283861_270360743078620_1928088637_n.jpg

finished sanding the filler smooth as i could then i started to roll! but also removed the washer jets which i didnt do when primering :bang: CLOGGED JETS
394488_270756536372374_1294261651_n.jpg

half way through i forgot i had masking tape on the bonnet so its going to end up having a primerd stripe down the bloody thing, ahwell be a one of a kind also it would go with the jets (y)
319388_270787036369324_493743956_n.jpg

i thought it actually looked alright when i removed the tape :) but the filler is still noticeable ahwel what the heck! its a project nothing to worry about maybe having to lacquer the paint after though as it is only emulsion paint for walls so will have to protect it,

Fitted the bonnet back on to the car and it looks quite nice in my opinion :D also fitted a black sun strip for £10 from halfords but sadly im going to have to down size my wipers or the arms!!
582577_270847593029935_1486036587_n.jpg

[AIR FILTER]
i thought the Punto needed a new filter, so i got one off amazon for.... £8.75 better than paying £26 from hellfrauds!!!
540250_267971666650861_1078064683_n.jpg

Loook at the bloody size of it!
time to fit it in the engine bay, firstly i removed the old paper filter out of the airbox and had to cut the air-intake pipe to place it on the end its a tight fit but its in had to cut it down alot and repair and tape it to strengthen it.

Its in! :slayer:
217651_268099096638118_1030722563_n.jpg

Also added a black tail pipe so that it stuck out abit more and gave the car a better look and sloped the rear number plate
539029_264448203669874_1413589046_n.jpg

got a bit childish with the Punto_s badge.. aha no body moan but i thought it was funny most likely going to get a warning about this (n) also added stickers under it to underline the badge and added a GHIA Badge
DSC00103.jpg

oh also wired in some house speakers in the boot no need for a subwoofer or amp im happy with how it is,
304752_270852343029460_83246606_n.jpg

(UPDATES TO COME WHEN MORE WORK HAPPENS)
started to do more painting on the punto, ive started painting the roof matte black to go with the bonnet so it matched.
As its a project car i can test things out on it so if i dont like the black roof i can turn it into checkerboarding by painting on white squares.
either way its gettin painted :cool:

264841_271467709634590_894001399_n.jpg 557350_271464859634875_1132186140_n.jpg
 
i was thinking that to be frankly honest with you
im doing it the cheap way with emulsion paint and roller, then going to lacquer it to seal the paint

this is what the roof looks like at this current time,
i reckon it looks alright and one of a kind (y)

295142_271743069607054_1331249517_n.jpg
 
Bought myself a set of sub woofers and encloser, it needed to be painted and wired all up again...

300487_277260579055303_1139236152_n.jpg 423955_277260722388622_354622144_n.jpg

finished painting and now had to fit the subwoofers in, i know the ones a JBL and i havent a clue what the other one is :D
422923_277260639055297_723953685_n.jpg

fitting the speakers in like this, so it looks much better that showing the front of the odd one
386002_277260865721941_1858178038_n.jpg

bought myself some RCA cables aswell.. well bought a few tbh me being stupid bought 3 of the buggers :bang:

249690_277260819055279_1829324182_n.jpg
ahwell there 16foot long so that will be a good amount to go from the dash into the boot :)

now awaiting for my Amp and then i can crack on installing it :)
 
Thought id upload a pic of the finished subwoofer and box,
with the air vents put into it aswell
:slayer:

576964_277286845719343_232680466_n.jpg

Realised i also had a plastic front piece for it so i wacked that on too :D

255442_277296365718391_1940917100_n.jpg
 
Started to lay the wiring down, due to only having the RCA cables at this current time thats all ive put in, very easy to do...

527981_277379655710062_638352533_n.jpg

just plug cables into the back of the cd player place them through the bottom of the dash and then, remove the passenger side plastics by the rubber held on by two phillips screws then pull it off and pull the rubber seal up, pull the carpet down from the front and then run the cable down the side with the other parts, and took behind carpet.

should look quite neat along the side and then hidden when plastics back on (y)(y)

295907_277379845710043_653397040_n.jpg

very handy removing the lower rear seating "held on by two Alan blots" to put it into the rear, unscrew the plastic held on by three screws and then plum cables in with the others and then up and under the rear of the seat, and then screw plastics back on and hey presto its hidden and neat :)
 
Right wiring the power lead in, most of you say drill this move this pop this, well half the cars havent got the gromit there as its plain metal or they dont want to cause effect to it. well there is away,

pull your carpet back and on the passengers side where the interior light switch is theres a rubber bung which has your wires for the switch to go through and just below it theres a smaller hole..

488186_277632735684754_287963061_n.jpg

where i have my green and yellow feed cable going through as shown above this is to show where it is and to feed the power cable back through, on the out side of the shell theres another bung pop it out and feed the cable through

539460_277632775684750_1054959640_n.jpg

as shown you can also pierce the bung to you put the cable through but its best to do this with the actual power lead, but i have shown using feed cable

250307_277632615684766_312466468_n.jpg

keep pushing the cable through the arch, it maybe best if you took your front indicator out so you can grab the cable, once you are able to grab the cable feed it through the hole near the water bottle,

255444_277632852351409_281754132_n.jpg

then attach the actual power cable and pull it back through, no need for drilling or massive damage push all the bungs back in place and put carpet back and feed it with the rca cables (y) :slayer:
 
Bought my self a full wiring kit, for £8.90 off of amazon (y)

comes with power lead with built in fuse housing, remote cable, RCA Audio cable, Earthing/Grounding

644225_278067622307932_2141129481_n.jpg - fuse.jpg

this is the fuse housing ive tried to blend it in with other parts of the engine bay it blends in quite well and isn't very noticeable

i have plumed it down the side like i did with the RCA audio cables and the remote cable

574643_278067295641298_122293606_n.jpg

which will later on be cover by the plastics when put back in :slayer:
 
Plastics are all back on and covering the wires
:D

310410_280178175430210_1798593079_n.jpg

there are no wiring shown inside the cab except under the rear back seats which is only a little bit of wire showing and then the rest in the boot.

My Hell Fire Amp 550 Watt

551824_279735818807779_2106722163_n.jpg

friend gave me this amp and a oldschool kenwood one which was quite rubbish so the hell fire one is now wired in,

i have a power line running from the power on the amp to the dash board along with the remote wire as my headset / CD Player doesnt have remote output,

there is no need to fuse this output as its fused by the power in from the battery by a 30 Amp fuse, then another fuse on the AMP which is a 30 amp fuse so i would class it as protected...

523074_279201042194590_263641046_n.jpg

here is the power lead and the remote lead fed through the back of the dash and out of the removable button caps, i also then hollowed out the cap and melted / drilled a hole in to it so i can install a switch to turn amp on and off

303251_279869625461065_1124343988_n.jpg

that's the switch installed loosely but its working, you can glue the cap in if you wished to do so but just for now its just pressed into its hole :devil:
 
Started to paint the Punto Matt black, like someone said on here.. thinking about going for a Ratted Police theme,

377789_282513591863335_952593484_n.jpg

the wing is painted on this picture Matt black same as roof and bonnet
to go with the "Ratted" theme ive stuck with my orange indicators side and front,

60142_282524591862235_1824608003_n.jpg

ive found some POLICE stickers on amazon for £3 which i couldn't moan at but not sure weather to do it as not wanting to get done for impersonating a police officer...

:devil:

if you havent gathered im keeping my doors white to add to the Police effect.. also was thinking of coating this matt black paint with Chalkboard paint (y) so people can chalk away
 
been painting the car lately, so haven't updated this much

well the car is nearly finished on the paintwork
just few bits need touching up on it (y)

155117_287139784734049_404064354_n.jpg

384252_287331258048235_671978587_n.jpg

few shots of it with the back windows out and the rear being painted
looking alright, even though I'm doing it via brush and paint tin..

slowly getting there but not wanting it prefect as its going to be a slight rat project. :yum:

30356_287772484670779_1179927928_n.jpg

windows back in :D

i bought my self a roll of hazard tape, £4.99 off the net.. 5 cm thick 33 meters in the roll, not bad to be honest

250588_289267904521237_1337077379_n.jpg

Bonnet stripes done.. i know i haven't matched up the tape but thought
it looked fine like that

i redid the petrol flap from the cream and brown kitchen striping to the hazard tape which i lined up so it looks slightly better

283431_289649417816419_1149450682_n.jpg

the petrol flap looks alright fitted on the car too (y)

155168_289650137816347_1072309251_n.jpg

still got bits n bobs to do on the paintwork and hazard taping..
i will update this soon when its finished,
need to give it a water over with the hose to get some of the sodding dust off of it,

:D
 
486696_290259657755395_1687113746_n.jpg

right i finished painting the right side rear for now,
i have also added more hazard tape as shown above to split the black up from the door stopper,
i will do this to the left side to when i get round to finishing the paint on that :)

292810_290262364421791_1819832800_n.jpg

bought some letter badges off of amazon for like 80p a letter,
which i thought was quite cheap but there very good,
very sticky and good quality.
removed the "C*nts" badge as knowing my look when its finally on the road ill get pulled and have some thing said about it!
Bloody Rozzers!

247387_290266557754705_1463665196_n.jpg

near completion, thinking about white wheel trims or bright orange steelies, :confused::confused:
soon will find out what ill do with it
 
Right update time..
my JBL sub has gone up the swanny
(n)
coils gone so im stuck with the splx one at this current time,
im going to downsize to one subwoofer now,

522958_292178527563508_268894660_n.jpg

also down grading my amp.
550 Watt Hell fire amp to a 200 Watt Kenwood amp,

Did this as the kenwood amp gives a better sound output
easy to put in no need to be careful if u knock knobs on the side and it changes it all completely.. as there isnt any adjustments :)

557634_293022910812403_1706689498_n.jpg

have ordered a box off of amazon waiting for it to come then the sup will be going into that,
thinking of getting a new sub "BassFace 10inch Sub" to replace the splx one at this current time.
 
Wayhey Sub box has arrived!
£23 off of amazon GREAT!

398172_295621610552533_533098739_n.jpg

10" SUB box encloser no air vents, not sure if thats a good or bad thing..
comes carpeted and with the banana clips inputs on the side, no speaker wire
with it thought but i cant complain.

230828_295633647217996_895453378_n.jpg

have installed my splX subwoofer into the box, using four pieces of speaker wire
two inside two outside,
as well as 8x self tapping screws.. easy job :D

545438_295641427217218_1356143558_n.jpg

placed in the back of my punto, on the left side as shown with the Kenwood amp screwed to the back to hide it and all the wiring.. looking snug and now i have boot space, much better than the larger dual box i had...

Next on the list is to make a wooden parcel shelf,
thinking about installing 6x9s in to it when ive made it and then carpet it,
also thinking about wiring them to the Amp them selves
not the car speakers :idea: :idea:
 
Back
Top