

I started this on the 30th January 2010
I love Marea Weekend 20v's, this is my 3rd one and the cheapest so far.
It all started in december when the hunt was on for a cheap Marea to mod, I had some criteria though... it had to be a 147, it had to be cheap and had to have mot and it had to be modded on a very limited budget. Impossible I here you say! well I started buying my parts in december on Ebay and would only bid to what I wanted to pay rather than get carried away and get the bits at any cost.
So in december I managed to get a stainless steel 5" outwardly rolled rear can for 20 quid which was a bargain.
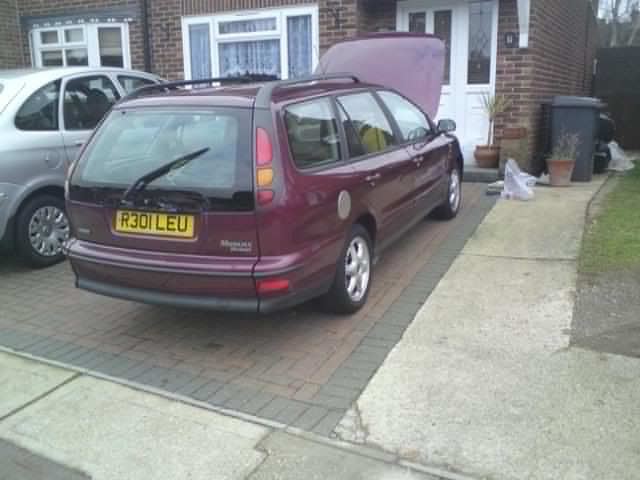
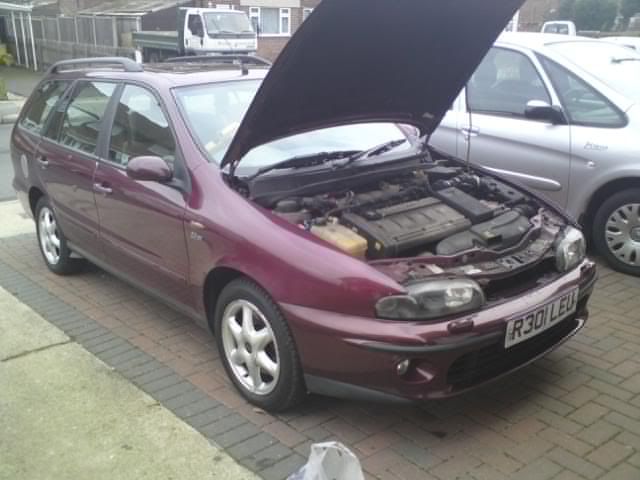
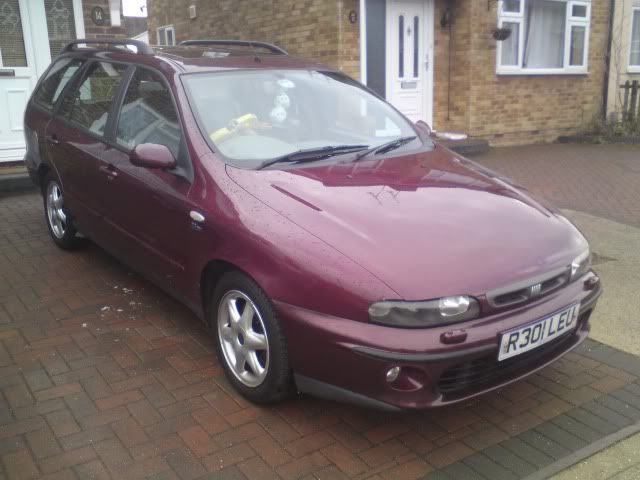
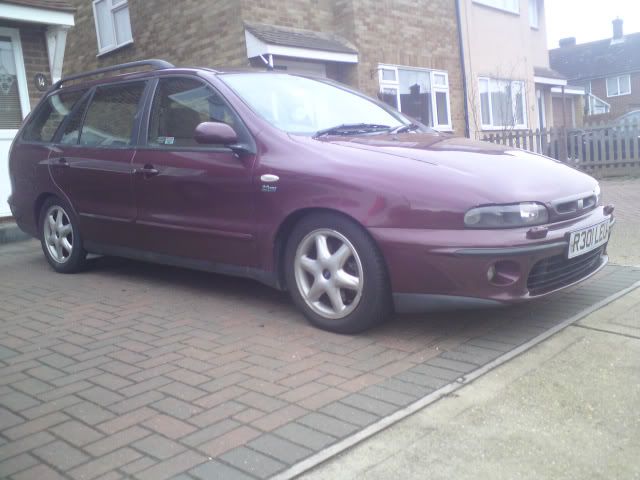
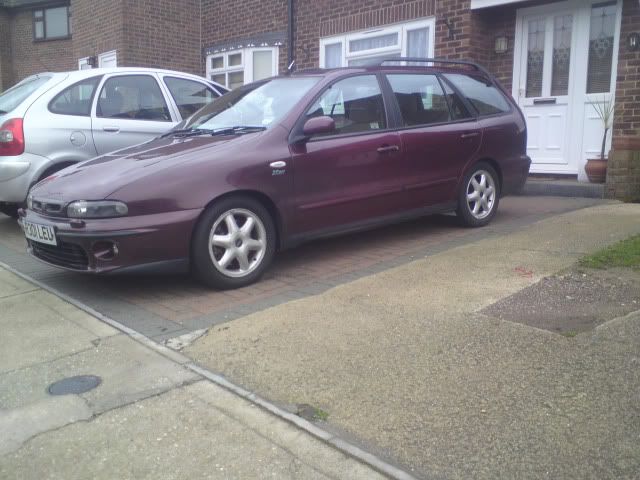
In January I picked up my Marea Weekend HLX 20v, I managed to pay 425 quid with a rather nice cd player mot till end of august and tax till the end of the month, the guy needed a quick sale due to divorce and it was originally up for 725 quid but once the cash was in his hand he took my offer and this is what it looked like then.
looks ok but needed a really good clean a few parts to repair the damaged bits.
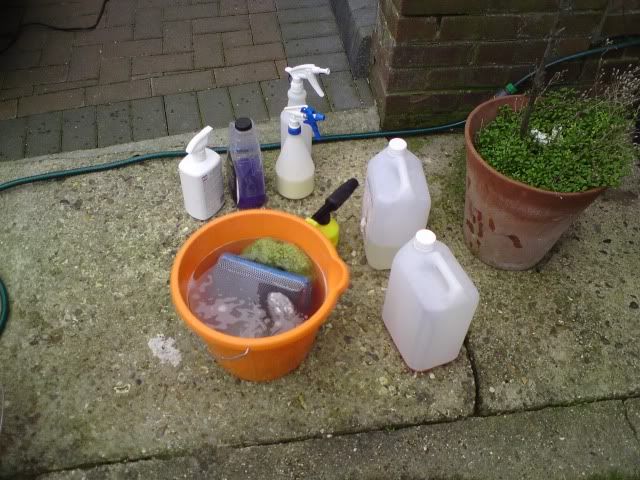
so I got to work with my cleaning goodies, it was first snowfoamed using a autobright snow foam lance and a mix of snow foam, megs shampoo and very cherry wheel cleaner.
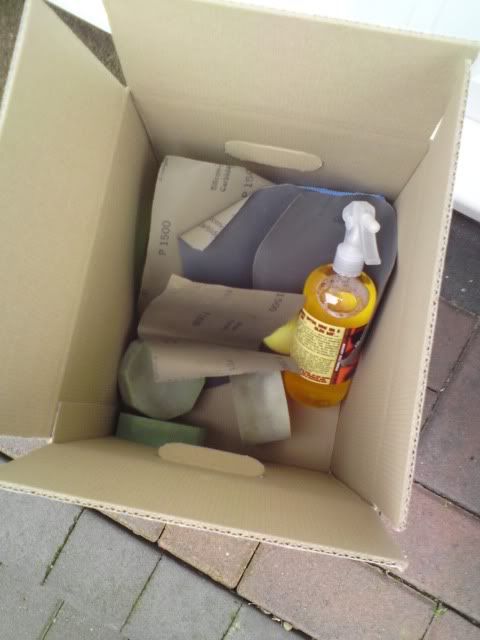
Some of my cleaning goodies
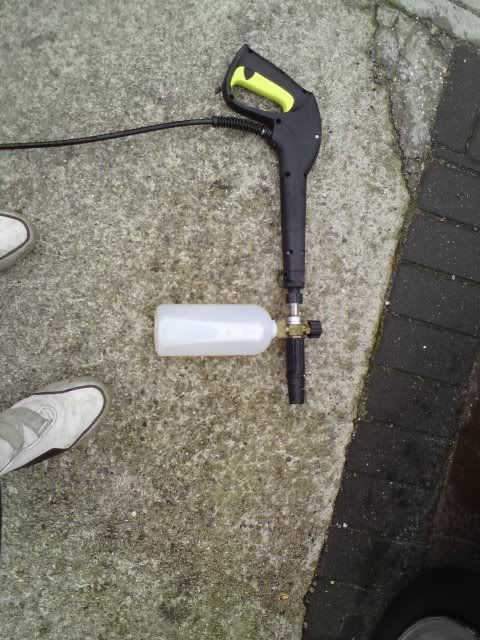
snow foam lance
Wet and dry and some dodo juice lube for the clay bar
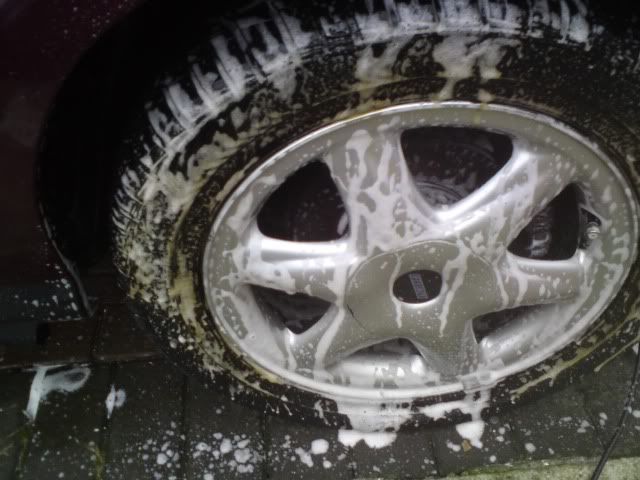
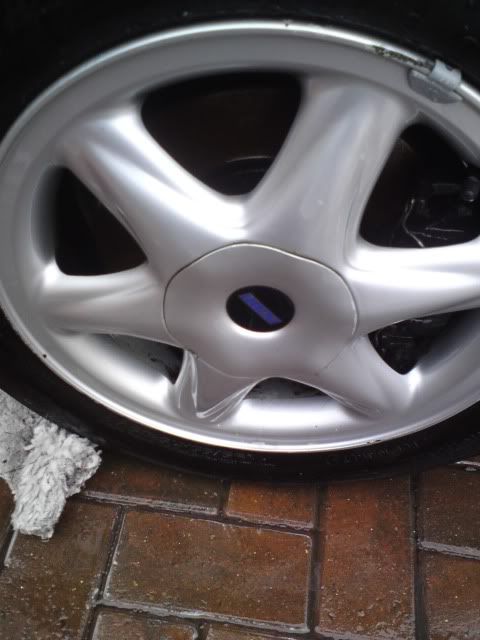
the wheels were cleaned first using very cherry wheel cleaner and then snowfoamed and left to work its magic before be aggitated using a swisswax wheel brush
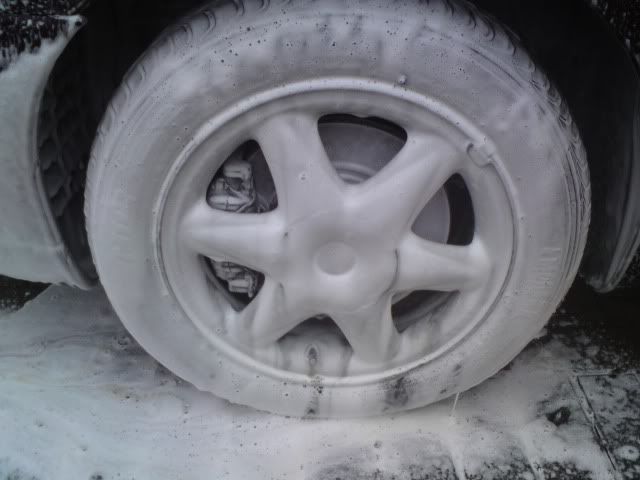
and then jet washed off
I then moved onto the body work and inside the arches.
first snowfoamed all over
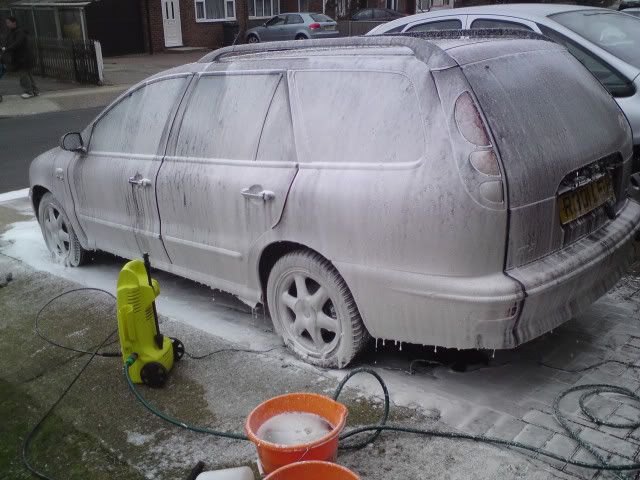
and inside the arches
the car was then washed with megs shampoo using the 2 bucket method.
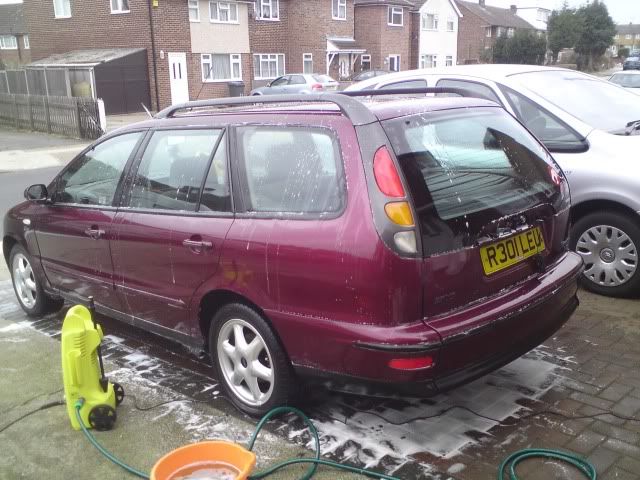
I then jet washed it off
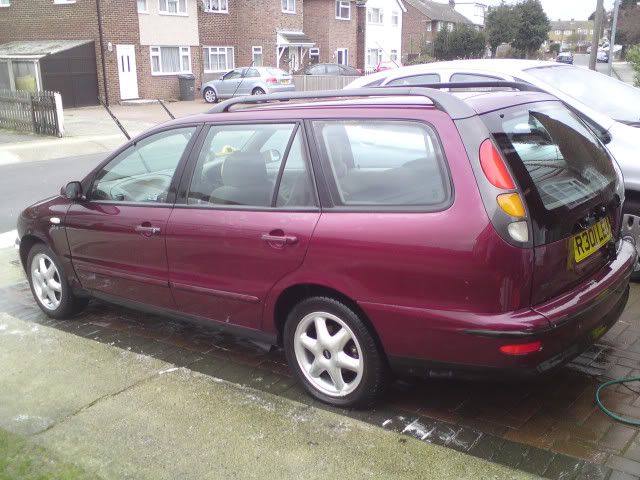
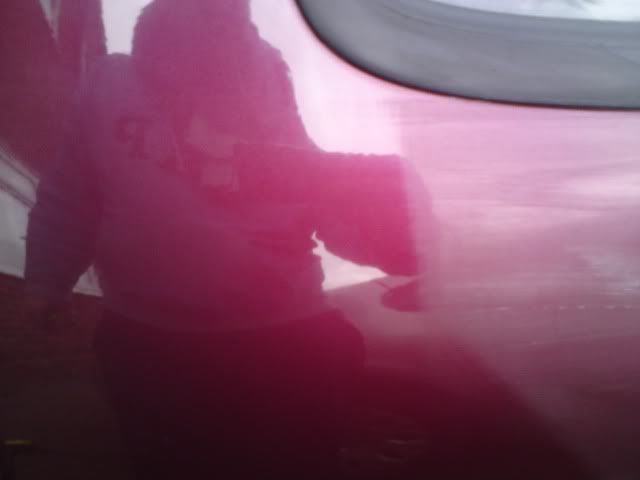
it was then clayed using dodo juice clay lube and a megs clay bar, the clay shows how much crap it gets off.
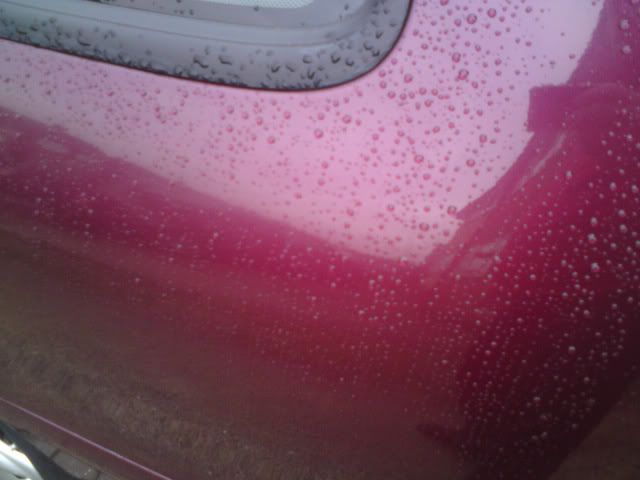
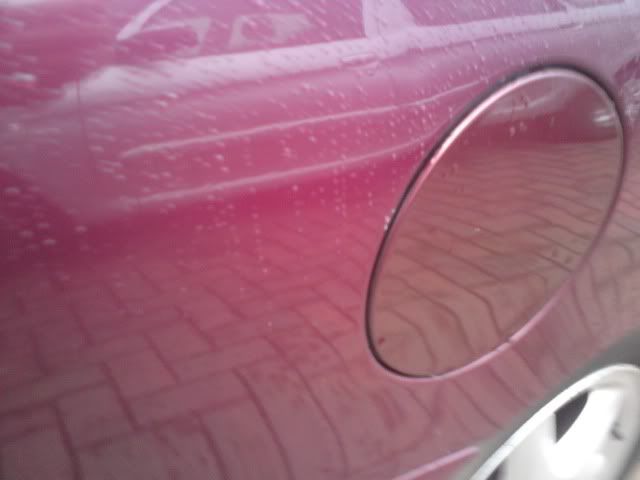
it was then washed again and dryed, I then moved onto mop the bodywork using Poorboys ssr3
and the polished using poorboys white diamond, I will let the pics do the talking.
the paint work was pretty bad and looked like it had lived its life going through car washes and after it was polished.
I then moved on to the engine bay and in particular the slampanel, it looked filthy for this I used auto glym machine cleaner and aggitated it with a wheel brush.
before
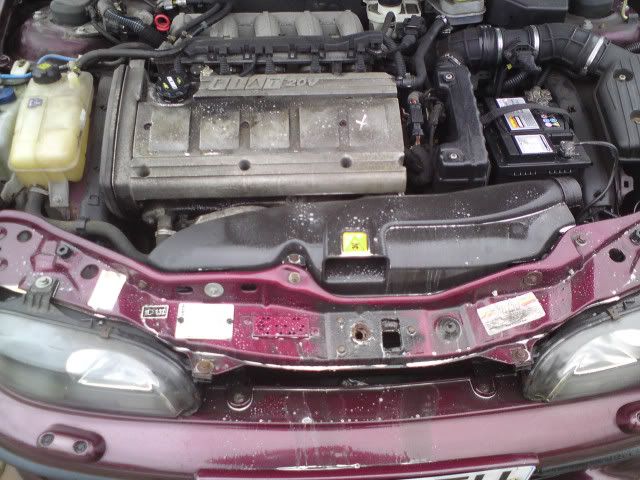
and after
I then decided to fit my new gear knob.
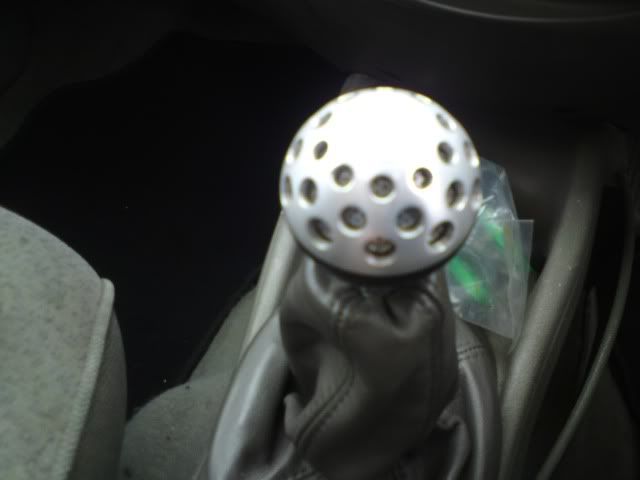
a massive improvement over standard.
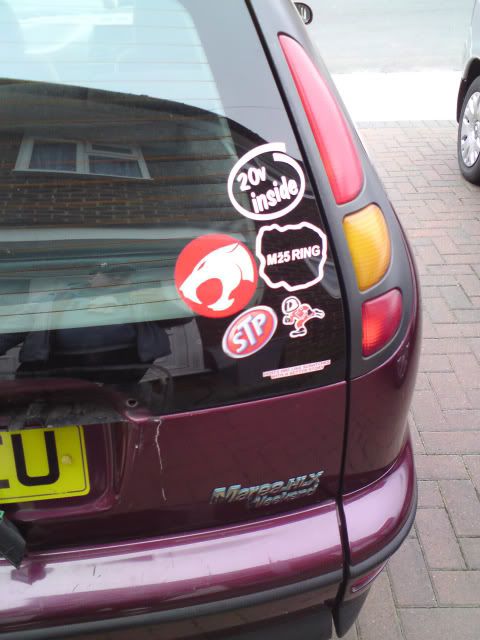
I also put some of my stickers on too.
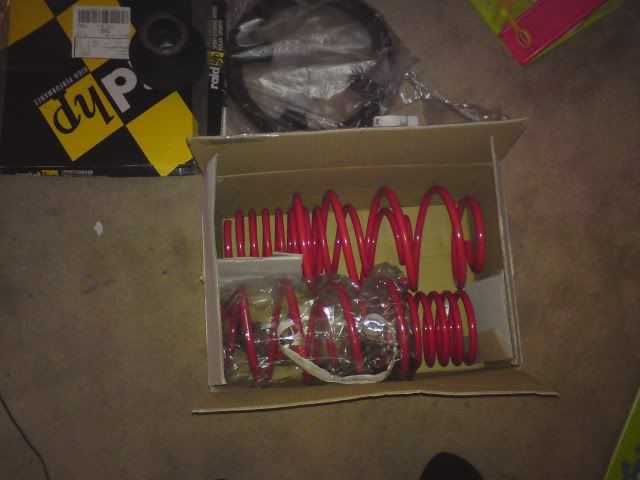
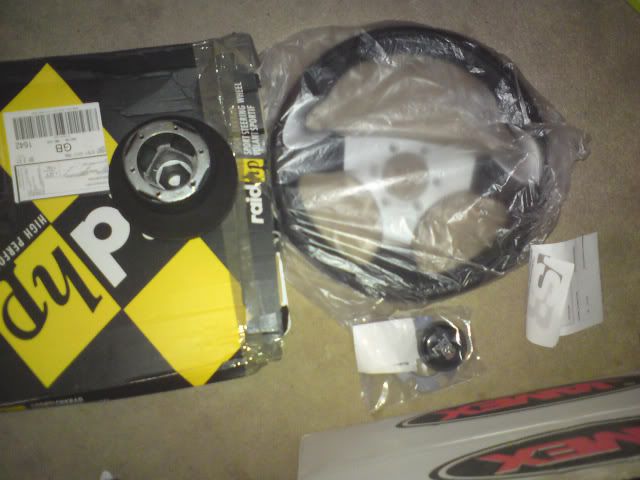
some more bits that have turned up that I need to fit, the jamex springs were a bargain at 79.99, the steering wheel was a bargain at 16.99 brand new,and the boss was on the rat 2! - now in the scrapyard in the sky
and also my ultra cool valve caps that I made myself!
and thats it until next week when I will fit the suspension, steering wheel and induction kit, I will update as I go along.
Its hard to believe but including buying the car and all the mods I have bought,it has only cost me 625 quid!
Right a new update, Monday I got up and decided to have a crack at the suspension, I started by loosening the wheels bolts, and then looked at doing the fronts first as I knew they would take me longer,one small problem is I did not have a 19mm spanner DOH! I will pick one up tomorrow.
I decided to lower my car 40mm on jamex springs,i was gonna go with the extra low kit which is a 60mm drop but decided against it. now my car always sat lower on the drivers side and I was intrigued to see why.
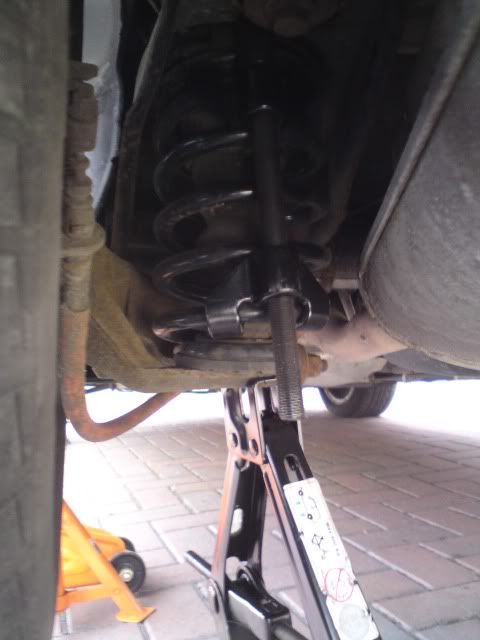
any way back to the rear suspension,i started to jack on the drivers jacking point and then I noticed that in the past the jackpoint had been damaged and just wasn't safe enough to put a axle stand on. so a block of wood came to the rescue.
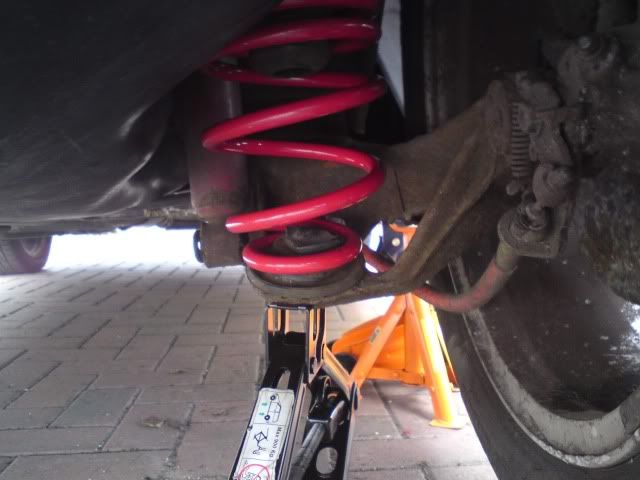
First up I jacked the car up and put axle stands on the sill and the rear jackpoint (owners manual to the rescue) to be double safe, now this is so much easier if you leave the wheel on,you will need a 19mm socket, spring compressors, adjustable spanner,and a scissor jack (in the spare wheel well).
as you can see the spring compressors are on, the scissor jack aids you in a way to push the rear wheel into the arch, this way you don't have spend ages tightening the spring compressors up
I then undid the rear shock absorber lower bolt and lowered the scissor jack the spring just fellout and this is what you are left with.
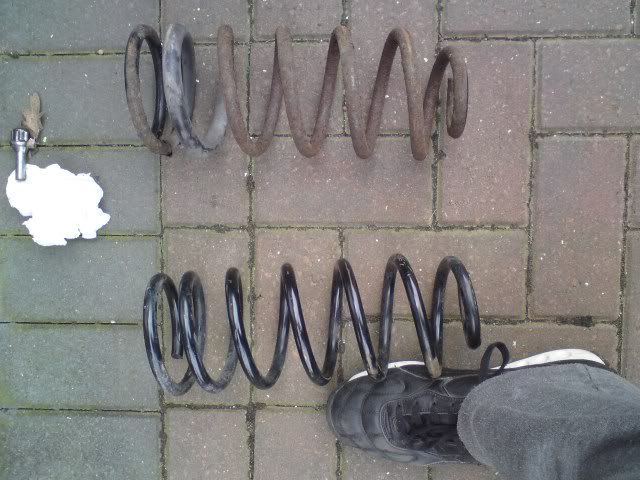
old and new springs
I then got my spring compressors on the new springs and just squashed them a little and in they went.
I then raised the scissor jack and pushed the rear wheel back up to align the the rear shock absorber lower bolt,pushed the bolt through and tightened the bolt back up and this is it finished.
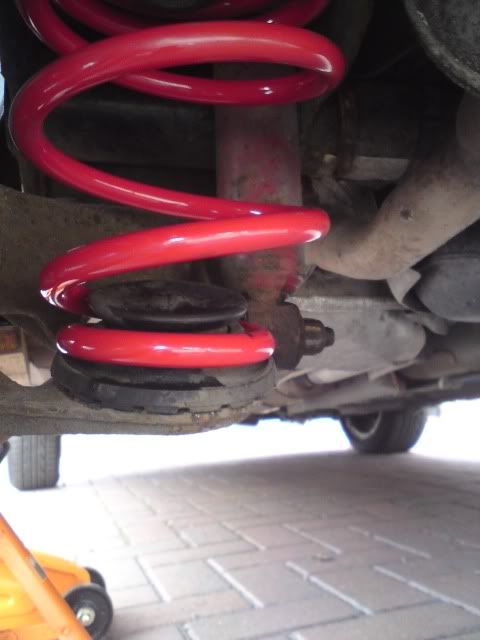
I then took a look at the springs that came off "No Frills" and was shocked that some one had fitted a new spring on the passenger side and not the drivers side, so this is the reason it sat lower on the drivers side
I then let the hand brake off took it out of gear and put my tools away and took some pics
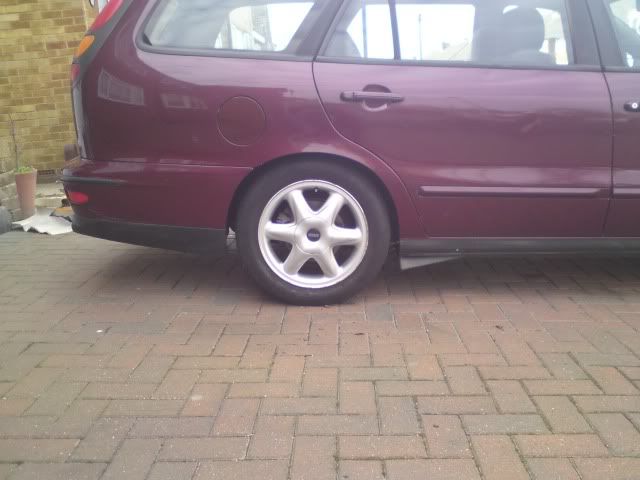
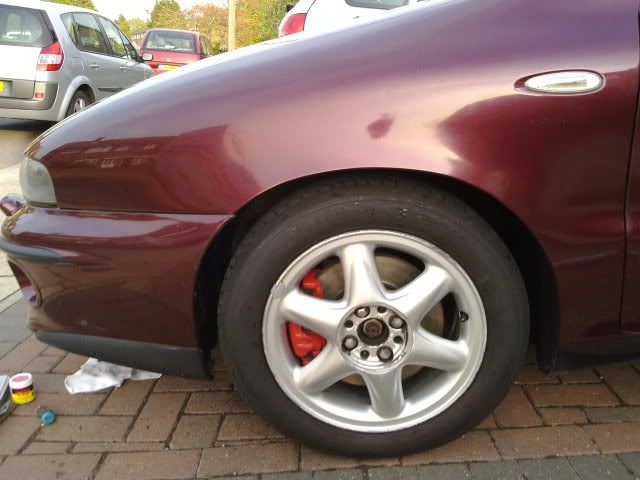
I am very happy and it does sit low, so I am pleased I didn't go for the ultra low kit as I think this is low enough, and its so easy to do, took me 25 minutes to do the passenger side a bit longer on the drivers side bit all in all well happy.
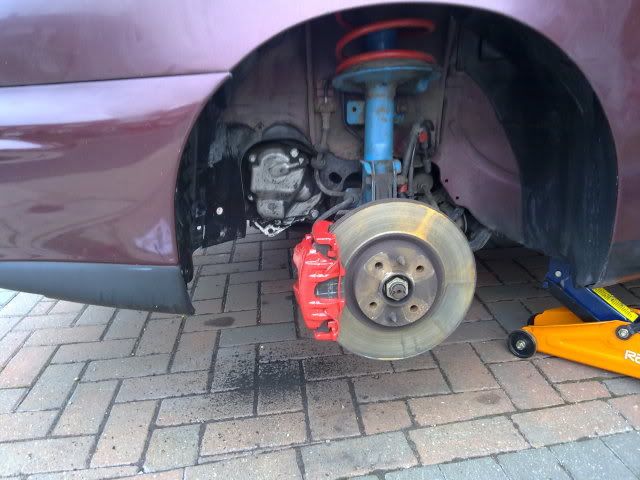
Right chaps,monday just gone I got up and the weather looked great so I gotta racking on the front suspension,it was very easy to do although a little time consuming due to a very unhelpful neighbour LOL.
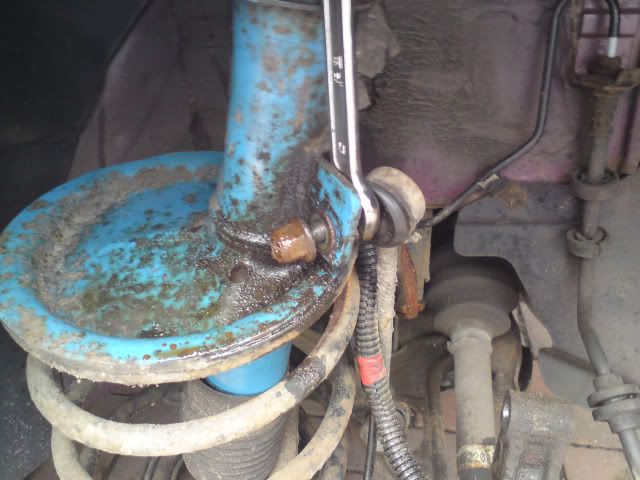
started off by loosening the strut bolt
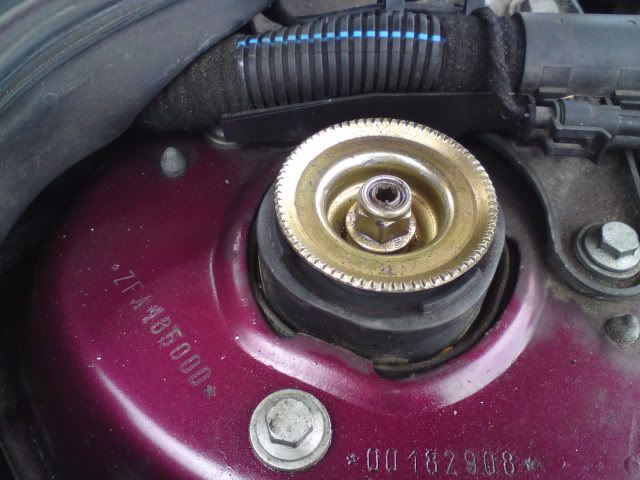
once that was loose I then jacked the car up on the jackpoint and supported it with axle stands,once that was done I then got the front wheels off, and loosened the 3 top bolts that hold the top hat onto the strut tops.
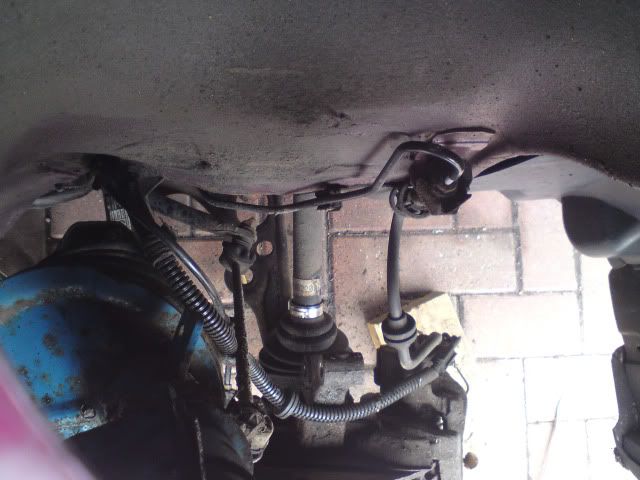
I then got the brake hoses out of the shock and the abs and disc sensor out of there shock mount too

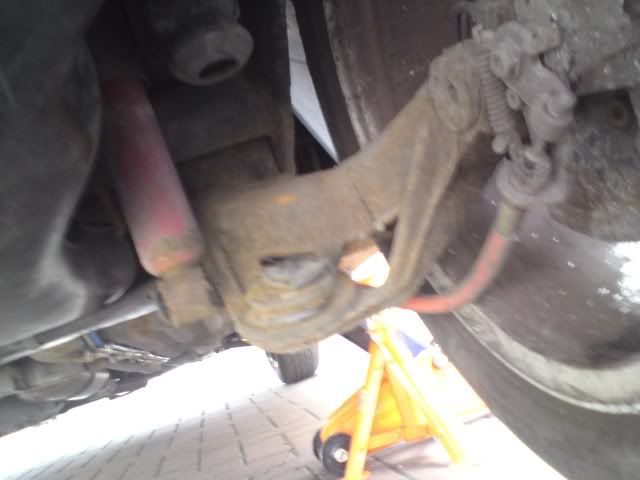
I then undid the lower shock bolts
I then undid the top mount bolts and moved the shocks 180 degrees so I could get at the stabiliser bar easier
once that was undone and removed from the shock I pulled the shock out!
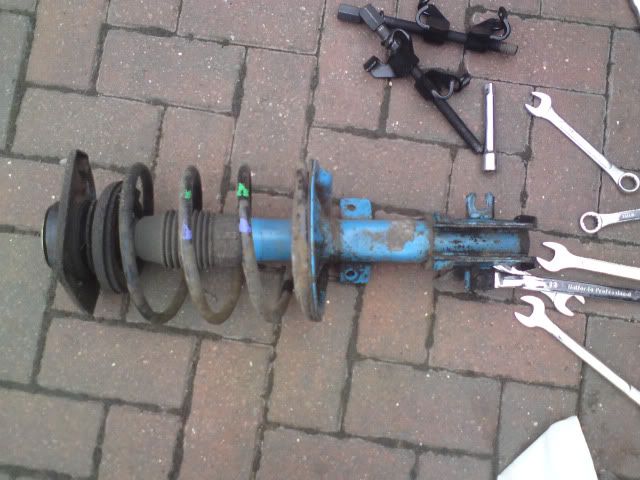
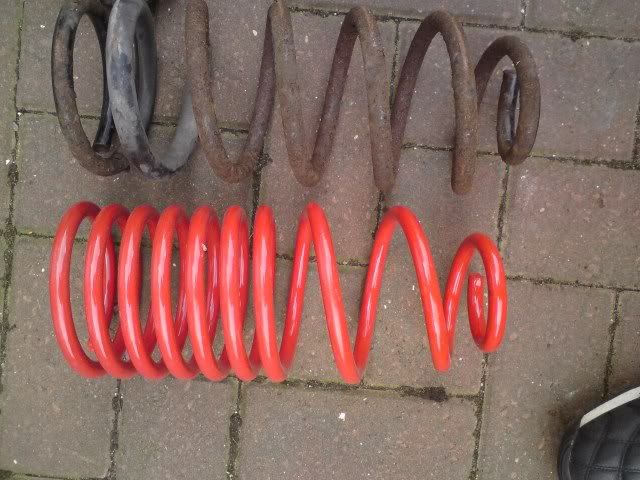
I then used my spring compressors on the springs and removed the top hat, I then undid the spring compressors and took the off the spring.
old and new spring,quite an improvement.
I then took a photo from the topdown the strut top with no shock in place
I then put it all back together,sorry no pics as it started to chuck it down.
but at the end of the day I was really happy with the results, and am please I didn't go for the ultra low kit as it is very close to the ground. what do you guys think.
the handling has greatly improved and is not as hard as I expected probably due to the 55 profile tyres but I am very please with it.
Also on wednesday the 31st of march, "No Frills" went on a trip to Power Italia where the Timing belt and aux belts and water pump were all changed in 1 hour 30 minutes which is so quick, much praise to Rog and I wouldn't take my 20v anywhere else! Rog also said that my car still had the original belt onit! its 12 years old and has got 83k on the clock!
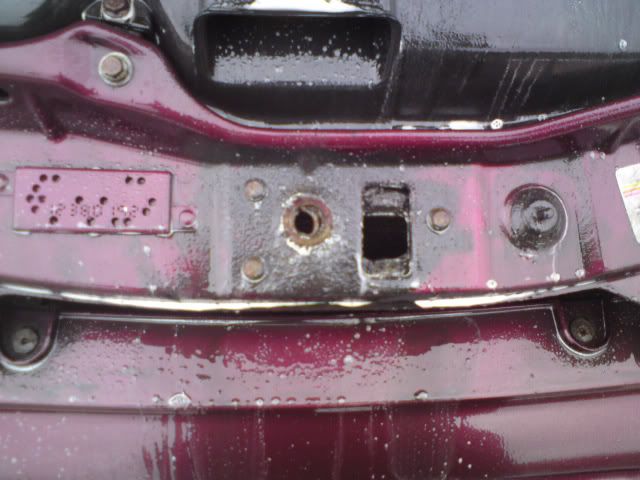
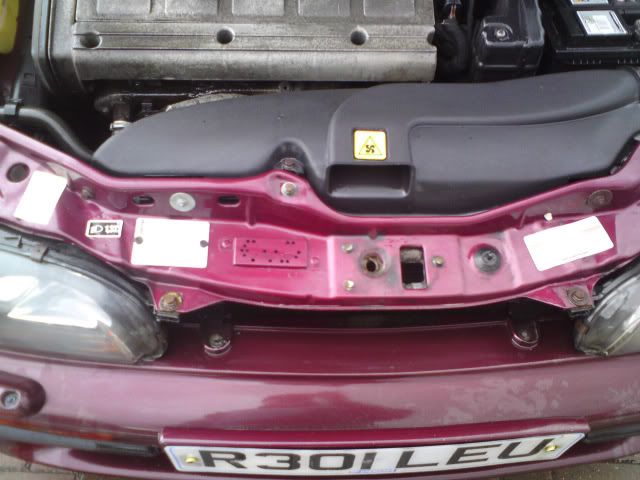
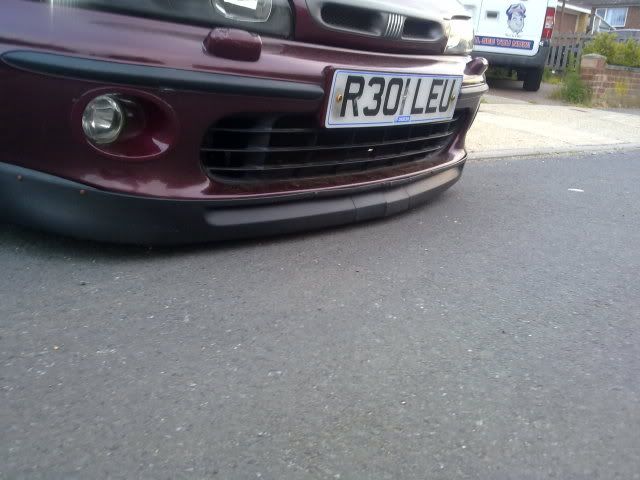
I also replaced the rear panel,which has been badly damaged since I got the car,
this was a pain as someone had tried to replace it before I got it and rounded the head on one of the allen bolts, but I got round it and got it out.
Before

after I put the new panel on
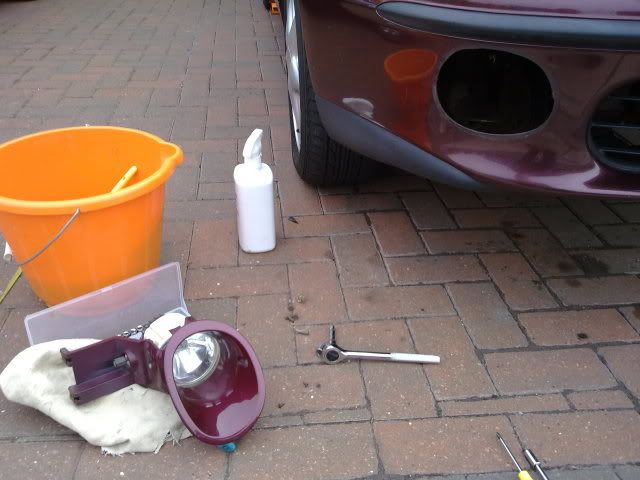
Hi,been a while,but got a few little bits done,
first up cleaned the inside the wheel arch and painted the caliper.
also found a plug to fill my rear wiper hole,its a trim clip from the back of the rear seats lol
I also changed the front fog light that was smashed.
well been a long time coming but have also been getting over my injuries sustained in my bike accident in september. but here goes.
well finally fitted my front mudflaps to match the rears only had them since march lol

I then thought to myself I am going ti fit my golf VR6 Chin spoiler, I have had this since may and started to see how easy it would be to fit and thought its going to be a nightmare.... well I had a re think and thought to myself fitting it very touring car esque (late 80's style)
as you can see the golf mk3 is slightly wider at the front than the marea
but a bit of pulling and swearing later voila ah
although it doesn't quite fit at the side which will mean I need to buy another one to butcher but by next years auto italis it will be how it should be
and after trying to get off my drive lol and yes it is touching
I actually really like the rawness of how I have fitted it, I used black flat screws with a blade screw driver and think its looks cool,
also forgot I had these pics too
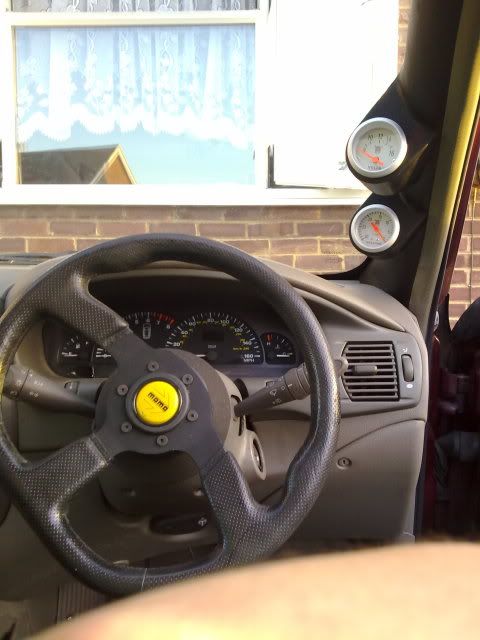
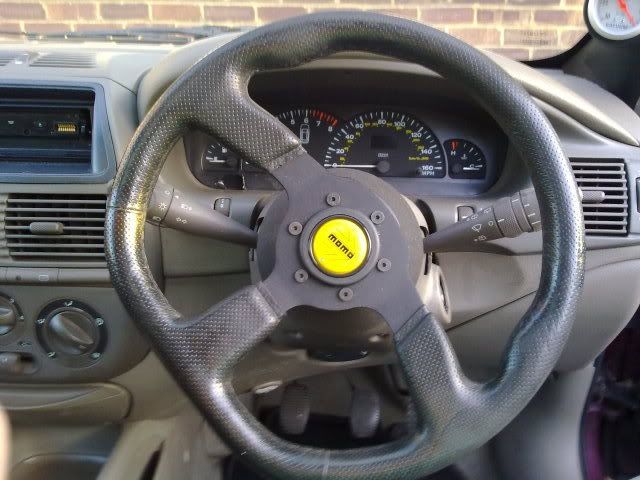
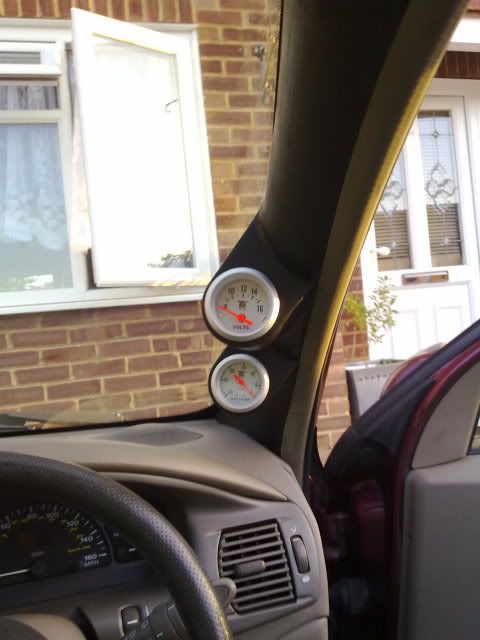
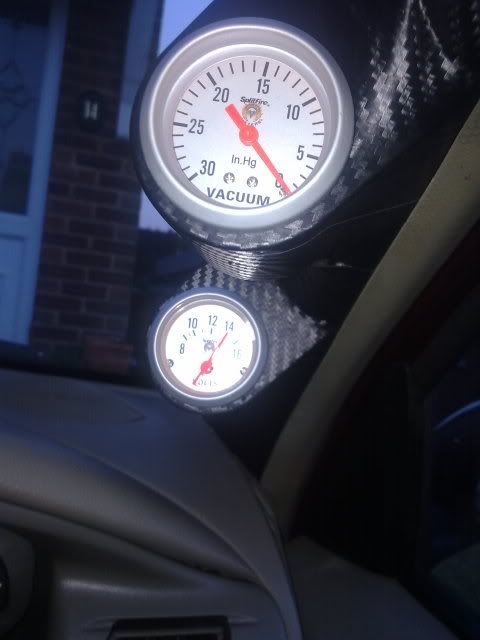
my momo steering wheel and the a pillar pod I DIY'D lol, also got the vacumme and volt splitfire gauges in there, this is getting covered in carbon tomorrow
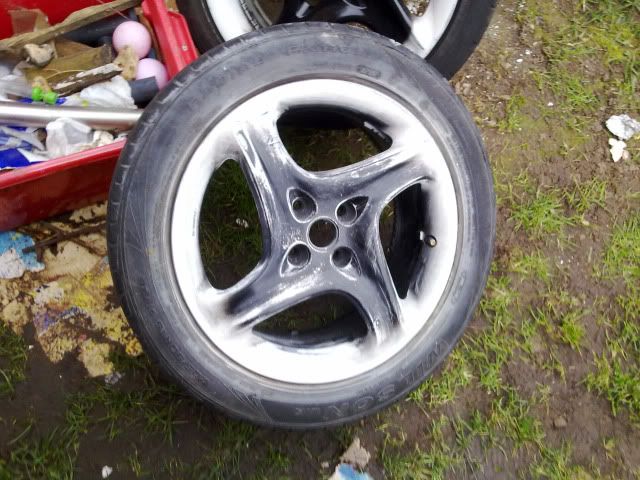
right new update I have now refurbed my coupe rims that I got of kee a few months back, and they took some work, but got them all done in one day, although one wheel in particular had a reaction to the paint and there are like crack marks going on but I am gonna get them on next weekend as the paint would of cured and I can then polish them, may even give them a few more coats, I went for gloss black in the end as I always get a nice finish with it and I have used this paint so many times before I know the outcome, any way some pics,
How they were before I touched them

I sprayed the centres black so I could sand it back for imperfections
then during sanding
and then masked up and painted in gray primer and a dust coast of black to sand back using 1500 grit
once all done and keyed up gloss coats start and this is the finshed product of one wheel
I also sticker bombed a spare fuel cap I have and its now on the car looks pretty cool, gonna sticker bomb part of the bootlid too

Right after I did the wheels was really not happy with them so I flatted them back and filler primed them but the filler primer reacted and I had to strip them again, was starting to lose the will at this point! but I carried on and got the result I wanted!
and how they are on the my wagon
Well chaps haven't updated for almost 3 months, but a few thing have changed mostly teh fact I am trying to get it really clean.
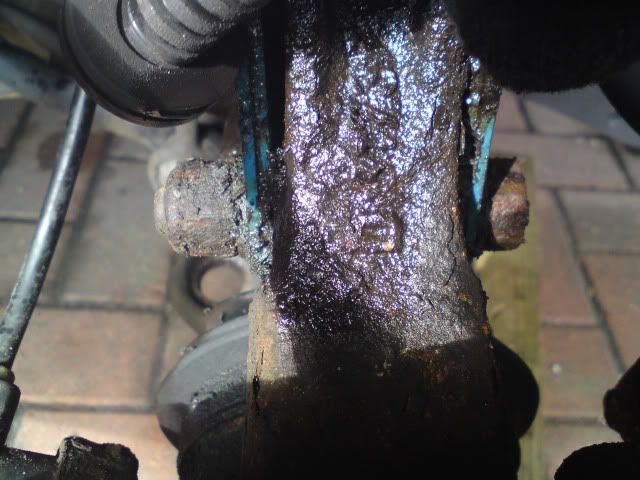
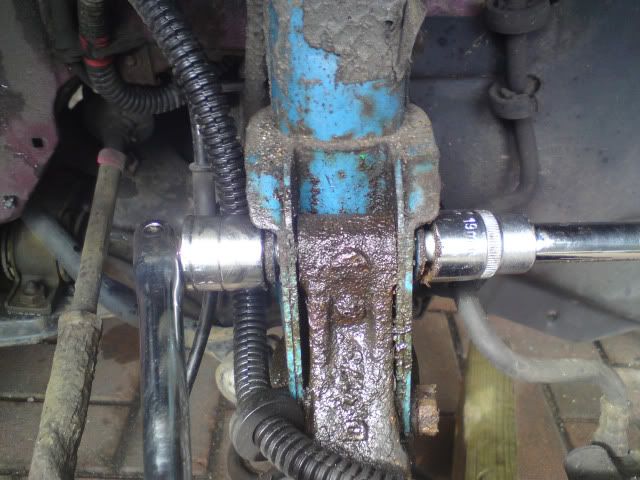
I have plumbed in the gauges now so they work faultlessley, I have also got a machine polisher so have been mopping the car with ssr3 and ssr3 with a top coat of AG deep gloss shine, have also got my drilled and grooved discs to fit and also got my suspension for the front original fiat abarth shocks and springs which are uber cool and uber rear, painted rear light surrounds just need to do the roof bars too match now. decided gonna change the front seats to the alfa momo items as the hold you much better. I am also gonna send some parts of for flocking. Still haven't fitted the back box but hopefully very soon. My aim now is to get it really clean, I am going to start to clean the bay, when the suspension is off in the next month I will be cleaning the inner wheel wells and as much as possible. I also checked the underside and found a couple of scabs so after a poke and a good wire brush blitz moment to see if it needed welding (luckily it was only surface rust) the passenger side got a coat rust treatment and then 2 coats of anti rust primer followed by a heavy coat of underseal.
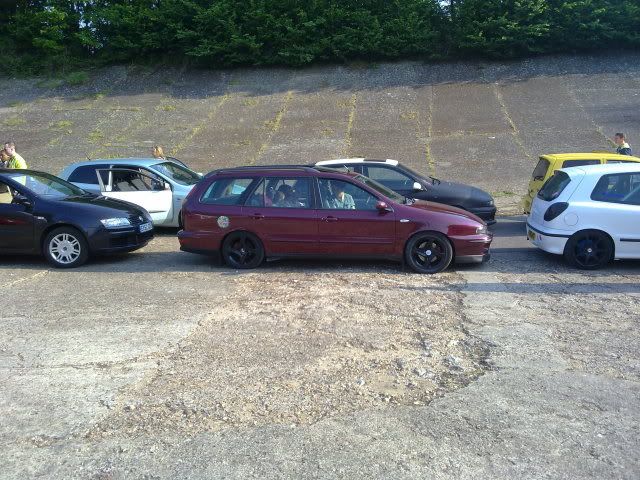
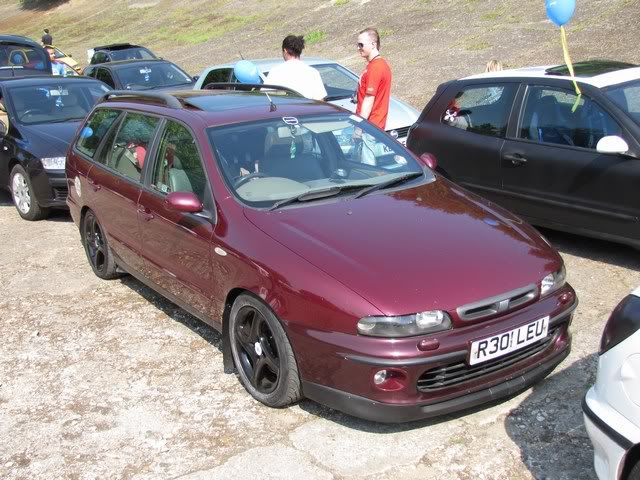
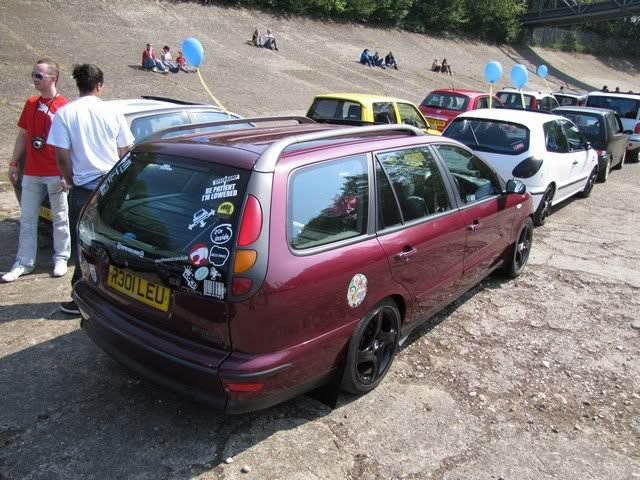
anyway have some pics
on show at Auto italia Brooklands race circuit 30/04/11
and my drive does challenge me at times
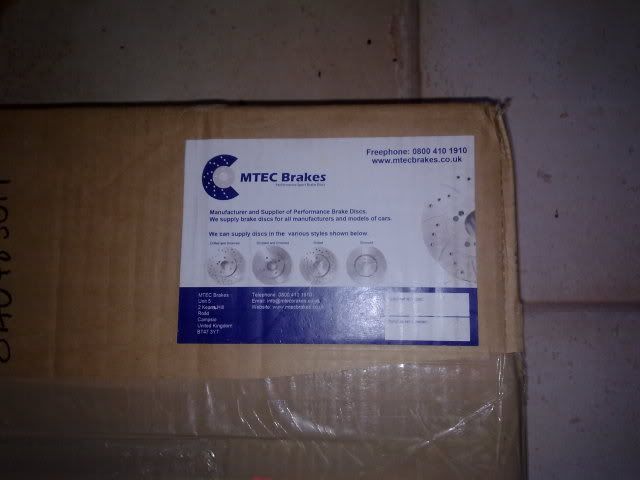
I also had these brake discs turn up
and after reading various marea and bravo owners moaning about rust I had to have a poke around, apparently Fiat galvanised all the body panels except the floor pan... They must of been drinking good vino lol
I gotta say mine is pretty clean, some of the old underseal was flaking so I scraped it back and wire brushed it
I then gave it 2 coats of the rust solution stuff for added protection then 2 coats of rust proof primer

and then a very liberal coat of underseal.
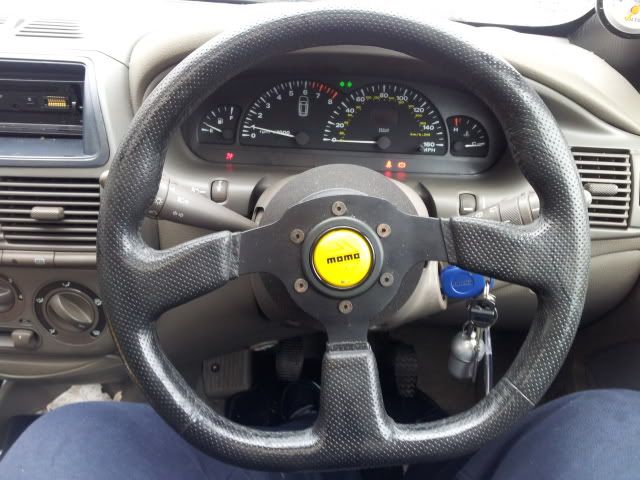
then my steering device went from this 330mm square bottom
to this 330mm suede deep dish (3" dish) wheel, I have wanted to get this on since I got it a week ago...
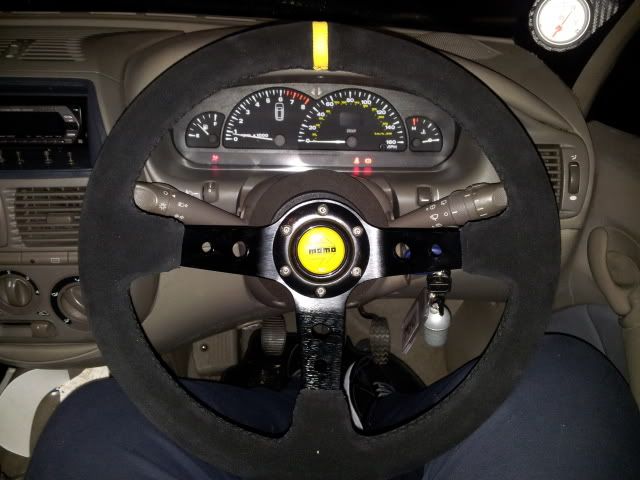
and I must say it is full of win, the only thing I struggled with was indicators they are no longer in flicking distance lol, next week, I hope to have my new seats in and a oil change
the seats i now have are electric recaro seats but i just need to fit them, once done i will post up some pics
cheers
robin
I love Marea Weekend 20v's, this is my 3rd one and the cheapest so far.
It all started in december when the hunt was on for a cheap Marea to mod, I had some criteria though... it had to be a 147, it had to be cheap and had to have mot and it had to be modded on a very limited budget. Impossible I here you say! well I started buying my parts in december on Ebay and would only bid to what I wanted to pay rather than get carried away and get the bits at any cost.
So in december I managed to get a stainless steel 5" outwardly rolled rear can for 20 quid which was a bargain.
In January I picked up my Marea Weekend HLX 20v, I managed to pay 425 quid with a rather nice cd player mot till end of august and tax till the end of the month, the guy needed a quick sale due to divorce and it was originally up for 725 quid but once the cash was in his hand he took my offer and this is what it looked like then.
looks ok but needed a really good clean a few parts to repair the damaged bits.
so I got to work with my cleaning goodies, it was first snowfoamed using a autobright snow foam lance and a mix of snow foam, megs shampoo and very cherry wheel cleaner.
Some of my cleaning goodies
snow foam lance
Wet and dry and some dodo juice lube for the clay bar
the wheels were cleaned first using very cherry wheel cleaner and then snowfoamed and left to work its magic before be aggitated using a swisswax wheel brush
and then jet washed off
I then moved onto the body work and inside the arches.
first snowfoamed all over
and inside the arches
the car was then washed with megs shampoo using the 2 bucket method.
I then jet washed it off
it was then clayed using dodo juice clay lube and a megs clay bar, the clay shows how much crap it gets off.
it was then washed again and dryed, I then moved onto mop the bodywork using Poorboys ssr3
and the polished using poorboys white diamond, I will let the pics do the talking.
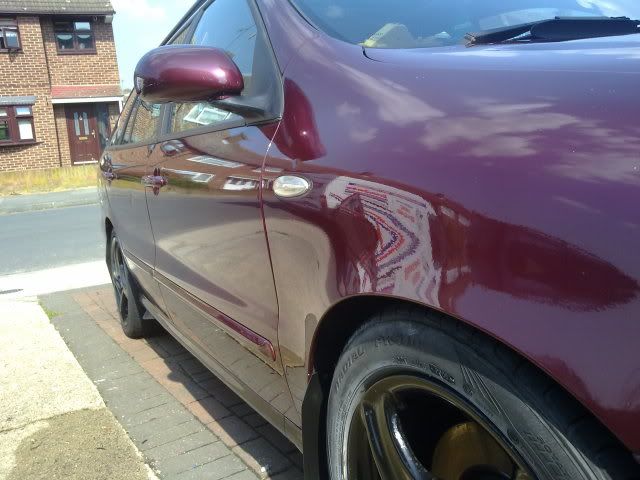
the paint work was pretty bad and looked like it had lived its life going through car washes and after it was polished.
I then moved on to the engine bay and in particular the slampanel, it looked filthy for this I used auto glym machine cleaner and aggitated it with a wheel brush.
before
and after
I then decided to fit my new gear knob.
a massive improvement over standard.
I also put some of my stickers on too.
some more bits that have turned up that I need to fit, the jamex springs were a bargain at 79.99, the steering wheel was a bargain at 16.99 brand new,and the boss was on the rat 2! - now in the scrapyard in the sky
and also my ultra cool valve caps that I made myself!
and thats it until next week when I will fit the suspension, steering wheel and induction kit, I will update as I go along.
Its hard to believe but including buying the car and all the mods I have bought,it has only cost me 625 quid!
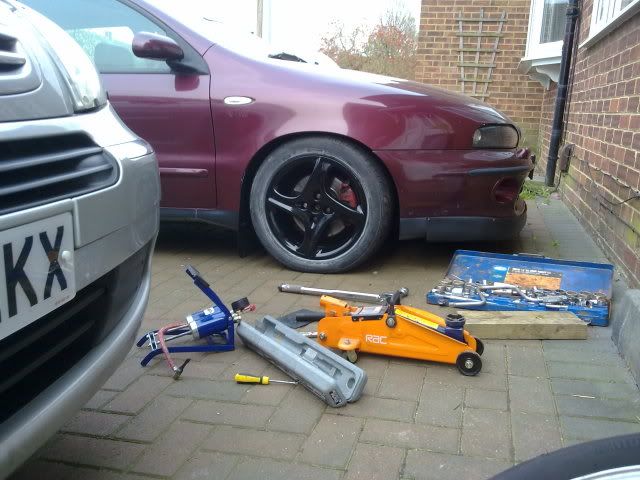
Right a new update, Monday I got up and decided to have a crack at the suspension, I started by loosening the wheels bolts, and then looked at doing the fronts first as I knew they would take me longer,one small problem is I did not have a 19mm spanner DOH! I will pick one up tomorrow.
I decided to lower my car 40mm on jamex springs,i was gonna go with the extra low kit which is a 60mm drop but decided against it. now my car always sat lower on the drivers side and I was intrigued to see why.
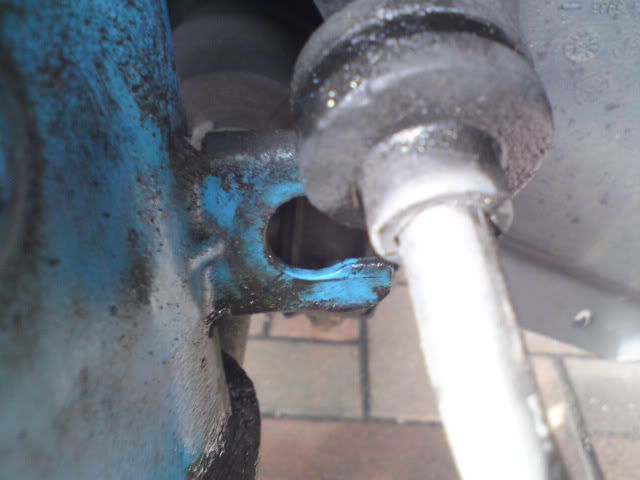
any way back to the rear suspension,i started to jack on the drivers jacking point and then I noticed that in the past the jackpoint had been damaged and just wasn't safe enough to put a axle stand on. so a block of wood came to the rescue.
First up I jacked the car up and put axle stands on the sill and the rear jackpoint (owners manual to the rescue) to be double safe, now this is so much easier if you leave the wheel on,you will need a 19mm socket, spring compressors, adjustable spanner,and a scissor jack (in the spare wheel well).
as you can see the spring compressors are on, the scissor jack aids you in a way to push the rear wheel into the arch, this way you don't have spend ages tightening the spring compressors up
I then undid the rear shock absorber lower bolt and lowered the scissor jack the spring just fellout and this is what you are left with.
old and new springs
I then got my spring compressors on the new springs and just squashed them a little and in they went.
I then raised the scissor jack and pushed the rear wheel back up to align the the rear shock absorber lower bolt,pushed the bolt through and tightened the bolt back up and this is it finished.
I then took a look at the springs that came off "No Frills" and was shocked that some one had fitted a new spring on the passenger side and not the drivers side, so this is the reason it sat lower on the drivers side
I then let the hand brake off took it out of gear and put my tools away and took some pics
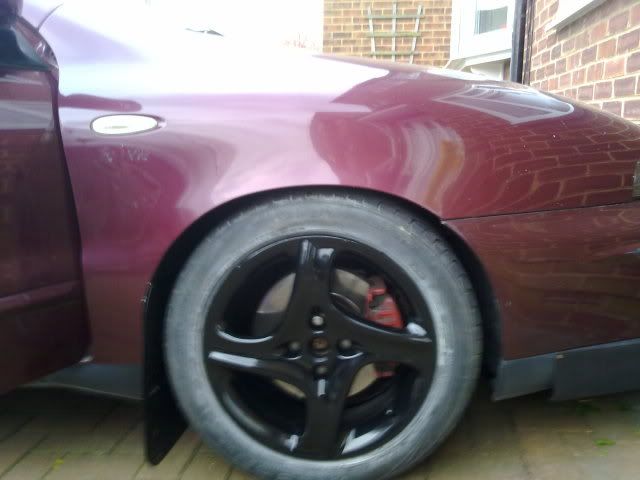
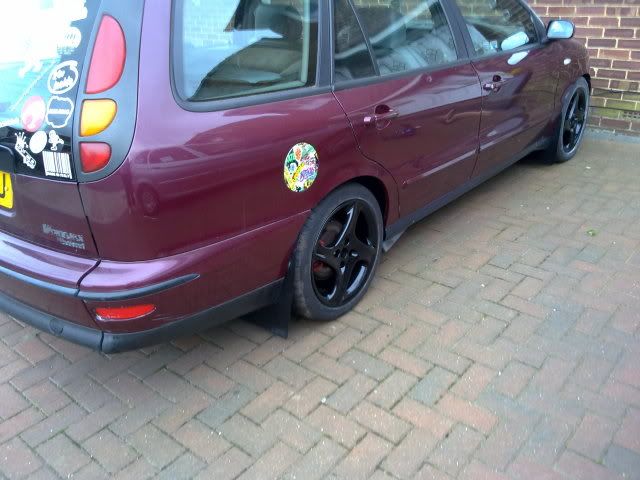
I am very happy and it does sit low, so I am pleased I didn't go for the ultra low kit as I think this is low enough, and its so easy to do, took me 25 minutes to do the passenger side a bit longer on the drivers side bit all in all well happy.
Right chaps,monday just gone I got up and the weather looked great so I gotta racking on the front suspension,it was very easy to do although a little time consuming due to a very unhelpful neighbour LOL.
started off by loosening the strut bolt
once that was loose I then jacked the car up on the jackpoint and supported it with axle stands,once that was done I then got the front wheels off, and loosened the 3 top bolts that hold the top hat onto the strut tops.
I then got the brake hoses out of the shock and the abs and disc sensor out of there shock mount too
I then undid the lower shock bolts
I then undid the top mount bolts and moved the shocks 180 degrees so I could get at the stabiliser bar easier
once that was undone and removed from the shock I pulled the shock out!
I then used my spring compressors on the springs and removed the top hat, I then undid the spring compressors and took the off the spring.
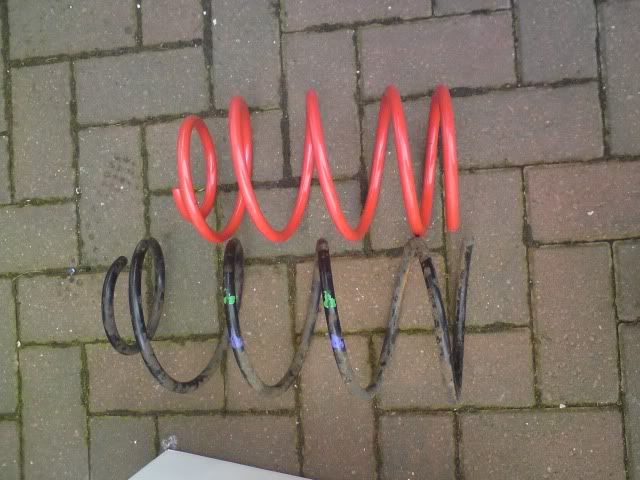
old and new spring,quite an improvement.
I then took a photo from the topdown the strut top with no shock in place
I then put it all back together,sorry no pics as it started to chuck it down.
but at the end of the day I was really happy with the results, and am please I didn't go for the ultra low kit as it is very close to the ground. what do you guys think.
the handling has greatly improved and is not as hard as I expected probably due to the 55 profile tyres but I am very please with it.
Also on wednesday the 31st of march, "No Frills" went on a trip to Power Italia where the Timing belt and aux belts and water pump were all changed in 1 hour 30 minutes which is so quick, much praise to Rog and I wouldn't take my 20v anywhere else! Rog also said that my car still had the original belt onit! its 12 years old and has got 83k on the clock!
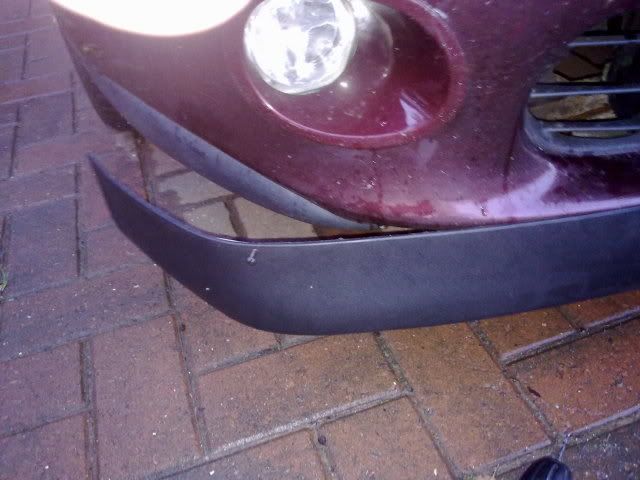
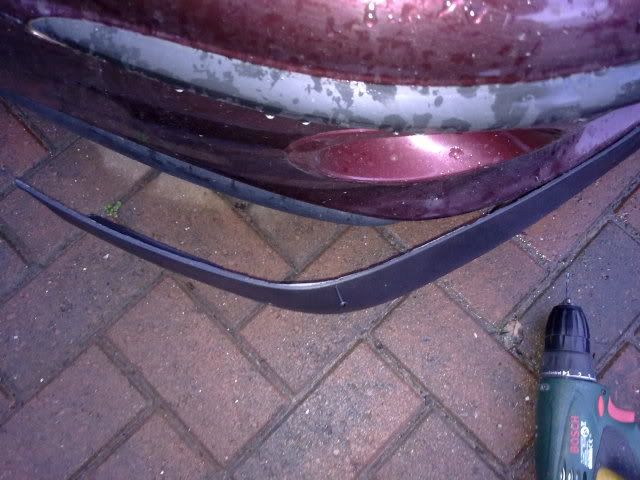
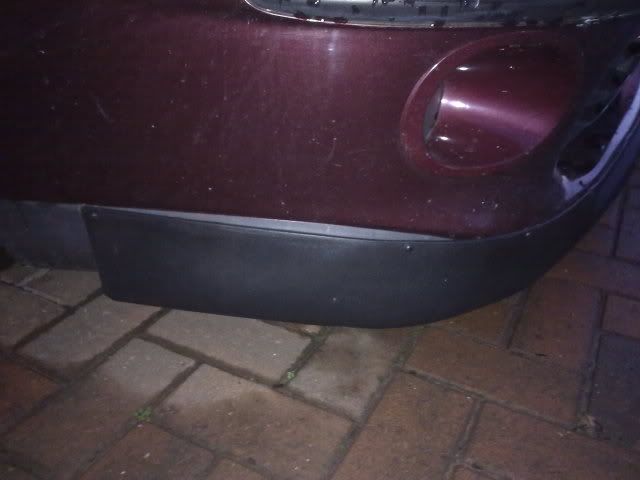
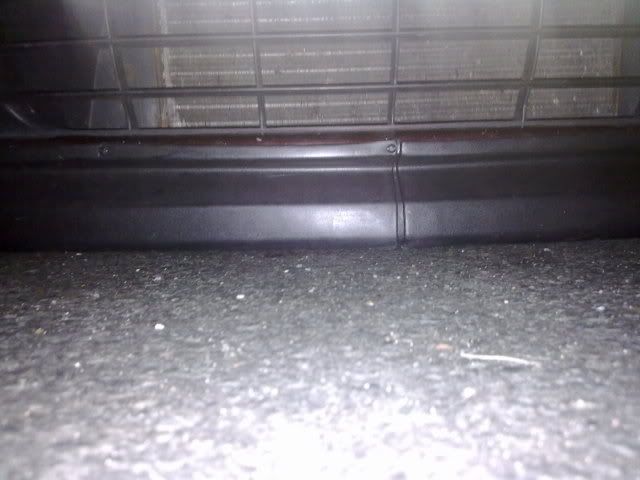
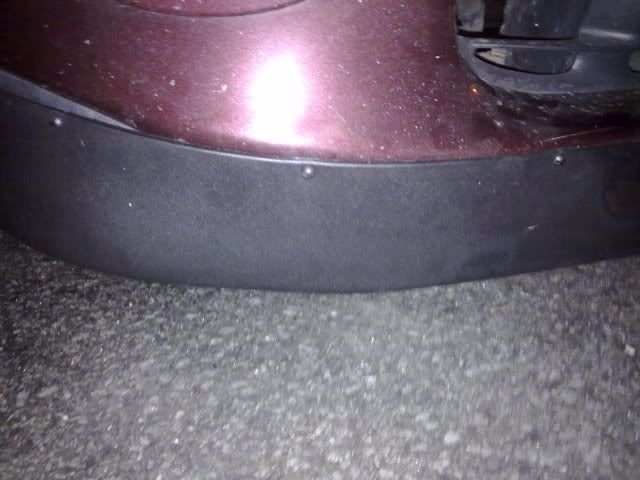
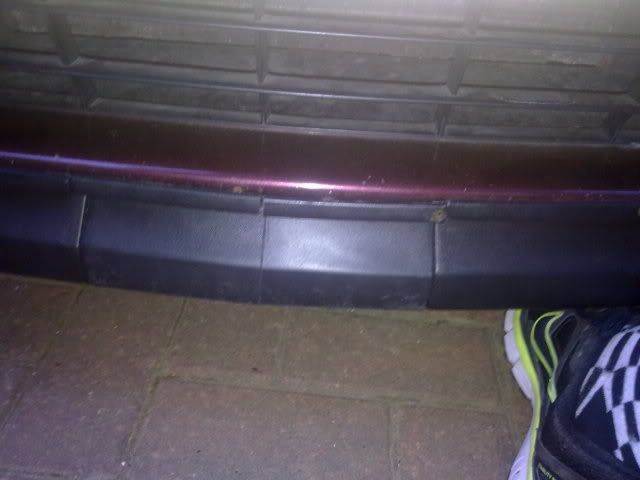
I also replaced the rear panel,which has been badly damaged since I got the car,
this was a pain as someone had tried to replace it before I got it and rounded the head on one of the allen bolts, but I got round it and got it out.
Before
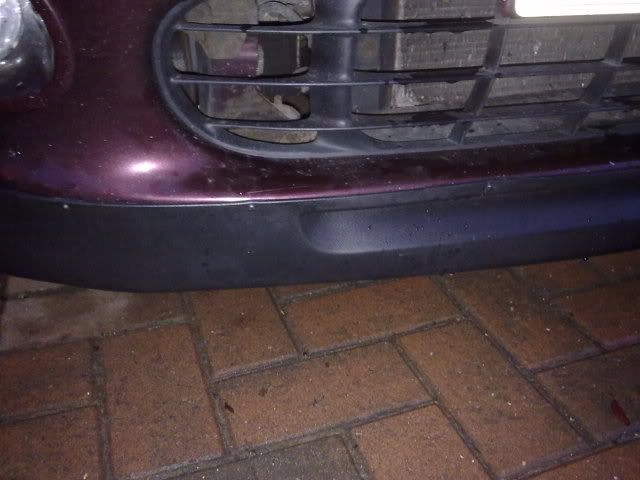
after I put the new panel on
Hi,been a while,but got a few little bits done,
first up cleaned the inside the wheel arch and painted the caliper.
also found a plug to fill my rear wiper hole,its a trim clip from the back of the rear seats lol
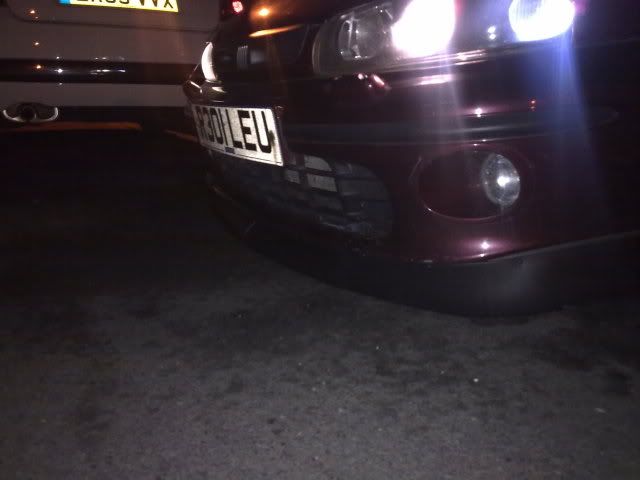
I also changed the front fog light that was smashed.
well been a long time coming but have also been getting over my injuries sustained in my bike accident in september. but here goes.
well finally fitted my front mudflaps to match the rears only had them since march lol
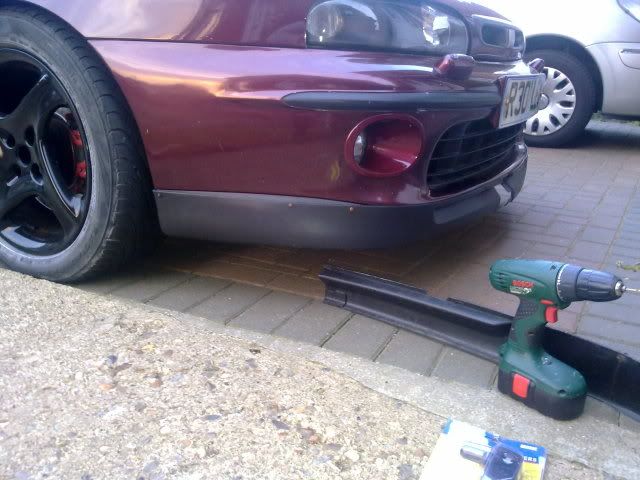
I then thought to myself I am going ti fit my golf VR6 Chin spoiler, I have had this since may and started to see how easy it would be to fit and thought its going to be a nightmare.... well I had a re think and thought to myself fitting it very touring car esque (late 80's style)
as you can see the golf mk3 is slightly wider at the front than the marea
but a bit of pulling and swearing later voila ah
although it doesn't quite fit at the side which will mean I need to buy another one to butcher but by next years auto italis it will be how it should be
and after trying to get off my drive lol and yes it is touching
I actually really like the rawness of how I have fitted it, I used black flat screws with a blade screw driver and think its looks cool,
also forgot I had these pics too
my momo steering wheel and the a pillar pod I DIY'D lol, also got the vacumme and volt splitfire gauges in there, this is getting covered in carbon tomorrow
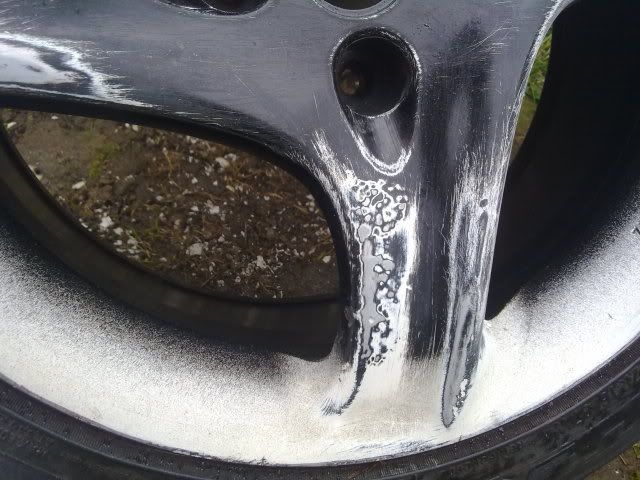
right new update I have now refurbed my coupe rims that I got of kee a few months back, and they took some work, but got them all done in one day, although one wheel in particular had a reaction to the paint and there are like crack marks going on but I am gonna get them on next weekend as the paint would of cured and I can then polish them, may even give them a few more coats, I went for gloss black in the end as I always get a nice finish with it and I have used this paint so many times before I know the outcome, any way some pics,
How they were before I touched them
I sprayed the centres black so I could sand it back for imperfections
then during sanding
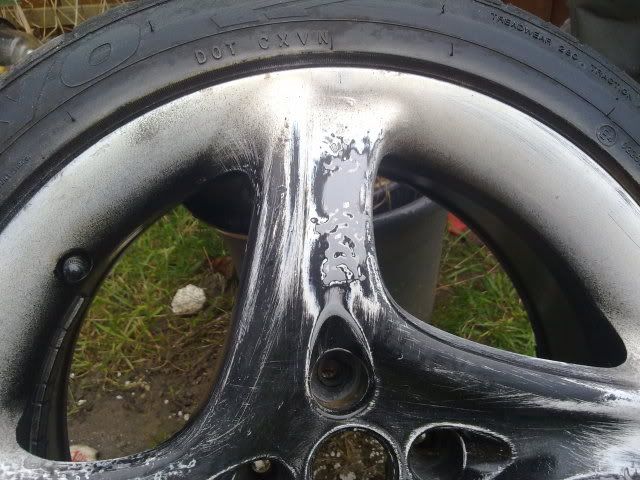
and then masked up and painted in gray primer and a dust coast of black to sand back using 1500 grit
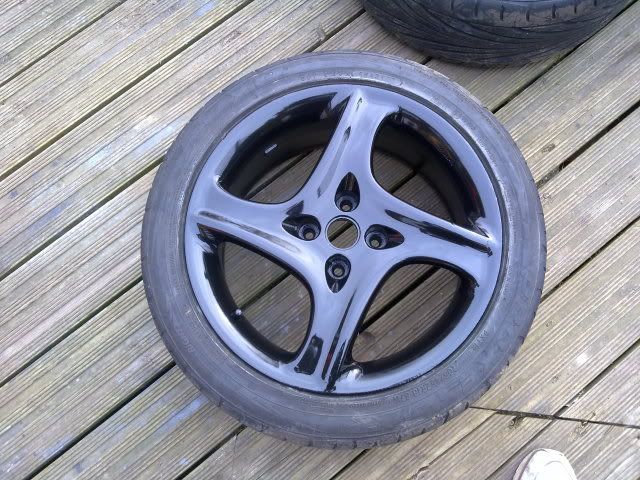
once all done and keyed up gloss coats start and this is the finshed product of one wheel
I also sticker bombed a spare fuel cap I have and its now on the car looks pretty cool, gonna sticker bomb part of the bootlid too
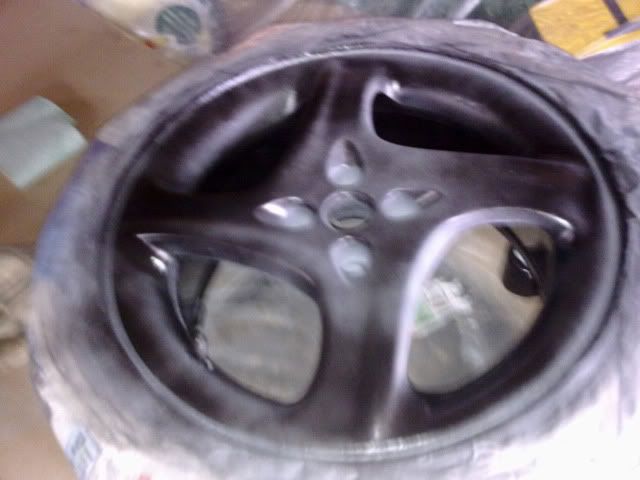
Right after I did the wheels was really not happy with them so I flatted them back and filler primed them but the filler primer reacted and I had to strip them again, was starting to lose the will at this point! but I carried on and got the result I wanted!
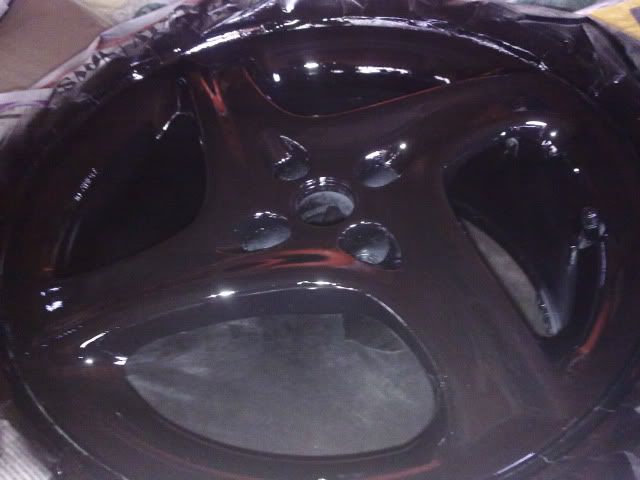
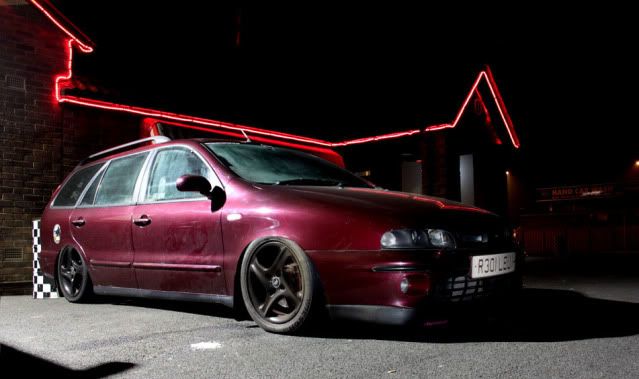
and how they are on the my wagon
Well chaps haven't updated for almost 3 months, but a few thing have changed mostly teh fact I am trying to get it really clean.
I have plumbed in the gauges now so they work faultlessley, I have also got a machine polisher so have been mopping the car with ssr3 and ssr3 with a top coat of AG deep gloss shine, have also got my drilled and grooved discs to fit and also got my suspension for the front original fiat abarth shocks and springs which are uber cool and uber rear, painted rear light surrounds just need to do the roof bars too match now. decided gonna change the front seats to the alfa momo items as the hold you much better. I am also gonna send some parts of for flocking. Still haven't fitted the back box but hopefully very soon. My aim now is to get it really clean, I am going to start to clean the bay, when the suspension is off in the next month I will be cleaning the inner wheel wells and as much as possible. I also checked the underside and found a couple of scabs so after a poke and a good wire brush blitz moment to see if it needed welding (luckily it was only surface rust) the passenger side got a coat rust treatment and then 2 coats of anti rust primer followed by a heavy coat of underseal.
anyway have some pics
on show at Auto italia Brooklands race circuit 30/04/11
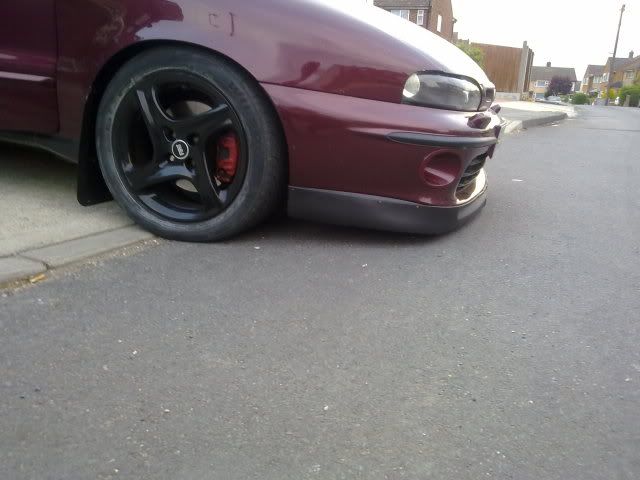
and my drive does challenge me at times
I also had these brake discs turn up
and after reading various marea and bravo owners moaning about rust I had to have a poke around, apparently Fiat galvanised all the body panels except the floor pan... They must of been drinking good vino lol
I gotta say mine is pretty clean, some of the old underseal was flaking so I scraped it back and wire brushed it
I then gave it 2 coats of the rust solution stuff for added protection then 2 coats of rust proof primer
and then a very liberal coat of underseal.
then my steering device went from this 330mm square bottom
to this 330mm suede deep dish (3" dish) wheel, I have wanted to get this on since I got it a week ago...
and I must say it is full of win, the only thing I struggled with was indicators they are no longer in flicking distance lol, next week, I hope to have my new seats in and a oil change
the seats i now have are electric recaro seats but i just need to fit them, once done i will post up some pics
cheers
robin
Last edited:
")