1418322502781.jpg

The bigish green landy

Introduction

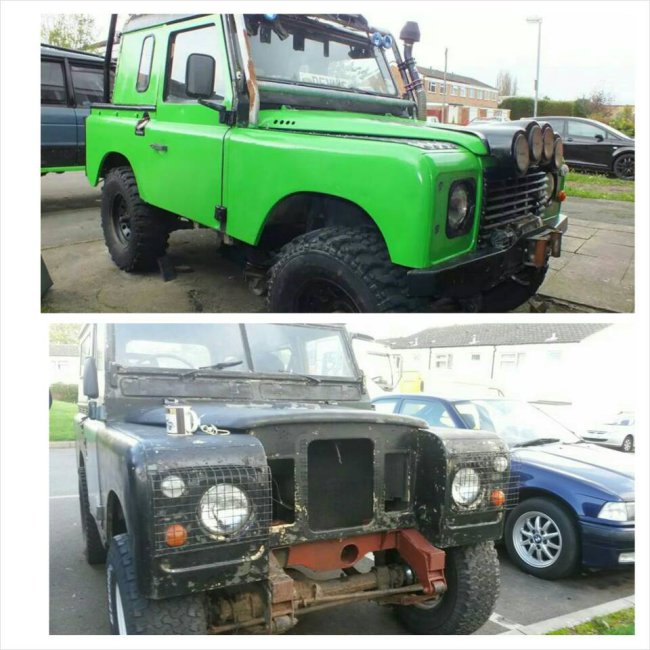
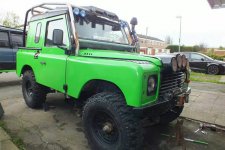
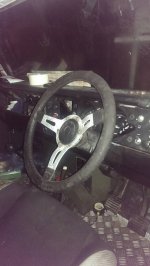
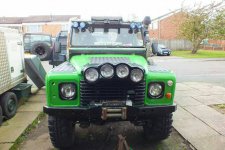
Well I'm a newbie and just got myself a Seicento and just posted a build up in that section and some of the lads wanted to see the build of the land rover so for now here's a few pics and ill get around to posting what I've done a how I went about it
Quite recently I went to another landrover show billing I think it was and found some aches

Took delivery of my new axles I made a start on cutting all the un wanted stuff off them

Also my Detroit rear locker also arrived

And finally not joke after atleast 2years it's finally back of all 4 springs and not sat on an axle stand on one side
IMG_1474007912.751696.jpg
IMG_1474007936.327009.jpg
IMG_1474007947.527540.jpg
IMG_1474007959.946747.jpg
IMG_1474007992.833705.jpg
IMG_1474008015.103530.jpg
IMG_1474008027.855357.jpg
 
So getting back into the landrover now yes that does me the yellow cinqs on the back burner for abit, BUT I've worked out I've had this around 4-5ish years now and I've never ever drove it in all them years so I'd be a shame to just have it sat there rotting away and tbh I do miss going off-roading haven't done a lot of it with the old mans disco being off the road too

But anyway Saturday after work I started by getting the rear axle off and got that on the floor so here's a few pictures

IMG_1474.JPG
IMG_1478.JPG

Old axle vs new I think I've said it before I ideally wanted disc brakes all round but I'll be keeping the drum rear axle in turn that means I should have to change my master cylinder in theory anyway we shall find out when it's actually on the road

IMG_1480.JPG

Then another busy day Sunday when I decided it was a good idea to turn it into a hovercraft and pull the front axle off too

IMG_1487.JPG
IMG_1492.JPG

Started finishing off the new rear axle still yet to work out what brackets I don't need but I've got the old coil spring hanger cut off

IMG_1494.JPG

Then comes the very expensive part and that's ordering new parabolic leaf springs, u bolts, and the new spring perches to weld onto the axles so hopefully I'll be able to make a start on getting the new rear axle all on up and nearly ready to weld up
 
So here the progress over the last weeks and abit

Started by rubbing the chassis back done with a wirebrush
IMG_1497.JPG
IMG_1498.JPG
IMG_1499.JPG

Then a couple of coats of red oxide primer as a base

IMG_1500.JPG
IMG_1501.JPG

Then the new leaf spring perches turned up from yrm metal solutions

IMG_1504.JPG

The followed up by my semi gloss chassis black paint

IMG_1516.JPG

And new engine/gearbox mounts as mine are currently in two halfs at the moment

IMG_1517.JPG

Then back onto painting couple coats of semi gloss
IMG_1524.JPG
IMG_1525.JPG
IMG_1526.JPG

Then Monday the springs finally turned up so it'd be rude not to do a dry run of getting everything mocked up

IMG_1544.JPG
IMG_1545.JPG
IMG_1546.JPG
IMG_1547.JPG
IMG_1553.JPG

Then I wanted to check where the wheel and tyre would some what fit as this is my dads spare and my tyres are actually an inch wider then what's on here disco but here's some what of an idea

IMG_1566.JPG
IMG_1567.JPG

So should hopefully have the axle set up right this weekend this pinion angle ect then it can be welded up and bolted back on then the fun stuff begins before the fronts going to be a touch harder then the rear but I'll explain more on that when I actually do it
 
So this update should have been done two weeks ago but been lazy

Anyways I started the weekend by measuring grinding and well setting my lovely snap-on jumper on fire that all resulted in this

IMG_1604.JPG
IMG_1601.JPG
IMG_1607.JPG
IMG_1609.JPG
IMG_1606.JPG

Basically in short what happened here was the bump stops got cut down the fit the u bolts and also the trailing arm brackets had to be cut off then it was all bolted up ready to be fully welded that happens the day after

IMG_1611.JPG
IMG_1613.JPG

Then the old man come up with a quick idea for some upper shock mounts that ended up looking something like this
IMG_1615.JPG
IMG_1619.JPG
IMG_1617.JPG
IMG_1621.JPG

Then the finished product with all the rear wheels diff guard ect
IMG_1625.JPG
IMG_1622.JPG
IMG_1624.JPG
IMG_1627.JPG

Some of the keen eyed might noticed the props not bolted up well that's because I've gotta take the rear diff out to replace with my Detroit locker, I've also got to take the rear drums off check brakes and do brake pipes, and also fit extended stainless flexies.

But now work moves to the middle of the chassis where he got to do the same again run down red oxide primer semi gloss, also replace the gearbox mounts.

Then work will move to the front where I've got to sort some new found rust issues weld in the engine mounts to the chassis and then paint the chassis and all the fun stuff to the axle can begin
 
Back
Top