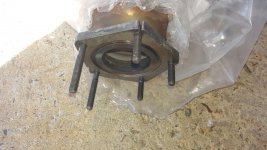
I found what are called "roll-type stud extractors" (e.g.
4PC STUD EXTRACTOR 3/8 AND 1/2" DRIVE IN CASE: Amazon.co.uk: DIY & Tools). They arrived today, but they are slightly too big to fit in the sunk space where the studs are, and so are unusable.
I could try buying another type of screw extractor which I just found here:
http://www.ebay.co.uk/itm/3-8-DRIVE-...-/232298761736
The first link to the 4 piece stud extractor .. that's what used to be called an 'easy out' (maybe it still is called that..). To use it in a bolt that has sheared off level with the surrounding metal, you have to drill a pilot hole the length of the easy-out through the centre of the bolt. You then have to use progressively larger drill bits to make the hole in the bolt just slightly smaller than the width of the biggest easy-out you would be able to use.
The snag is, the hole drilled into the bolt must be dead centre otherwise the whole thing usually goes pear-shaped.. The best way of drilling a hole dead centre is by using a bench-mounted pillar drill with the unit to be drilled held in a vice. Of course not many people have a pillar drill and more often than not, the unit to be worked on can't easily be removed from the car..
The easy-out works by cutting and gripping inside the hole as it is turned anti-clockwise. Don't put your faith in an easy-out. The last time I used one it shattered - it just couldn't cope with the pressure of undoing a broken stud.
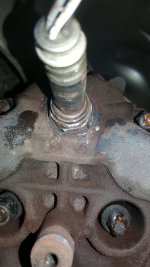
The second link - the roller type extractor ... you would use that to remove a stud that was standing proud of the surface. Years ago I was removing the cylinder heads from a V8 Rover when one of the bolts snapped as I was undoing it. Fortunately, after lifting that head I found that the bolt had snapped above the level of the block - and I was able to use a stud extractor to remove it.
If it had snapped flush with the engine block I would have drilled - in stages - the broken bolt and tried an easy out.
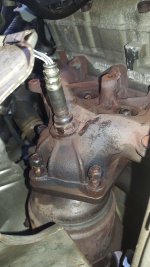
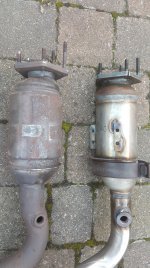
Think of the exhaust manifold where it connects to the block - if, after removing the manifold you need to remove the studs - you'd first try the 2 nut method. If that didn't work then you'd try a stud extractor. If a stud sheared you'd then try drilling/an easy out.
If that didn't work .. you'd take some time to drill through the broken stud, clean the recess out, fill it with 'liquid metal' (
https://www.ebay.co.uk/sch/i.html?_...Xliquid+metal.TRS0&_nkw=liquid+metal&_sacat=0) and wait until it was almost set then screw a new stud in...
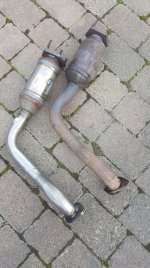
If you're looking to repair something like the downpipe where it comes from the manifold and joins the exhaust system - flange to flange - I wouldn't worry if the studs/bolts/nuts are seized and can't be undone. Put a socket on the bolt head and a socket on the nut - and snap them.
If need be, get your electric drill and drill through any remaining stud or bolt in the flange. Use an ordinary nut and bolt as a replacement.
Whatever problem you have, there's always a solution. The solution may involve penetrating fluid, a hammer, chisel, violence, heat and an electric drill, but it's always successful .. eventually .. honest. If you can think of a way to fix it, it's fixed.
Years ago .. etc ... I would buy an old Rover that had maybe stood for 20 years or more. All bolts were taken of with an angle grinder/chisel/drill. Quickest and most effective way. The exhaust was always corroded and rotten beyond belief ..
Where the exhaust joined the manifold downpipe was always corroded. The studs were permanent rusty 'things' .. drilled through and replaced with bolts. A fix is a fix ..